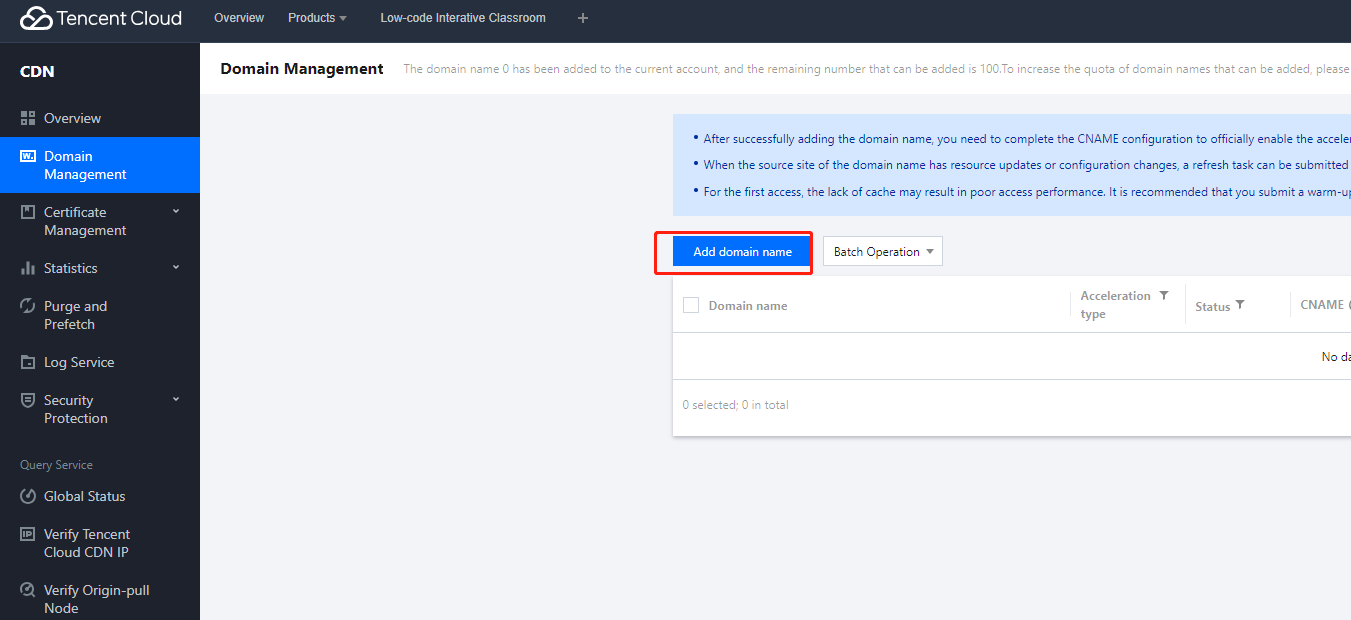
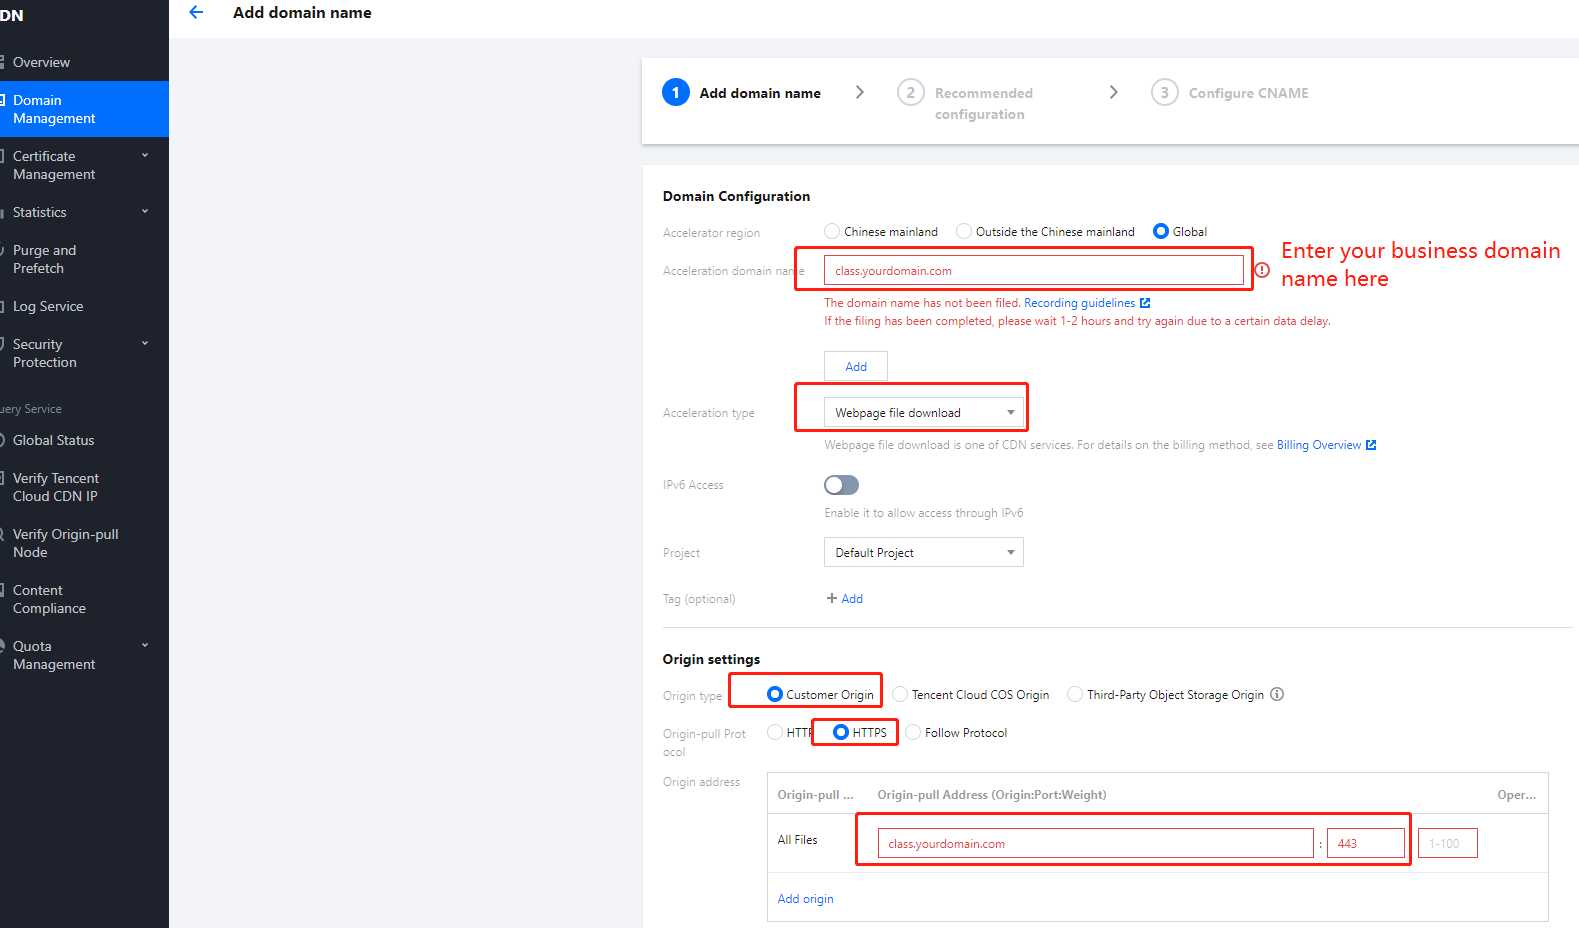
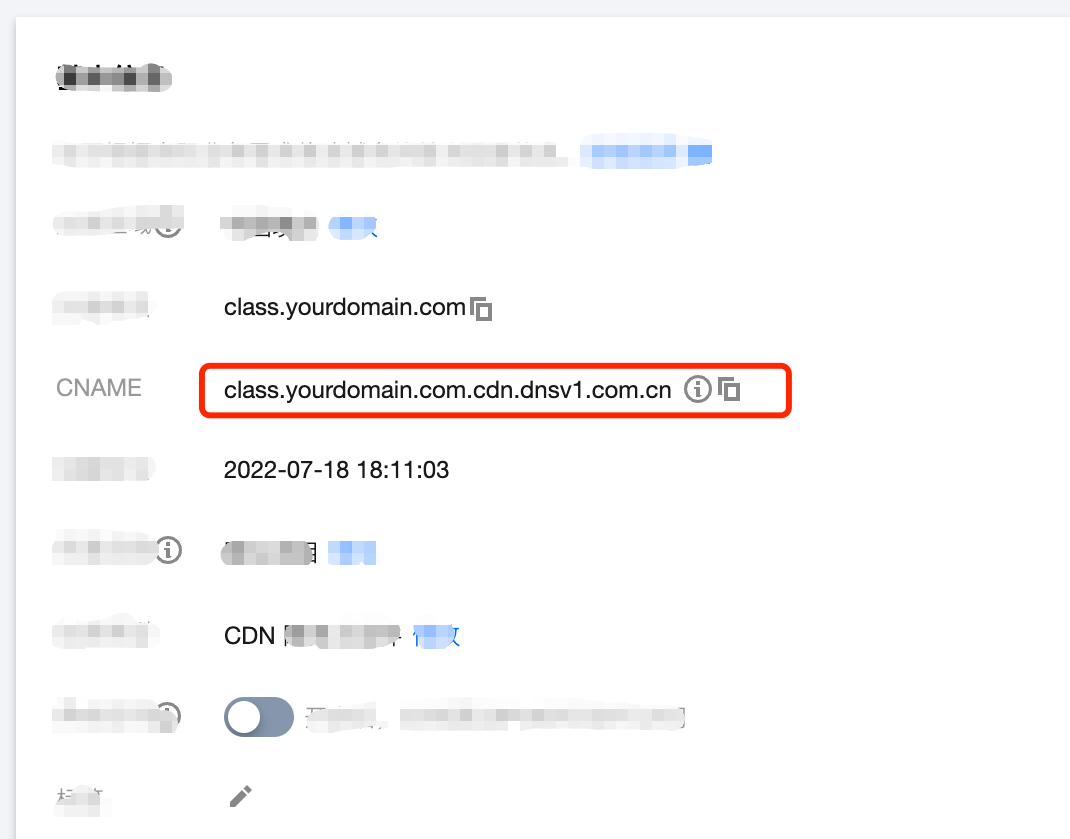
tencent cloud

Low-code Interactive Classroom

Release Notes and Announcements
Announcement on the Renaming of Low-Code Interactive Classroom Product
Announcement on the Upgrade of Low-Code Interactive Classroom
Product Introduction
Overview
Use Cases
Features
Strengths
Purchase Guide
Billing Overview
Monthly Packages
Billing Examples
Purchase Instructions
Payment Overdue
Refunds
Demo Download and Experience
Client Integration Guide
Web and H5
Android
iOS
Windows and macOS
Console Guide
Overview
Usage
Applications
Quick Run-through
API Documentation
History
Introduction
API Category
Making API Requests
User Login APIs
Room Management APIs
Group Management APIs
Application Configuration APIs
Recording Management APIs
Courseware Management APIs
User Management APIs
Developer APIs
Data Types
Error Codes
Interface Customization
Getting Started
Event Listening
Service Callbacks
Advanced Features
Custom Business Domain
Mobile Screen Sharing
Mobile Preloading
Practical Tutorial
Integration with Scheduling System
Integration with Account System
Integration with Recording and Playback
Integration with Courseware Module
LCIC Policy
Privacy Policy
Data Processing And Security Agreement
FAQs
Billing
Recording
Console and API authorization issues
Interactive Whiteboard Lag
Screen Sharing
Dealing with Firewall Restrictions
Web
Electron
Device Performance Requirements
Service Agreement
Service Level Agreement

Custom Business Domain

PDF
Focus Mode
Font Size
Last updated: 2024-06-28 10:02:14
Finders who want to use their own domain name to complete the web-side of the low-code interactive classroom:
from address https://yourdomain.com/ turn into https://class.qcloudclass.com/

Plan


operation steps

Note:
We assume that the business layer has a class-specific third-level domain name: class.yourdomain.com

1. Configure CDNs

1.1 create domain name
Go to the CDN console.Click on Add domain name to proceed with the addition.


1.2 Configure back-to-source parameters
Configure the relevant domain settings and origin server settings.


1.3 Copy cname
Upon successful addition, click on the domain name to view the basic configuration information and copy the CNAME.


2. Configure domain name resolution

1. Go to domain name resolution to configure the domain name of class.yourdomian.com to point to.
2. Configure domain name resolution pointing, take Tencent Cloud dnspod as an example.


Type selection:CNAME
Record value: 1.3 CNAME value obtained
3. click save

3. Configure back-to-source HOST

Switch to the Origin Domain page, and modify the Origin Domain => class.qcloudclass.com.

Optimization

In order to achieve a better access effect for custom business domain names, the following adjustments still need to be set.

1. Complete https configuration

On the Domain Management page, click on the domain name and select HTTPS Configuration to proceed with the configuration.


2. Complete cache configuration

Configure node cache expiration settings on the Cache Configuration page.


3. Complete the gzip configuration

On the Advanced Configuration page, configure the intelligent compression rules.


4. Cache configuration

On the Cache Configuration page, configure the cache key rules.


resource refresh

See cdn-refresh warmup.
Why do we need to do resource refresh?
According to actual operational needs/bug fixes/experience optimization, the low-code interactive classroom will conduct hot updates to the online version from time to time.
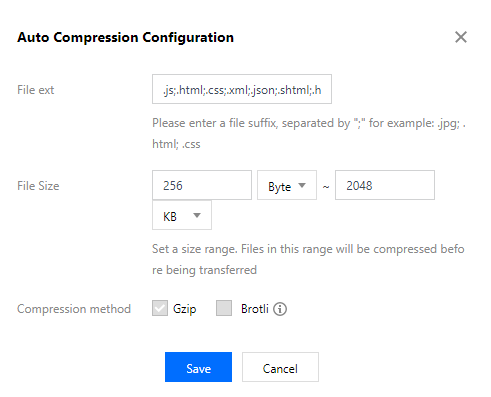
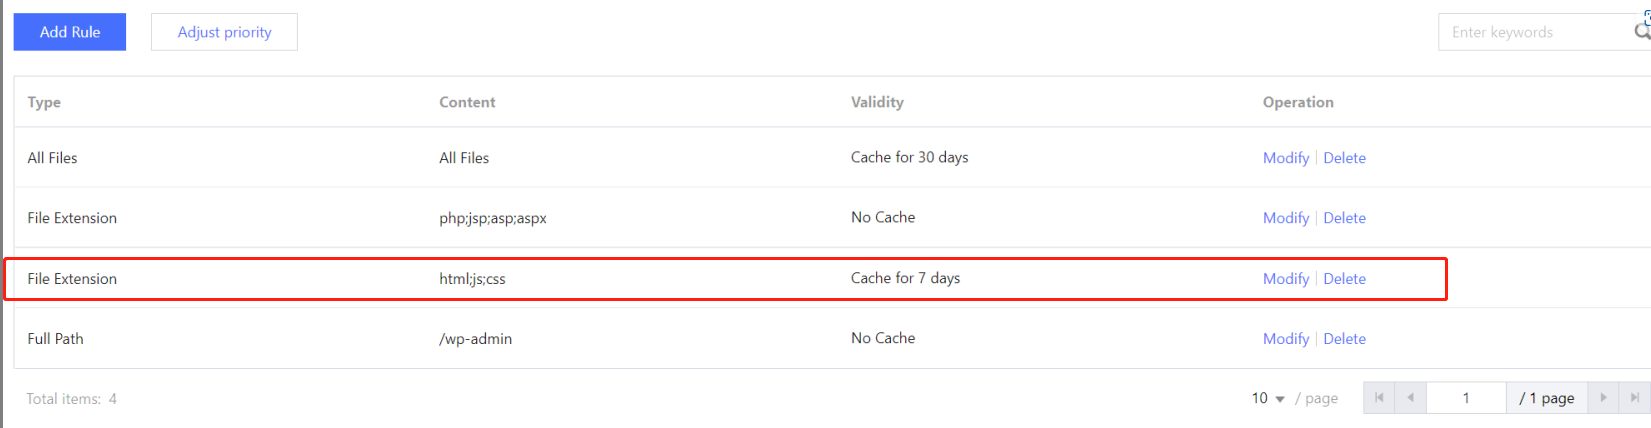
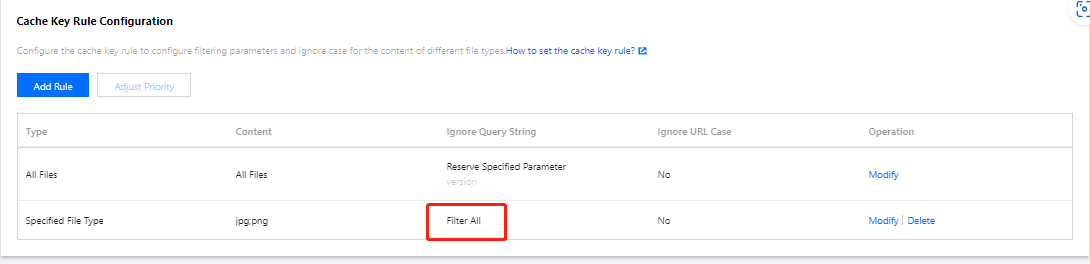
The CDN's caching strategy determines that there may be inconsistencies between the performance of the business's own domain name and the official domain name of the low-code interactive classroom.
We recommend that the business side perform resource refresh operations on a regular basis, or perform immediate refresh operations on demand, see Resource Refresh below.


Help and Support

Was this page helpful?

Help us improve! Rate your documentation experience in 5 mins.

Feedback