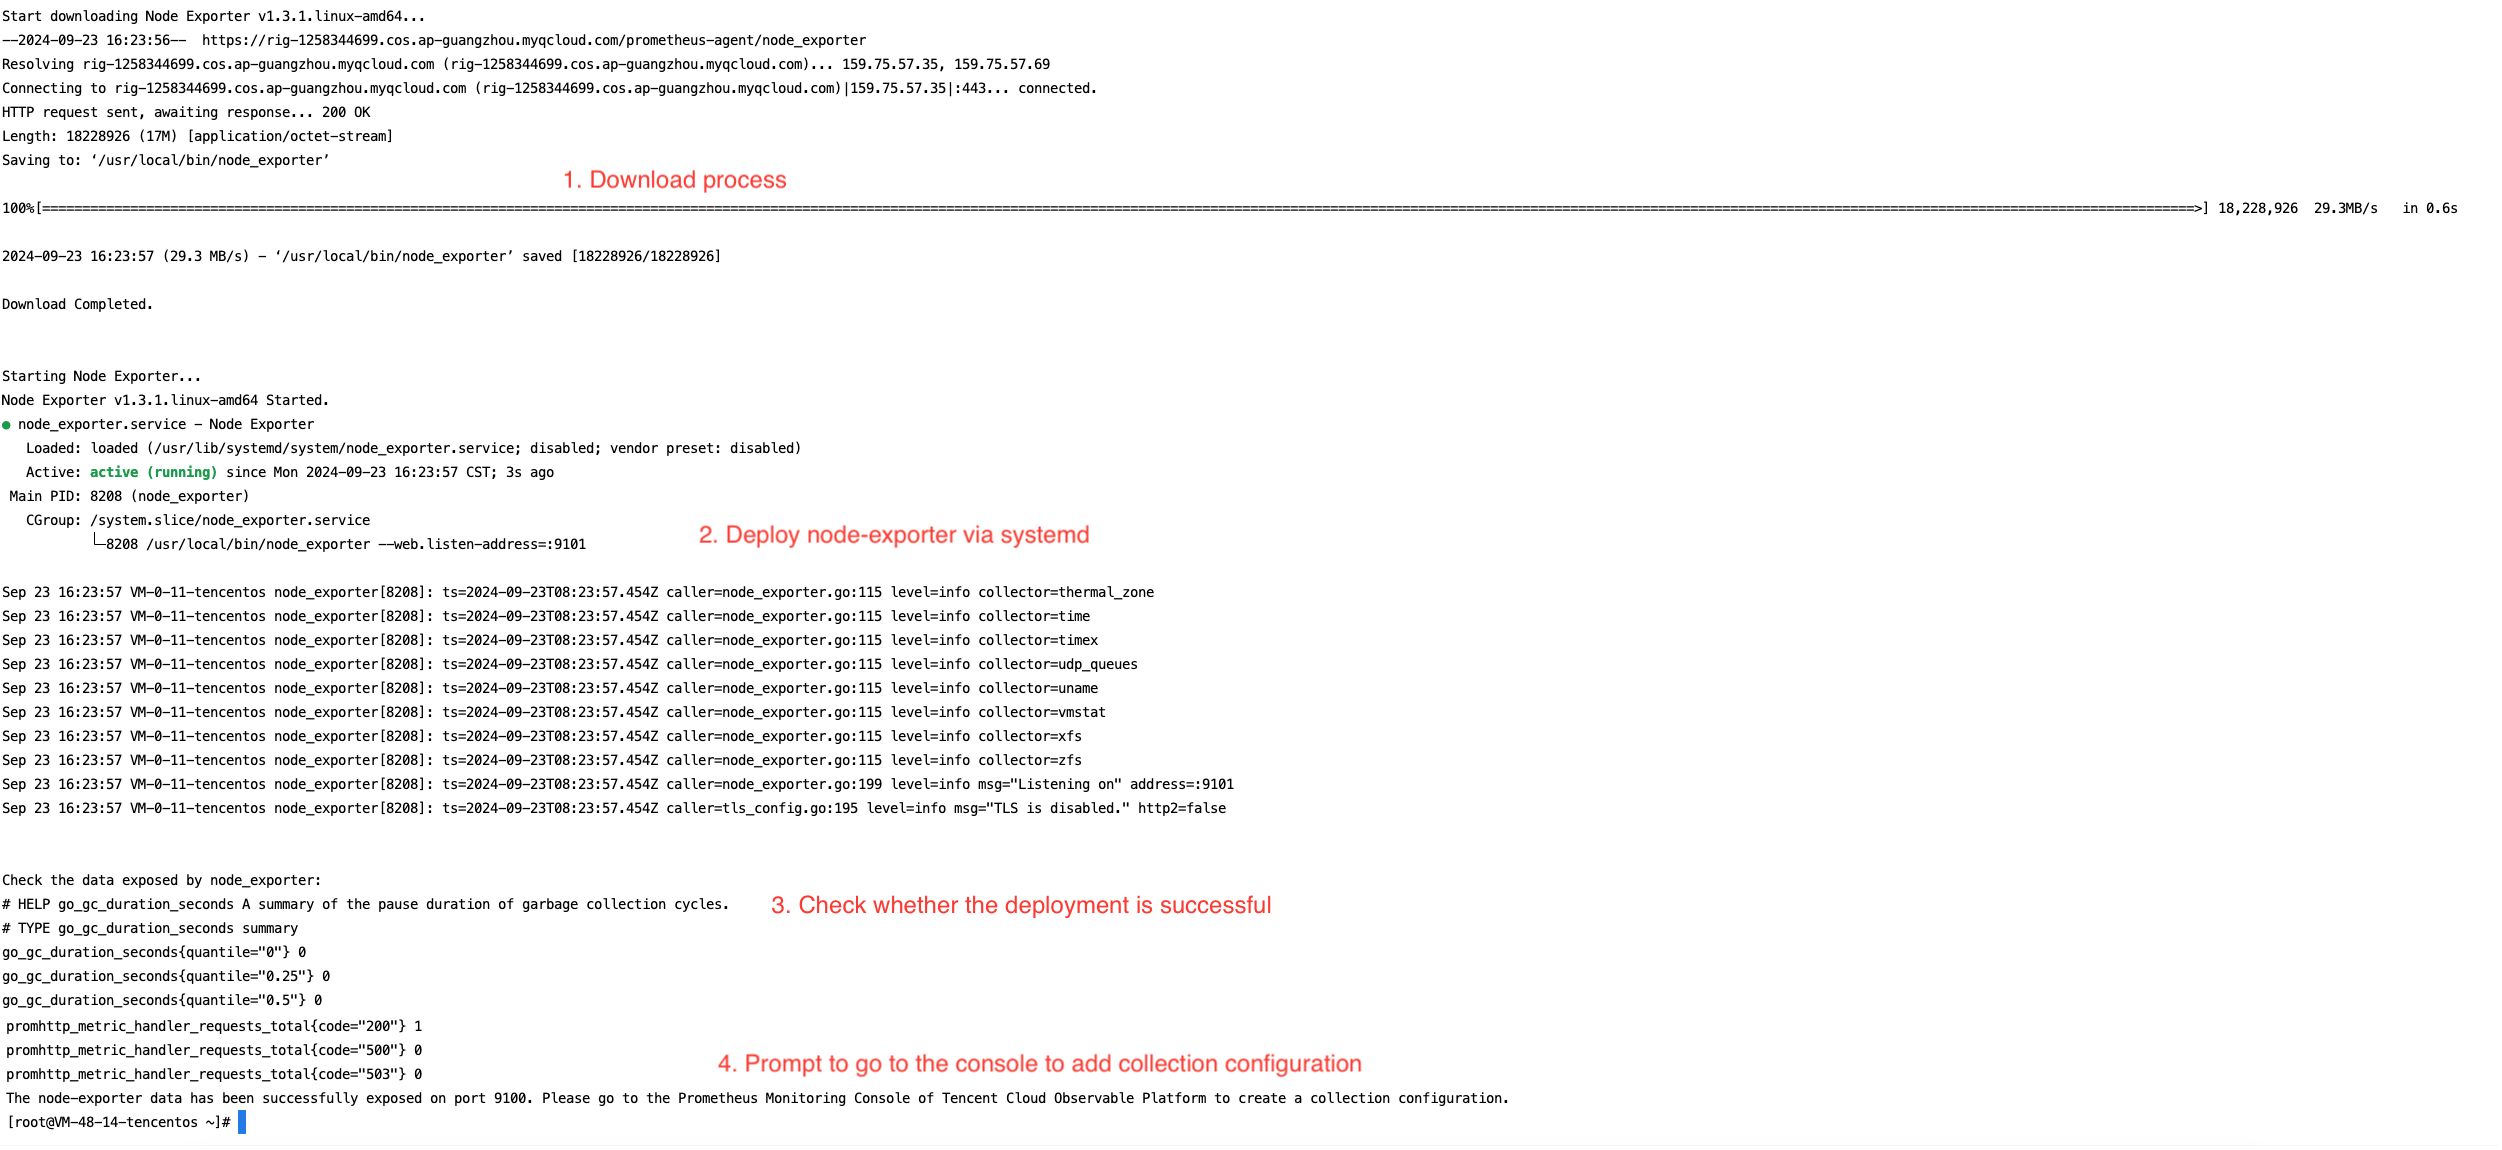
Executing the script will automatically trigger the following actions: Download node_exporter, run node_exporter, check data reporting, and complete (data will be successfully exposed on port 9100).
An example of the script execution result is shown below:
Note:
The default parameters in the script are port=9100 and path=/metrics. If you need to customize parameters or perform operations such as restarting, stopping, health checks, or viewing logs, you can manage the script using Systemctl.
Custom parameters:
To modify the port, replace the script execution statement with:
For more guidance on configuring custom parameters, see documentation.
Common script management operations:
Restart:
systemctl restart node_exporter
Stop:
systemctl stop node_exporter
Status check:
systemctl status node_exporter
Viewing logs:
journalctl -u node_exporter
2. Ensure that the host's network is connected to the Prometheus instance's private network.
If the connection has been established via Direct Connect (DC), reporting can be done over the private network without any additional operation. Otherwise, to report over the public network, follow the steps below:
The host needs to have a public IP address enabled, which will serve as the target IP for data collection.
The inbound rules of the host’s security group need to be configured with an authorized policy that allows access: the protocol type should be Custom TCP, the port should match the <port> specified in the script, and the source IP should be 0.0.0.0/0.
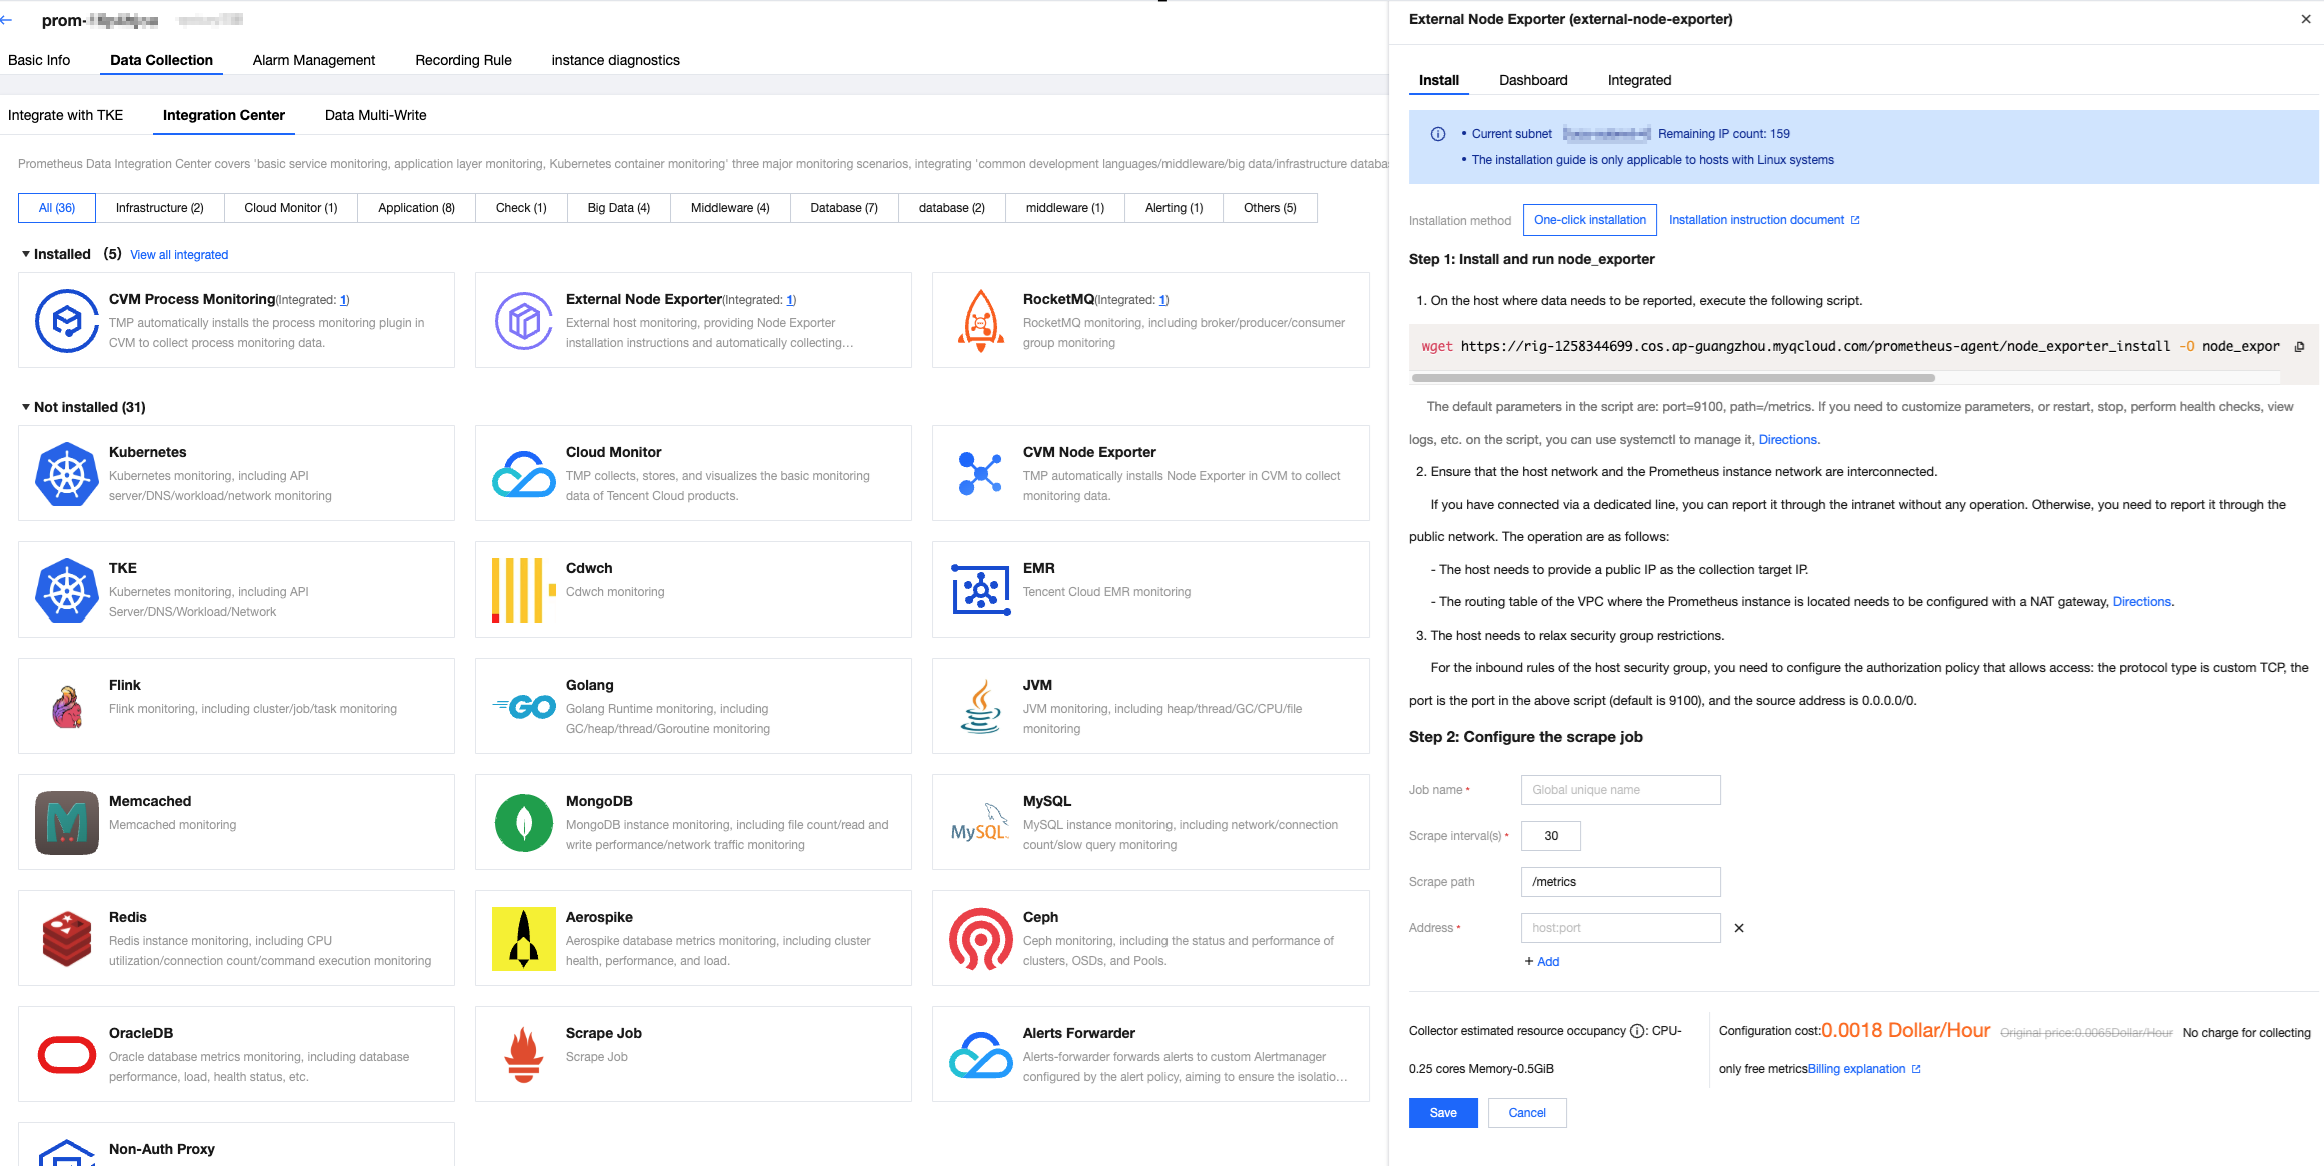
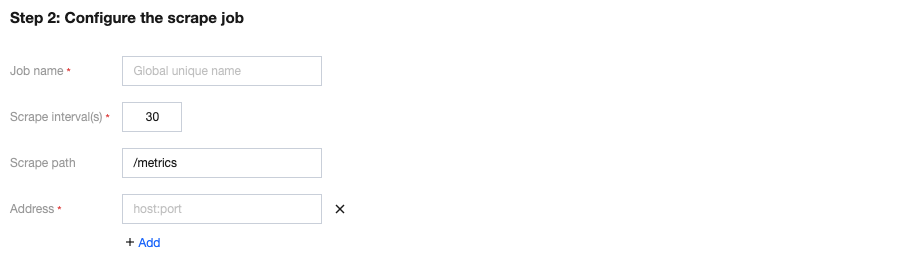
Step 2: Configuring the Scraping Job
Parameter
Description
Job name
Exporter name, which should meet the following requirements:
The name should be unique.
The name should conform to the following regular expression: '^[a-z0-9]([-a-z0-9]*[a-z0-9])?(\\.[a-z0-9]([-a-z0-9]*[a-z0-9])?)*$'.
Scrape interval(s)
Enter the metric collection interval (s).
Scrape path
Enter the collection target address in the format host:port. Multiple addresses can be added.
Address
Enter the metric collection path. The default path is /metrics.
Method 2: Custom Installation
The installation method from Step 1 can also be replaced with a custom installation, following the guide below.
1. Downloading and installing node_exporter:
On the host where data needs to be reported, download and install node_exporter. You can click the Prometheus open-source website download link for node_exporter or directly execute the following command:
2. Running node_exporter to Collect Basic Monitoring Data:
Grant permissions, execute node_exporter, and view the logs.
chmod +x node_exporter && nohup ./node_exporter &
cat nohup.out
The following image shows a successful execution:
You can use the following command to view the monitoring data exposed on port 9100:
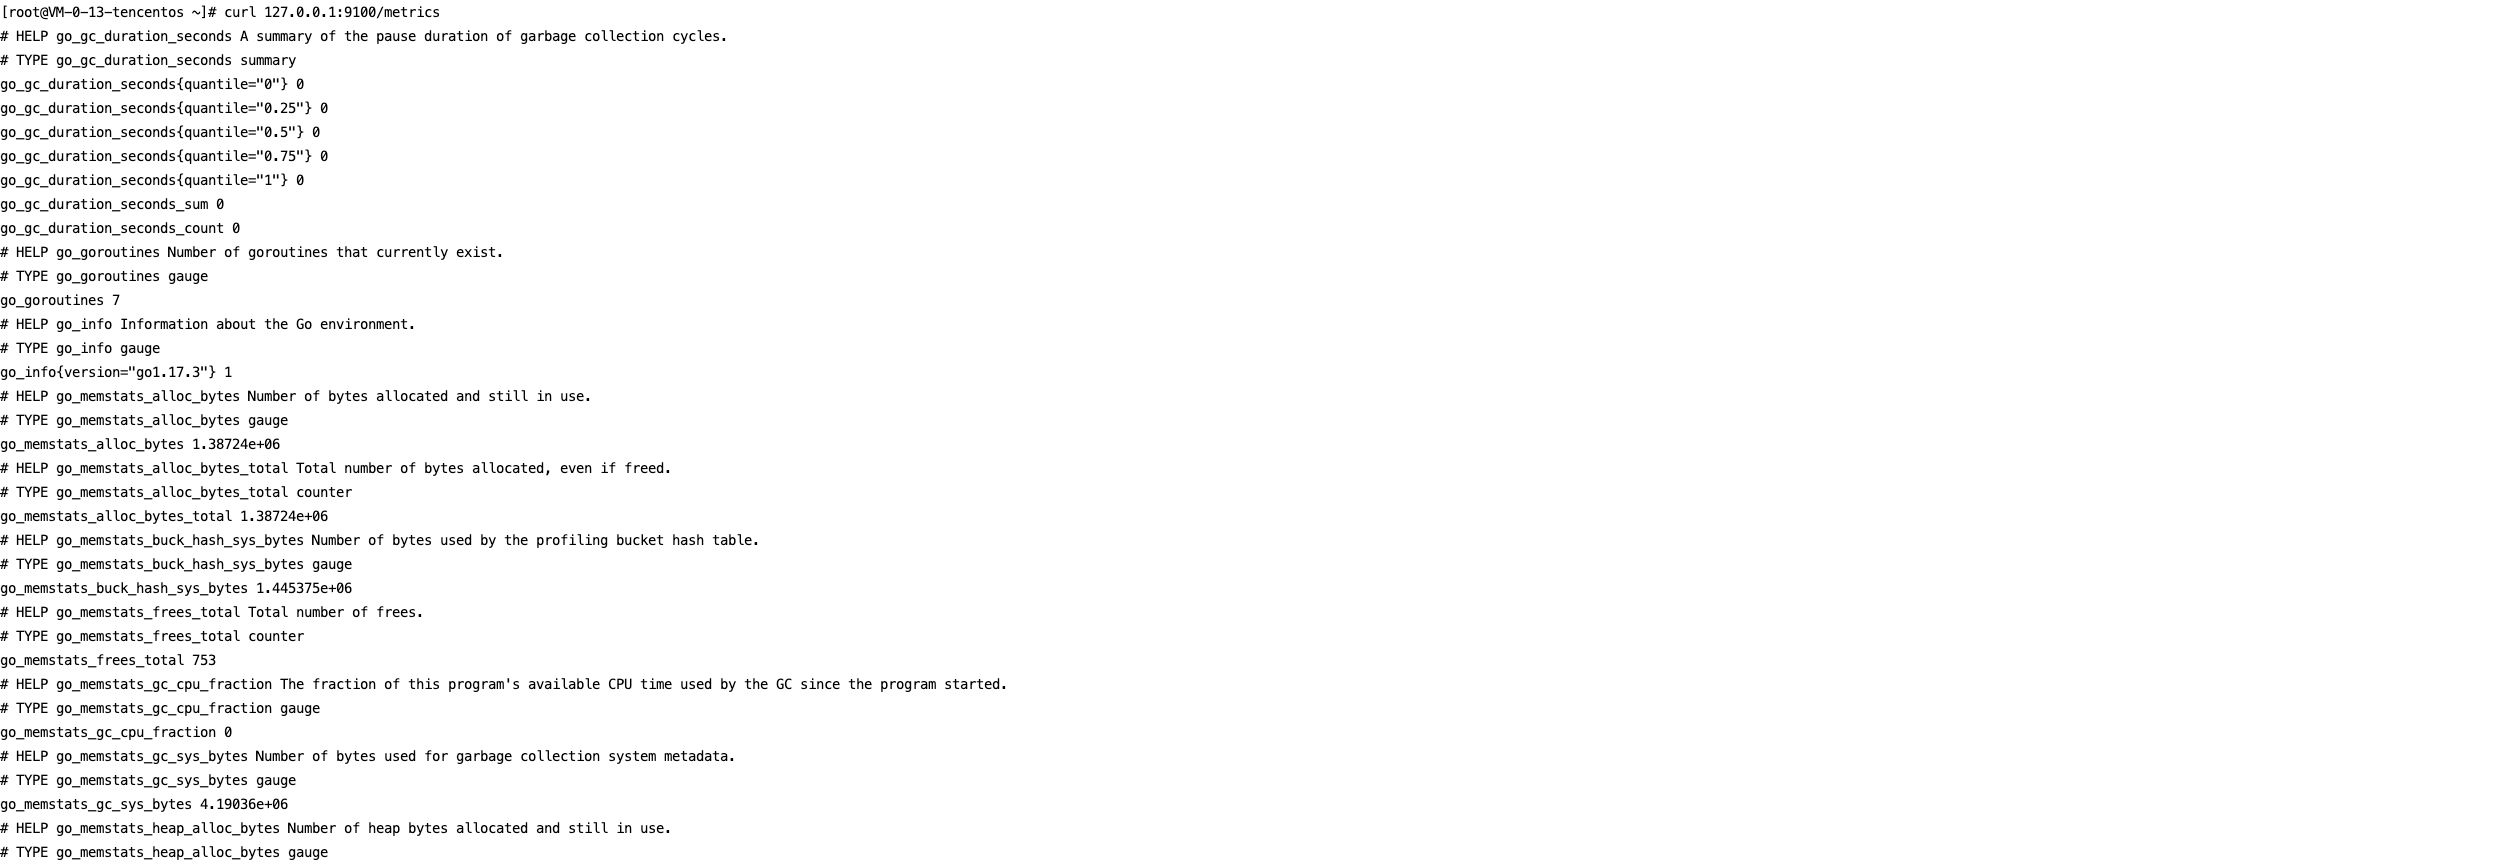
curl 127.0.0.1:9100/metrics
The following image shows the exposed metric monitoring data after executing the command:
After completing the above operations, you need to configure the scraping task on the page. See Configuration Description in Method 1 for guidance.
Viewing Monitoring Information
Prerequisites
The Prometheus instance has been bound to a Grafana instance.
Operation Steps
1. Log in to the TMP console and select the corresponding Prometheus instance to enter its management page.
2. In Data Collection > Integration Center, find the Non-Tencent Cloud Host Monitoring card on the Integration Center page, and click to open the integration page. Then, select Dashboard > Dashboard Install/Upgrade to install the corresponding Grafana Dashboard.
3. Open the Grafana instance address associated with the Prometheus instance, and navigate to the Dashboards page to view the relevant monitoring dashboards.
Configuring Alarm
1. Log in to the TMP console and select the corresponding Prometheus instance to enter its management page.
2. Select Alarm Management to add the corresponding alarm policies. For details, see Creating Alarm Rules.