The server manager is not a component installed by default in Windows 10, and you may need to manually install it.
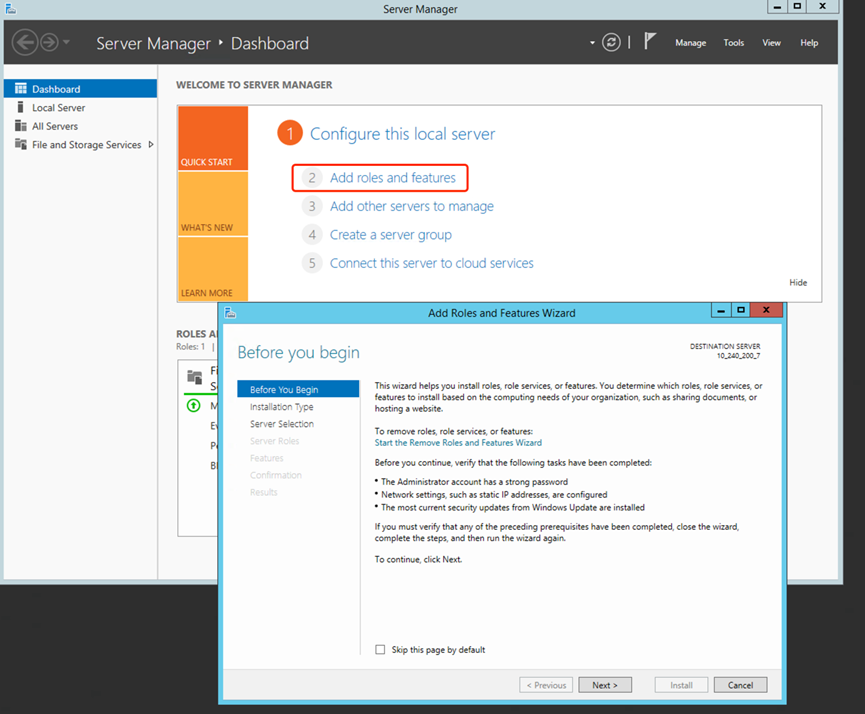
1. Enter servermanager in the start menu, or find and open Server Manager.
2. Select Add Roles and Features.
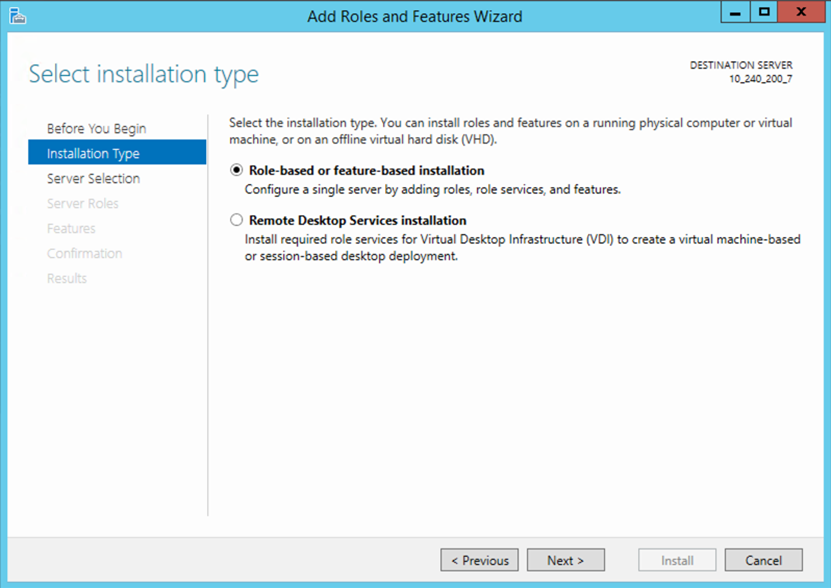
3. On the Add Roles and Features Wizard page, click Next to the installation type, select Role-based or Feature-based Installation, and click Next.
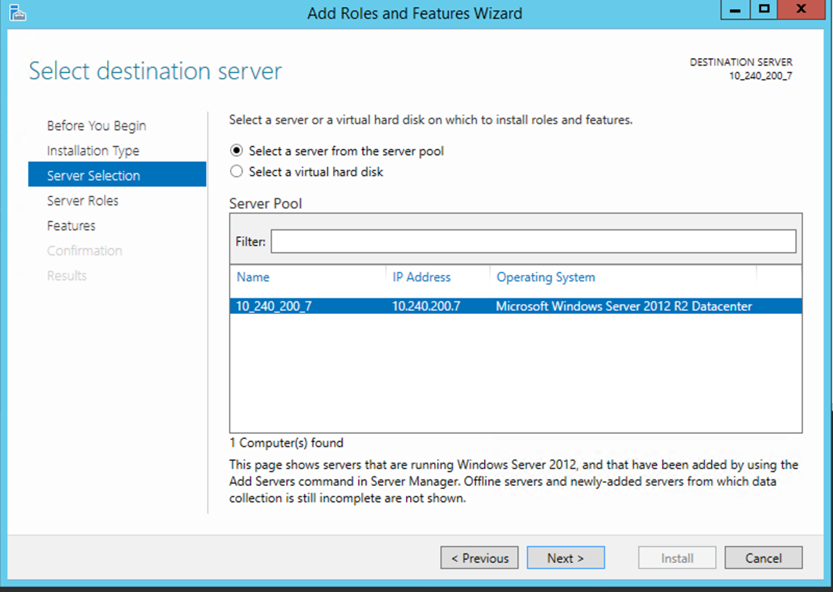
4. Select the currently used server, and click Next.
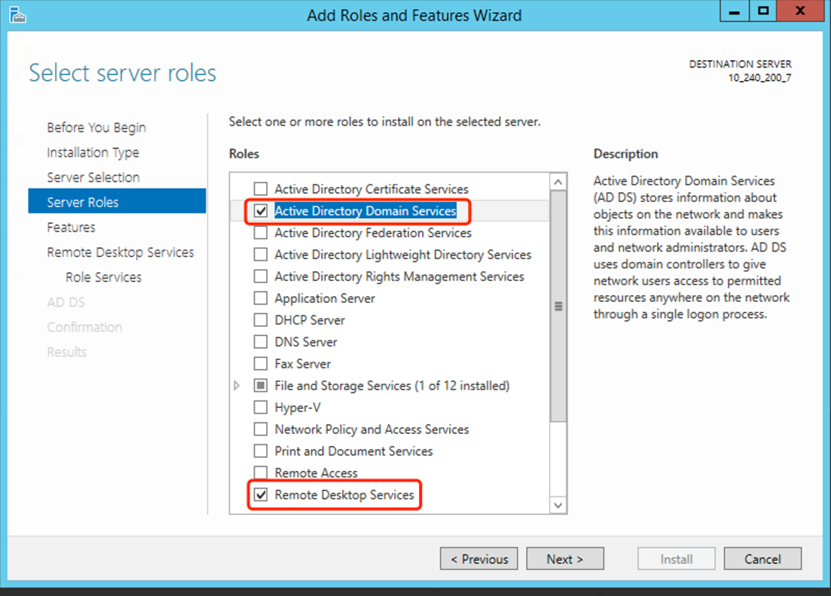
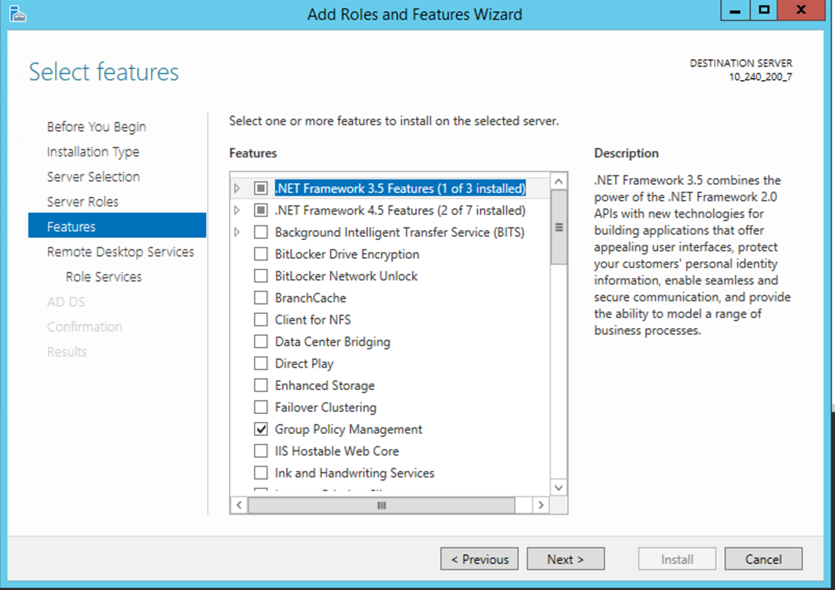
5. On the Server Roles page, select the roles: Active Directory Domain Services, Remote Desktop Services. Click Next.
6. (Optional) Select additional features as needed.
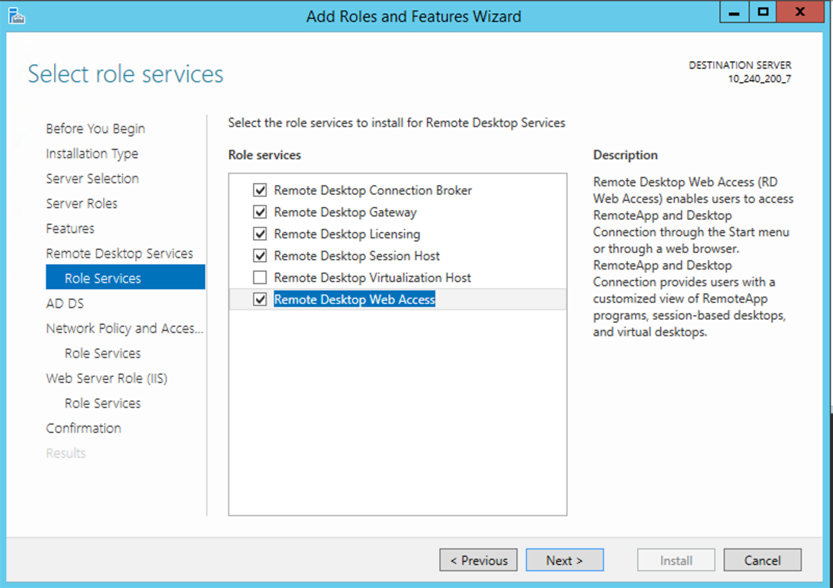
7. For the next step of the remote desktop service, on the Select Role Services page, check: Remote Desktop Web Access, Remote Desktop Session Host, Remote Desktop Connection Broker, Remote Desktop Licensing, Remote Desktop Gateway. Click Next.
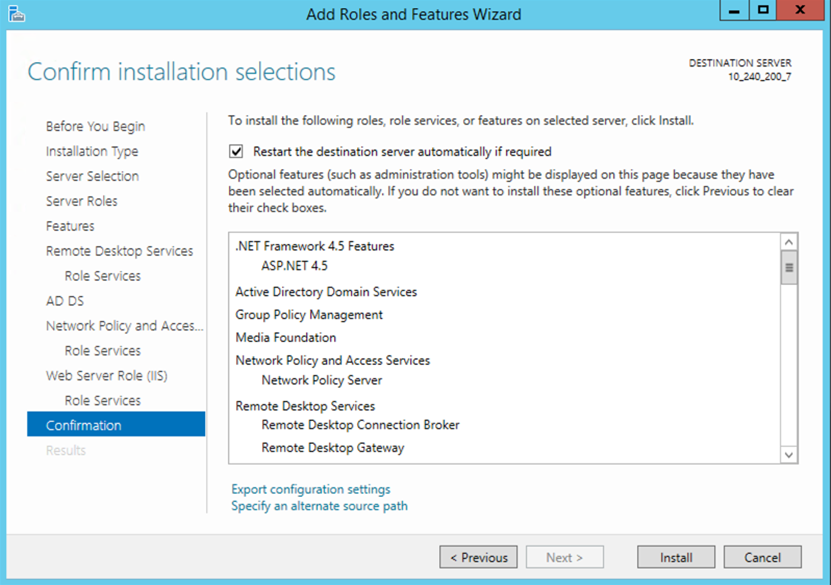
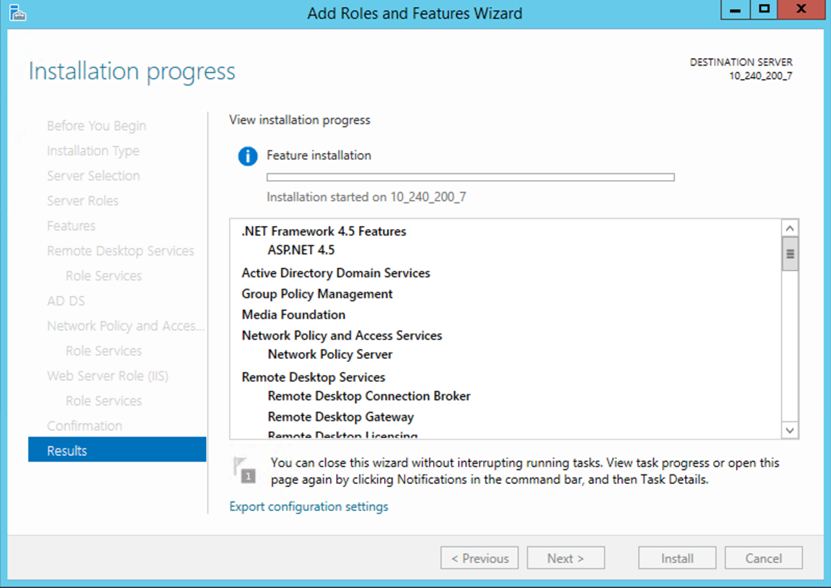
8. Confirm the components that need to be installed and click Install. After the installation, restart the server according to the actual situation.
Group Policy Modification
1. Select the Start menu, then click Run (or use the shortcut key Win + R).
2. In the pop-up "Run" window, enter "gpedit.msc" to enter the Group Policy window.
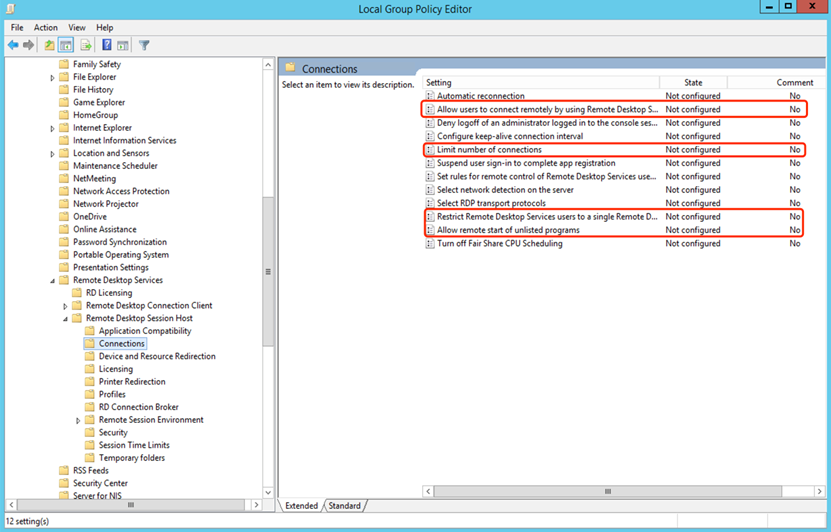
3. After entering the Group Policy window, select Computer Configuration > Administrative Templates > Windows Components > Remote Desktop Services > Remote Desktop Session Host > Connections, and modify the configuration:
Note:
Allow users to remotely connect through the remote desktop service: Set to Enabled.
Limit the number of connections: Set to Enabled, and enter the maximum allowed RD connections as 100 (or set according to actual conditions).
Restrict Remote Desktop Services users to a single Remote Desktop Services session: Set to Disabled.
Allow remote startup of unlisted programs: Set to Enabled.
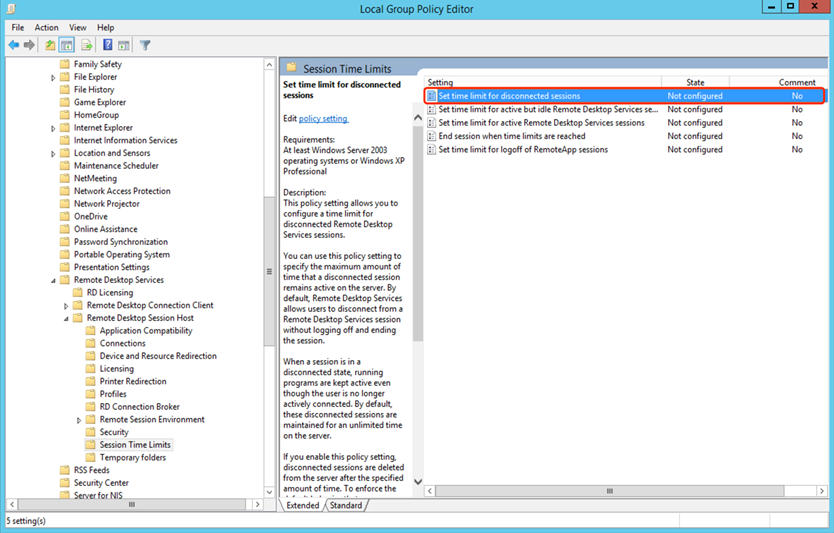
4. Select Computer Configuration > Administrative Templates > Windows Components > Remote Desktop Services > Remote Desktop Session Host > Session Time Limit, and modify the configuration:
Note:
Set the time limit for disconnected sessions: Set to Enabled, ending disconnected sessions after 1 minute (or as appropriate).
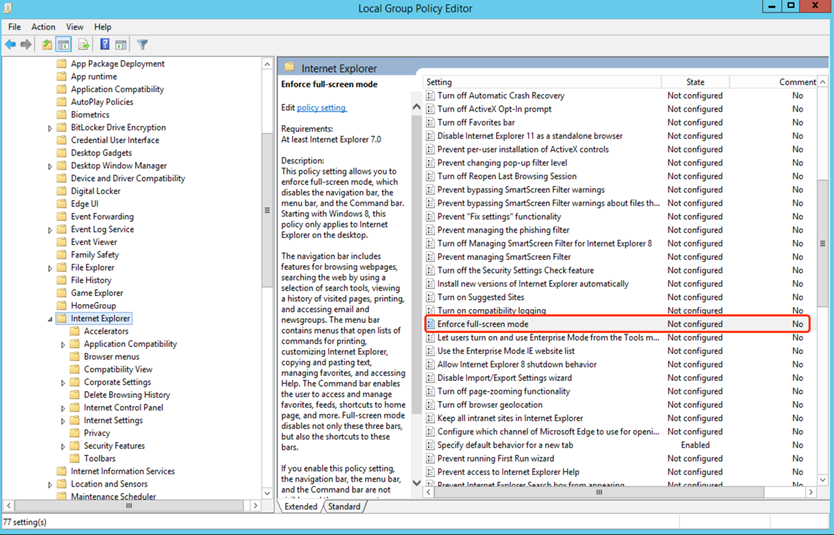
5. Select Computer Configuration - Manage Template - Windows Components - Internet Explorer Settings, modify the configuration to enable the Force Full Screen Mode setting.
Web Asset Configuration
1. On the Asset Management > Host Assets page, synchronize or add configuration for host assets and manage them on the corresponding BH instance.
2. Select the Web Application Assets page and click Add Asset.
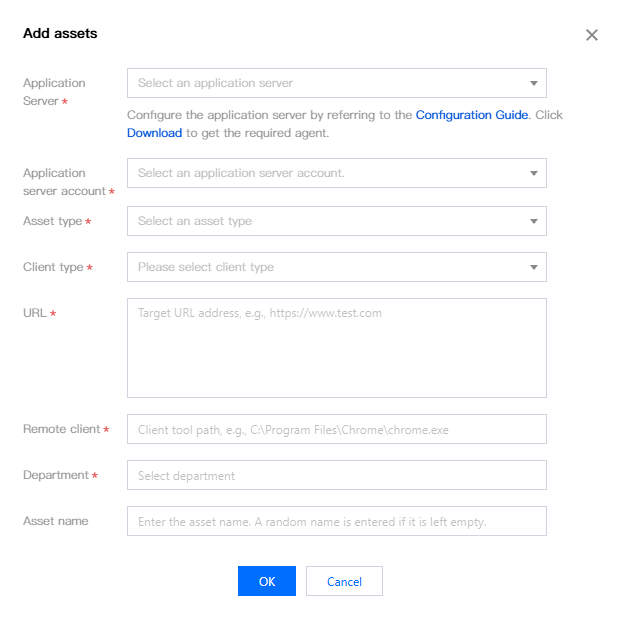
3. In the pop-up window for adding assets, fill in the asset configuration according to the actual parameter situation.
Parameter Name
Description
Application Server
Select a Windows server to serve as the web application server.
Application Server Account
Login account configured on the application server.
Asset Type
Currently, only Web is supported.
Client Type
The web client program installed on the application server currently only supports Chrome and Microsoft Edge.
URL
The URL that needs to be accessed through a web client on the application server.
Remote Client
Web client program path. The correct full path needs to be filled in and it should correspond to the client type.
3.1 Download the Agent program, upload it to the target web application server, and perform the installation.
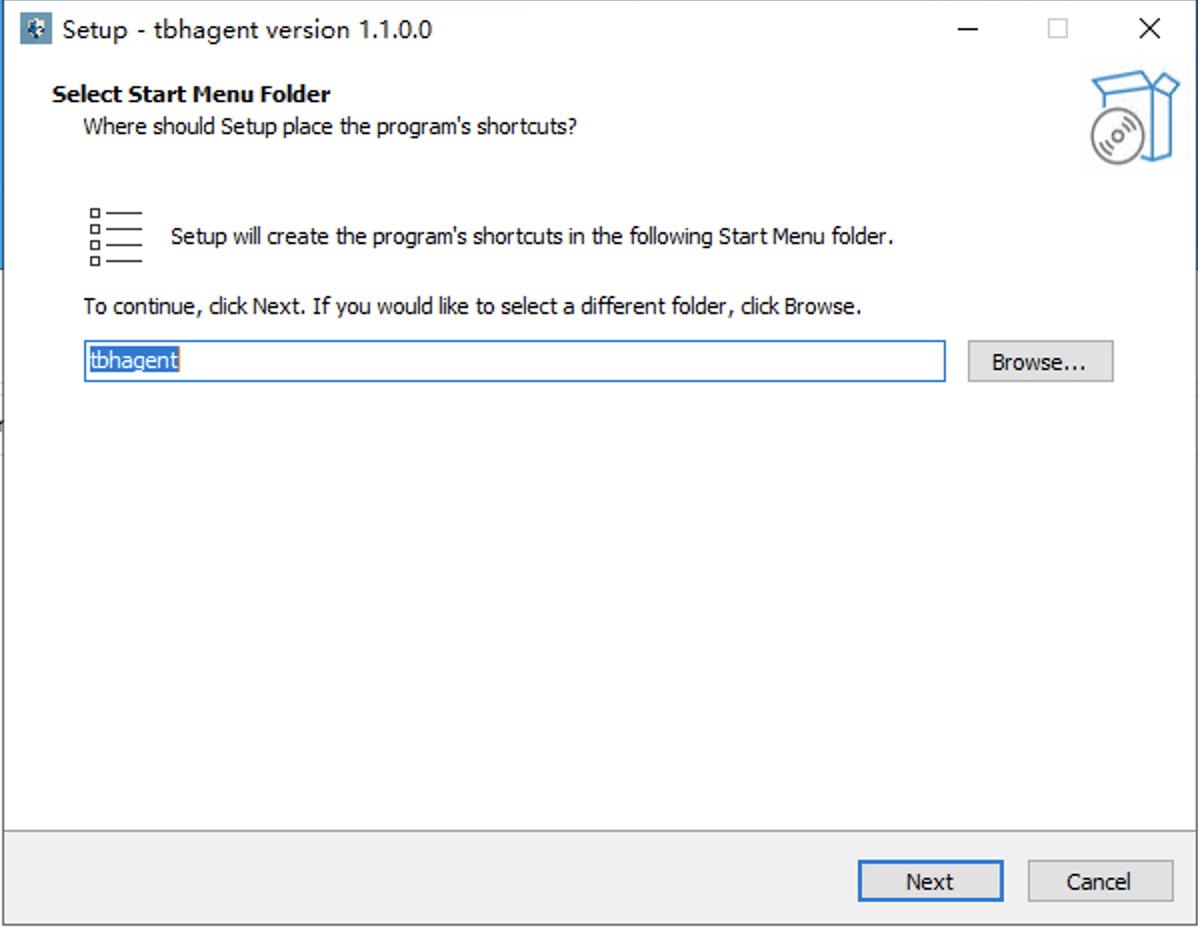
3.1.1 In the installation interface, select the installation folder and click Next.
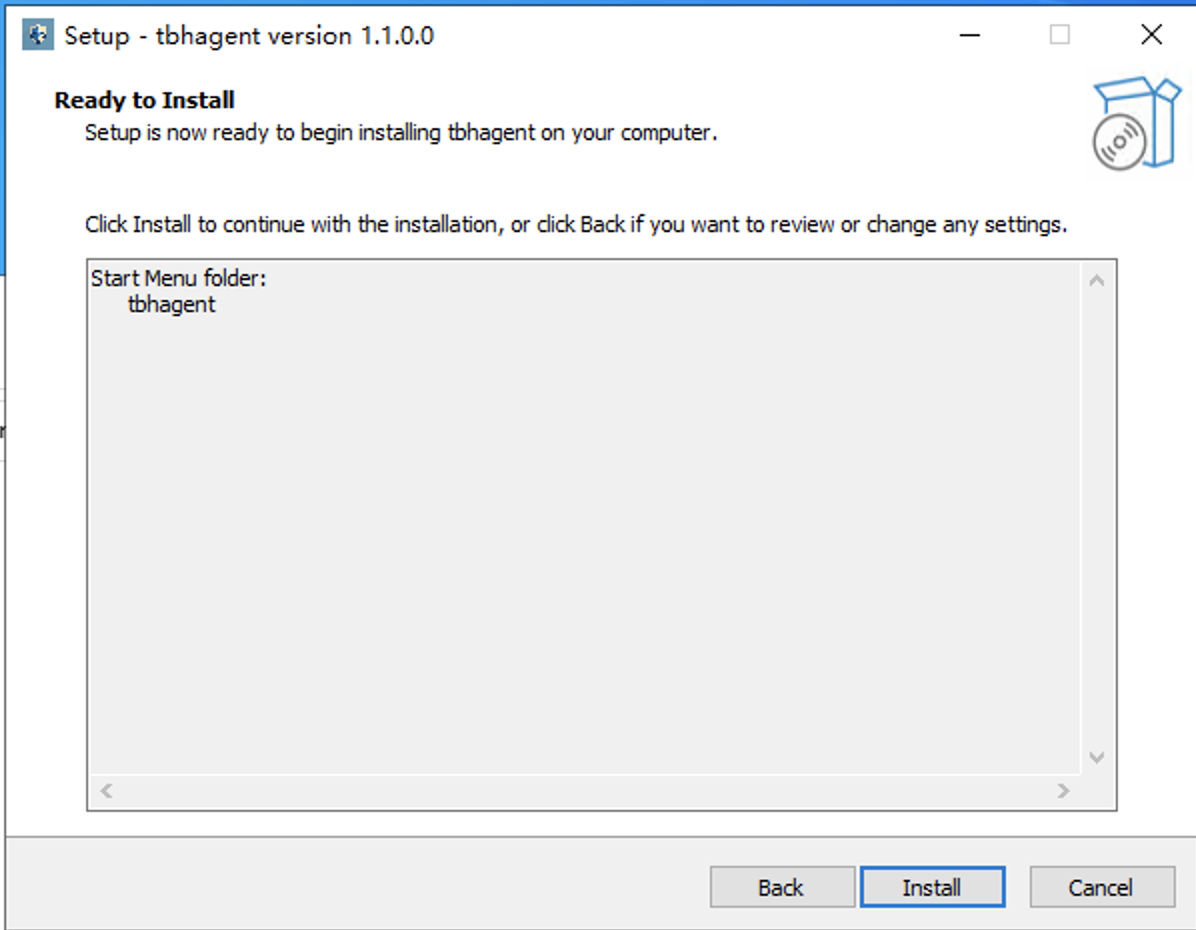
3.1.2 Click Install to continue the installation process.
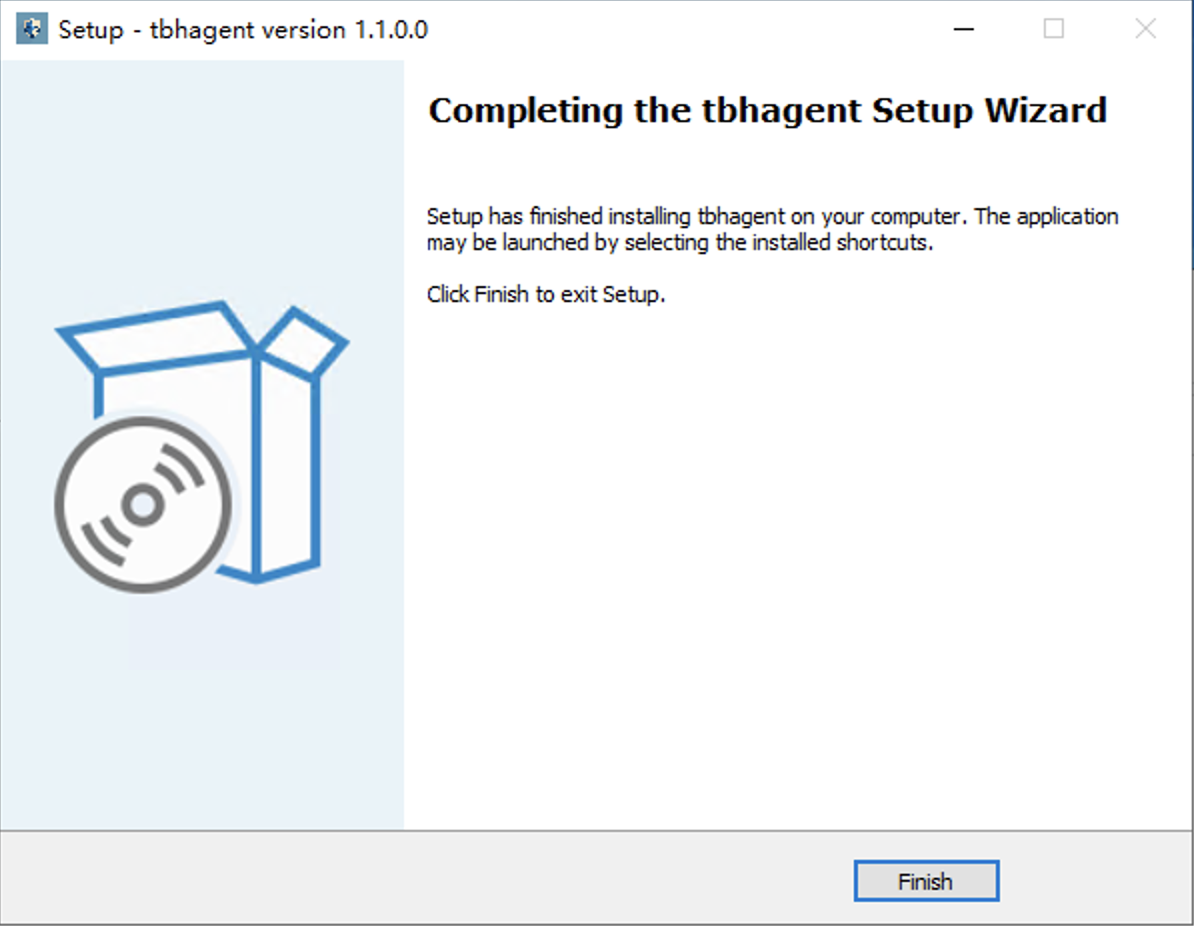
3.1.3 After the installation is complete, click Finish to exit the installation program.
4. Change the asset custody status added in step 3 to Bound.
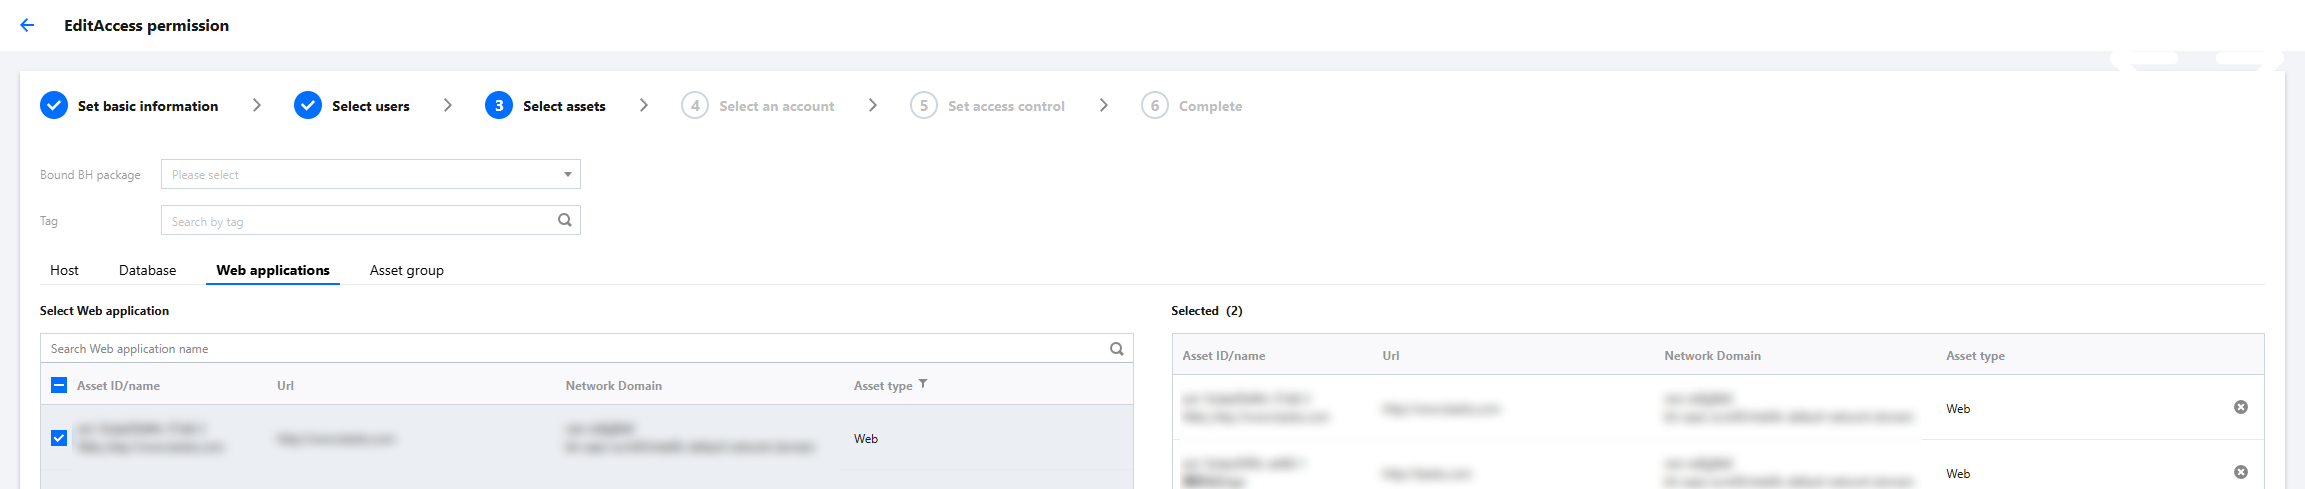
5. On the Access Permission page, authorize the web application assets added by the operation and maintenance personnel.
6. Switch to maintenance mode or log in to the Operations Console, select Web Application Assets, and click access the corresponding asset.