VOD supports adding (or deleting) standard multilingual subtitle files to HLS videos outputted from Adaptive Bitrate Streaming. During playback, users can switch between different language subtitles to enhance the viewing experience.
The process includes two steps: Add subtitles to the media files and Associate subtitles with the media files.
For ease of description, this article assumes the following specific scenario: add Chinese (zh) and English (en) subtitles to the output file from the adaptive streaming template ID (10) for FileId (1397757888586312345), so that when playing the file, you can choose to display the added Chinese or English subtitles.
Step 1. Add Subtitles to Media Files
This step adds subtitles to the media asset with FileId (1397757888586312345) and obtains a subtitle ID. Next, this subtitle ID will be used for subtitle association.
VOD provides two ways to add subtitles to media files: uploading subtitles and automatic subtitle generation.
Upload Subtitles
Upload existing subtitle files. After a successful upload, the subtitle information is automatically added to the media asset. There are two upload methods: console upload and server API upload.
Upload through console
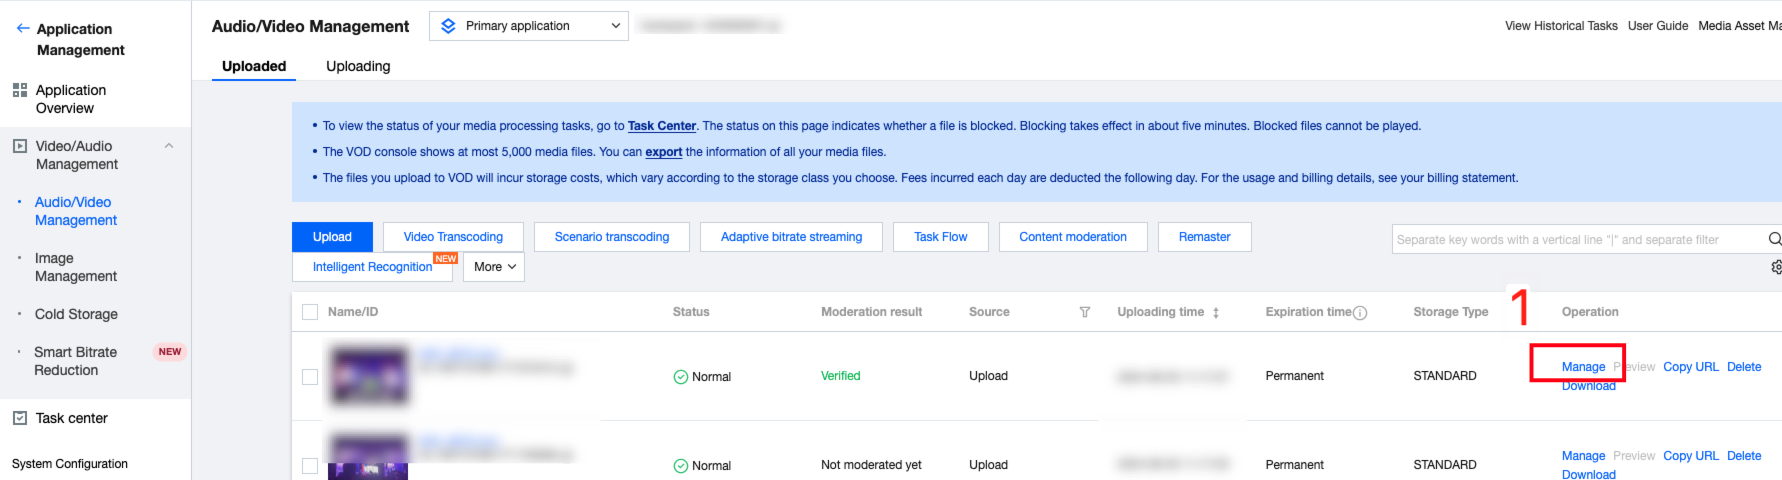
1. log in to VOD console, go to the audio and video management page of the target application, and click manage the media asset you need to process.
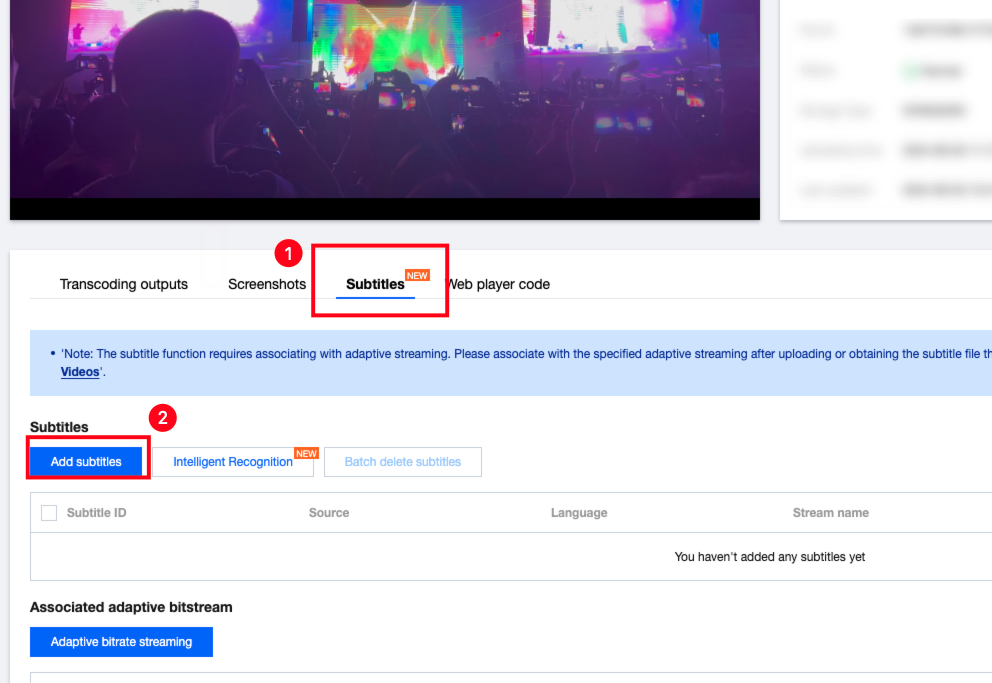
2. Click Subtitle > Add Subtitles.
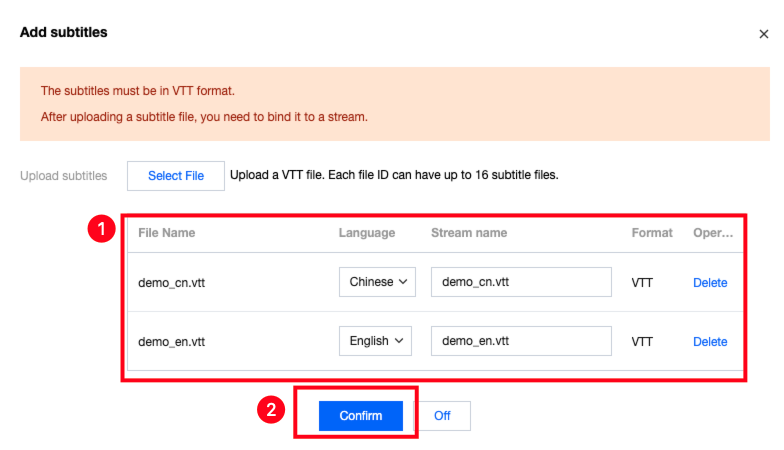
3. Upload the required subtitle file, and edit language and stream name (for display in the player), then click Confirm.
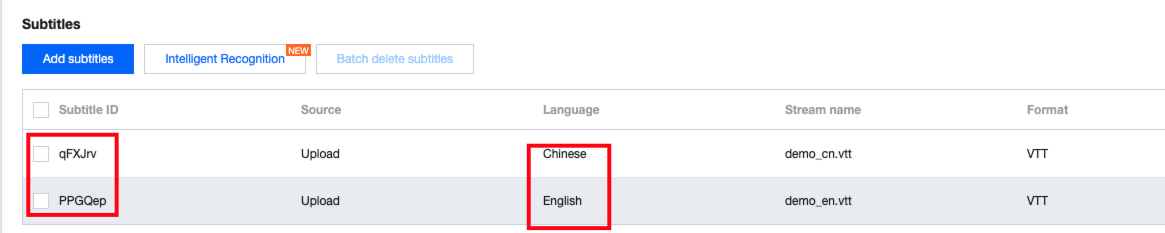
4. The Chinese and English subtitle IDs are qFXJrv and PPGQep, respectively.
Server API Upload
1. Invoke the server API ModifyMediaInfo, input parameters AddSubtitles to specify the subtitles to be uploaded:
There are two ways to create templates: console creation and server API creation.
1.1. Console Creation of Templates
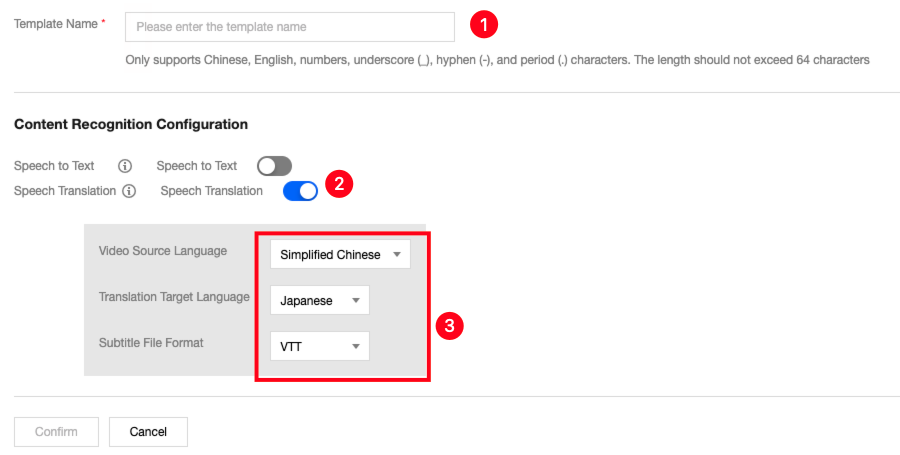
1.1.1. Log in to VOD Console, after entering the target application, click Media Processing > Template Settings > Intelligent Recognition Template, click Create Intelligent Recognition Template.
1.1.2. Supports selecting "Speech to Text" to output the source language subtitle file, or "Speech Translation" to output the subtitle file in the target translation language. The following screenshot scenario describes converting source video speech to CR and translating it to the target language subtitle file.
1.1.3. After creating, you can see the newly created template ID 72314 in the template list.
1.2. Create template via Server API
1.2.1. Invoke the server API to create an audio/video CR template. The input parameter AsrTranslateConfigure specifies the speech translation task parameters:
"AsrTranslateConfigure":{
"Switch":"ON",
"SrcLanguage":"zh",
"DstLanguage":"en",
"SubtitleFormats":["vtt"]
}
Note, if subtitle translation is not needed, you can use Speech Full Text Recognition (AsrFullTextConfigure) to specify generating subtitles in the video source language:
"AsrFullTextConfigure":{
"Switch":"ON",
"SrcLanguage":"zh",
"SubtitleFormats":["vtt"]
}
1.2.2. According to this scenario, we specified Speech Translation (AsrTranslateConfigure). The interface output example (other fields omitted) provides the template ID (72314).
Multiple methods are supported to initiate intelligent recognition tasks:
Invoke server API
Initiate task flow from the console
Specify task flow upon upload
Upload from server
Upload from client
Upload through console
For the above methods, please refer to the Developer Guide Task Initiation. Additionally, you can directly initiate an II task through the console as follows:
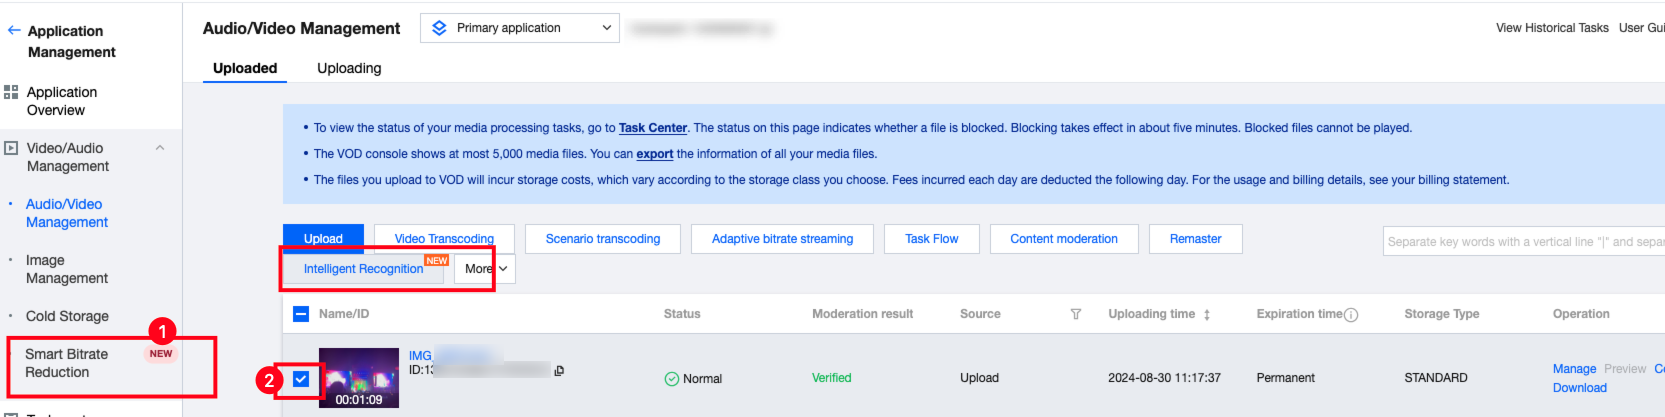
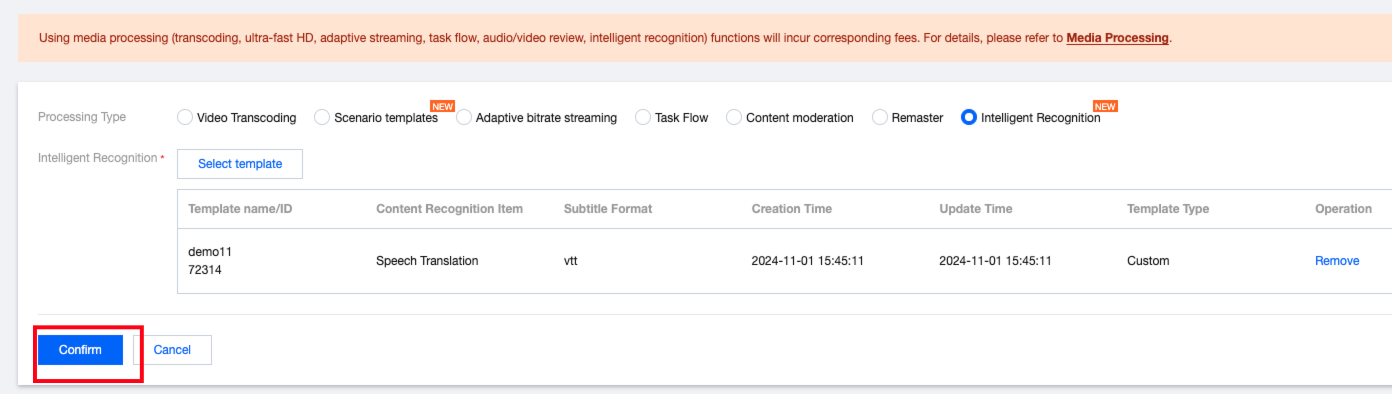
2.1. Log in to VOD console, go to the Audio and Video Management page of the target application, select the FileId for subtitle generation, and click Intelligent Recognition.
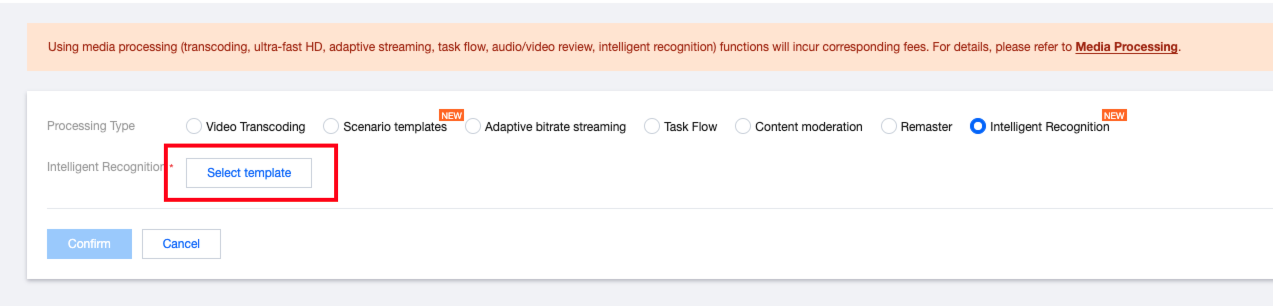
2.2. Click Select template.
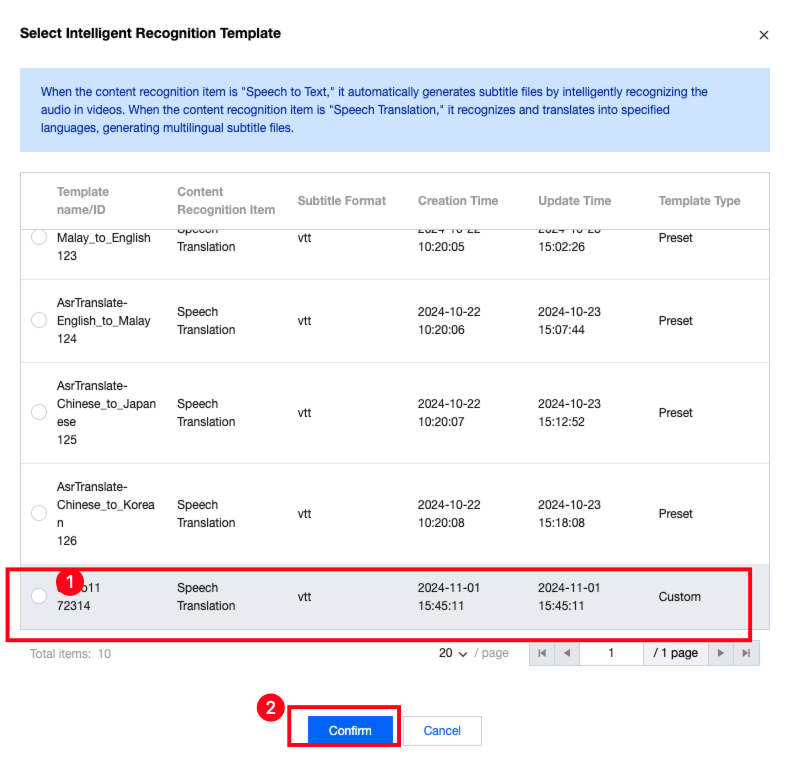
2.3. Select the recognition template you want to use and then click Confirm.
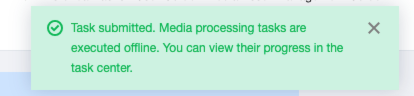
The page will indicate that the task has been successfully created:
2.4. On the Task Center page, you can see the task ID and task status of the subtitle generation task.
When the task status shows Completed, the subtitles have been successfully generated and automatically added to the media assets.
3. Result Acquisition
Using the task ID obtained from Back 'Task Initiation' and following the development guide Result Acquisition, you can obtain the subtitle generation results, which are located in the AiRecognitionResultSet array (type AiRecognitionResult) within the ProcedureTask structure:
When Type is AsrFullTextRecognition, it indicates that the full text translation result is saved in AsrFullTextTask.
When Type is AsrTranslateRecognition, it indicates that the translation result is saved in AsrTranslateTask.
The example above shows that the Chinese and English subtitle IDs are qFXJrv and PPGQep, respectively.
When the task is successful, the generated subtitle information has been automatically added to the media assets.
Step 2. Associate subtitles with the media files
There are two ways to associate subtitles with the media files: associating subtitles via the console and associating subtitles via server APIs. The former only supports associating subtitles with already generated Adaptive Bitrate output files, while the latter supports associating subtitles with both stock and incremental files.
Console Subtitle Association
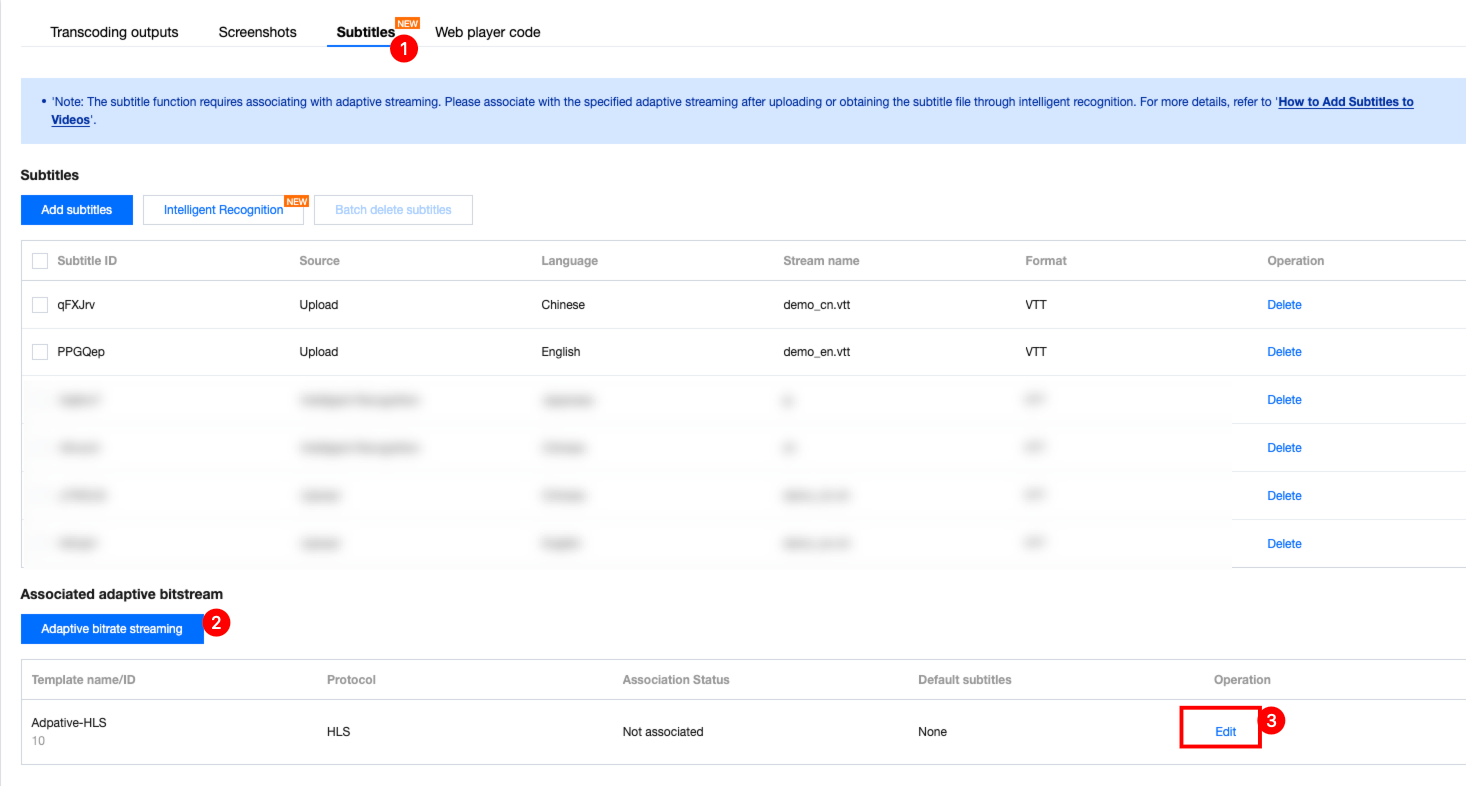
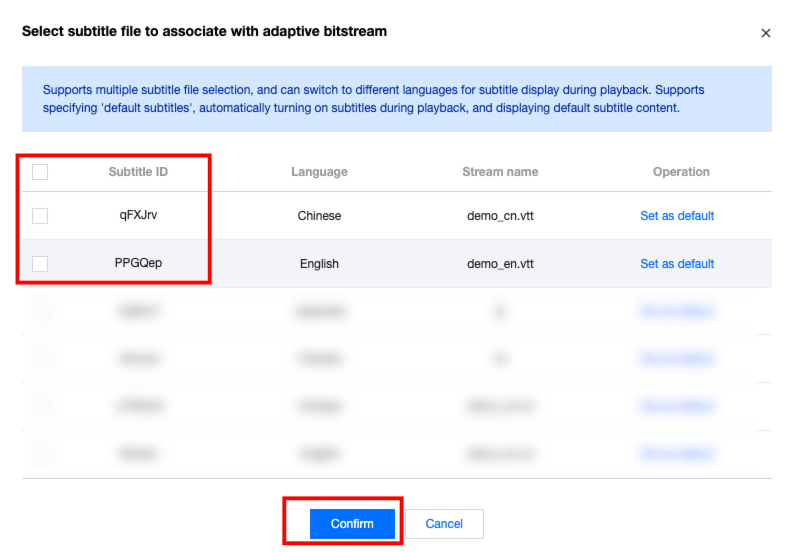
1. log in to VOD console, go to the audio and video management page of the target application. Click Manage > Subtitles > Edit for the Media Asset with FileId (1397757888586312345).
2. After clicking Confirm, an Operation Successful prompt will pop up in the upper right corner of the page, indicating that the subtitle association was successful.
Server API Associated Subtitles
Including associating subtitles with existing files and incremental files.
1. Associating subtitles with existing files
To associate subtitles with the output files of adaptive bitrate conversion, please invoke the server API Associated Media Subtitles. Input parameters are as follows:
The input parameter example for MediaProcessTask is as follows:
{
"AdaptiveDynamicStreamingTaskSet":[
{
"Definition":10,
"SubtitleSet":["qFXJrv","PPGQep"]
}
]
}
Once the task is completed, the output file of the adaptive bitrate streaming will be associated with subtitles.
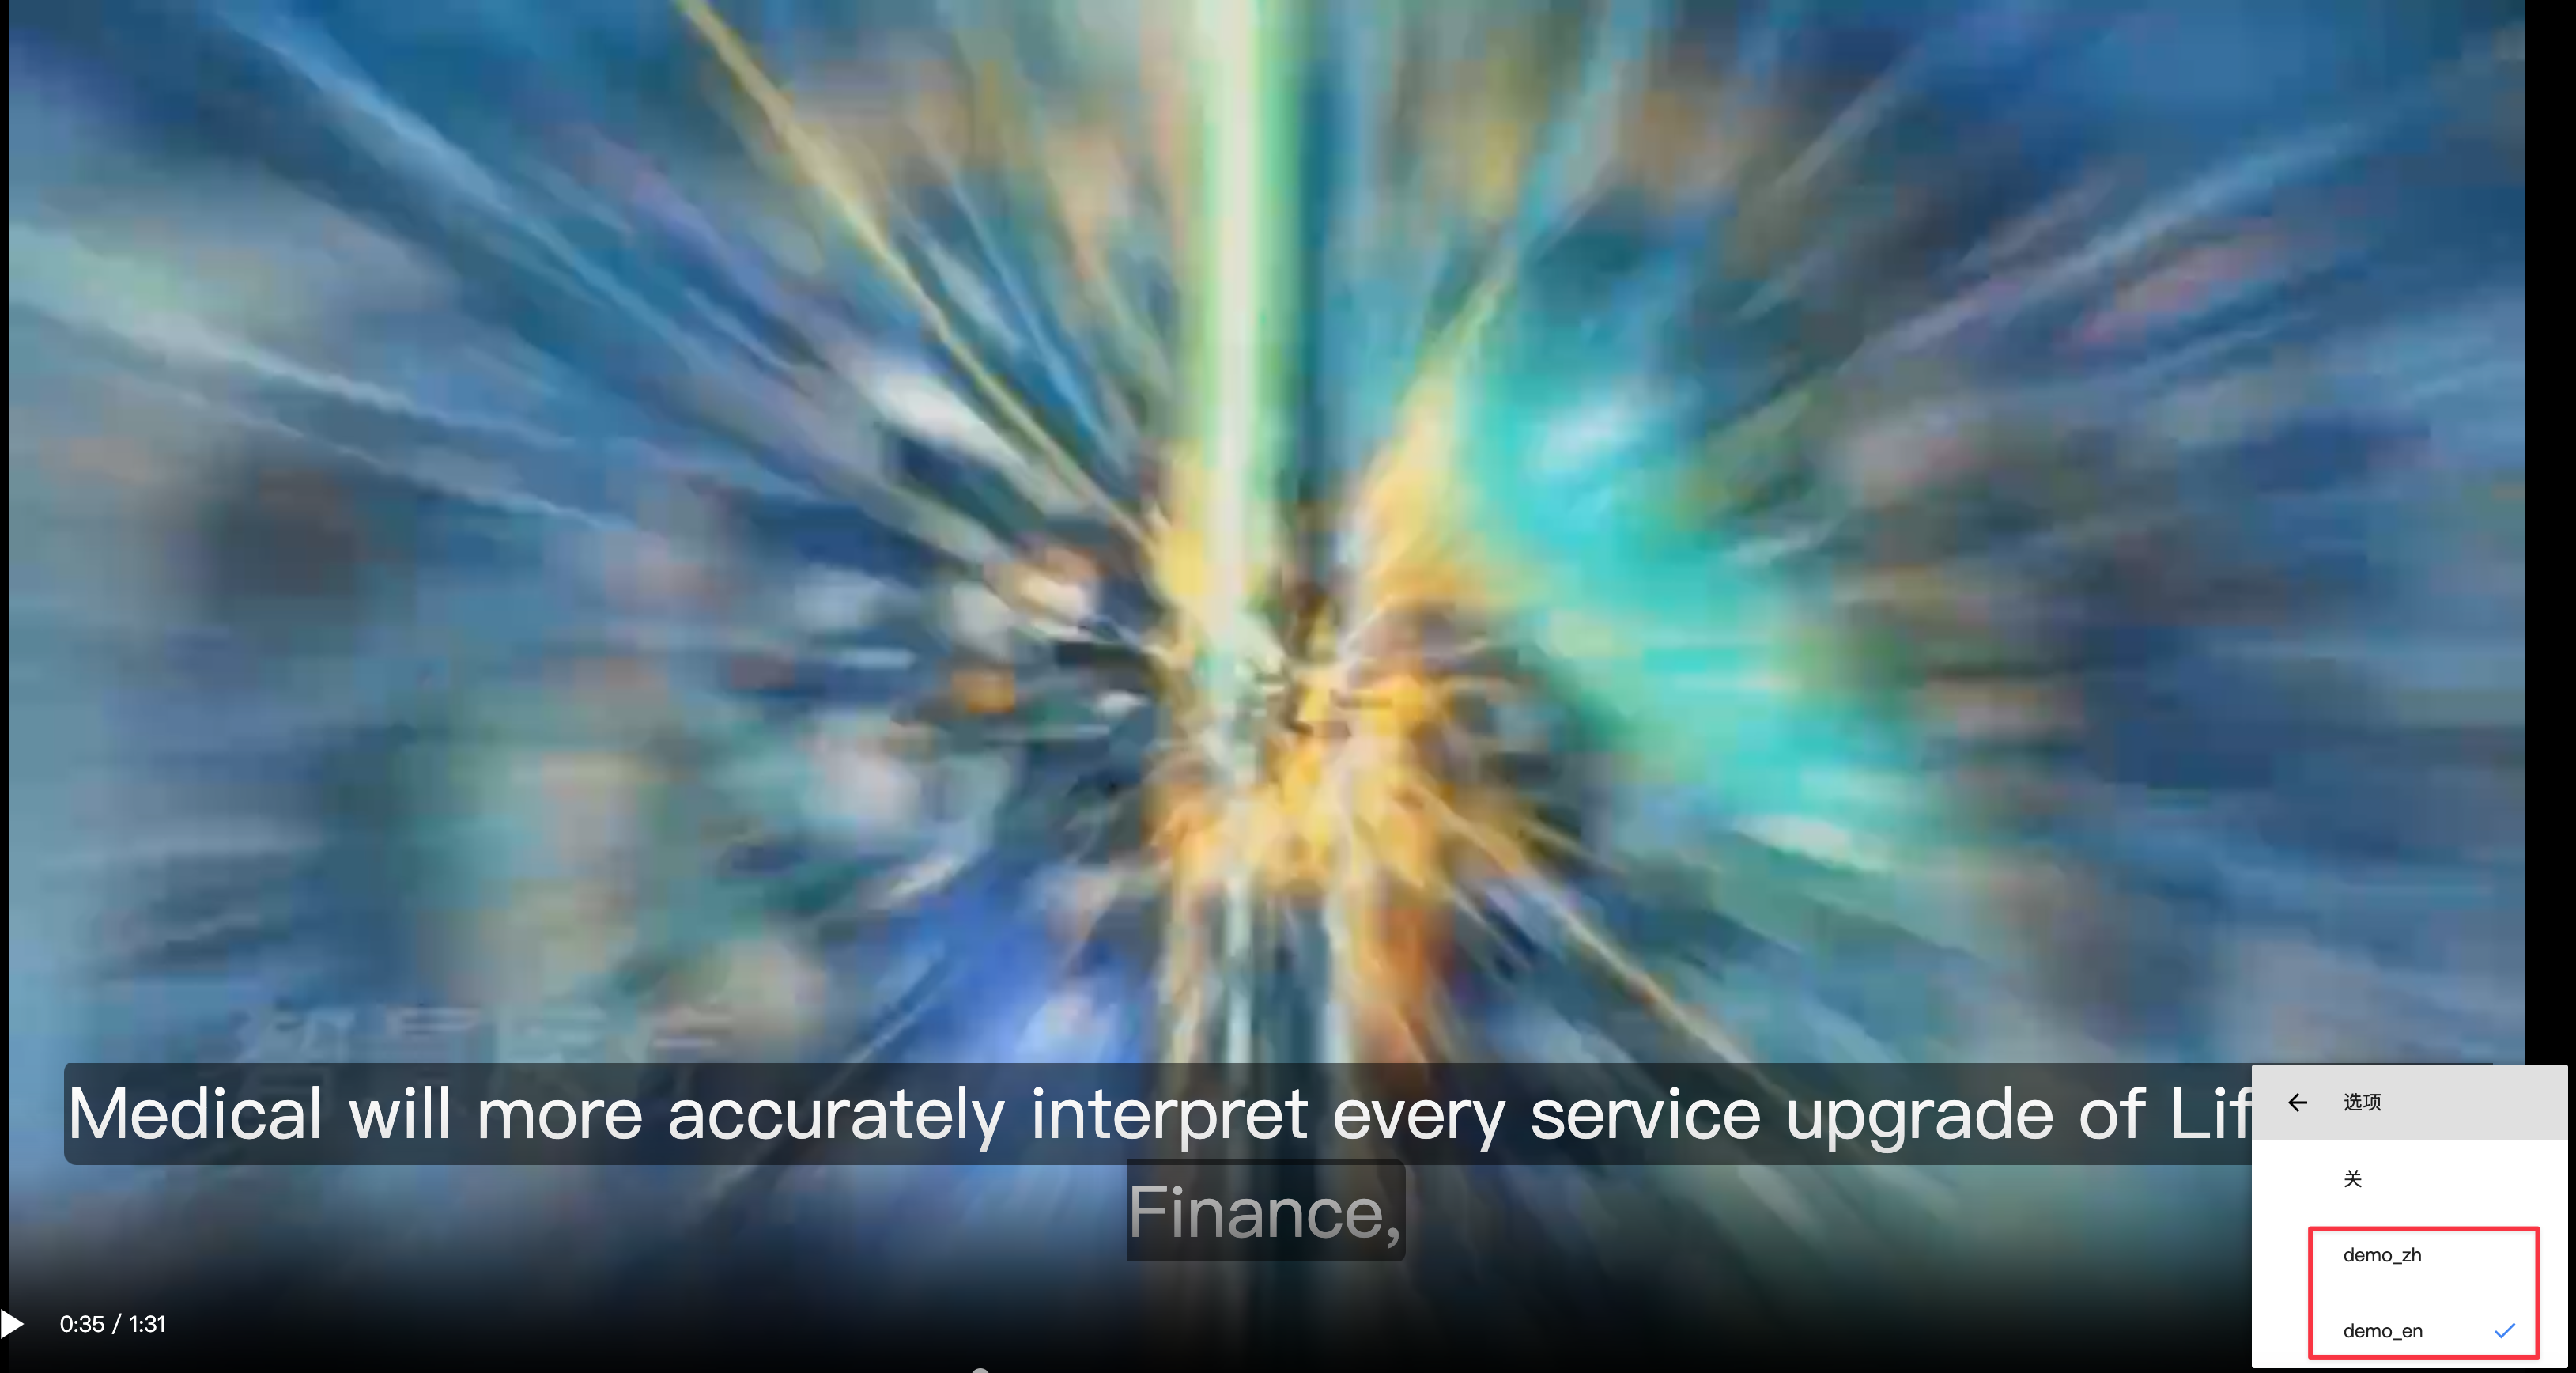
Step 3. Playback Effect
After successfully associating subtitles, you can choose to display subtitles in different languages while playing the video. Refer to the effect in the image below: