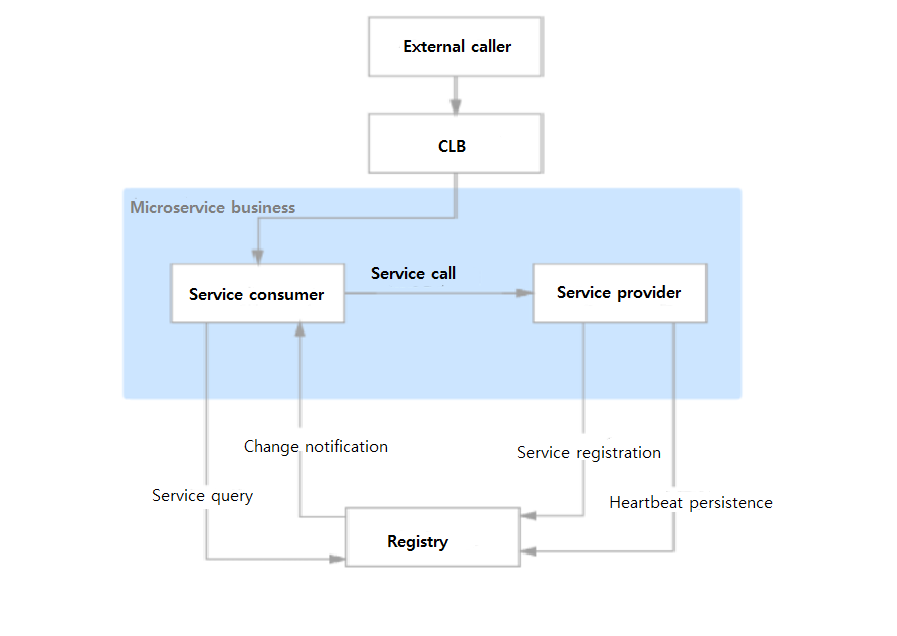
This document describes how to deploy your microservice applications in TEM and make them mutually callable and accessible over the public network by using the provider/consumer demo applications developed in Spring Cloud with JAR file upload as an example.
Prerequisites
Create an environment and application.
Directions
Step 1. Get the demo application
TEM currently supports Nacos, Eureka (for existing users), and ZooKeeper registries. The following steps take the Nacos registry as an example. To demonstrate Spring Cloud microservice applications using a registry, we have prepared a set of provider/consumer demo applications using the Nacos registry. You can view their source code at GitHub or directly download them as JAR packages.
Before you start to deploy the Spring Cloud demo application, you need to configure the registry resource in the environment. Please add the registry corresponding to the application you select as instructed in Adding Environment Resource.
Step 3. Deploy the Application
1. On the Application management page, select the target application and click Deploy to new environment.
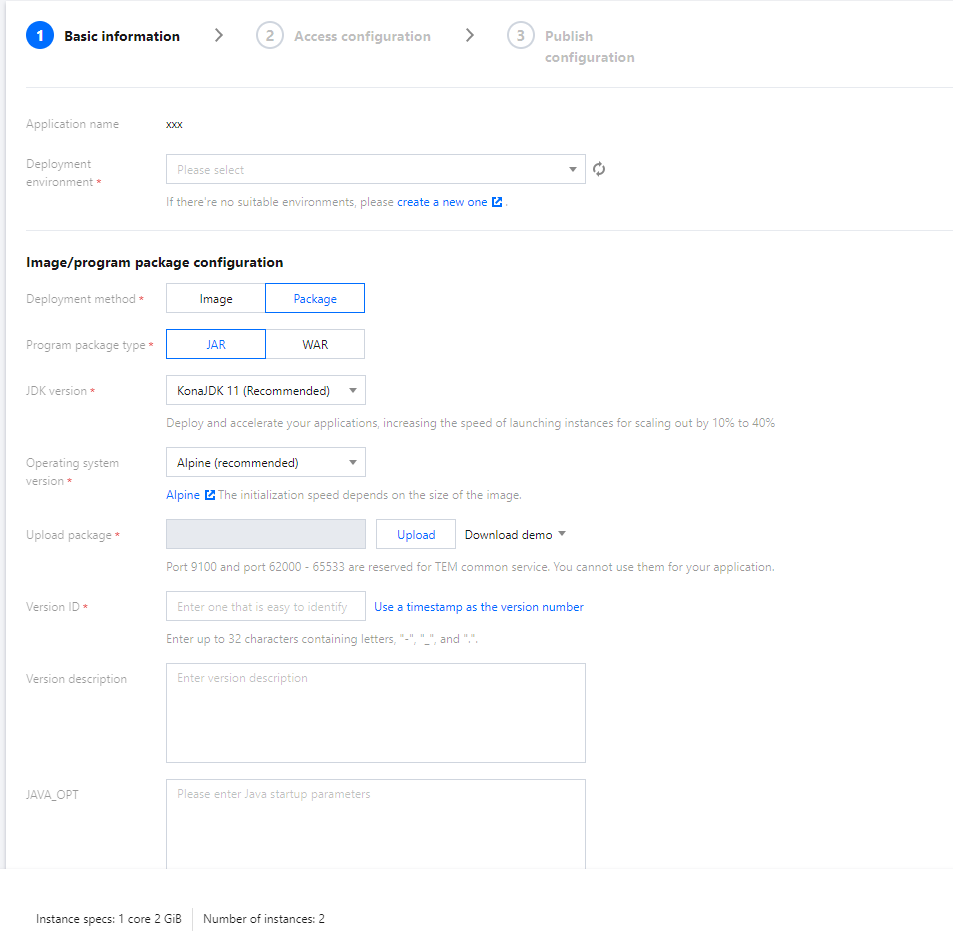
2. On the Deploy Application page, configure the relevant parameters as needed.
Upload Package: upload your package.
Release Environment: select the environment just created.
3. For a Spring Cloud application, if a registry is associated with the selected release environment, you can select Auto Inject Registry Info. For more information, see Application Registration and Discovery.
4. Click Deploy to complete the deployment of the consumer application.
5. Repeat the four steps above to deploy the provider application.
Step 4. Check Registered Applications
1. After the application instance to be deployed starts running, you can enter the Registry page in the TEM console and select the registry associated with your deployment environment.
2. On the registry details page, select the Application Management tab to check whether the provider and consumer applications are successfully registered.
Step 5. Verify the Access
After deployment of the provider and consumer applications, you can create an access configuration in the CLB gateway for the consumer application for internet access.
1. In the TEM console, click CLB Gateways in the left sidebar.
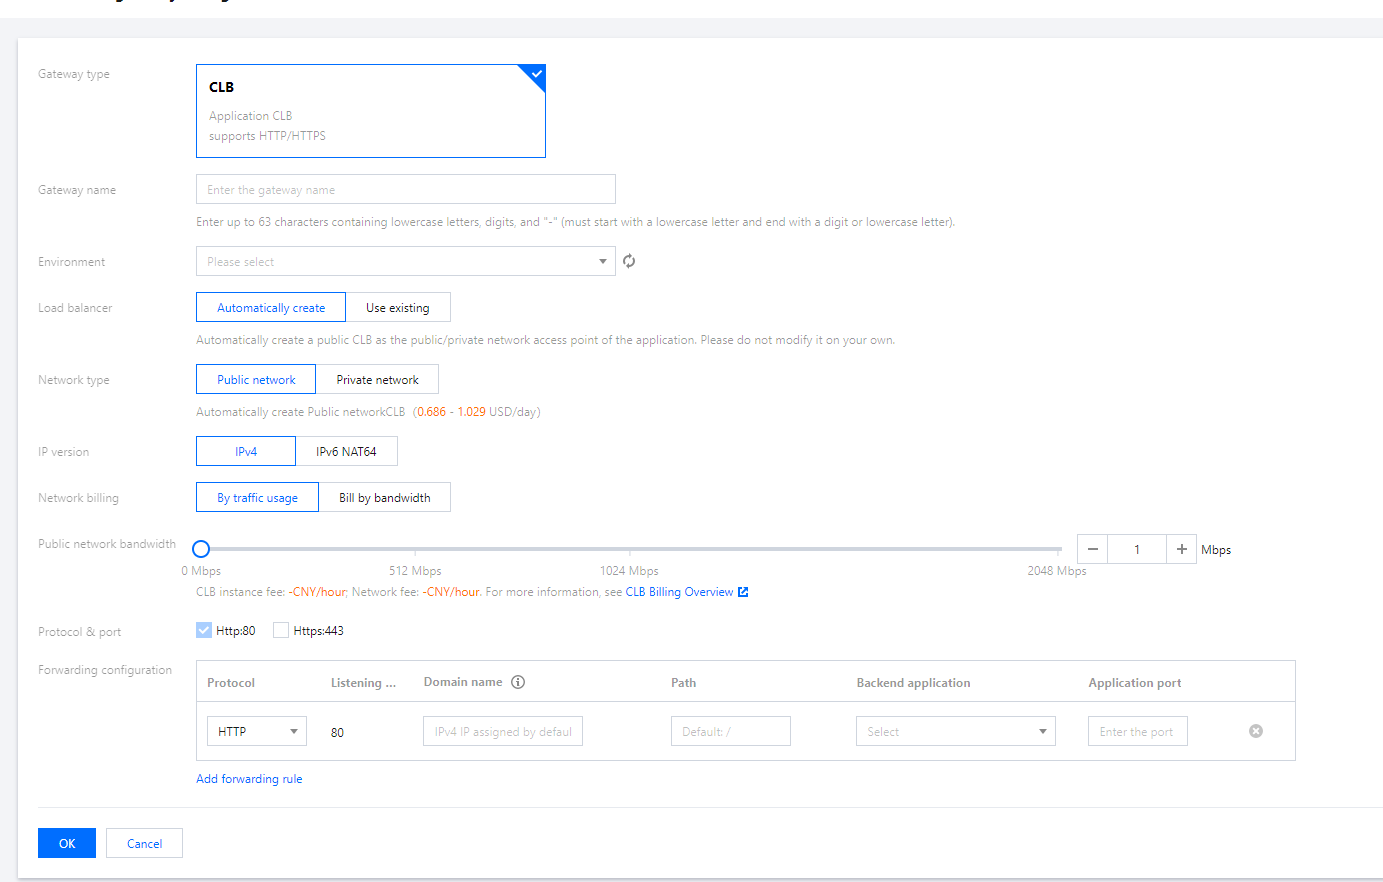
2. Click Create and enter the gateway configuration. Choose the correct Environment.
Load balancer: Create one automatically or use an existing CLB.
Protocol & port: HTTP:80 and HTTPS:443 are supported, and HTTPS domain names can be bound to certificates. Select HTTP:80 for the Demo application.
IP version: Options include IPv4 and IPv6 NAT64.
Forwarding configuration:
Domain name: Choose an existing domain name. If it’s not specified, a random IPv4 IP is assigned by default. For the demo application, use the assigned default IP address.
Path: It defaults to “/”. Configure it as needed.
Backend application: Select the consumer demo application you deployed.
Application port: Select port 19003 for the consumer demo application.
Server certificate: If HTTP is selected, you need to select a server certificate. If existing certificates are not suitable, you can create one.
3. Click Confirm to complete the configuration. You can then check the IP for internet access in the list of CLB gateways.
4. Enter the following URL in a browser:
http://IP for internet access/echo/str
If the following result is returned, the application is successfully deployed.