Capacity Scheduler organizes resources in a hierarchical manner, allowing multiple users to share cluster resources based on multi-level resource restrictions.
Directions
Creating a resource pool
1. Log in to the EMR console and click Details of the target Hadoop cluster in the cluster list to go to the cluster details page.
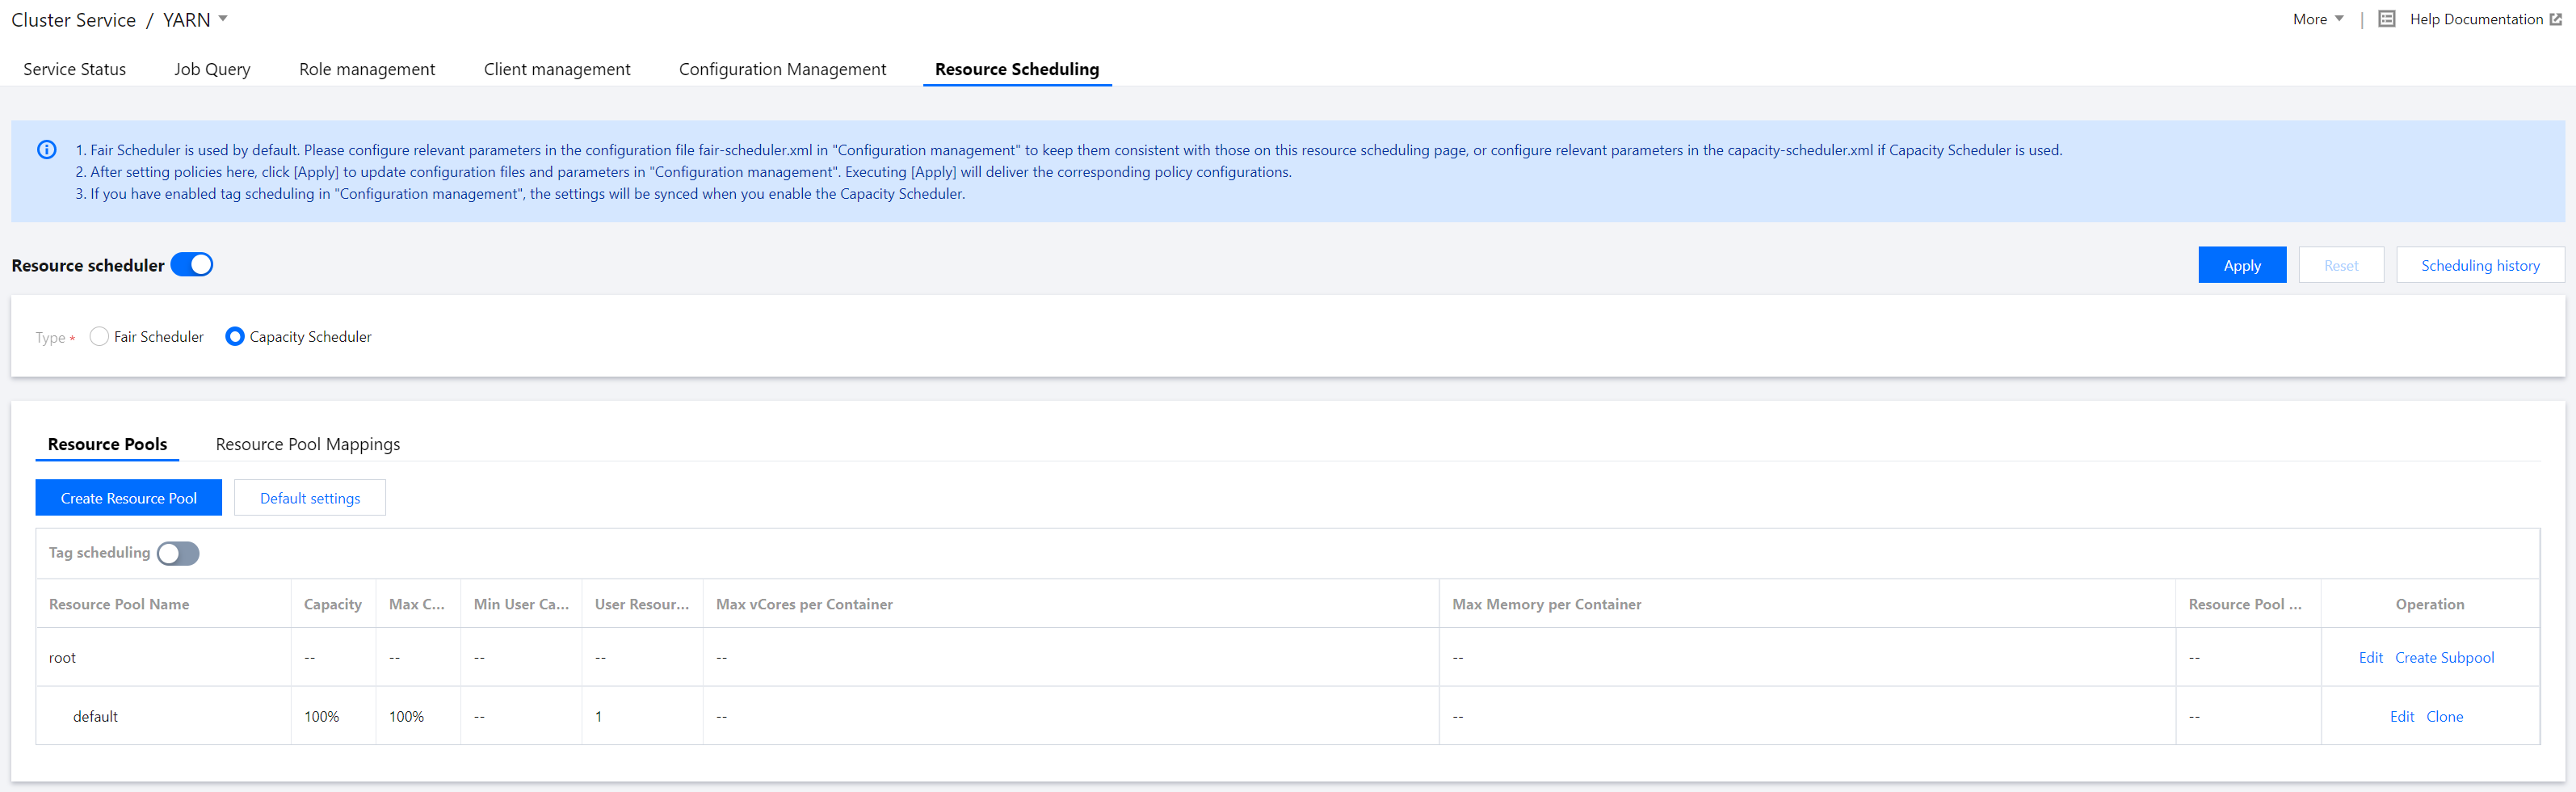
2. On the cluster details page, select Cluster Service and choose Operation > Resource Scheduling in the top-right corner of the YARN component block to go to the Resource Scheduling page.
3. Toggle on Resource scheduler and configure the scheduler.
4. Create a resource pool for Capacity Scheduler.
Select Capacity Scheduler and click Create Resource Pool to create a resource pool. You can edit or clone an existing resource pool as well as create a subpool for it. You can also click Default settings to set the number of times of delayed scheduling.
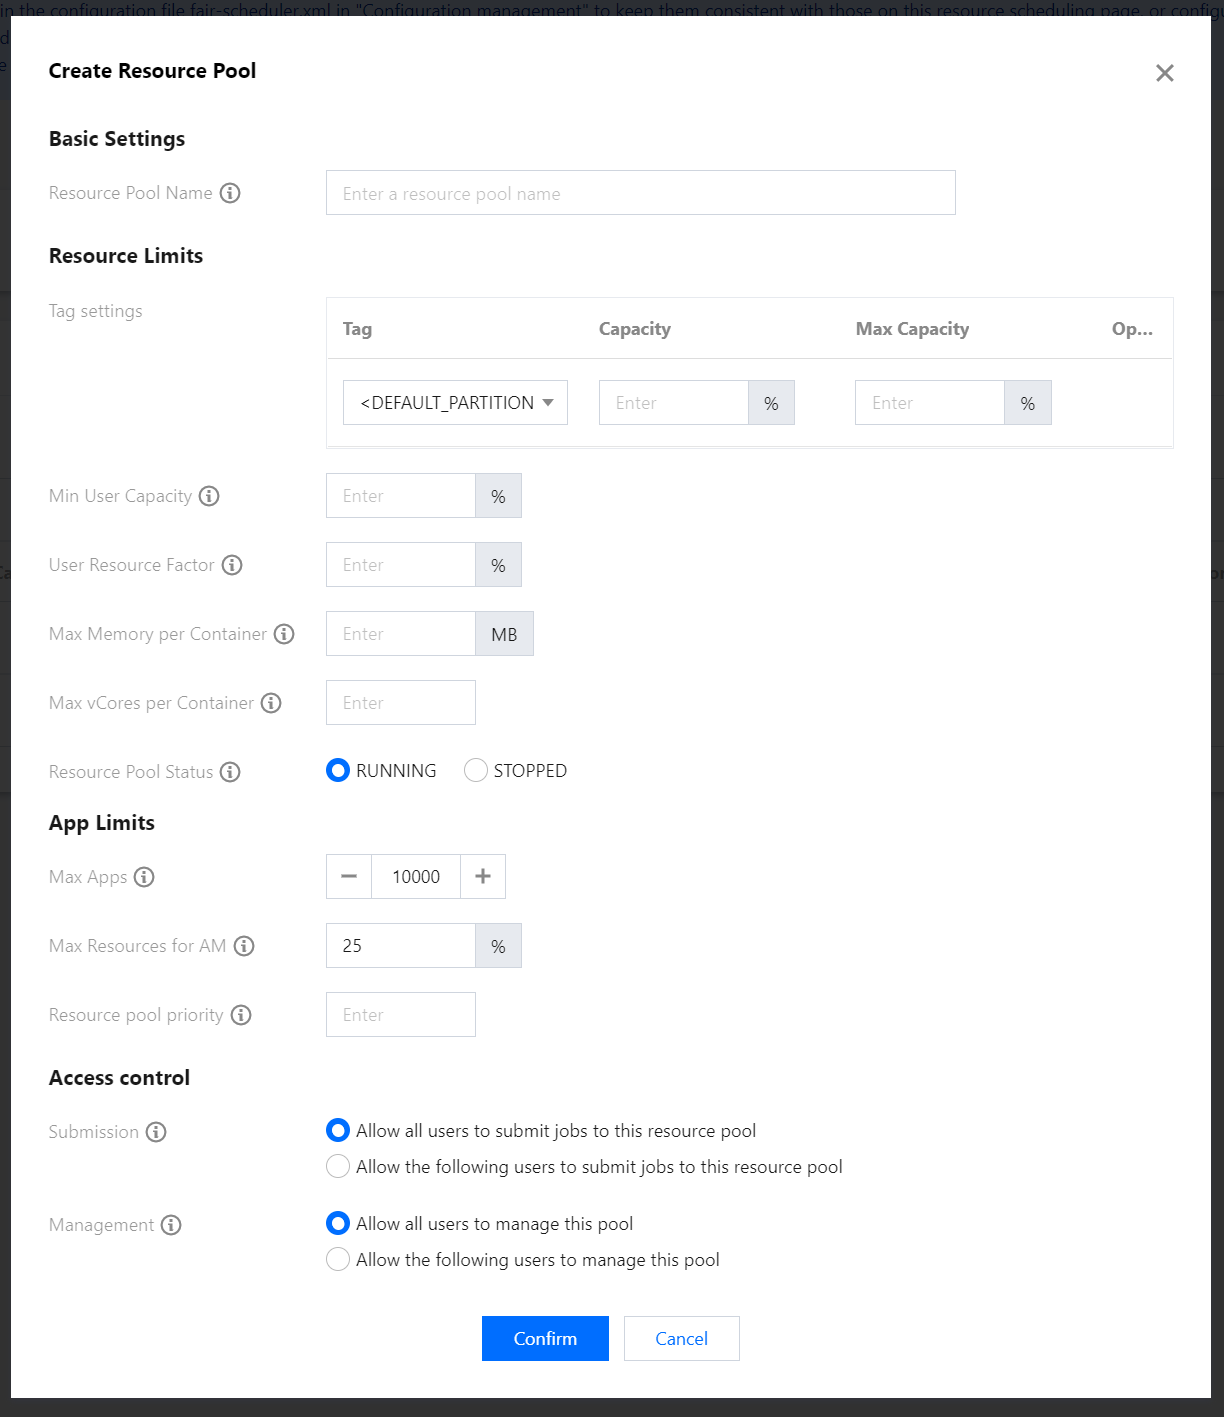
Available resource amount. The total capacity of the subpools of a parent pool is 100. Available resource amount = resource amount of the parent pool * percentage set here. The queue can consume more resources than the queue's capacity if there are idle resources in other queues.
Maximum queue capacity in percentage. Because of resource sharing, the amount of resources used by a queue may exceed its capacity, and this field specifies the maximum amount of resources that can be used by the queue.
If a resource request does not have a node label specified, the application will be submitted to the corresponding partition specified by this configuration item. By default, the value is empty, i.e., applications will be allocated to containers on nodes with no label.
Minimum resources in percentage guaranteed for each user. Each queue enforces a limit on the percentage of resources allocated to a user at any given time. When multiple users' applications are running in a queue concurrently, the amount of resources used by each user varies between a minimum and maximum value. The minimum value depends on the number of running applications, and the maximum value is determined by `minimum-user-limit-percent`.
Maximum amount of resources in percentage that can be used by each user. For example, if the value is `30`, the amount of resources for each user cannot exceed 30% of the queue capacity at any given time.
Maximum memory that can be allocated to each container. The value will overwrite and cannot be greater than that of the system's `yarn.scheduler.maximum-allocation-mb`.
Maximum number of CPU cores that can be allocated to each container. The value will overwrite and cannot be greater than that of the system's `yarn.scheduler.maximum-allocation-vcores`.
Status of the queue. The value can be `Running` or `Stopped`. If a queue is in the `Stopped` status, new applications cannot be submitted to it or any of its subqueues.
Set the allowed number of times of delayed scheduling to ensure the local execution of tasks. If the value is `-1`, delayed scheduling will be disabled.
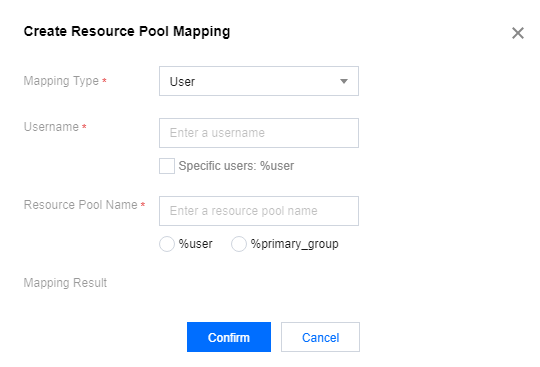
Configuring resource pool mappings
1. In the Policy Settings section, choose Resource Pool Mappings > Create Resource Pool Mapping to create a resource pool mapping.
2. Configure Overwrite Specified Queues.
This feature is disabled by default. For example, you have defined a mapped queue in Resource Pool Mappings and specified a queue other than the mapped queue when submitting a job; if the specified queue is default and Overwrite Specified Queues is enabled, the mapped queue will be used; otherwise, the specified queue will be used.
Sample label-based scheduling
1. Log in to the EMR console and click Details of the target Hadoop cluster in the cluster list to go to the cluster details page.
2. On the cluster details page, select Cluster Service and choose Operation > Resource Scheduling in the top-right corner of the YARN component block to go to the Resource Scheduling page.
3. Toggle on Resource scheduler and select Capacity Scheduler.
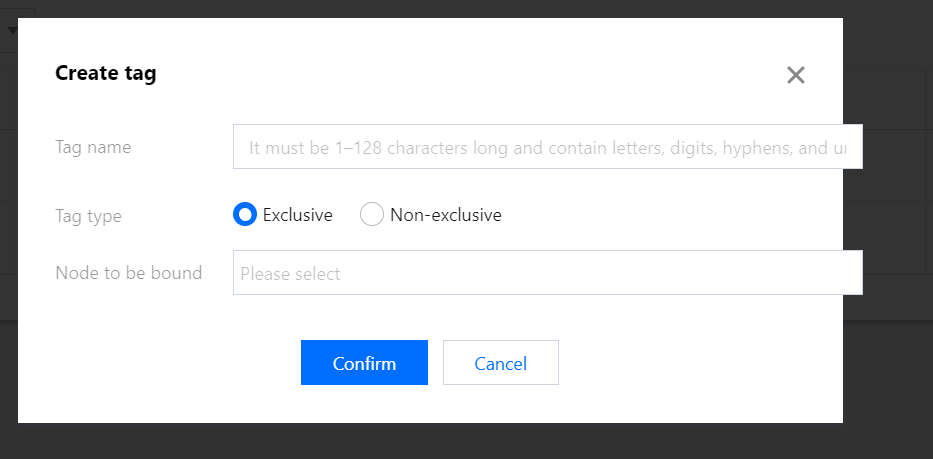
4. Toggle on Label-based scheduling and click Label management to go to the label management** page.
5. Click Create Label, enter the label name, and set the label type and node to be bound to as needed.
6. After the label is set, click Apply. Then, you can view and edit the resource queue of the label in the resource pool.
7. On the Resource Scheduling page, click Create Resource Pool and set Label, Capacity, Max Capacity, and other parameters as needed.
Note
The capacity and maximum capacity of a resource pool can be configured by label.
8. After the resource pool is set, click Apply to submit the task to the backend.
Caution
Proceed with caution when restarting the ResourceManager. If you are prompted that the ResourceManager will be restarted after you click Apply, check whether the operation is successful in Scheduling History and whether the ResourceManager is healthy in Role Management.