AutoClaw is a zero-threshold local AI agent launched by Zhipu AI, supporting the core execution capabilities of OpenClaw, and focuses on easy adoption for ordinary users. This article describes how to configure and use the Tencent Cloud large language model Token Plan in AutoClaw.
AutoClaw supports integrating any third-party model service compatible with the OpenAI protocol through the "Custom Model" feature. With the following configuration, Tencent Cloud Token Plan model can be integrated into AutoClaw.
Prerequisites
Before starting the configuration, make sure you have completed the following preparatory work:
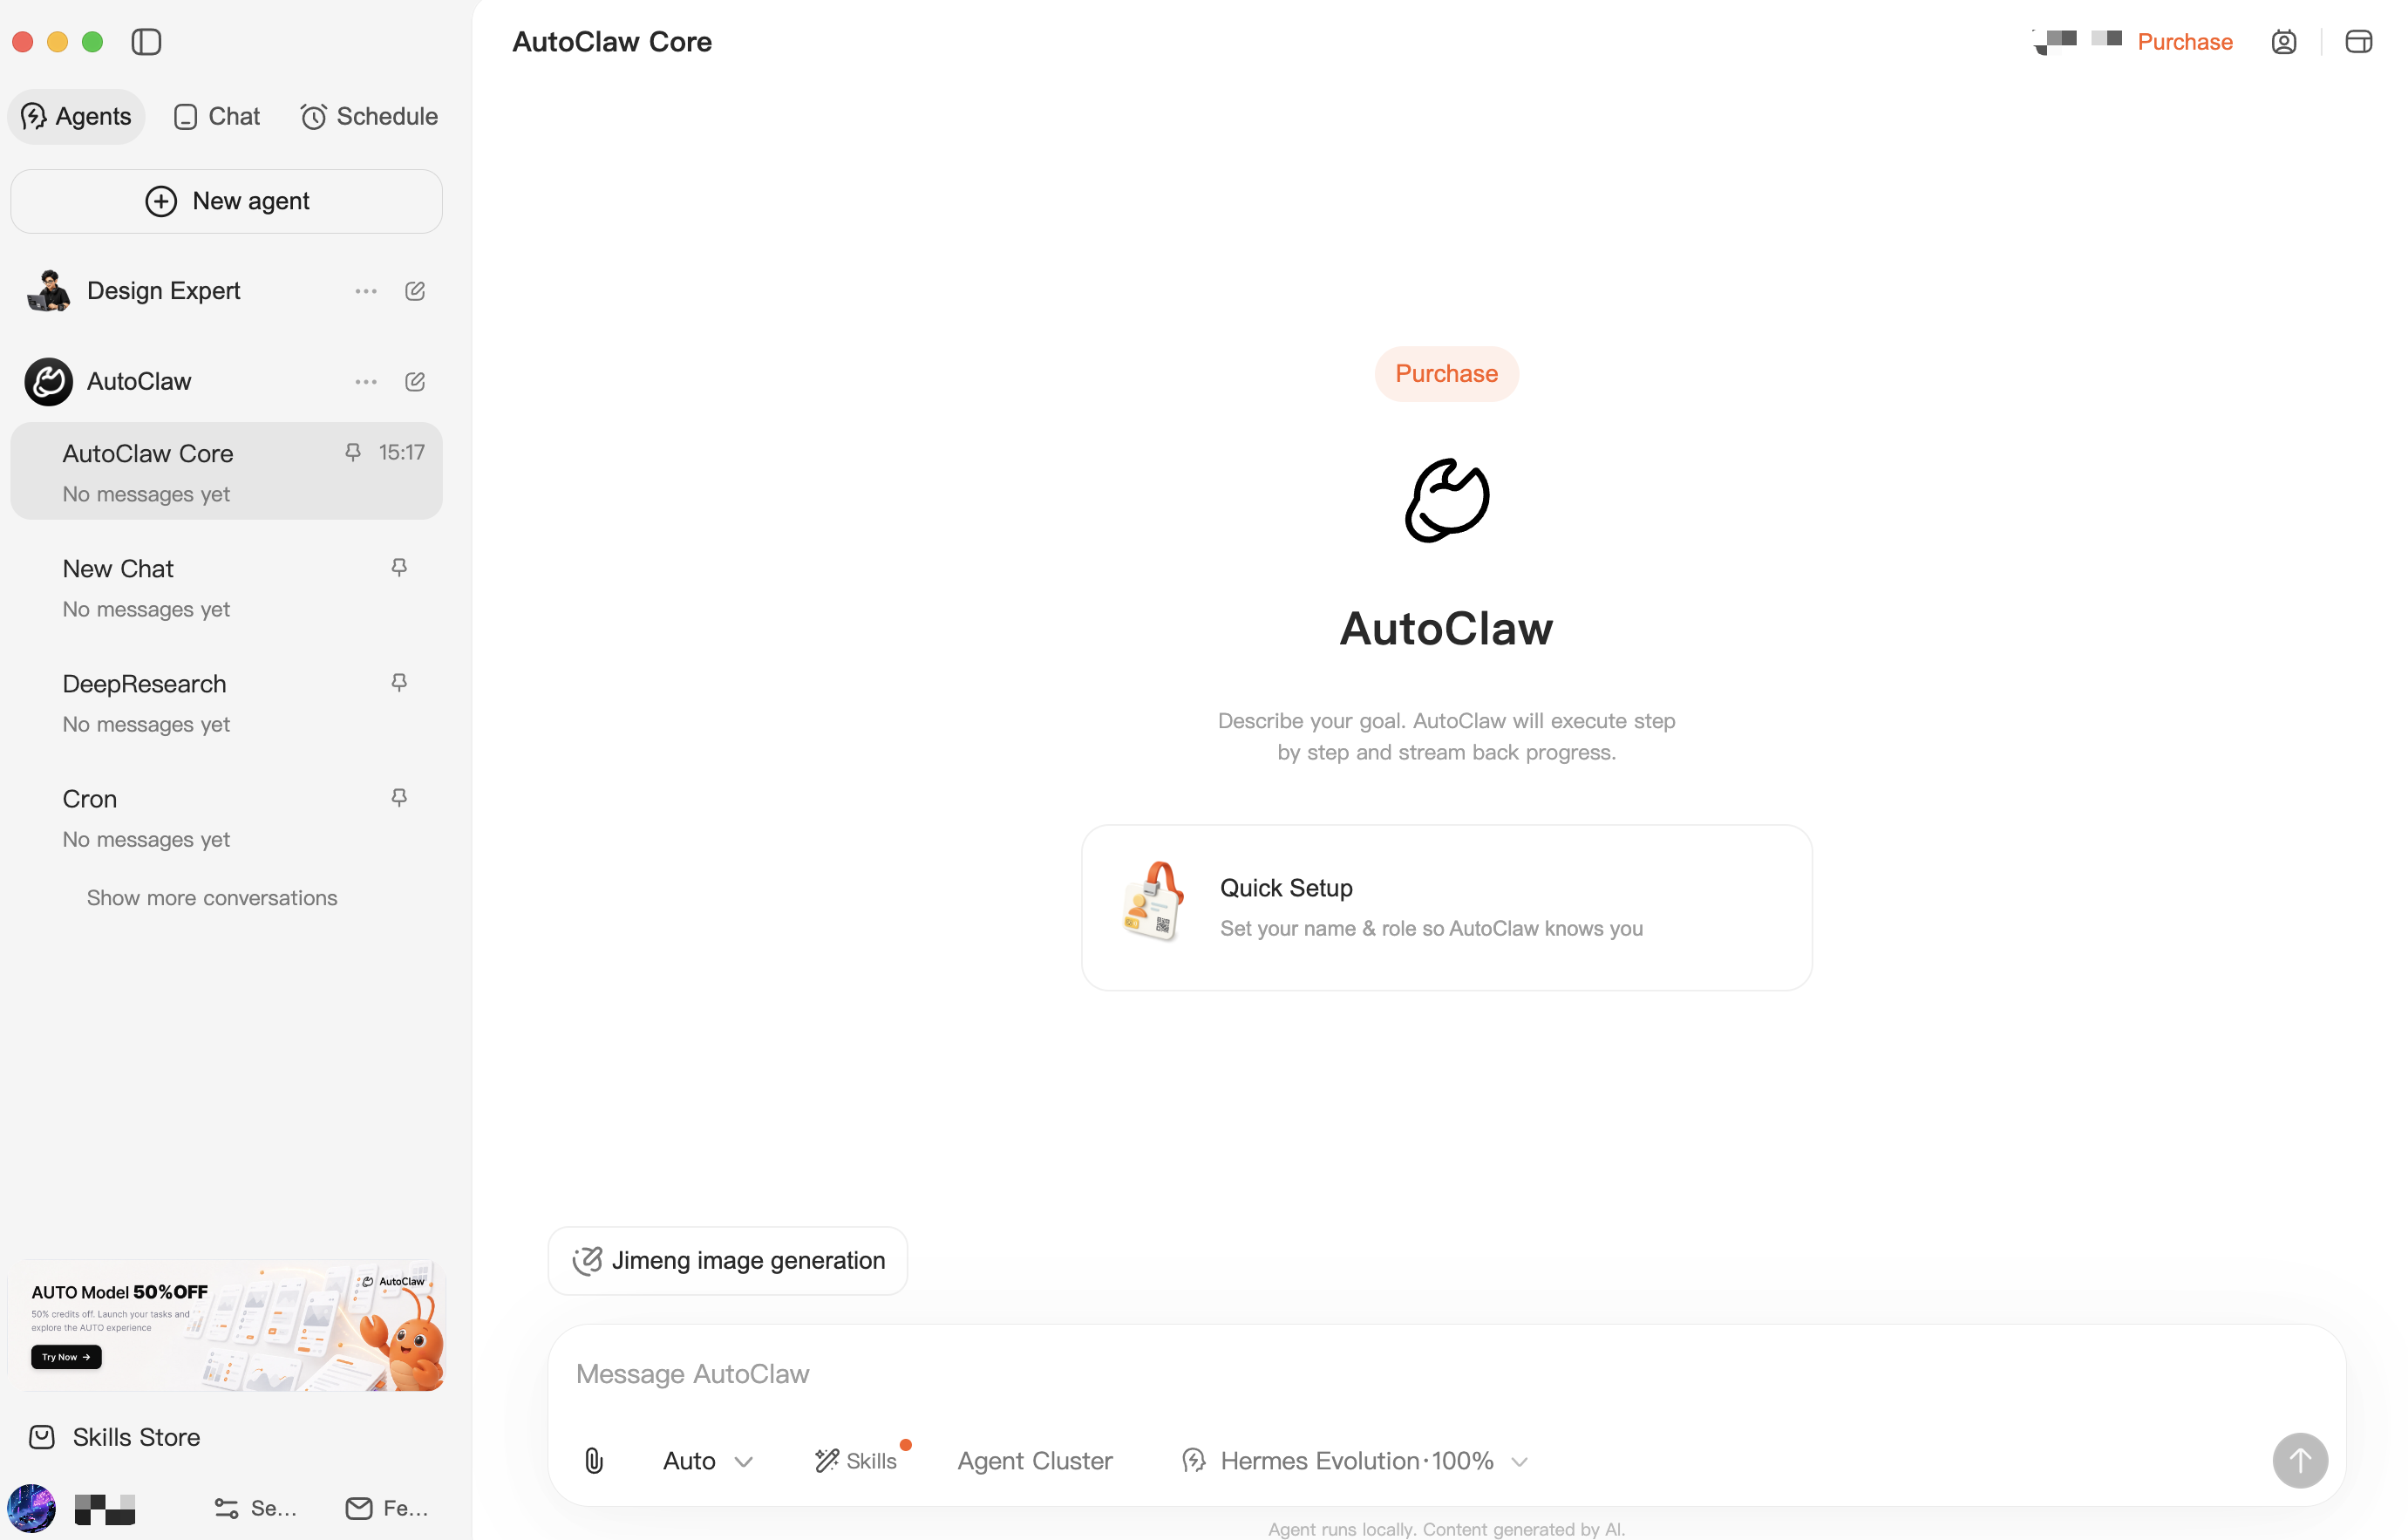
Start the AutoClaw application and go to the main interface.
Step 2: Go to the settings page
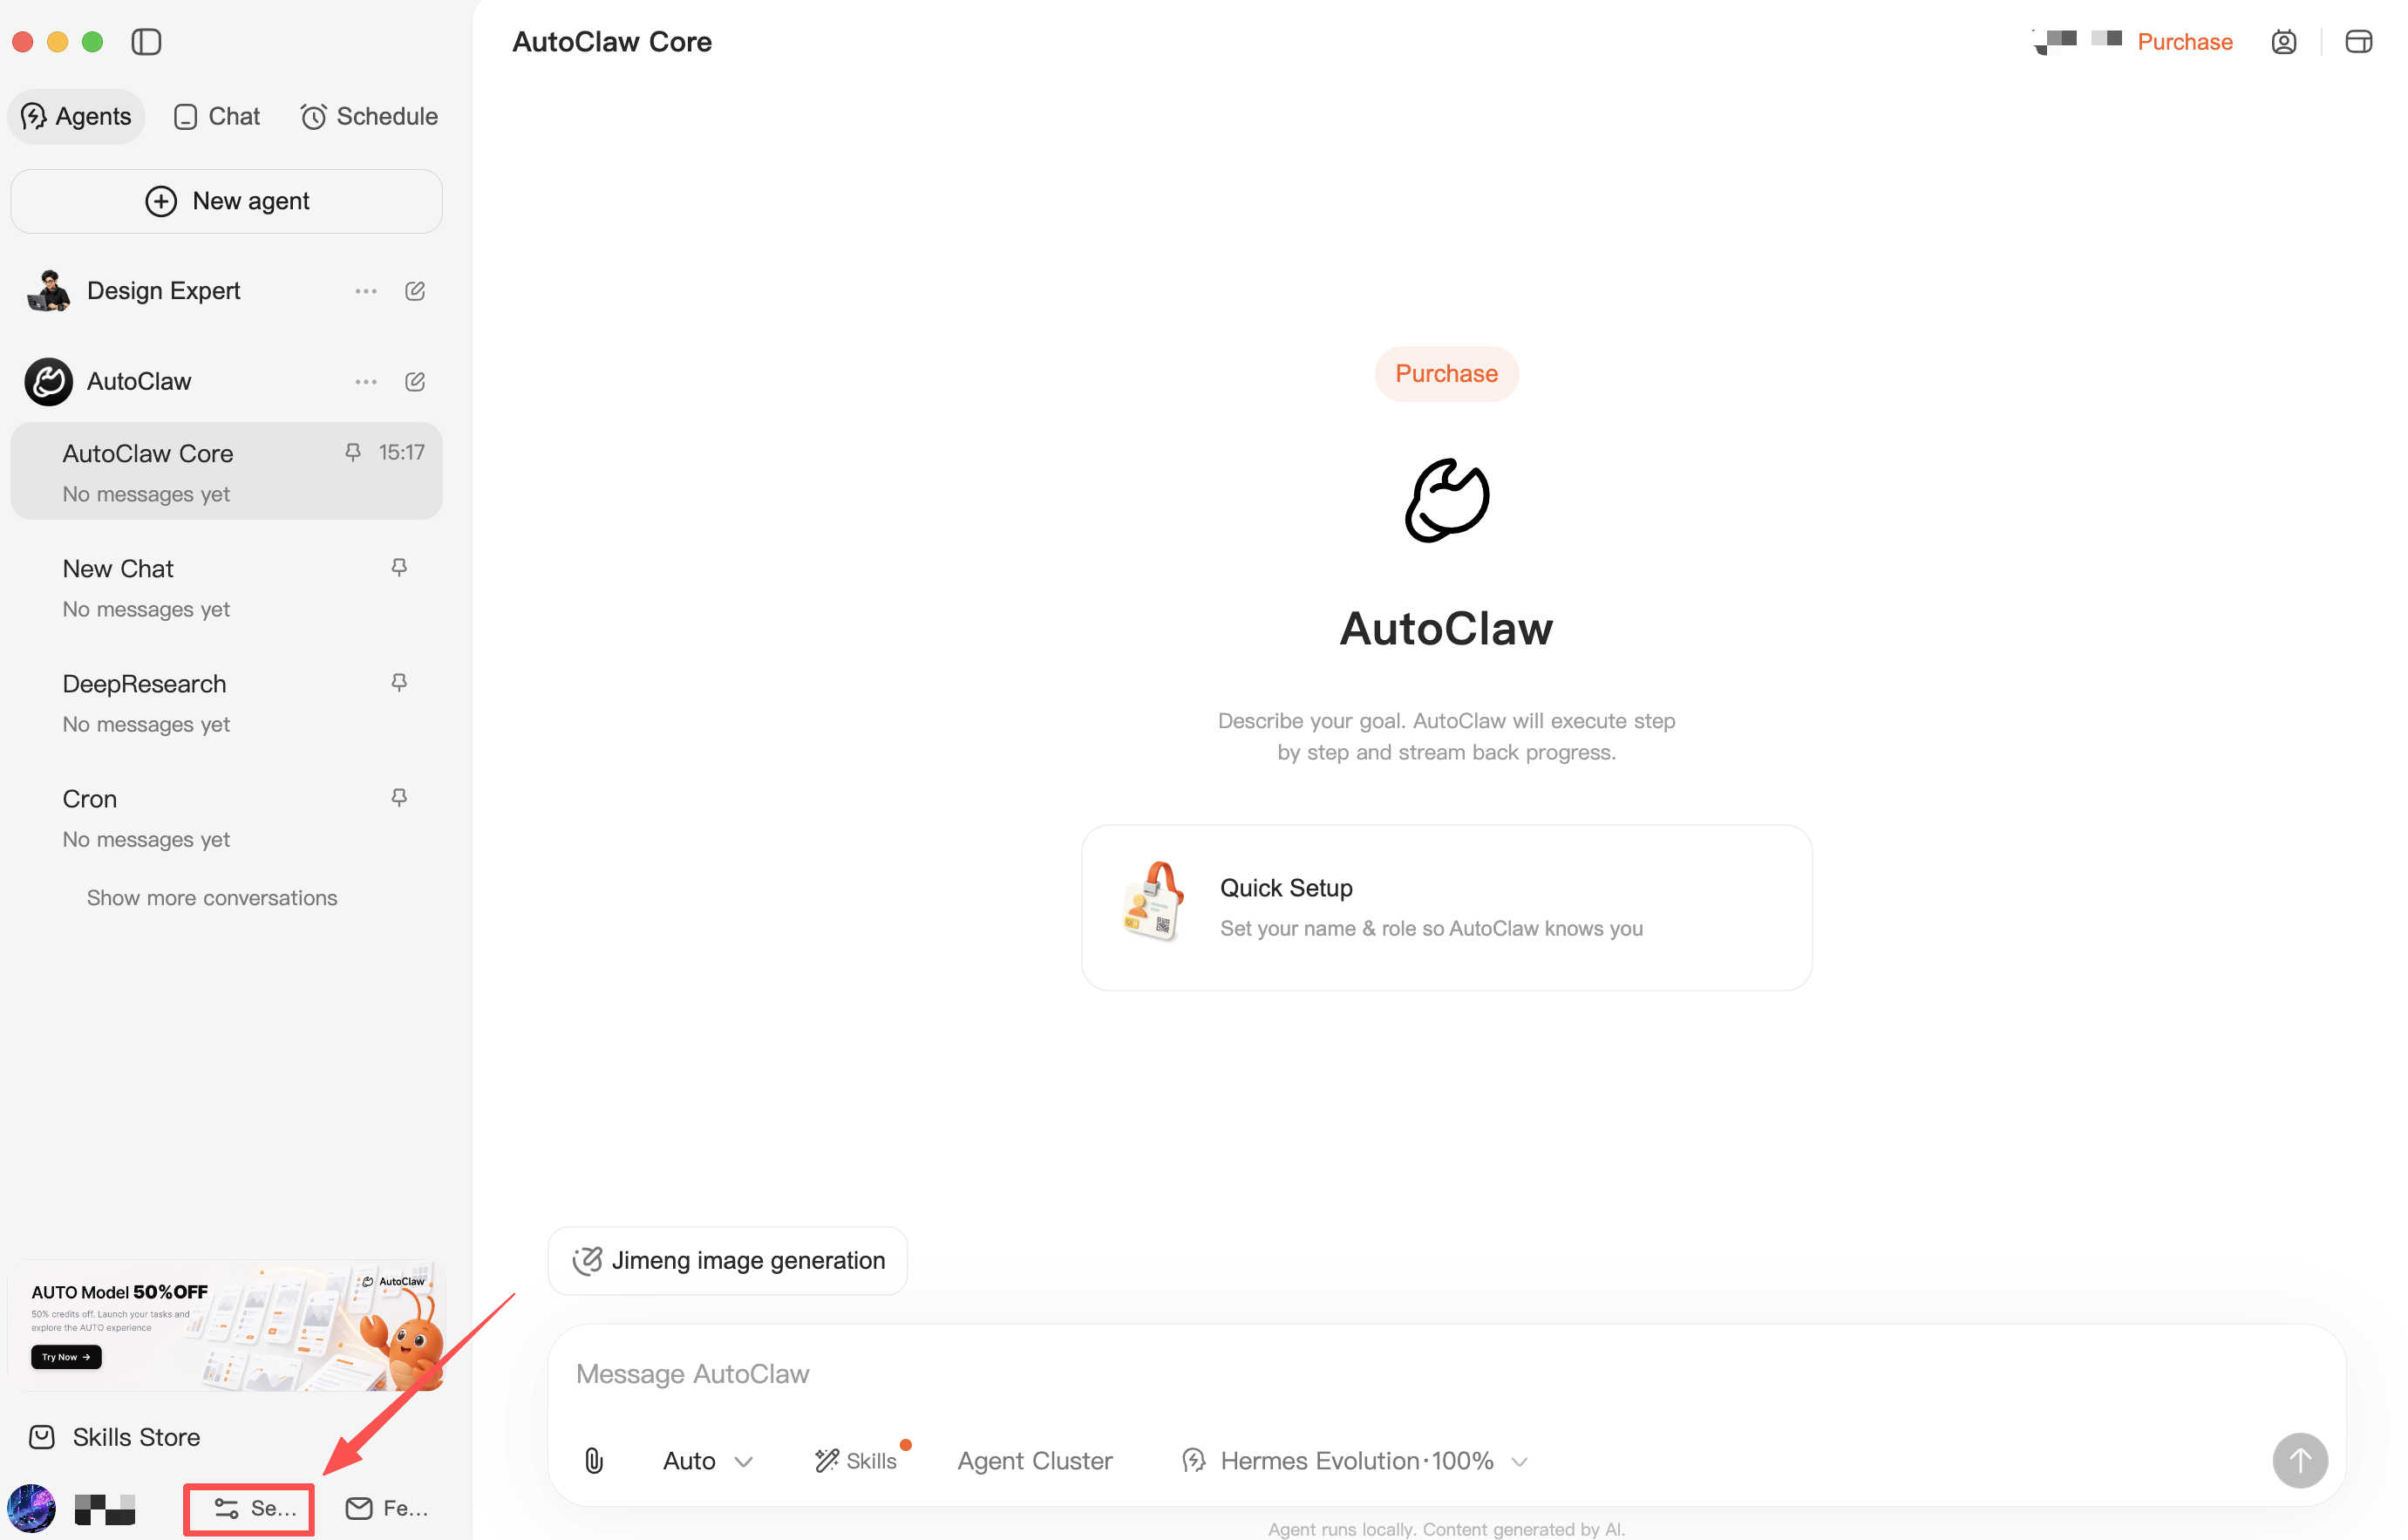
Click the Settings beside the Feedback button in the lower-left corner to go to the settings page.
Step 3: Go to the Model Configuration page
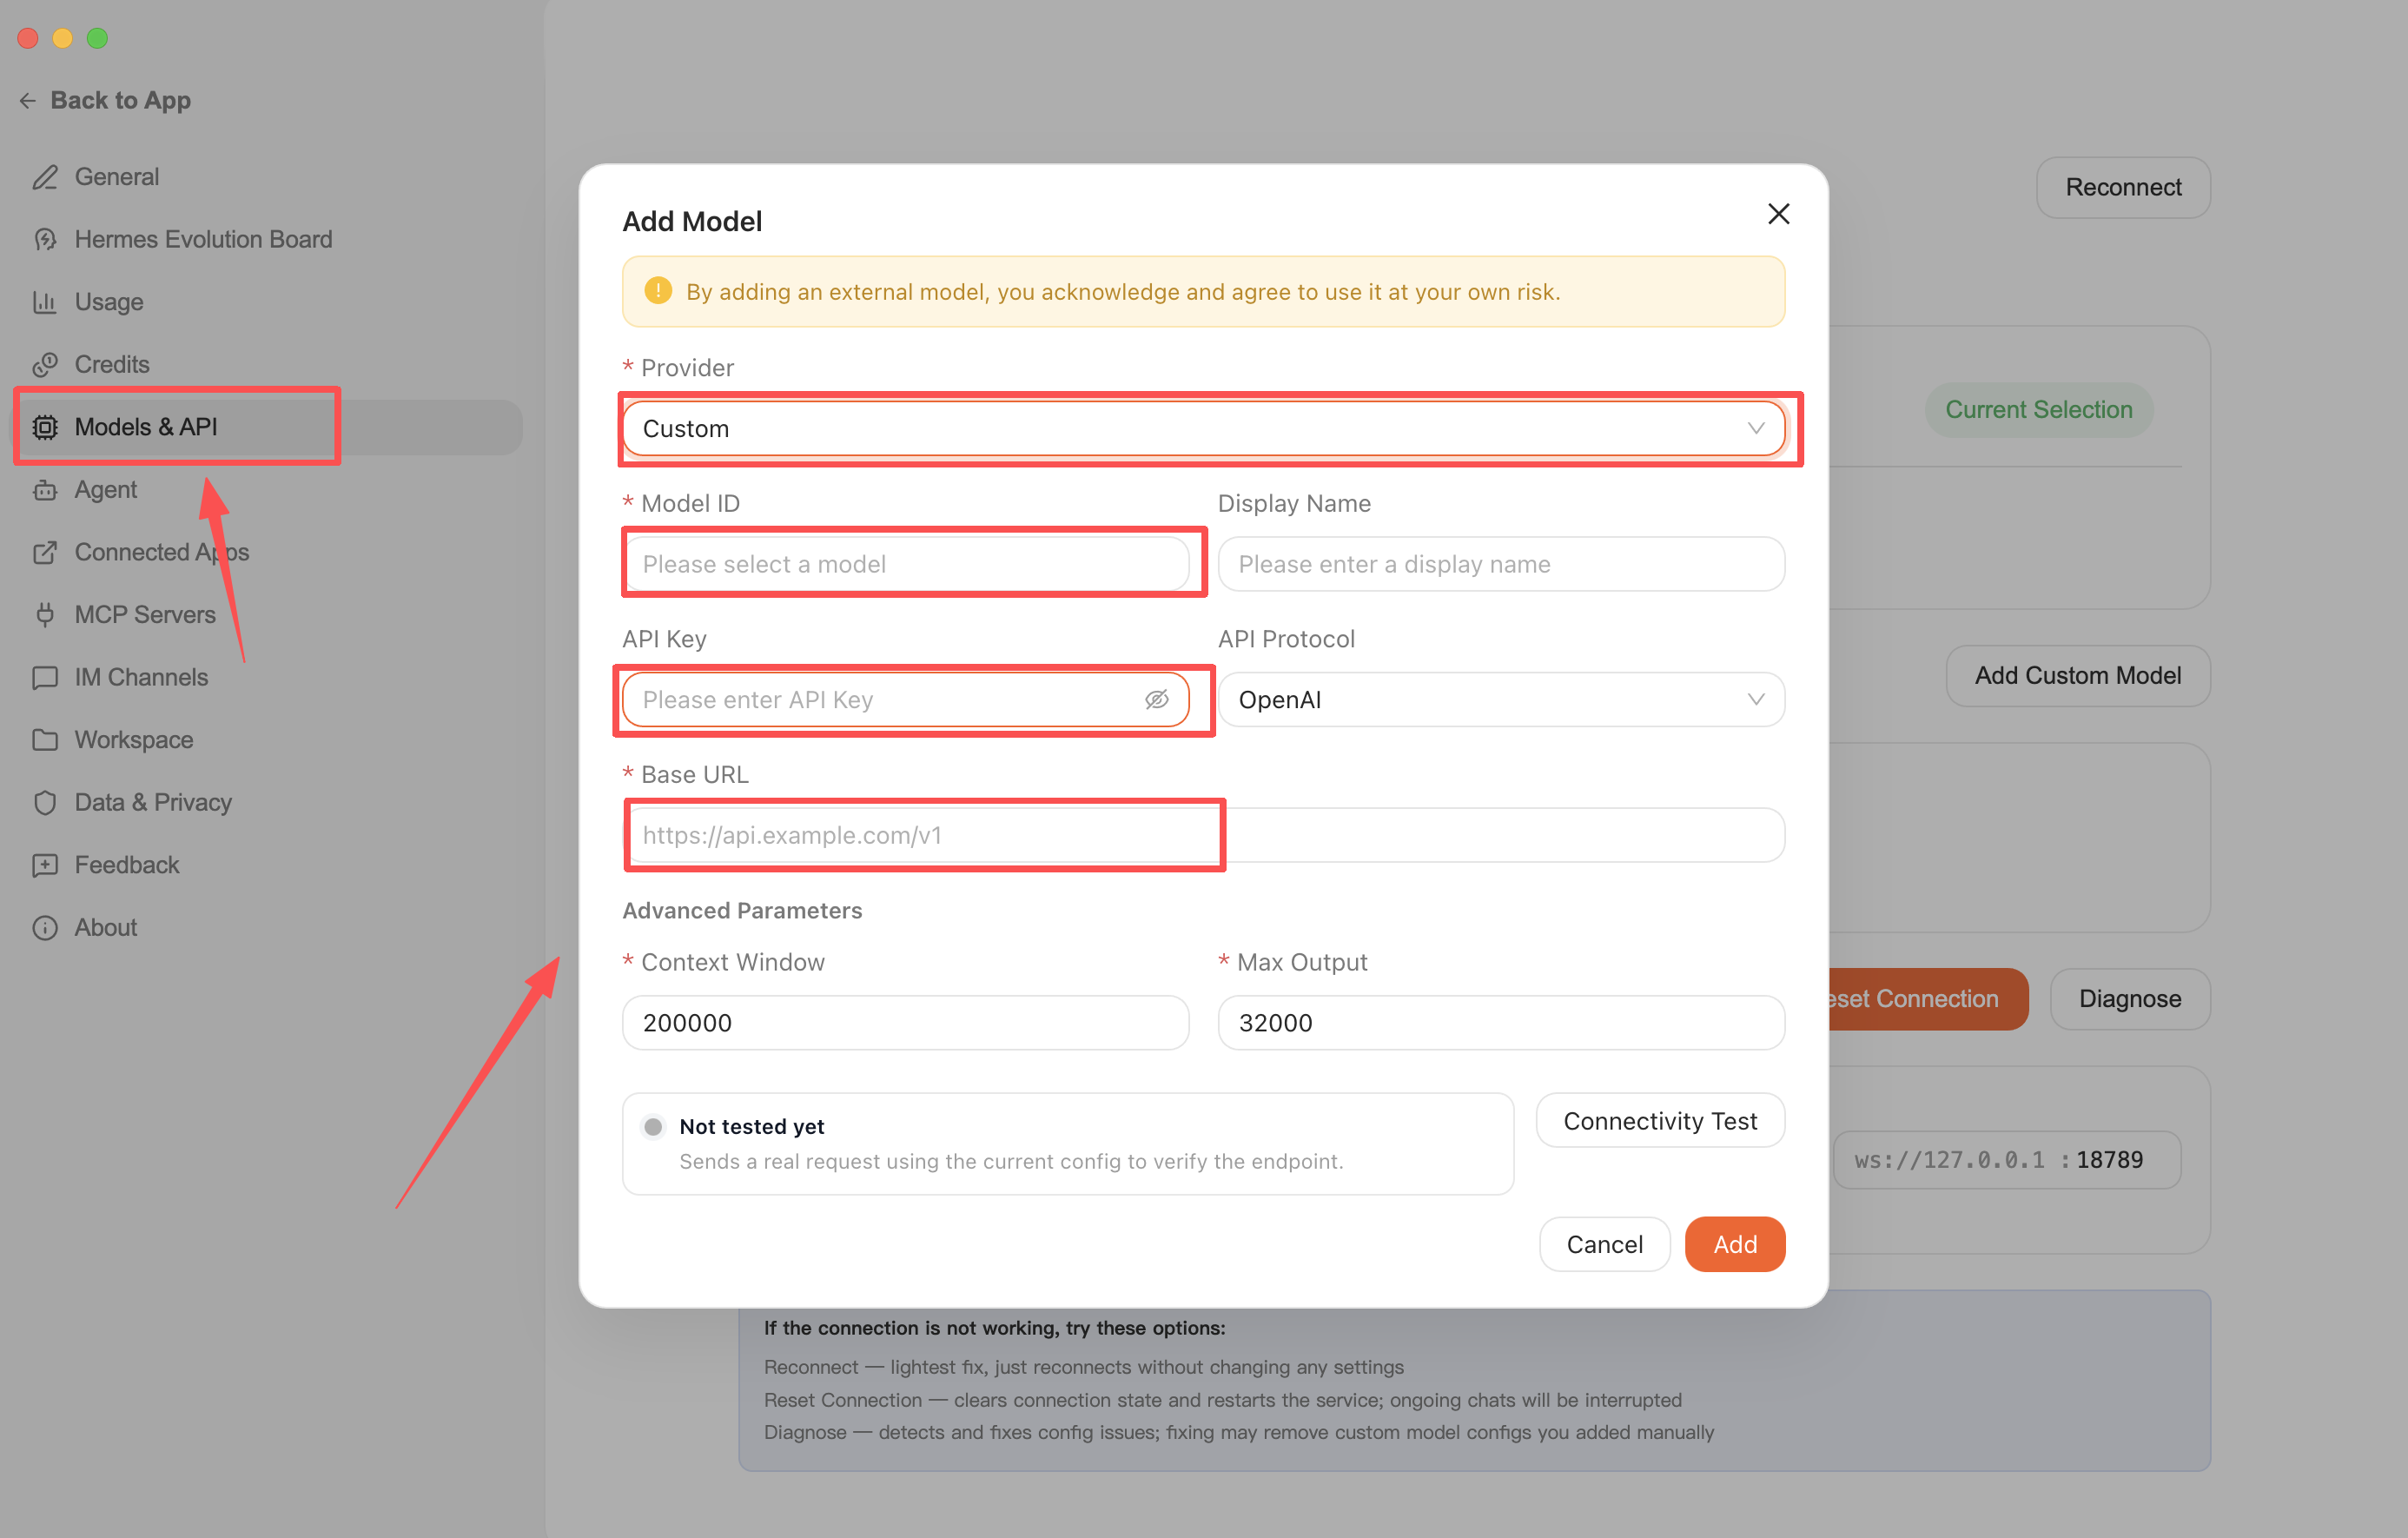
In the left sidebar of the settings page, click Models & API to go to the model configuration page. The page will display two sections: Built-in Models and Custom Models.
Step 4: Add a custom model
Click the Add Custom Model on the right, in the pop-up Add Model dialog box, select Provider as Custom, and fill in the Model ID, API Key, Base URL, and other information:
Configuring Auto
Parameter
Value
Provider
Select Custom
Model ID
auto
Display Name
Auto
API Key
The dedicated API Key obtained after the Token Plan is purchased
After completing the form, click Connectivity Test. The system will initiate a real request using the current configuration to verify whether the API is available. When the status shows Test Successful, it indicates the configuration is correct.
Step 6: Add model
After the connectivity test is successful, click Add to complete adding the model. Repeat Steps 4 to 6 to add the remaining models one by one.
Step 7: Set as default model
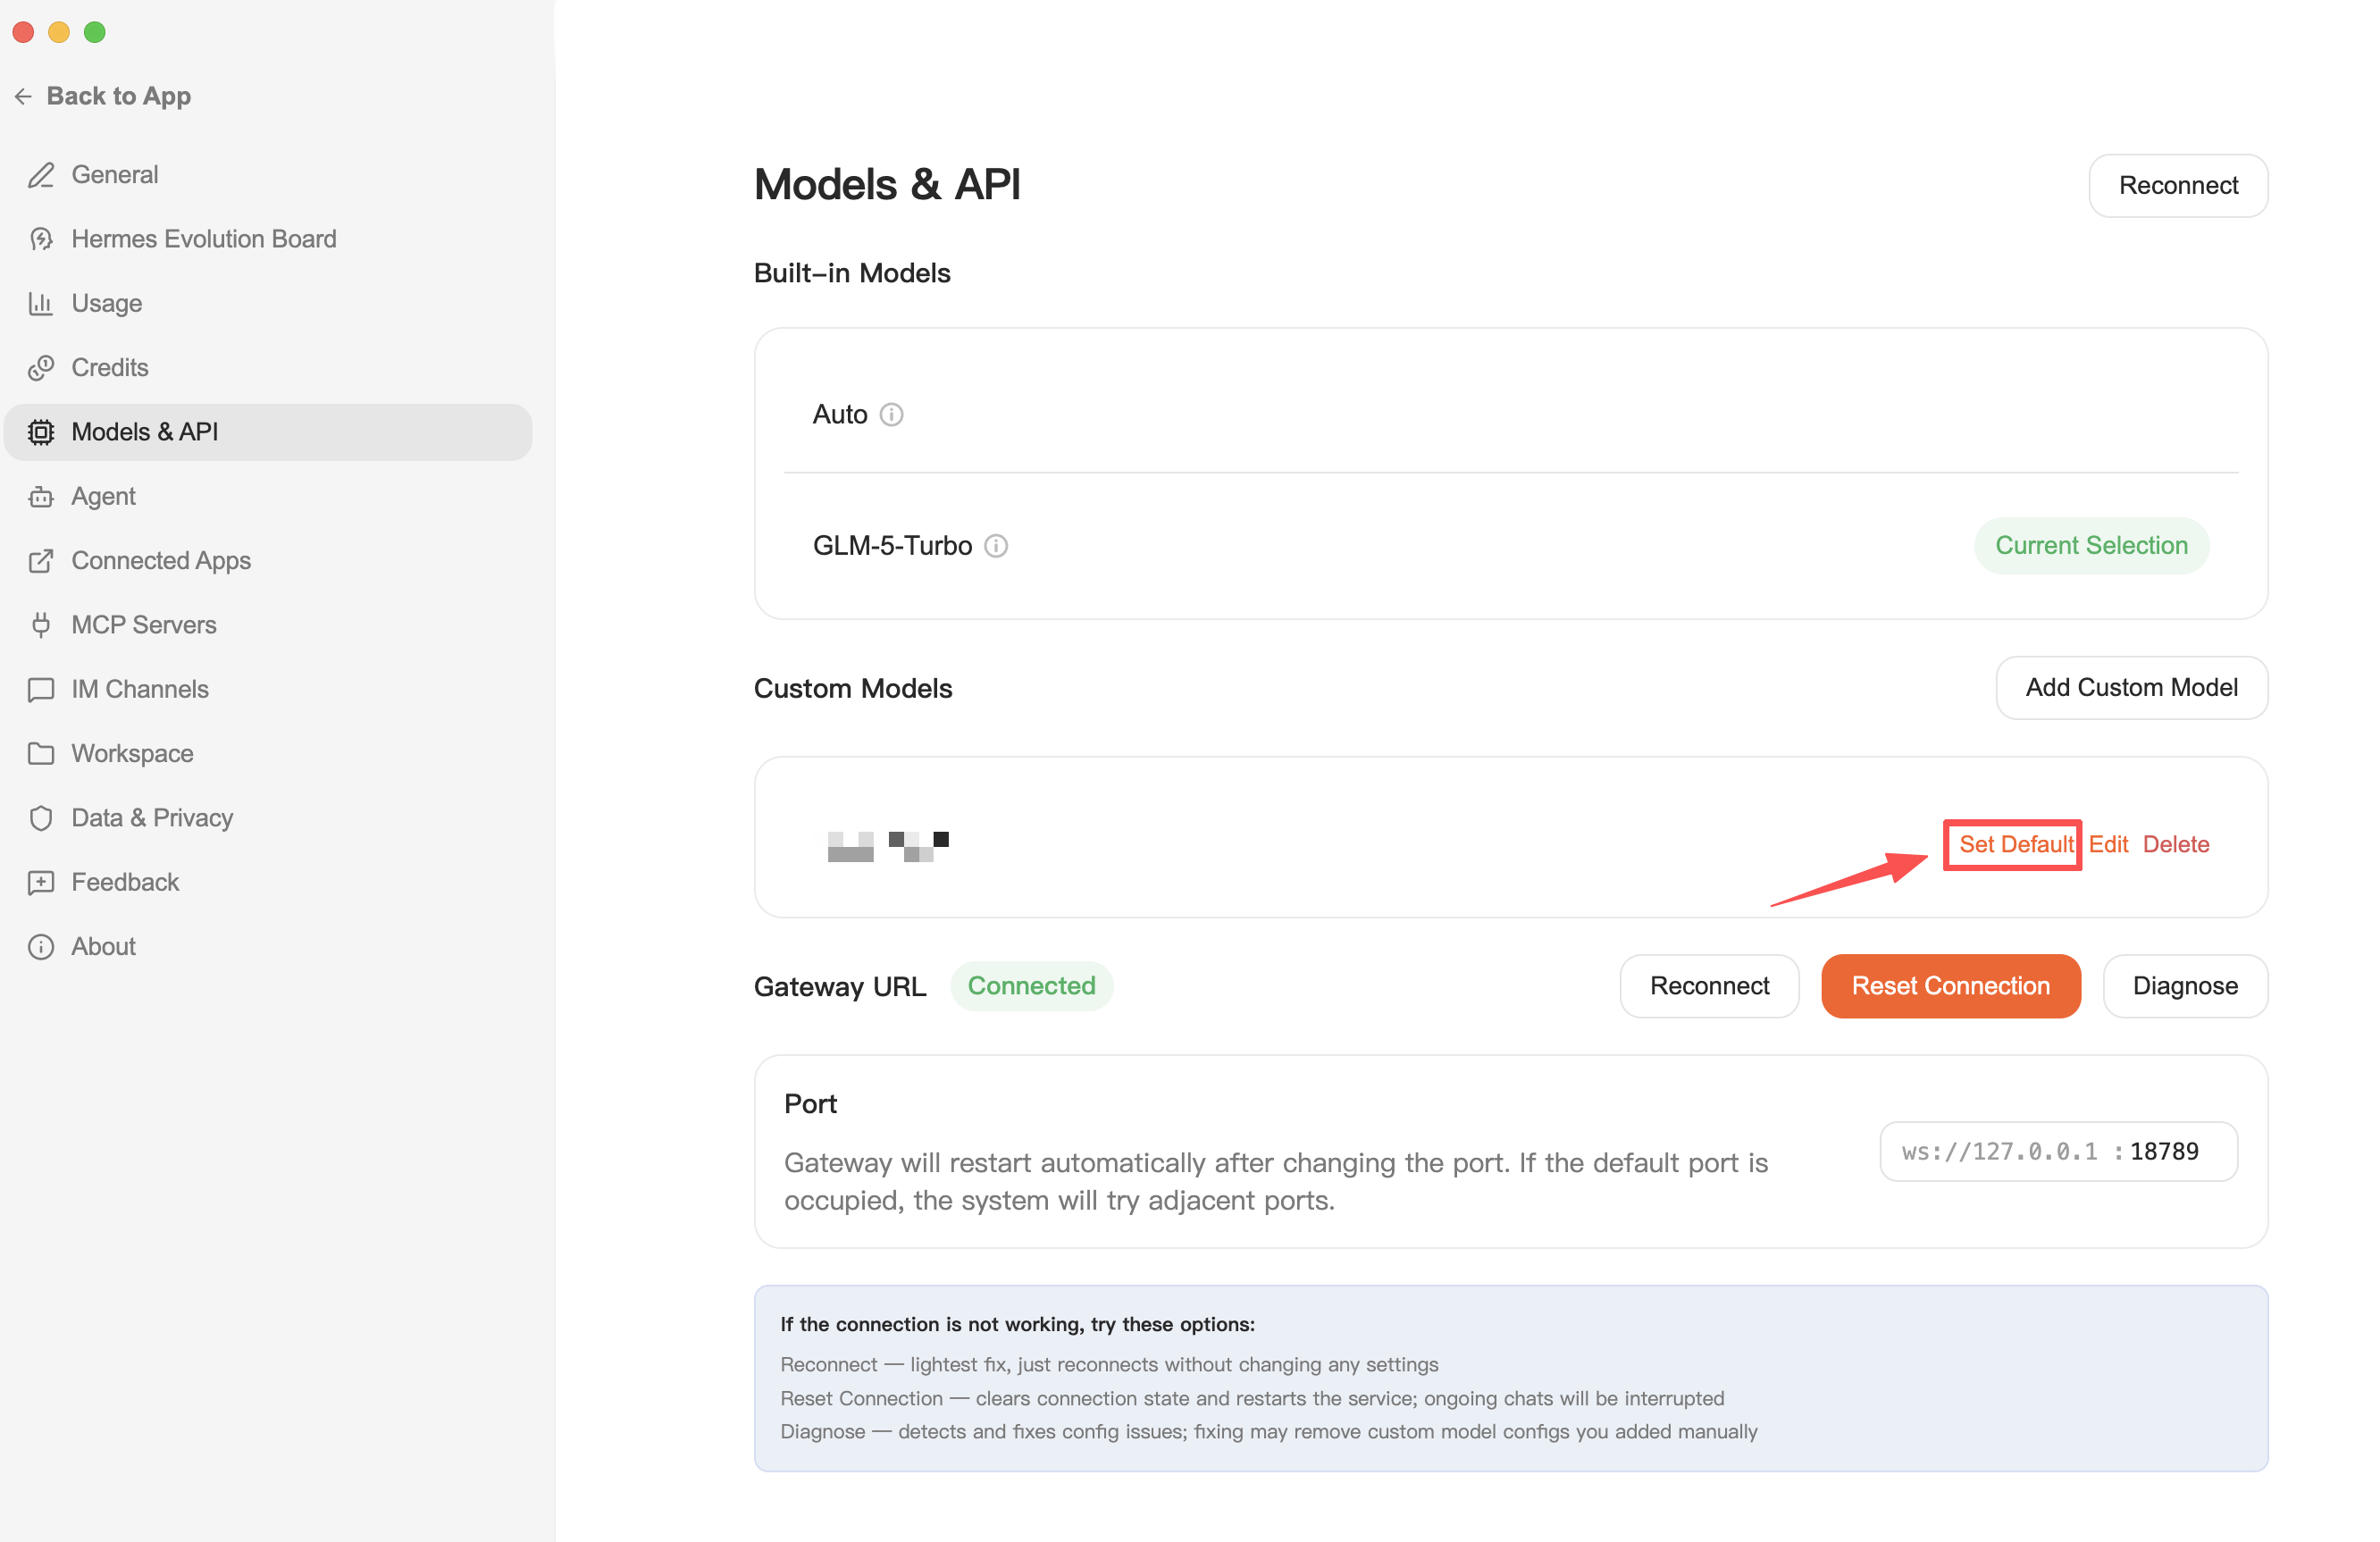
Return to the Model & API page, locate the newly added model in the Custom Models list, and click Set Default to set this model as the default one for use.