Restoring Database from Logical Backup
Download
Focus Mode
Font Size
Scenarios
Note:
To save storage space, physical and logical backup files of TencentDB for MySQL are first compressed by qpress and then packaged by xbstream (xbstream is a packaging/unpackaging tool from Percona) for compression and packaging.
TencentDB for MySQL supports the logical backup method. Users can generate logical backup files by performing manual backups in the console and download them to obtain logical backup files for the entire instance or specific databases/tables. This document describes how to use logical backup files for manual restoration.
The recovery method described in this document is only applicable to the Linux platform and does not currently support the Windows platform.
For data recovery on the Windows platform, see Migrating Data with the Command-Line Tool.
Supported instance editions: MySQL Two-Node and Three-Node.
Operation Steps
Step 1: Downloading a Backup File
1. Log in to the TencentDB for MySQL console. In the instance list, click the Instance ID or Manage in the Operation column to go to the instance management page.
2. On the instance management page, choose Backup and Recovery > Data Backup List, select the backup you need to download, and click Download in the Operation column.
3. In the pop-up dialog box, we recommend that you copy the download address, log in to a CVM (Linux) within the VPC where the cloud database resides, and use the wget command for high-speed private network download, which is more efficient.
Note:
You can also choose to download directly via Download, but it is more time-consuming.
The wget command format is: wget -c 'backup-file-download-address' -O custom-filename.xb
Example:
wget -c 'https://mysql-database-backup-bj-118.cos.ap-beijing.myqcloud.com/12427%2Fmysql%2F42d-11ea-b887-6c0b82b%2Fdata%2Fautomatic-delete%2F2019-11-28%2Fautomatic%2Fxtrabackup%2Fbk_204_10385%2Fcdb-1pe7bexs_backup_20191128044644.xb?sign=q-sign-algorithm%3Dsha1%26q-ak%3D1%26q-sign-time%3D1574269%3B1575417469%26q-key-time%3D1575374269%3B1517469%26q-header-list%3D%26q-url-param-list%3D%26q-signature%3Dfb8fad13c4ed&response-content-disposition=attachment%3Bfilename%3D%2141731_backup_20191128044644.xb%22&response-content-type=application%2Foctet-stream' -O test0.xb
Step 2: Unpacking the Backup File
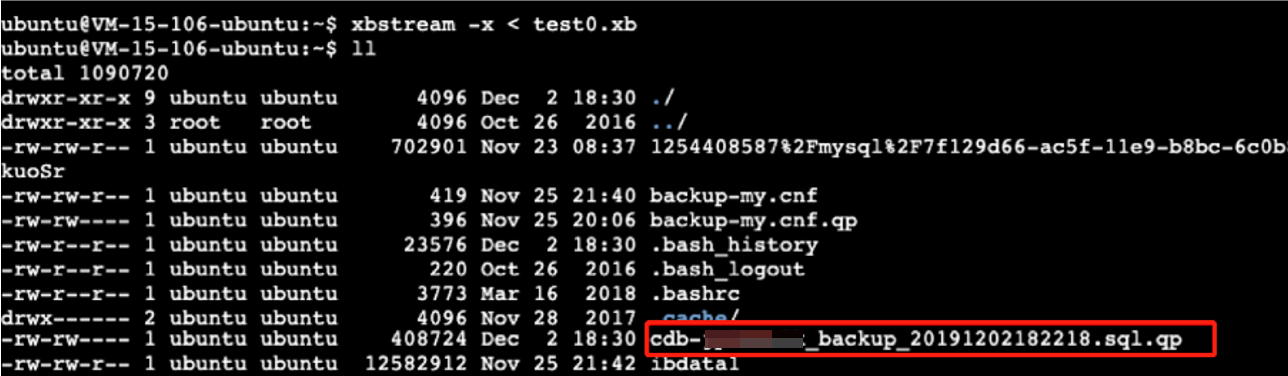
Use xbstream to unpack the backup file.
Note:
For the xbstream tool download address, see the Percona XtraBackup official website. The major version of Percona XtraBackup must correspond to your TencentDB for MySQL version. For example, MySQL 5.7 corresponds to Percona XtraBackup 2.4, and MySQL 8.0 corresponds to Percona XtraBackup 8.0.
For database versions MySQL 5.6 and MySQL 5.7, we recommend using Percona-XtraBackup-2.4.26 or later. For installation instructions, see Percona XtraBackup 2.4.
For database version MySQL 8.0, we recommend using Percona-XtraBackup-8.0.30-23 or later. For installation instructions, see Install Percona XtraBackup 8.0 overview.
xbstream -x < test0.xb
Note:
Replace
test0.xb with your backup file.The unpacking result is shown in the following figure:
Step 3: Extracting the Backup File
1. Download the qpress tool using the following command.
wget -d --user-agent="Mozilla/5.0 (Windows NT x.y; rv:10.0) Gecko/20100101 Firefox/10.0" https://docs-tencentdb-1256569818.cos.ap-guangzhou.myqcloud.com/qpress-11-linux-x64.tar
Note:
If the wget download reports an error, you can click Download qpress tool to download it locally, and then upload the qpress tool to the Linux CVM. For details, see Uploading Files to a Linux CVM via SCP.
2. Extract the qpress binary file using the following command.
tar -xf qpress-11-linux-x64.tar -C /usr/local/binsource /etc/profile
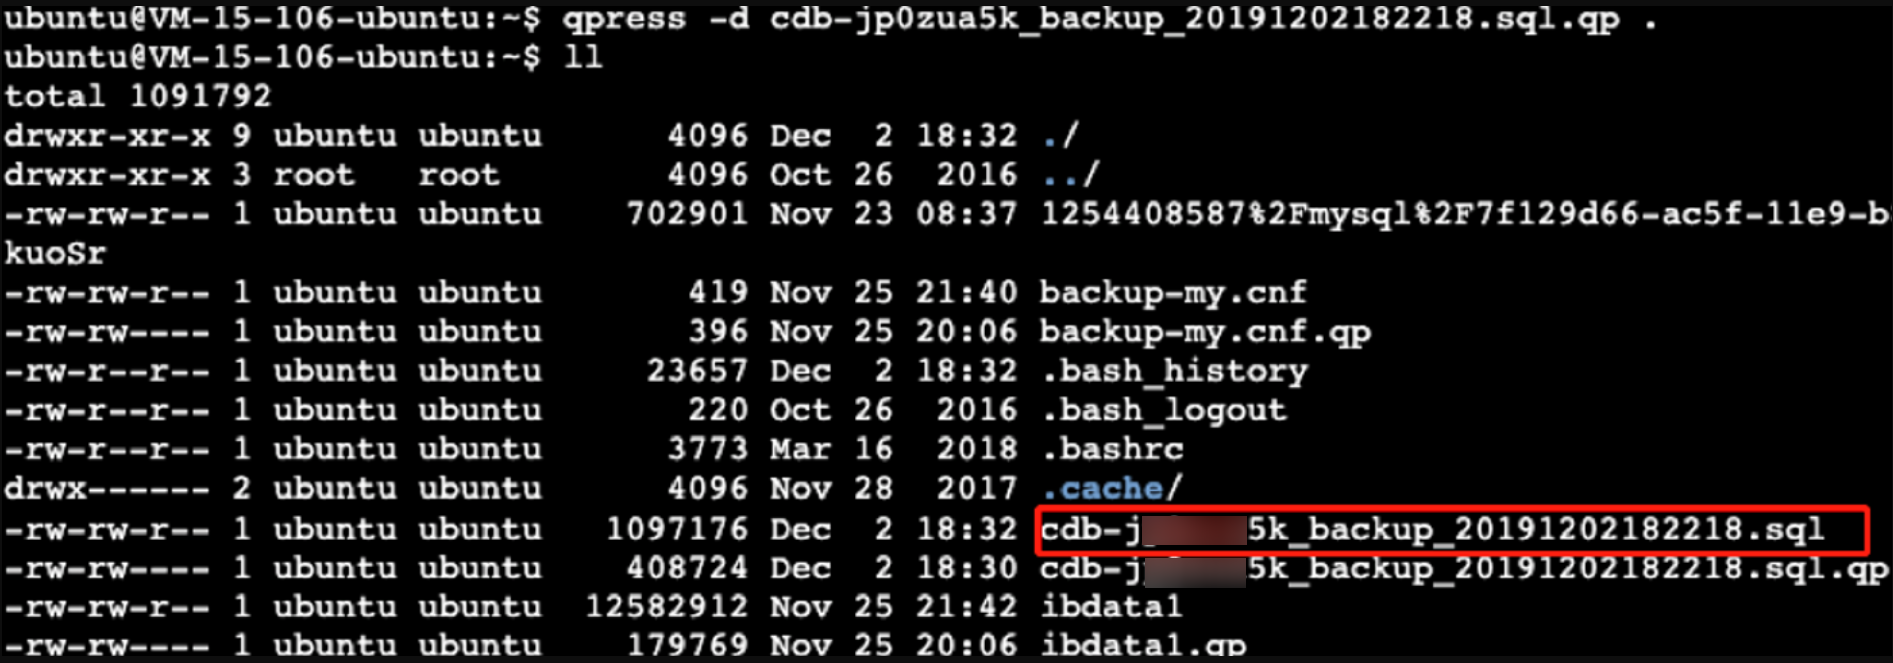
3. Use qpress to decompress the backup file.
qpress -d cdb-jp0***5k_backup_20191202182218.sql.qp .
Note:
Based on the decompression time, locate the backup file with the
.sql.qp suffix and replace cdb-jp0***5k_backup_20191202182218 with that filename.The decompression result is shown in the following figure:
Step 4: Importing the Backup to the Target Database
Run the following command to import the SQL file into the target database:
mysql -uroot -P3306 -h127.0.0.1 -p < cdb-jp0***5k_backup_20191202182218.sql
Note:
This document uses the import of a local MySQL instance on port 3306 as an example. You can replace it according to your actual situation.
Replace
cdb-jp0***5k_backup_20191202182218.sql with the sql file actually extracted by qpress.Help and Support
Was this page helpful?
You can also Contact sales or Submit a Ticket for help.
Help us improve! Rate your documentation experience in 5 mins.
Feedback