MQTT provides multiple authentication methods to ensure secure communication between clients and the server. Username and password authentication is the most basic authentication method. This document uses this method as an example to introduce the operation steps for quickly configuring authentication and authorization.
2. In the left sidebar, choose Resource > Cluster, select a region, and click the ID of the created cluster.
3. On the cluster basic information page, select Authentication and enter the Username and Password tab. Currently, username and password authentication is used as an example. For more authentication methods, see Certification Method Overview.
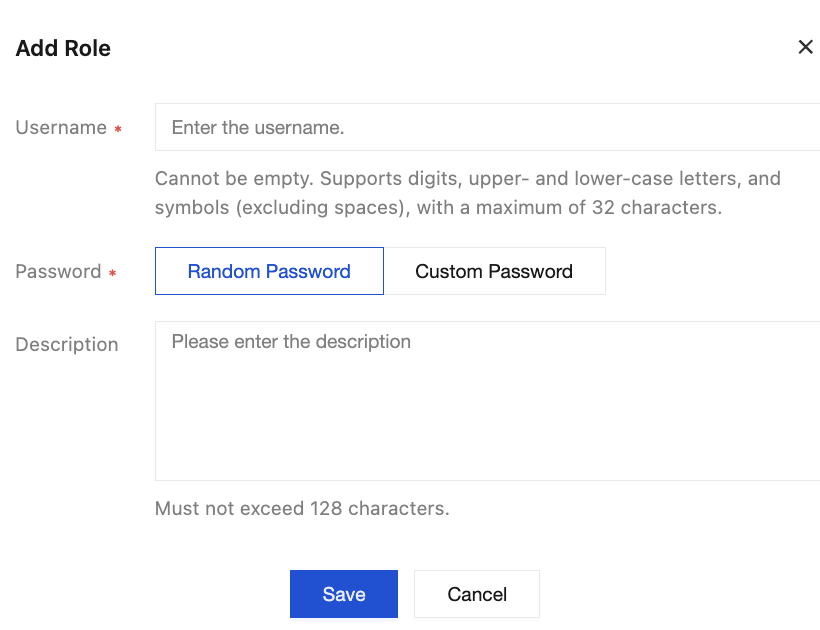
4. Click Create User, fill in the username and description, and set a password. Username and password authentication is the most basic authentication method provided by MQTT. You need to fill them in when using the client to publish or subscribe to messages.
Username: must be no more than 32 characters in length and can contain only digits, upper- and lower-case letters, hyphens (-), and underscores (_).
Password: can be automatically generated by the system or customized.
Description (optional): can not exceed 128 characters.
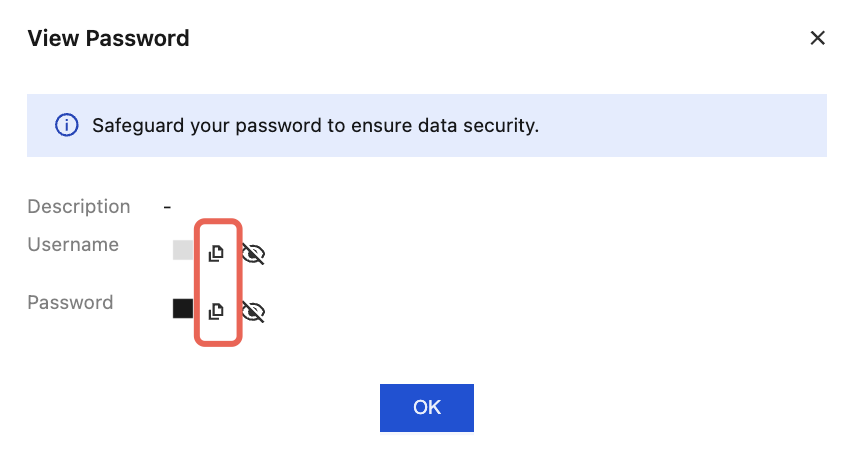
5. Click Save to complete user creation. In the permission list, you can copy the username and password in any of the following ways.
Note:
Leaking your key could lead to data leakage. Please keep your password secure.
Method 1: Copying from the Token Column
Method 2: Viewing and Copying from the Operation Column
Copy from the Username and Password columns.
Click View Password in the Action column and click the Copy icon in the pop-up password window.
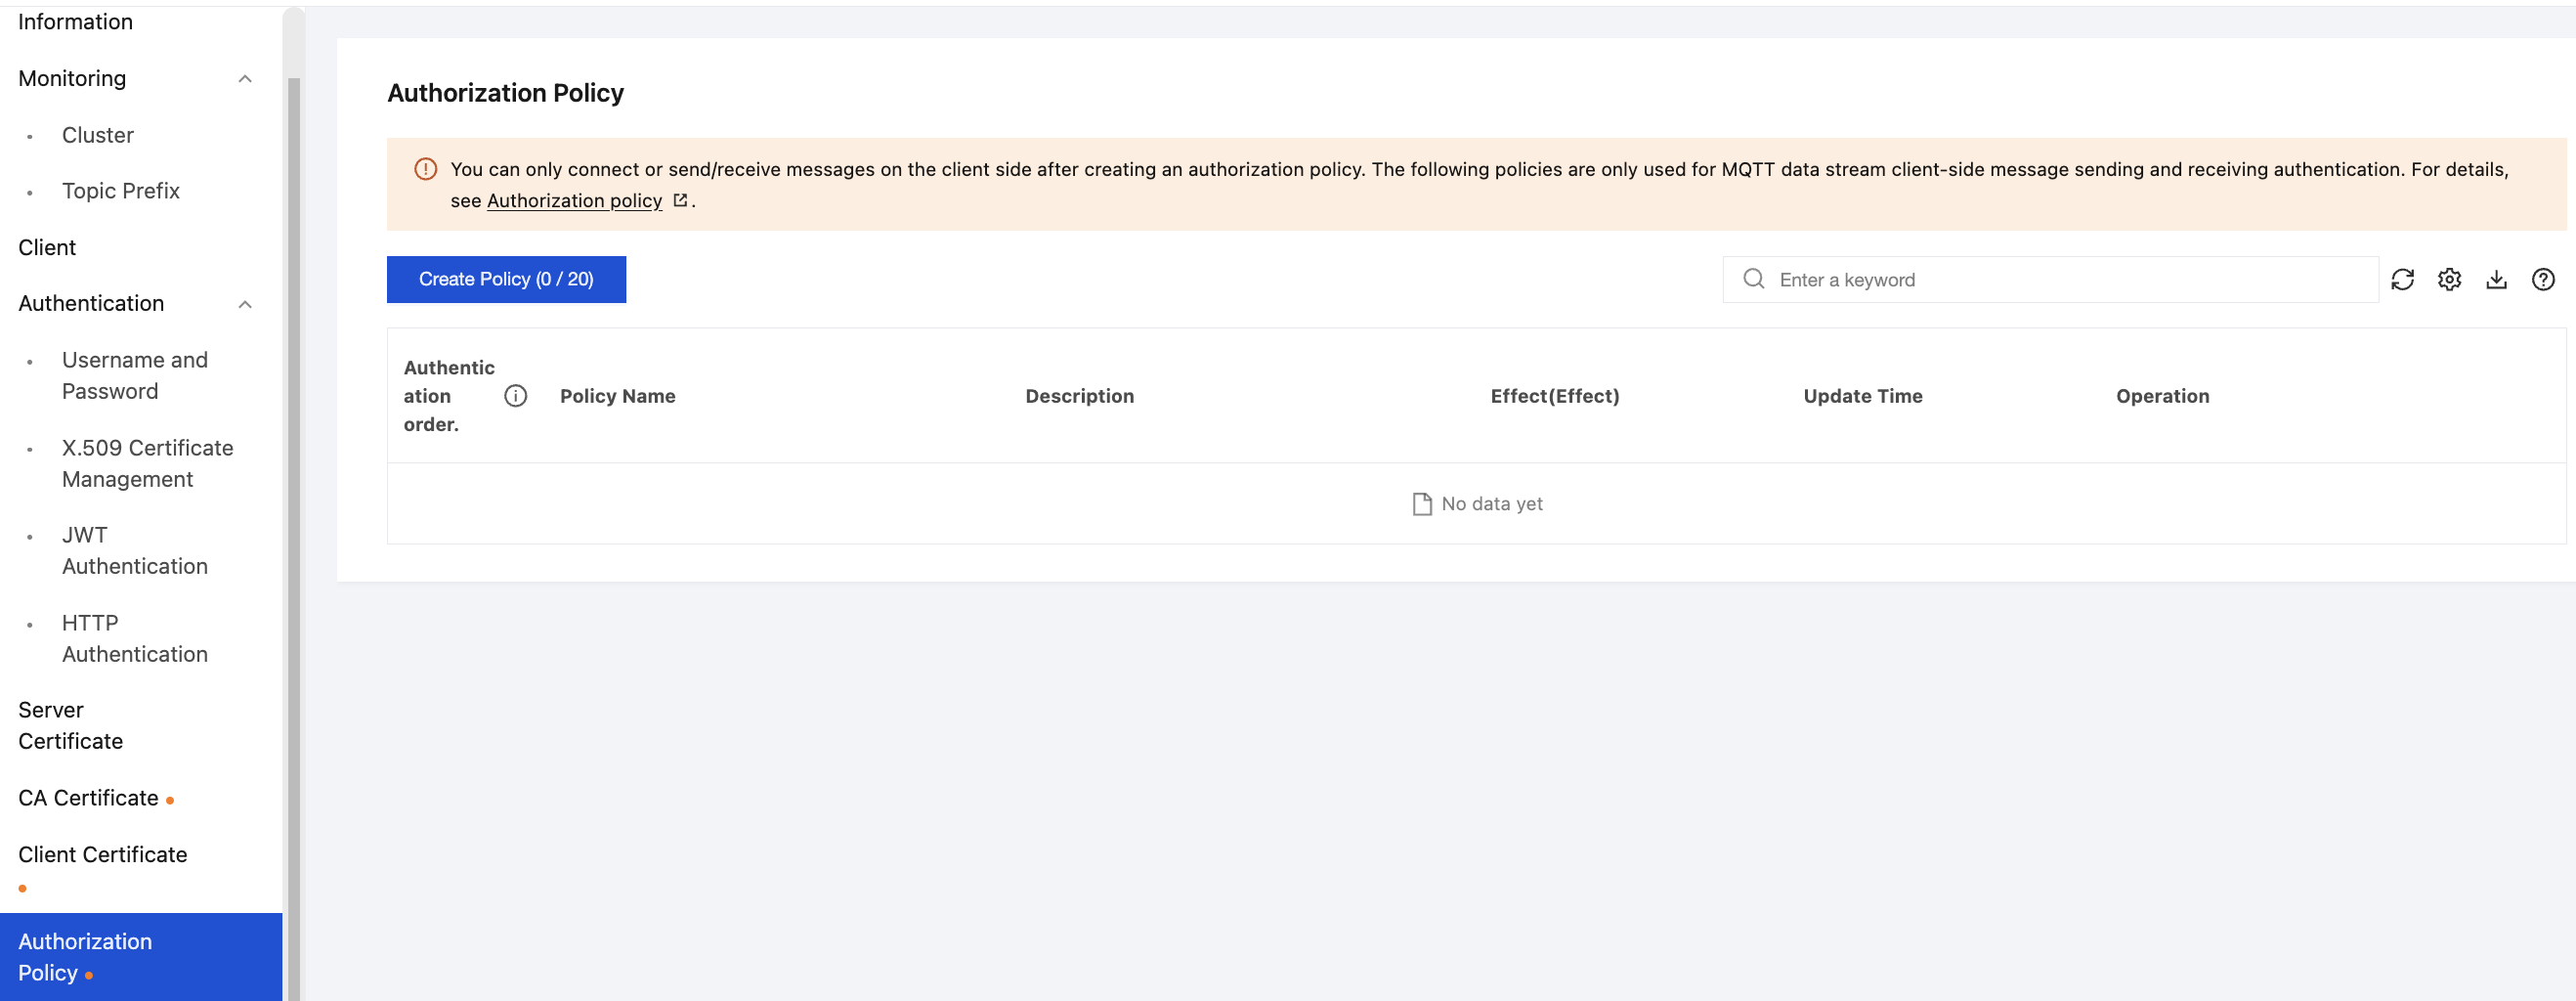
Configuring an Authorization Policy
TDMQ for MQTT supports fine-grained authorization policies, which can authorize by username, client identifier, topic, client IP address, and action (connect, publish, and subscribe).
When the authorization policy is not enabled, the data plane resources have no permission restrictions. You can use any username and password pair to connect, produce, and consume.
In the quick start stage, you can choose to disable the authorization policy and skip its configuration steps. For the production environment, it is recommended to perform fine-grained permission control based on the principle of least privilege.
If you have enabled authorization policy management, you need to grant producing and consuming permissions to the user you have created. For details, see Configuring Data Plane Authorization.
In the quick start stage, you can create a simple rule as follows, which allows access from all clients: