This document focuses on Tencent Cloud Virtual Desktop (CVD) and details how to quickly create an instance and access your cloud desktop, helping you easily start your CVD journey.
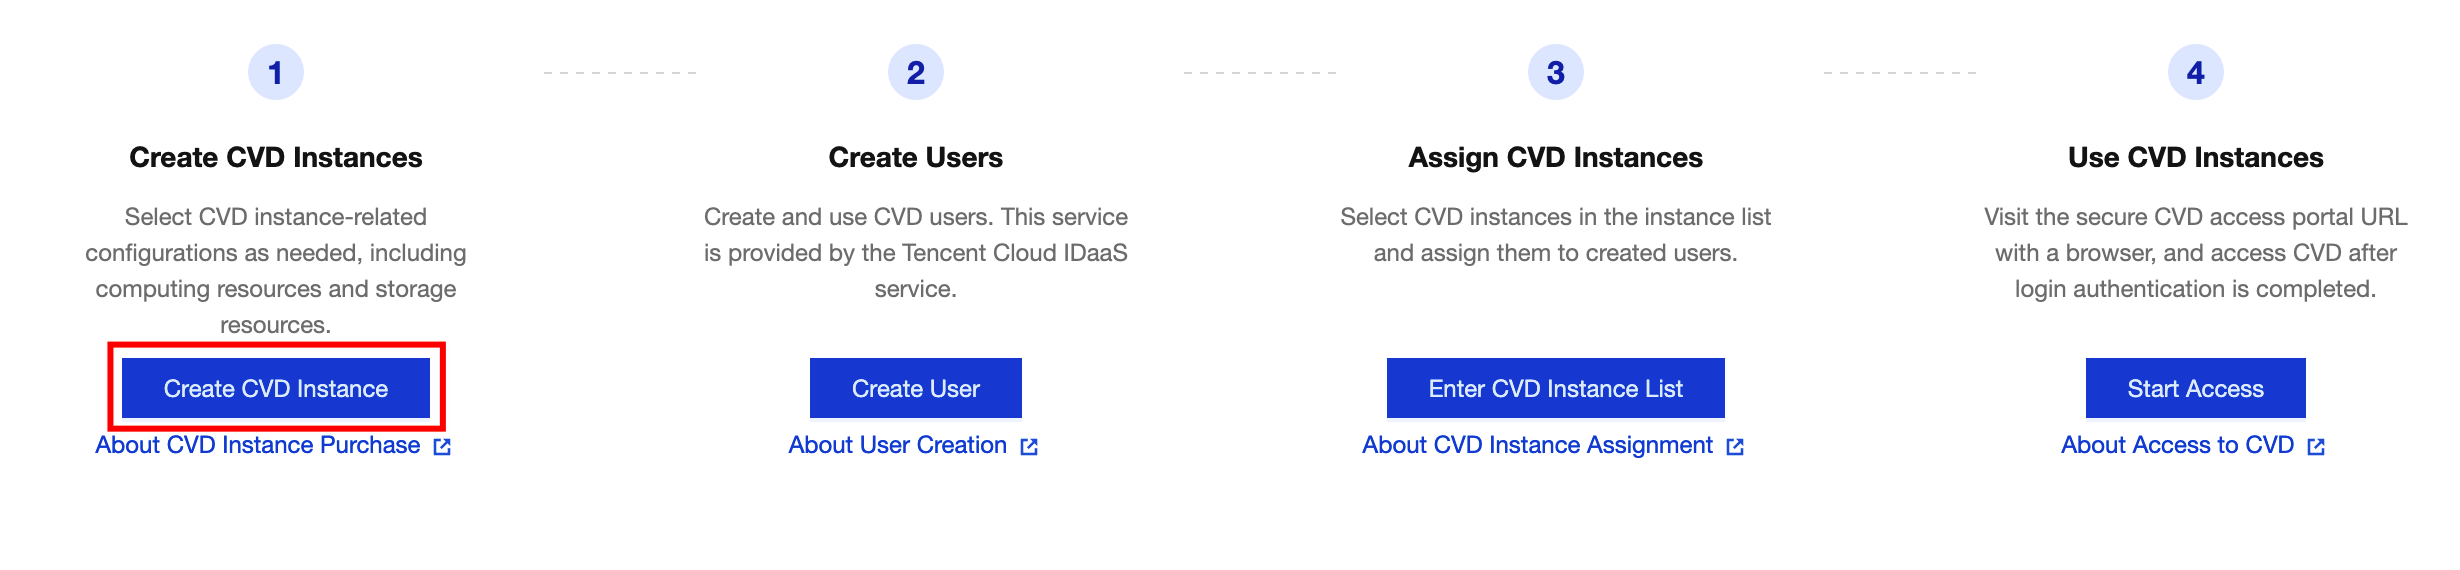
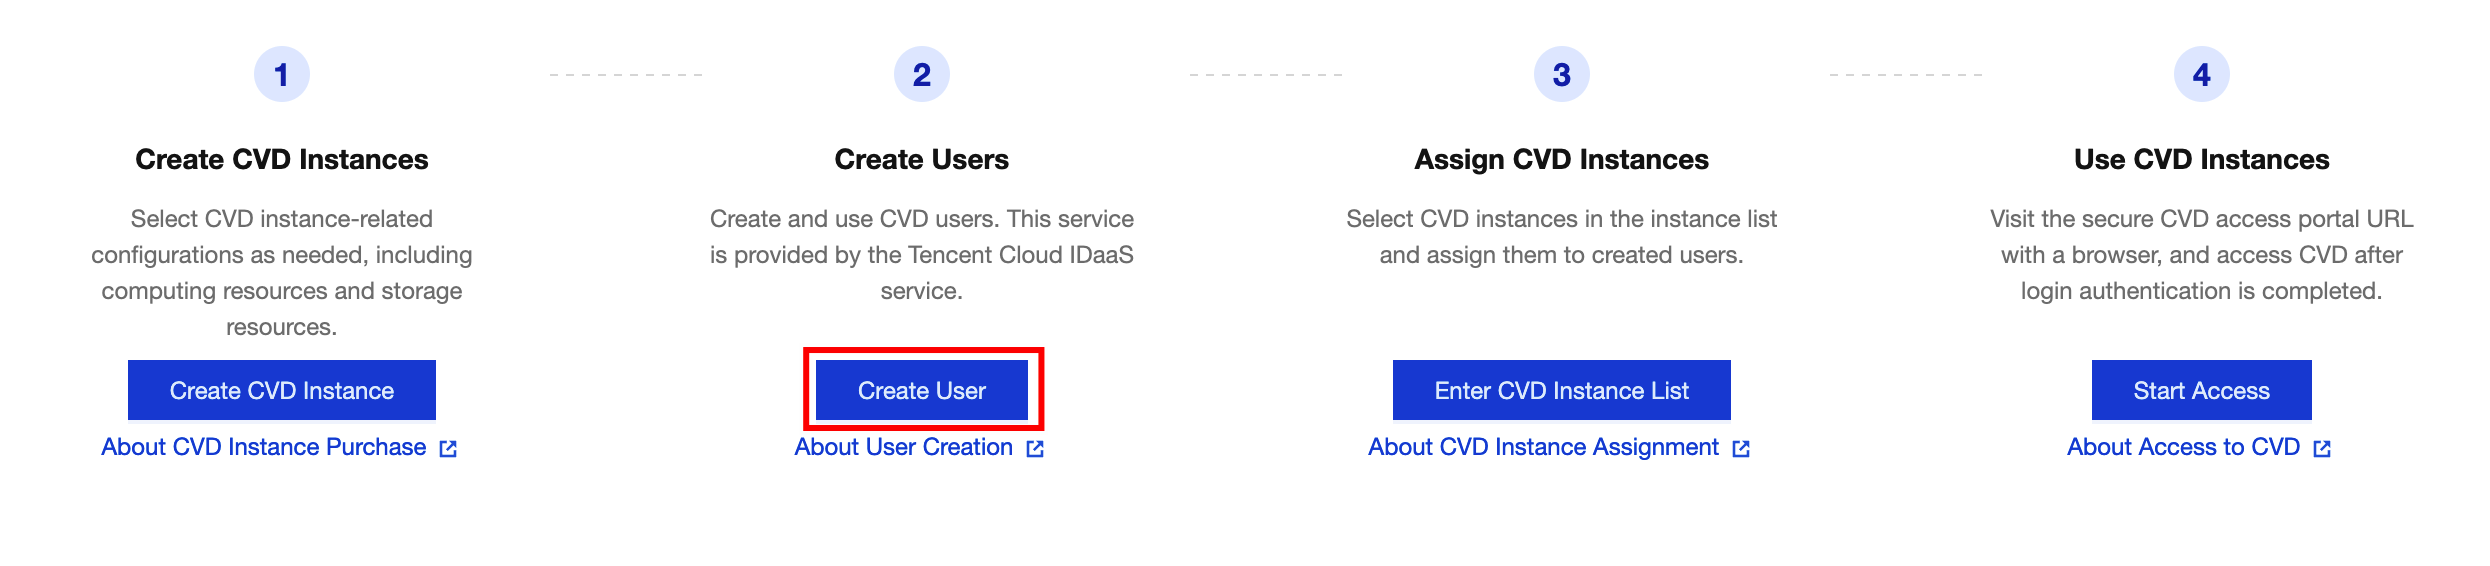
Process Overview
Depending on the job responsibilities and usage requirements, CVD users can be categorized as follows:
User Type
Description
Administrator
Manager of CVD resources, responsible for the unified management of CVD resources through the console, including full lifecycle management such as creating, assigning, deleting/refunding instances, and managing policies.
End user
User of CVD resources, who accesses and uses the assigned CVD resources by logging in to the access portal through a browser.
Quick Configuration of the CVD Service by the Administrator
Step 1: Creating a CVD Instance
Log in to the CVD console and go to the Overview page to create a CVD instance. Select the relevant configurations for the CVD instance as needed, such as the billing mode, computing resource, region, and image type.
Step 2: Creating a User
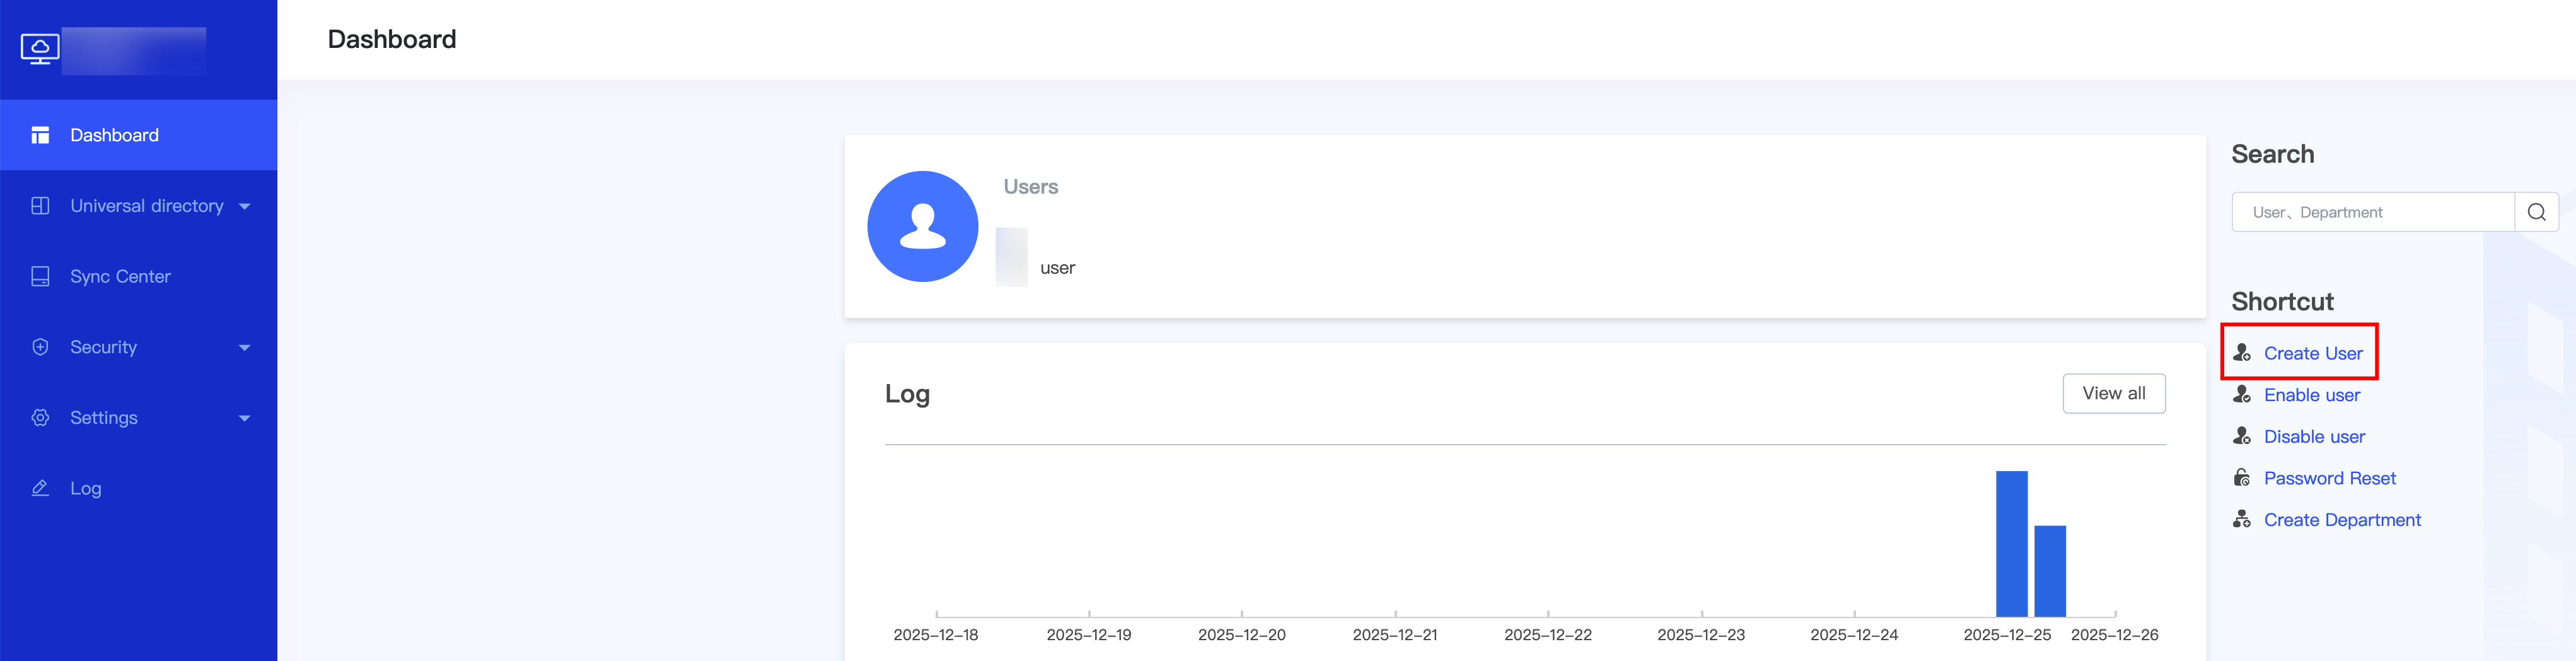
1. On the Overview page, click Create User.
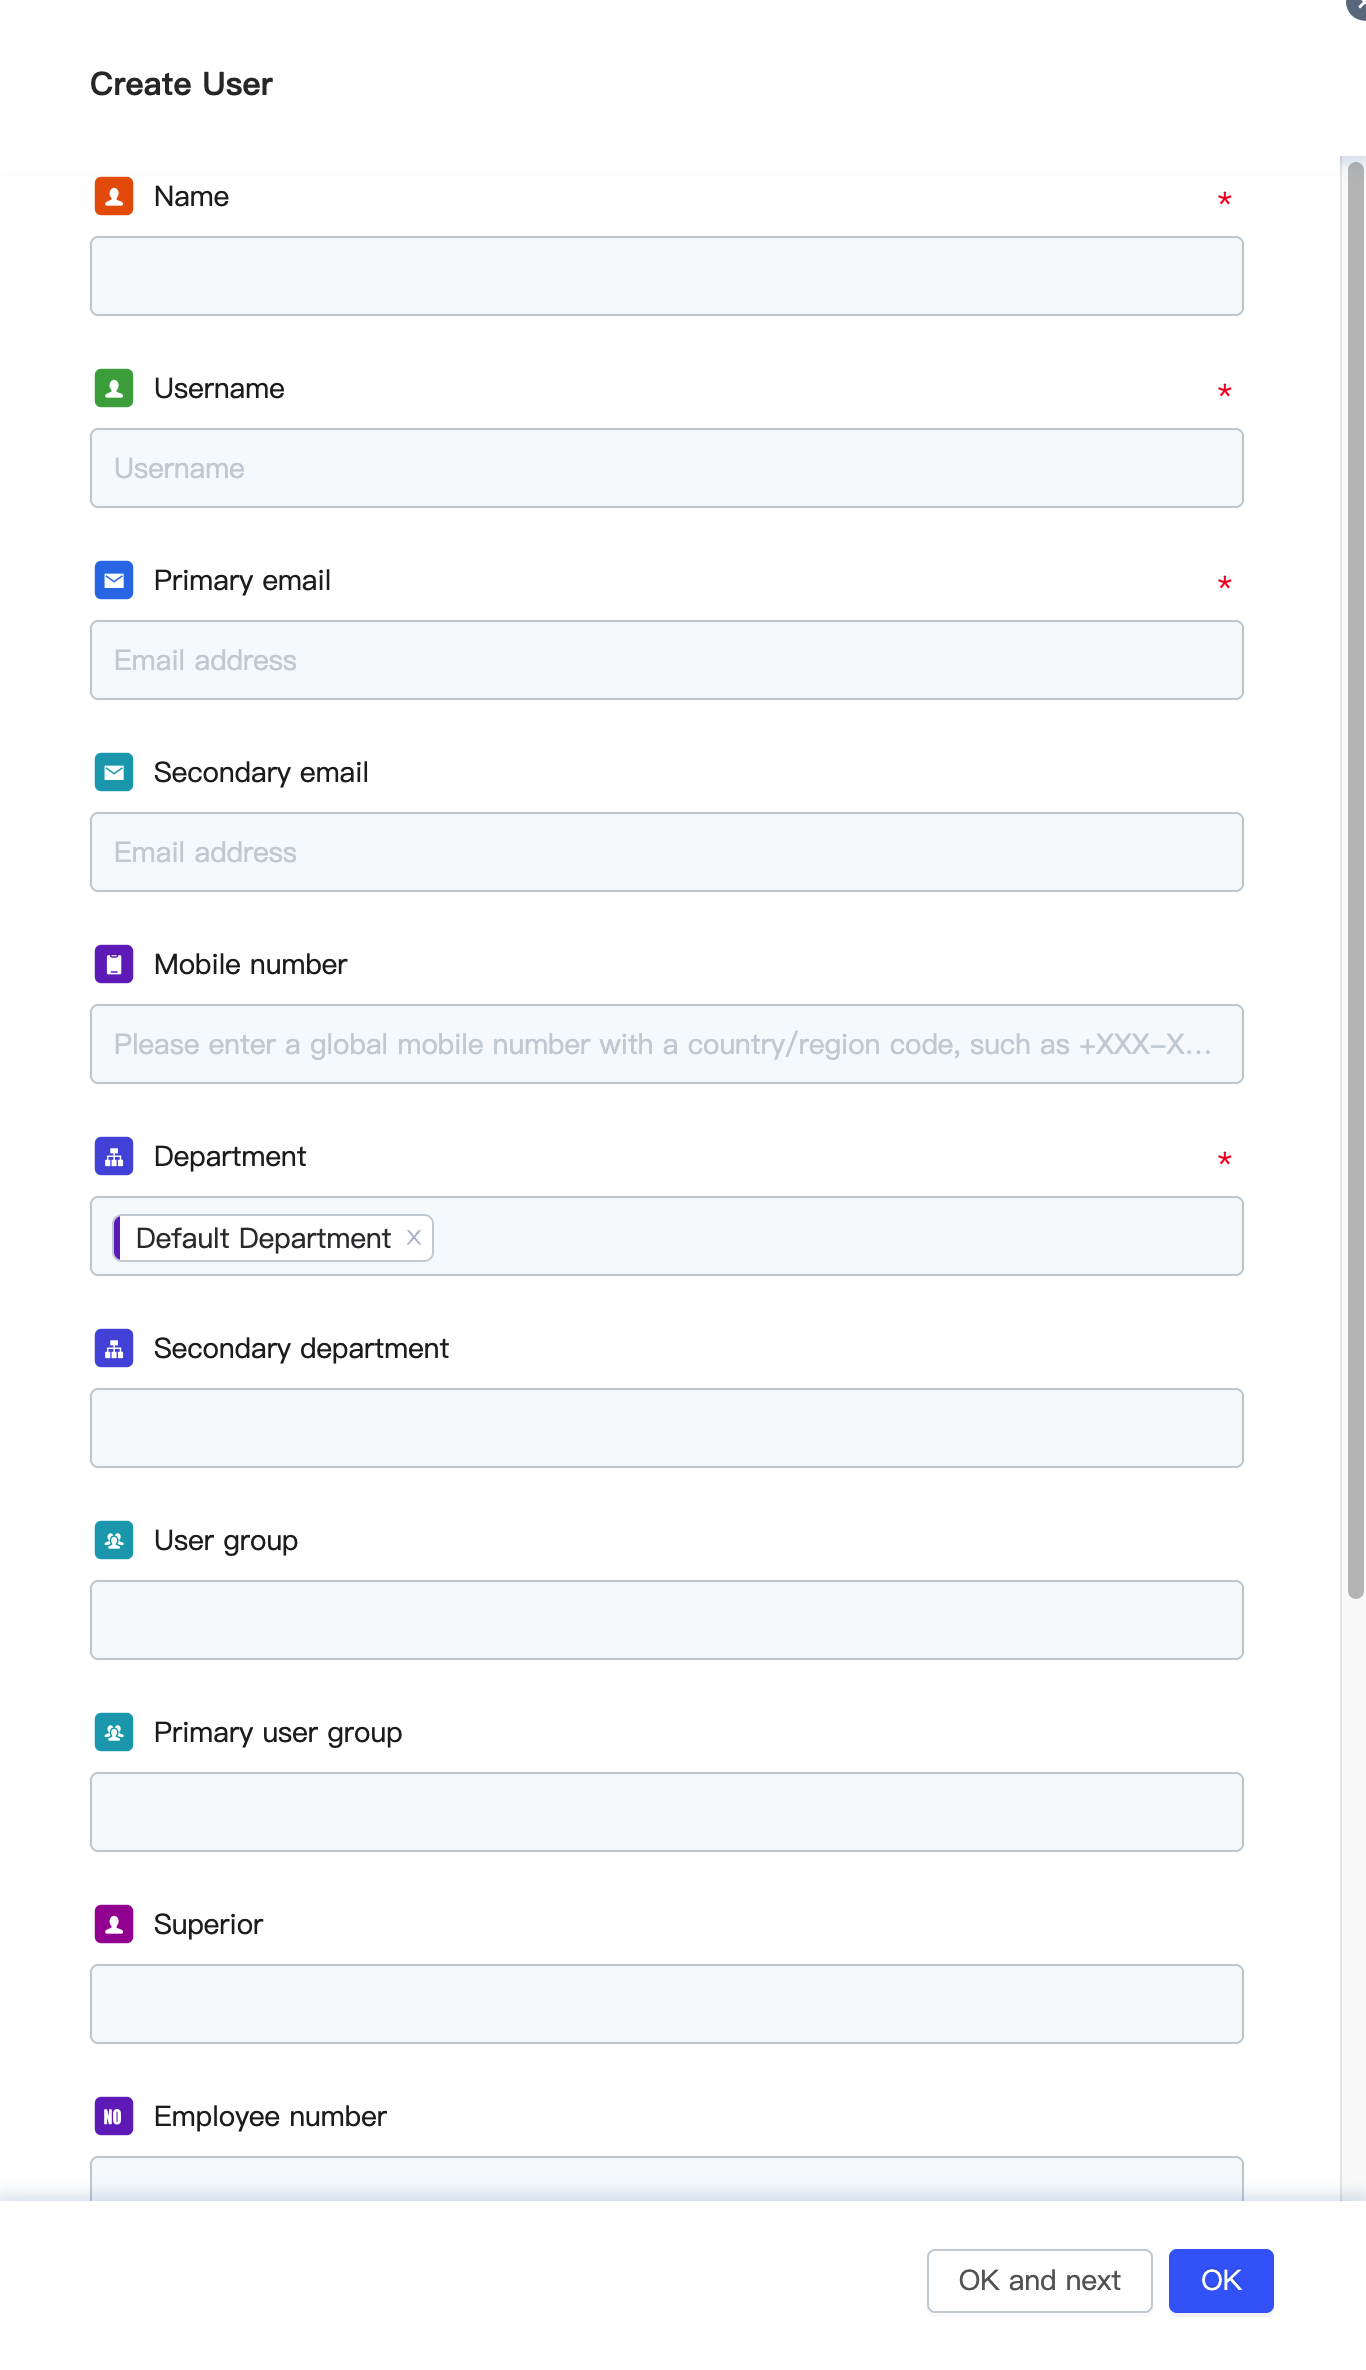
2. Then, click Create User and specify the relevant information to create an end user who will be assigned to use the CVD instance. For more detailed user operations, see User Management.
Note:
The primary email is the key channel for end users to receive activation information. Provide the correct email address. If a user does not receive the activation email, the user can follow the steps below to retry activation.
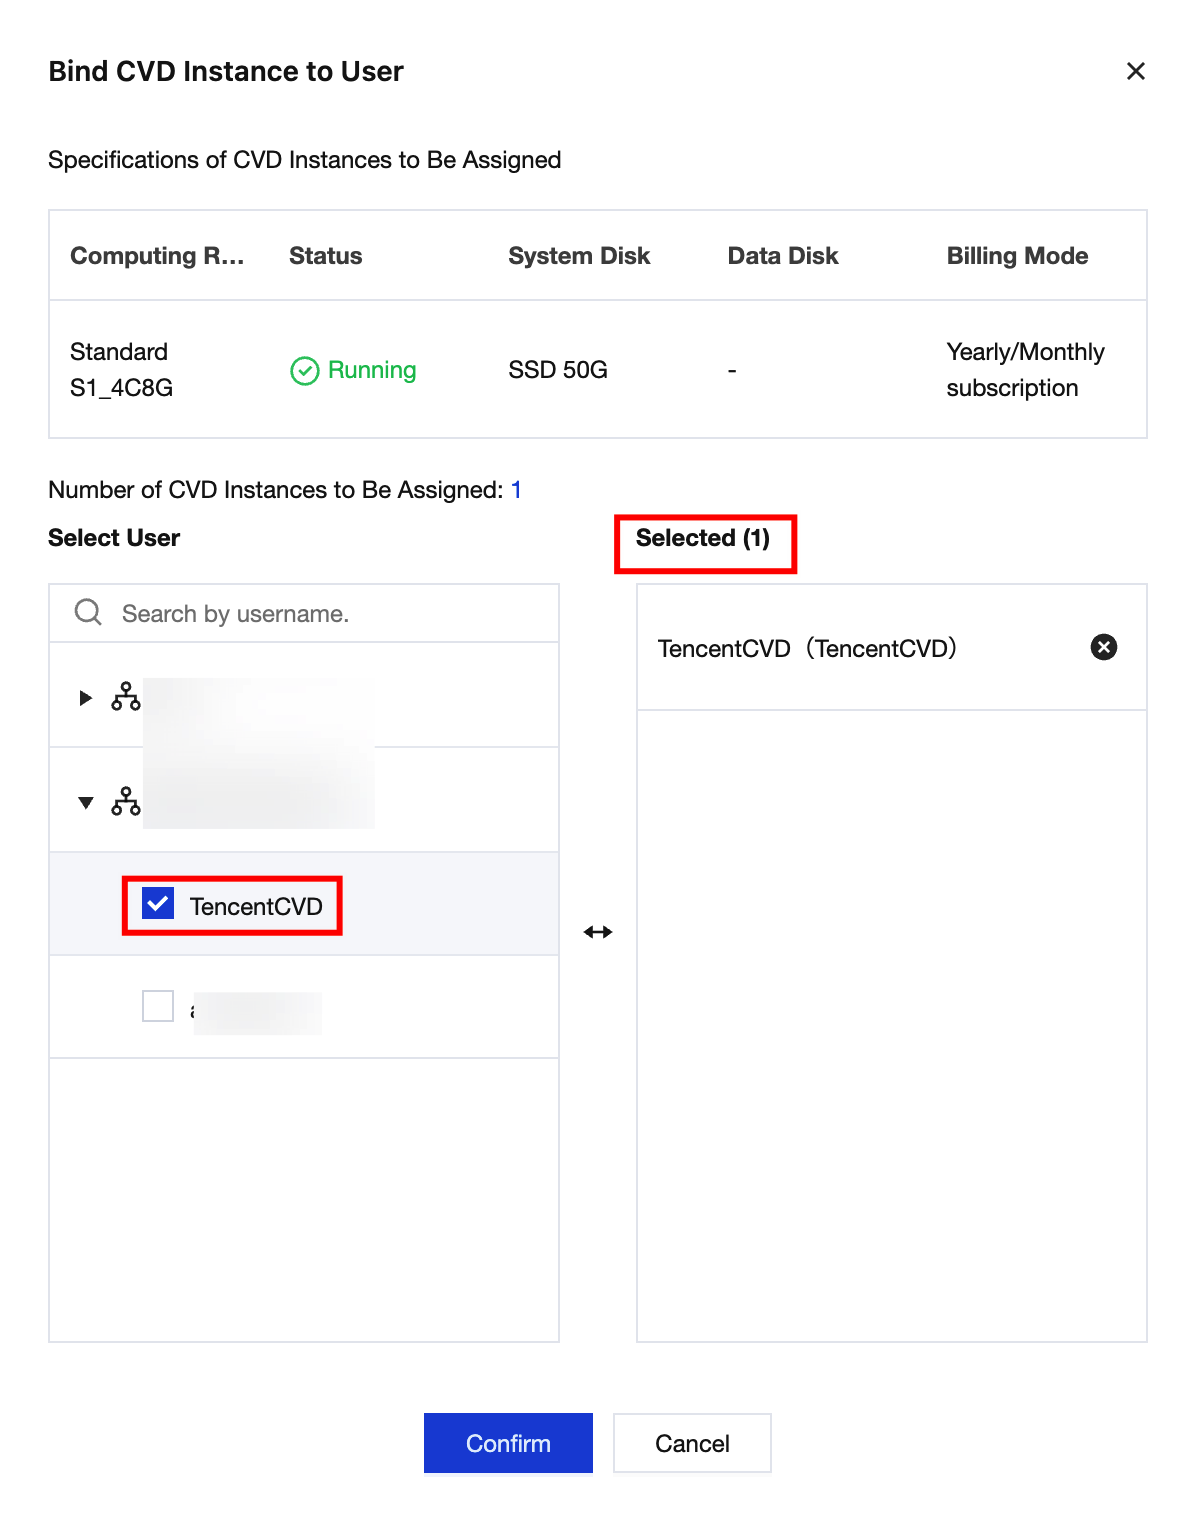
Step 3: Assigning the CVD Instance
1. Open the Desktop List page, select the CVD instance to be assigned in the corresponding region, and click Bind User.
2. Go to the Bind User page, find the user to be bound by searching for the username. You can select one or more users to be bound to CVD instances.
Accessing the CVD Instance Using the End User Account
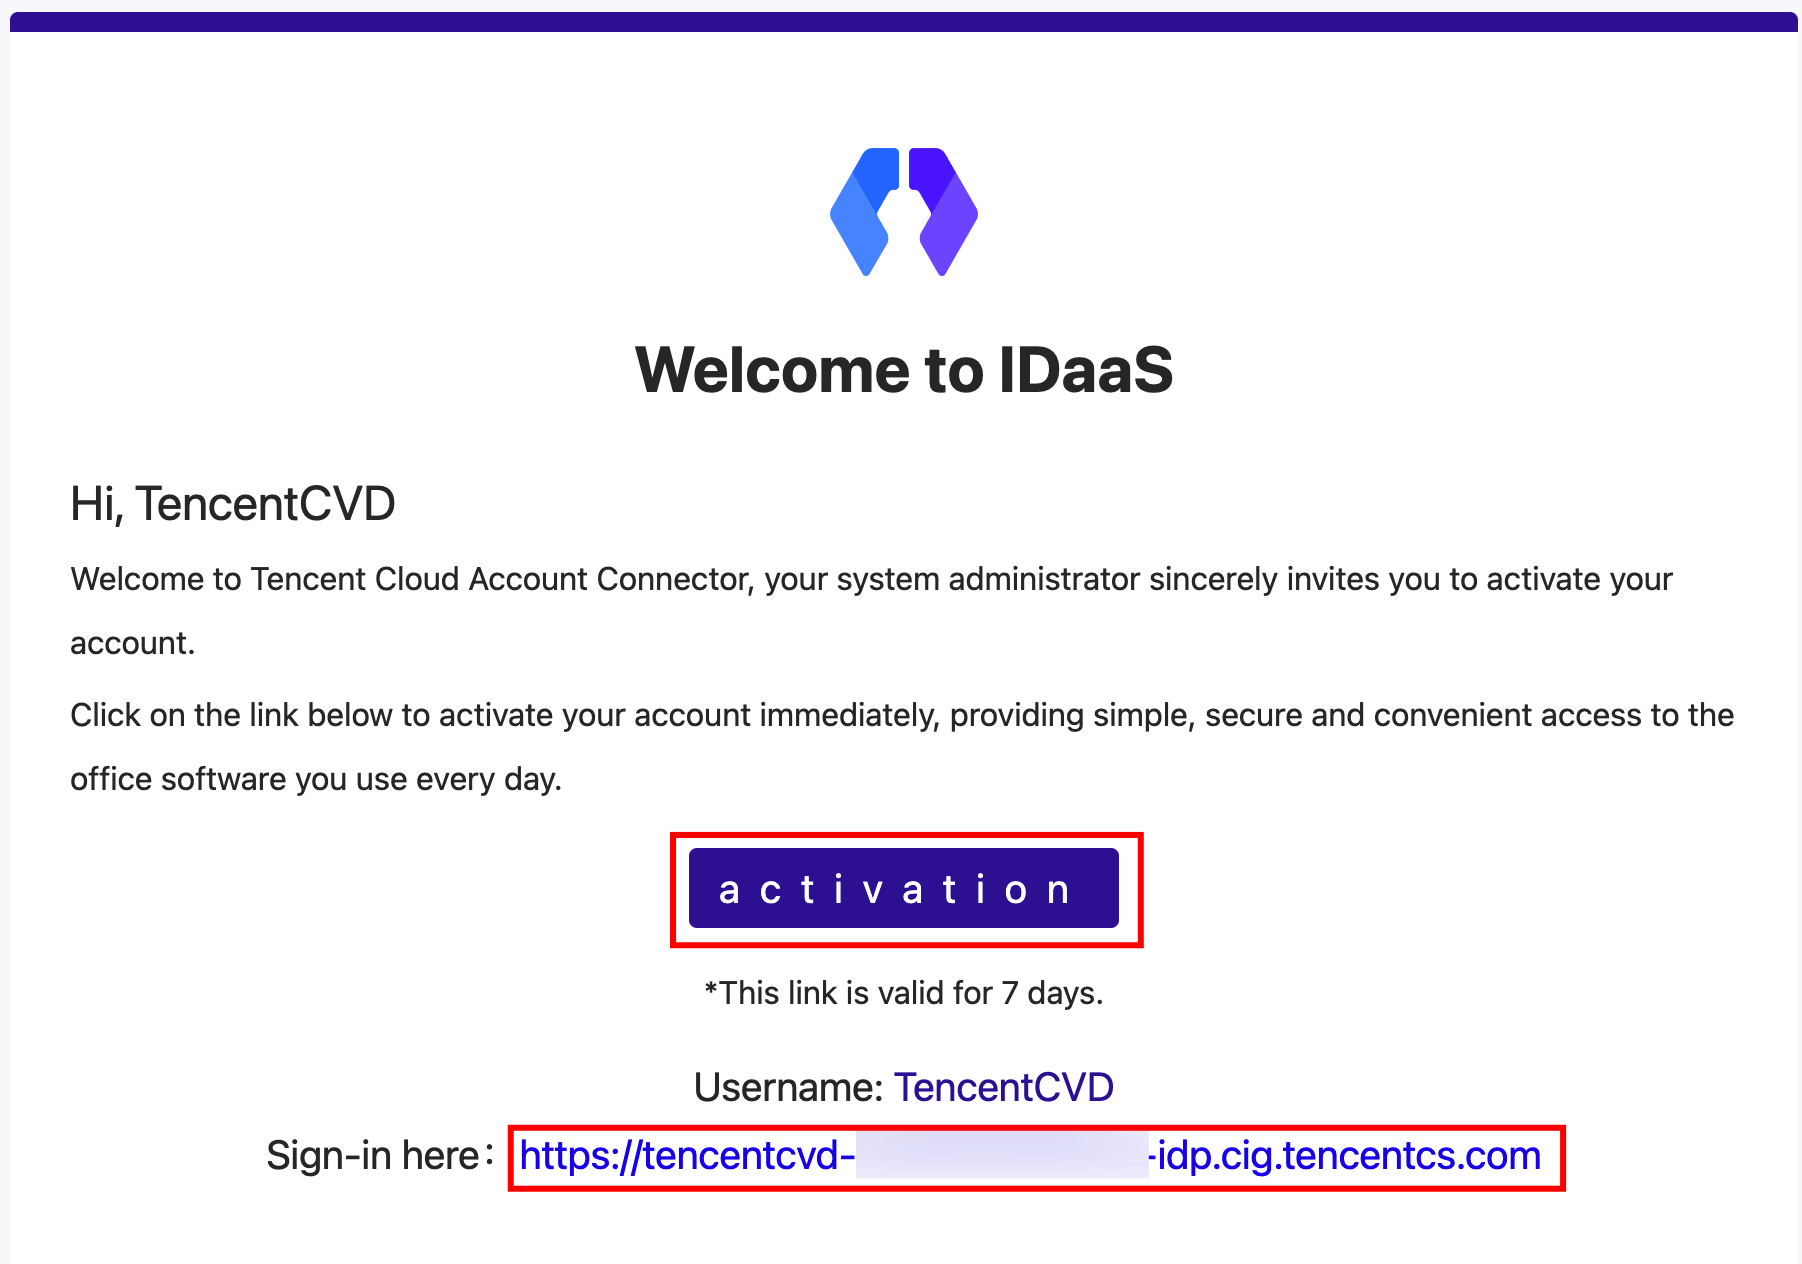
The end user will receive an activation email. Follow the instructions in the email to activate the end user account. Visit the login URL provided in the end user's email, enter the activated account, and specify the password to access the CVD resources bound to the end user.
If the email is not received successfully, follow these steps to retry:
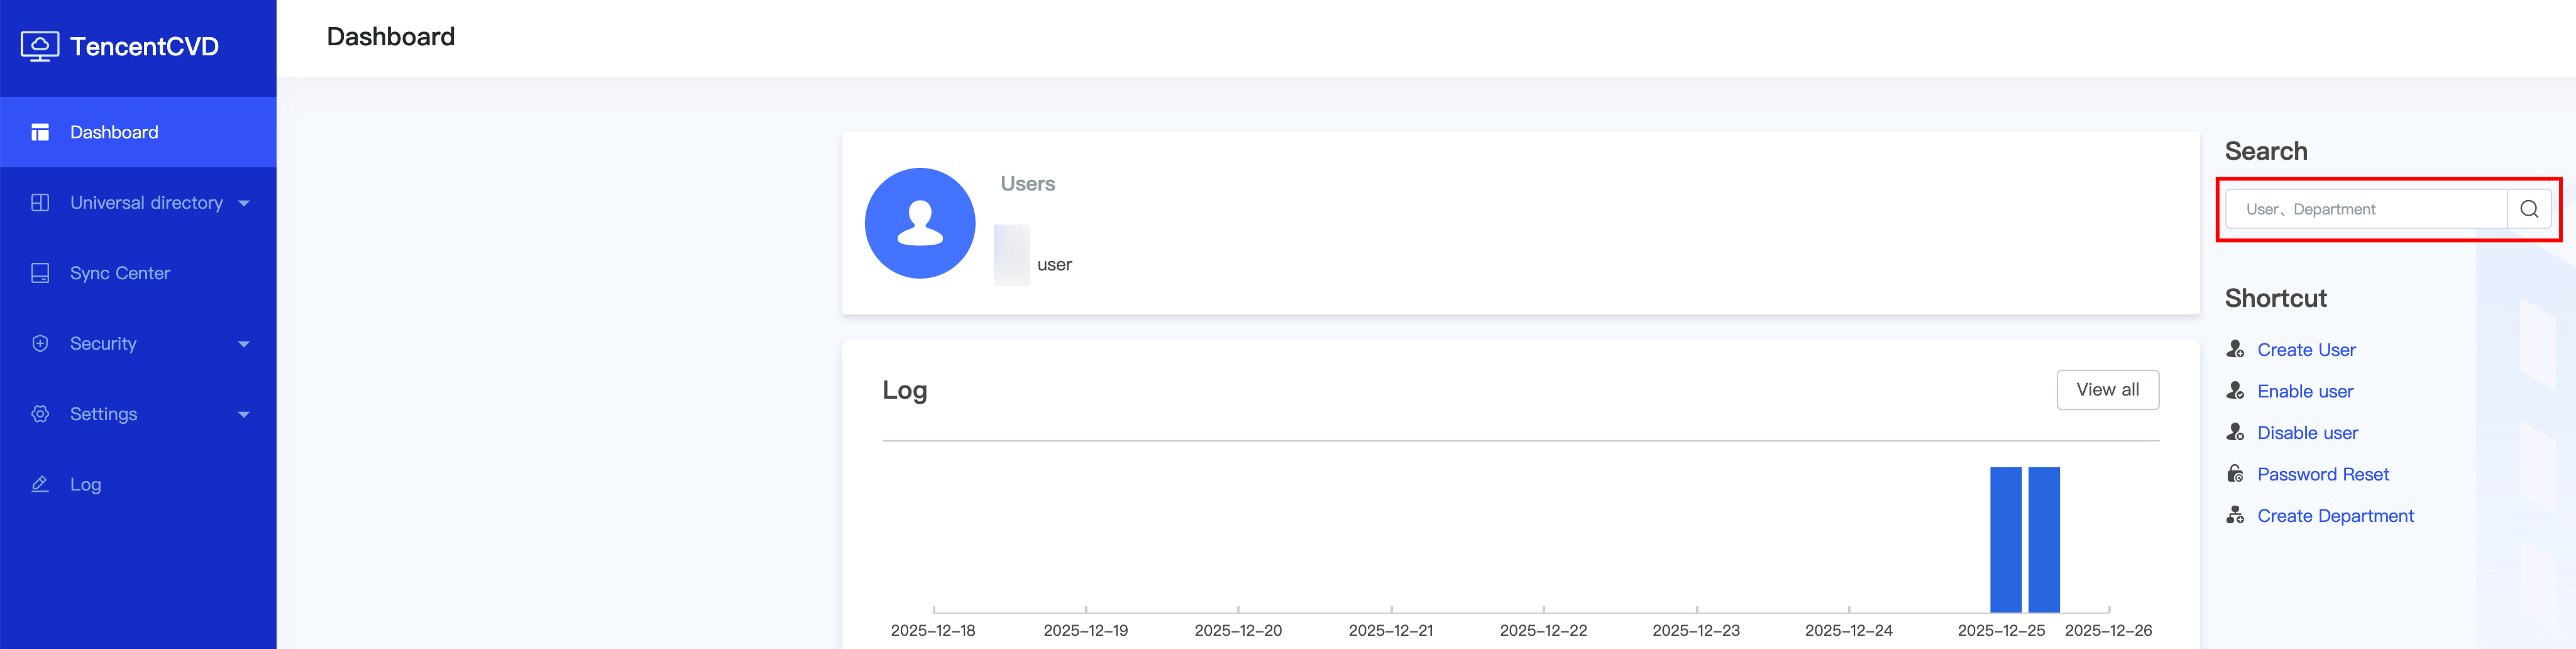
1.Search for the username of the user who does not receive the activation email.
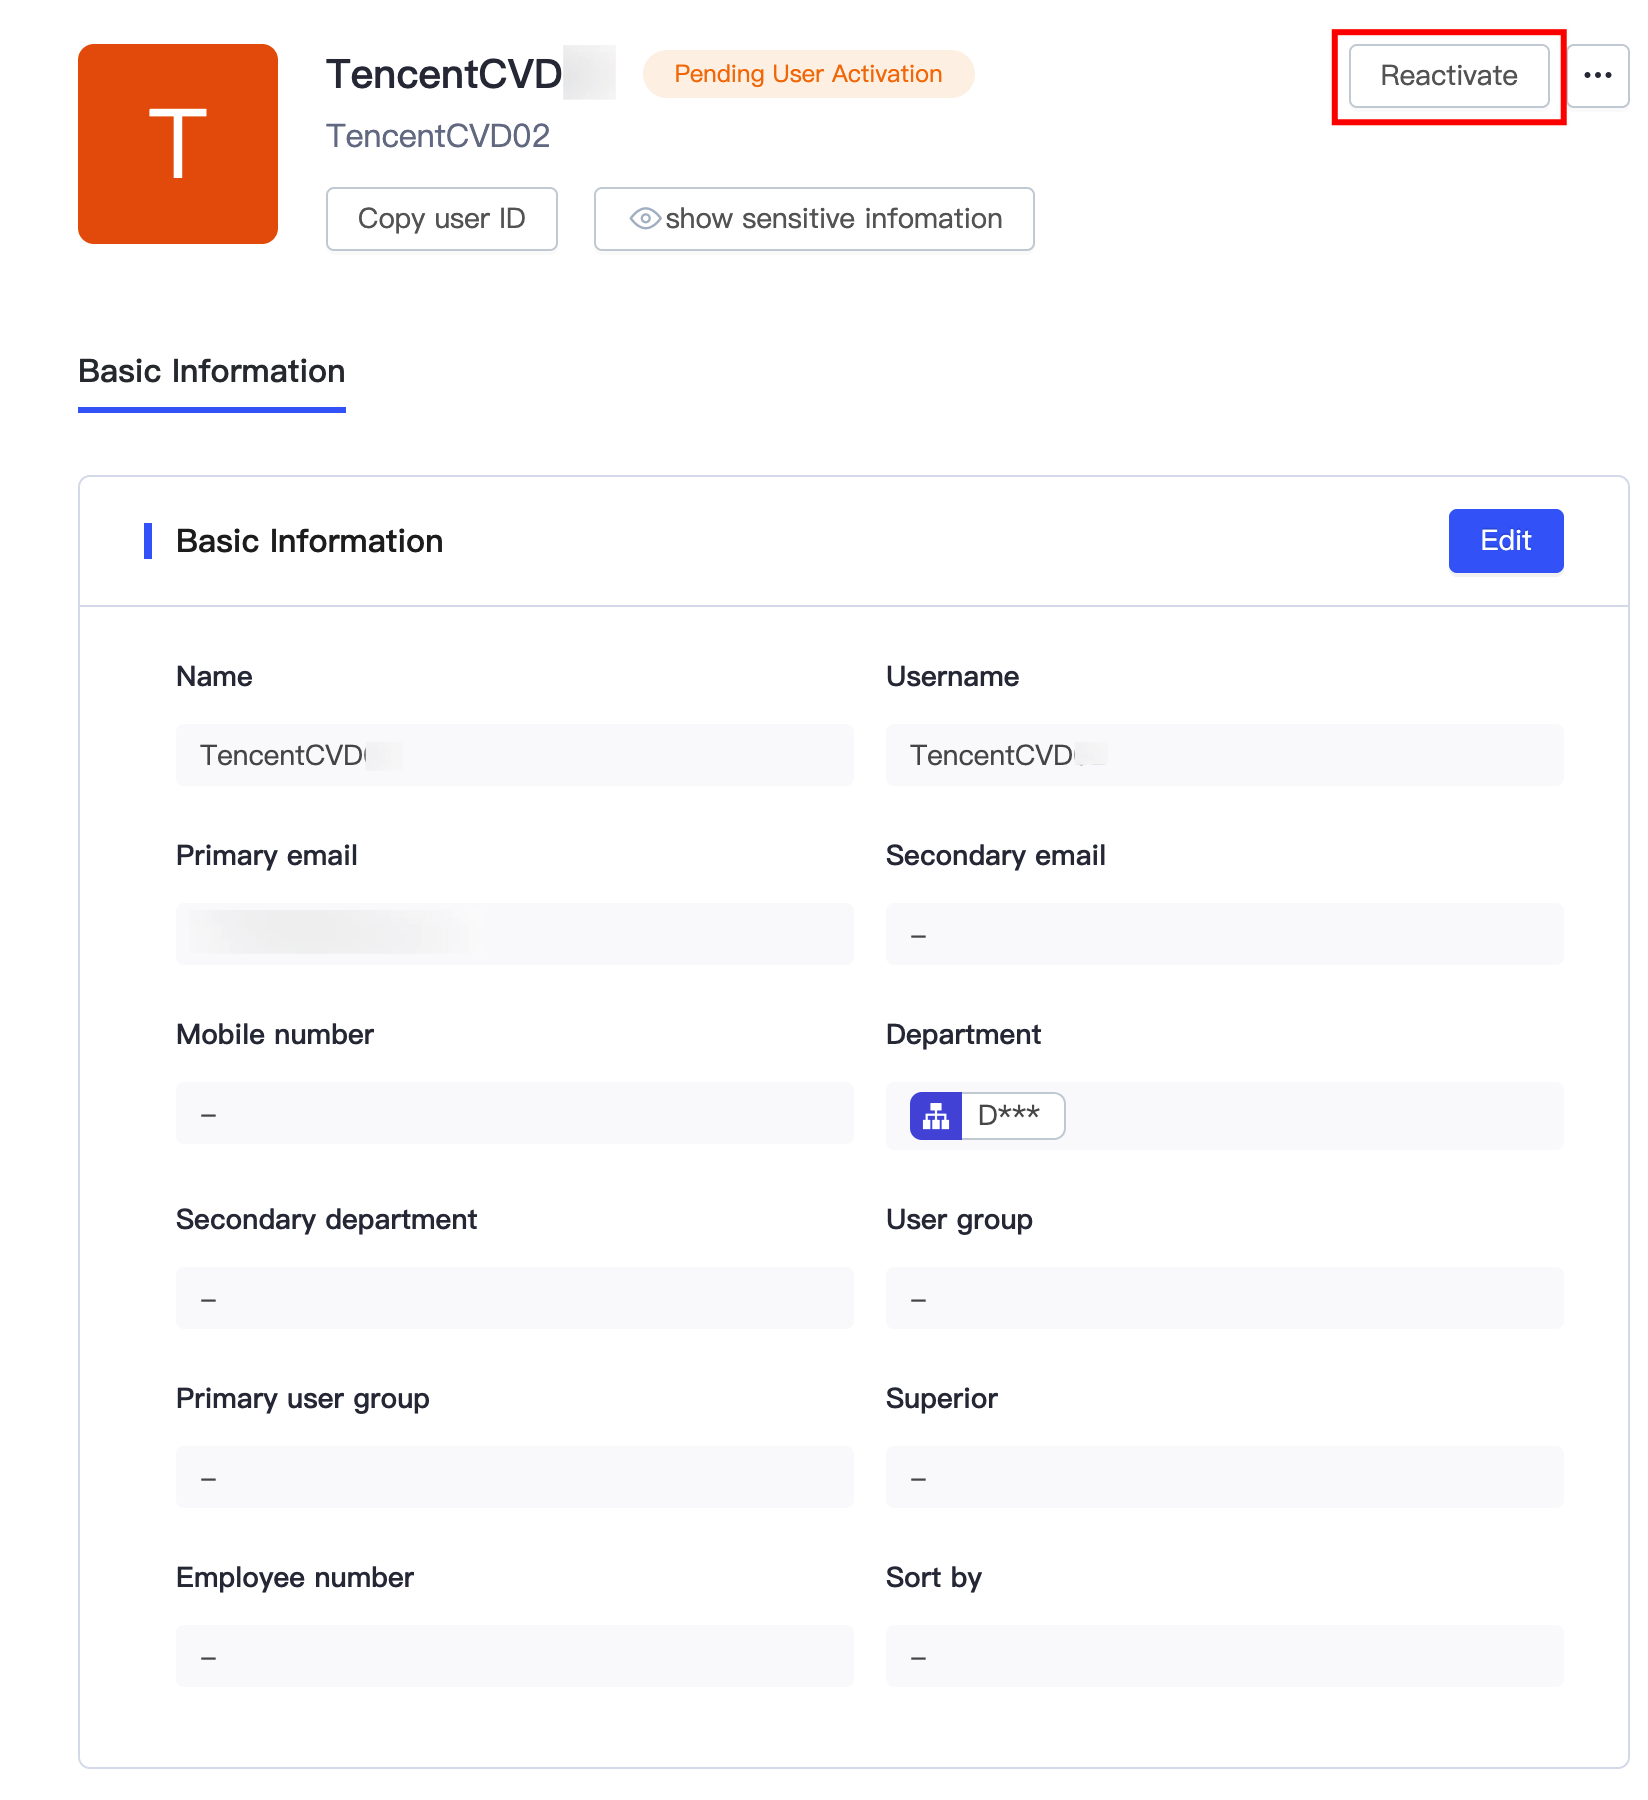
2.Click Reactivate to resend the activation email, prompting the unactivated user to activate. If the user still does not receive the activation email, check whether the email address is correct. If modification is needed, you can click Edit to change the email address.
By now, you have mastered the complete process of creating and accessing a CVD instance.