Android
Download
Mode fokus
Ukuran font
Operation step
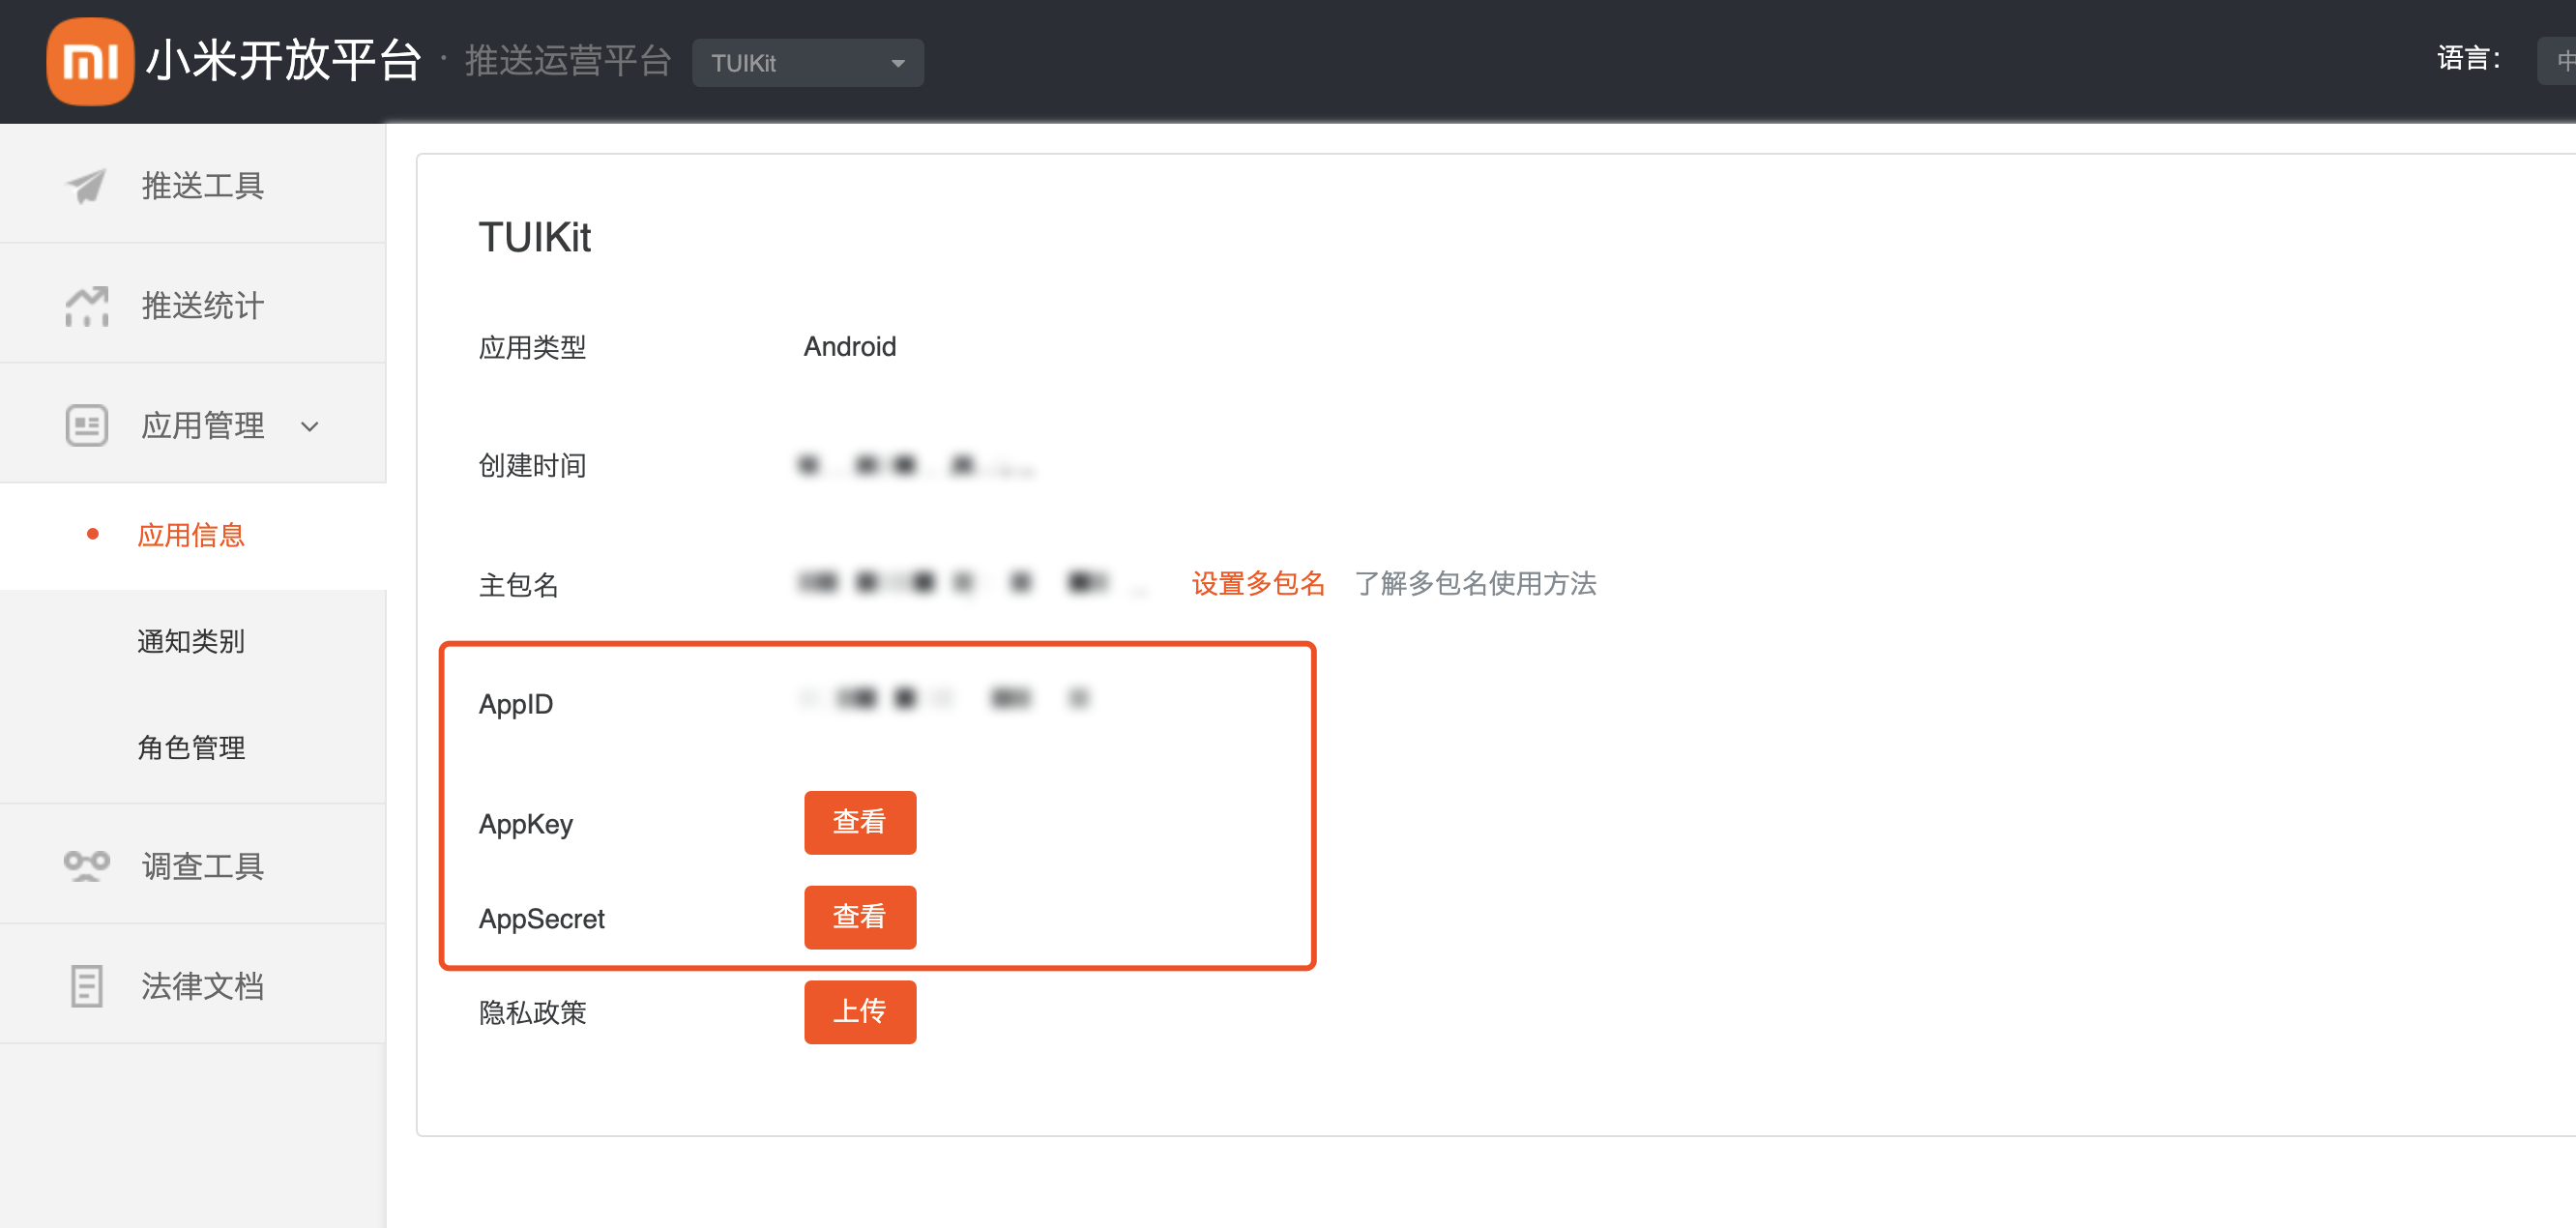
Step 1. Register your app with vendor push platforms
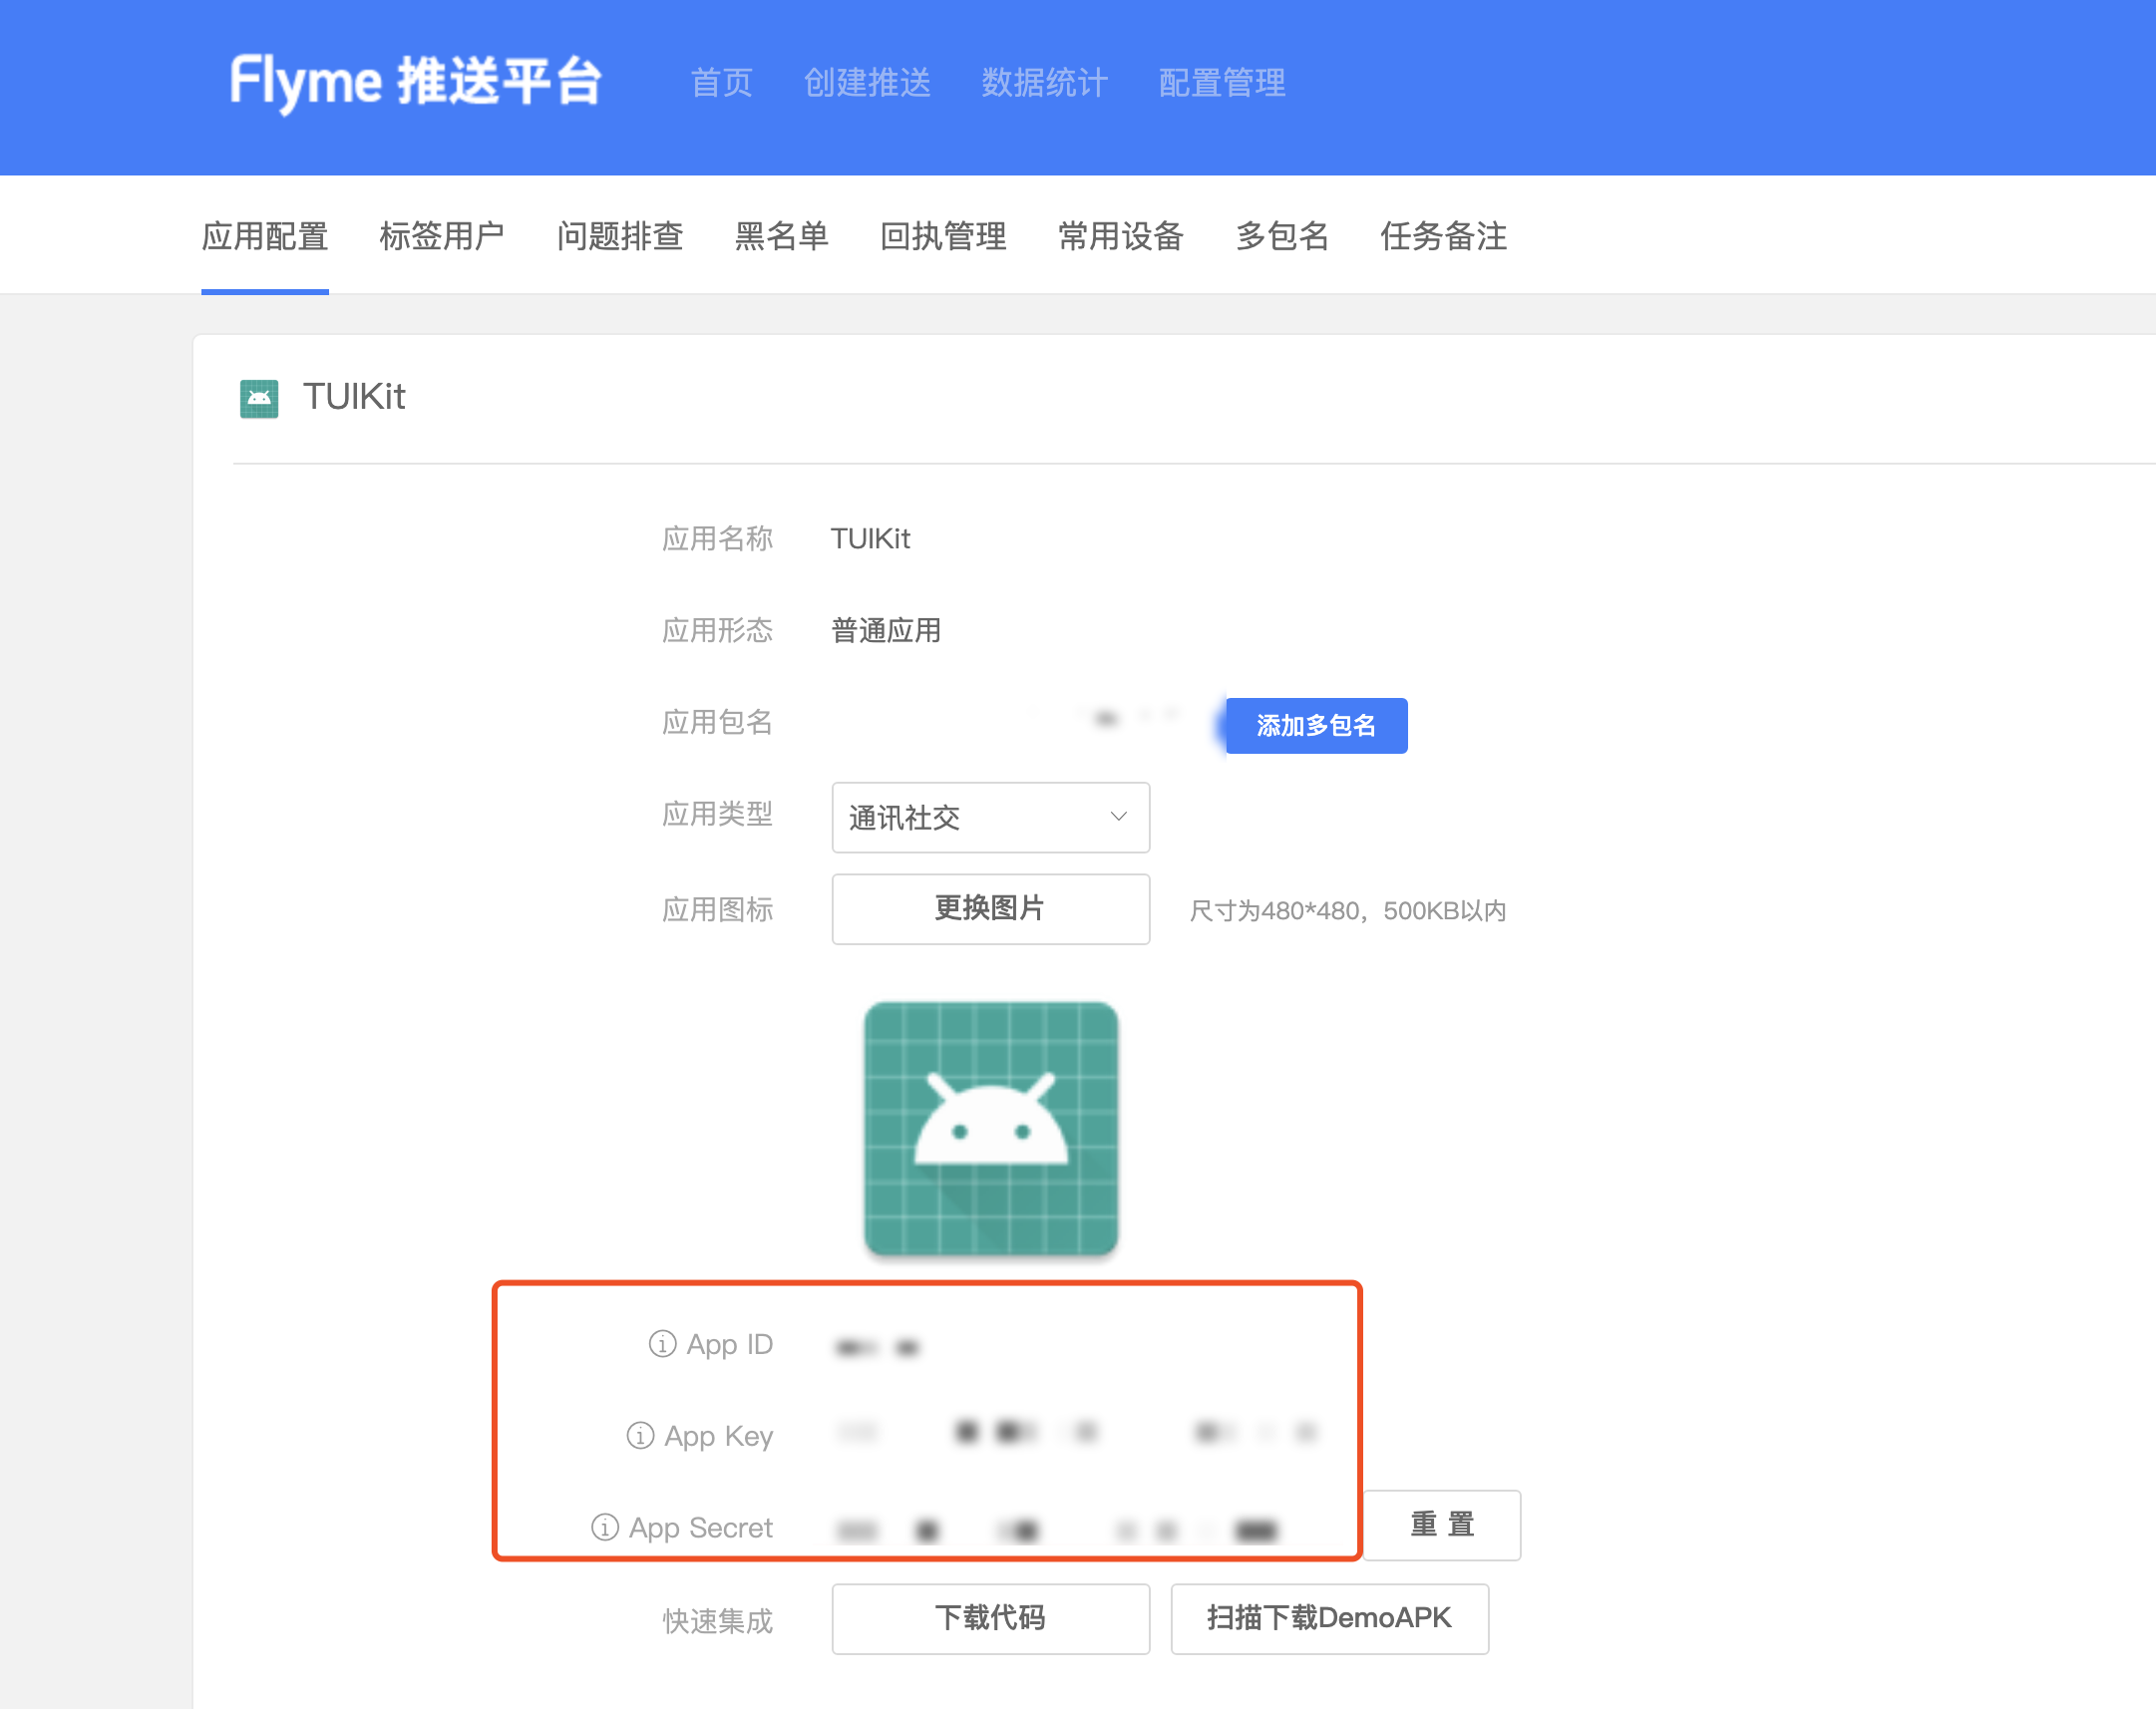
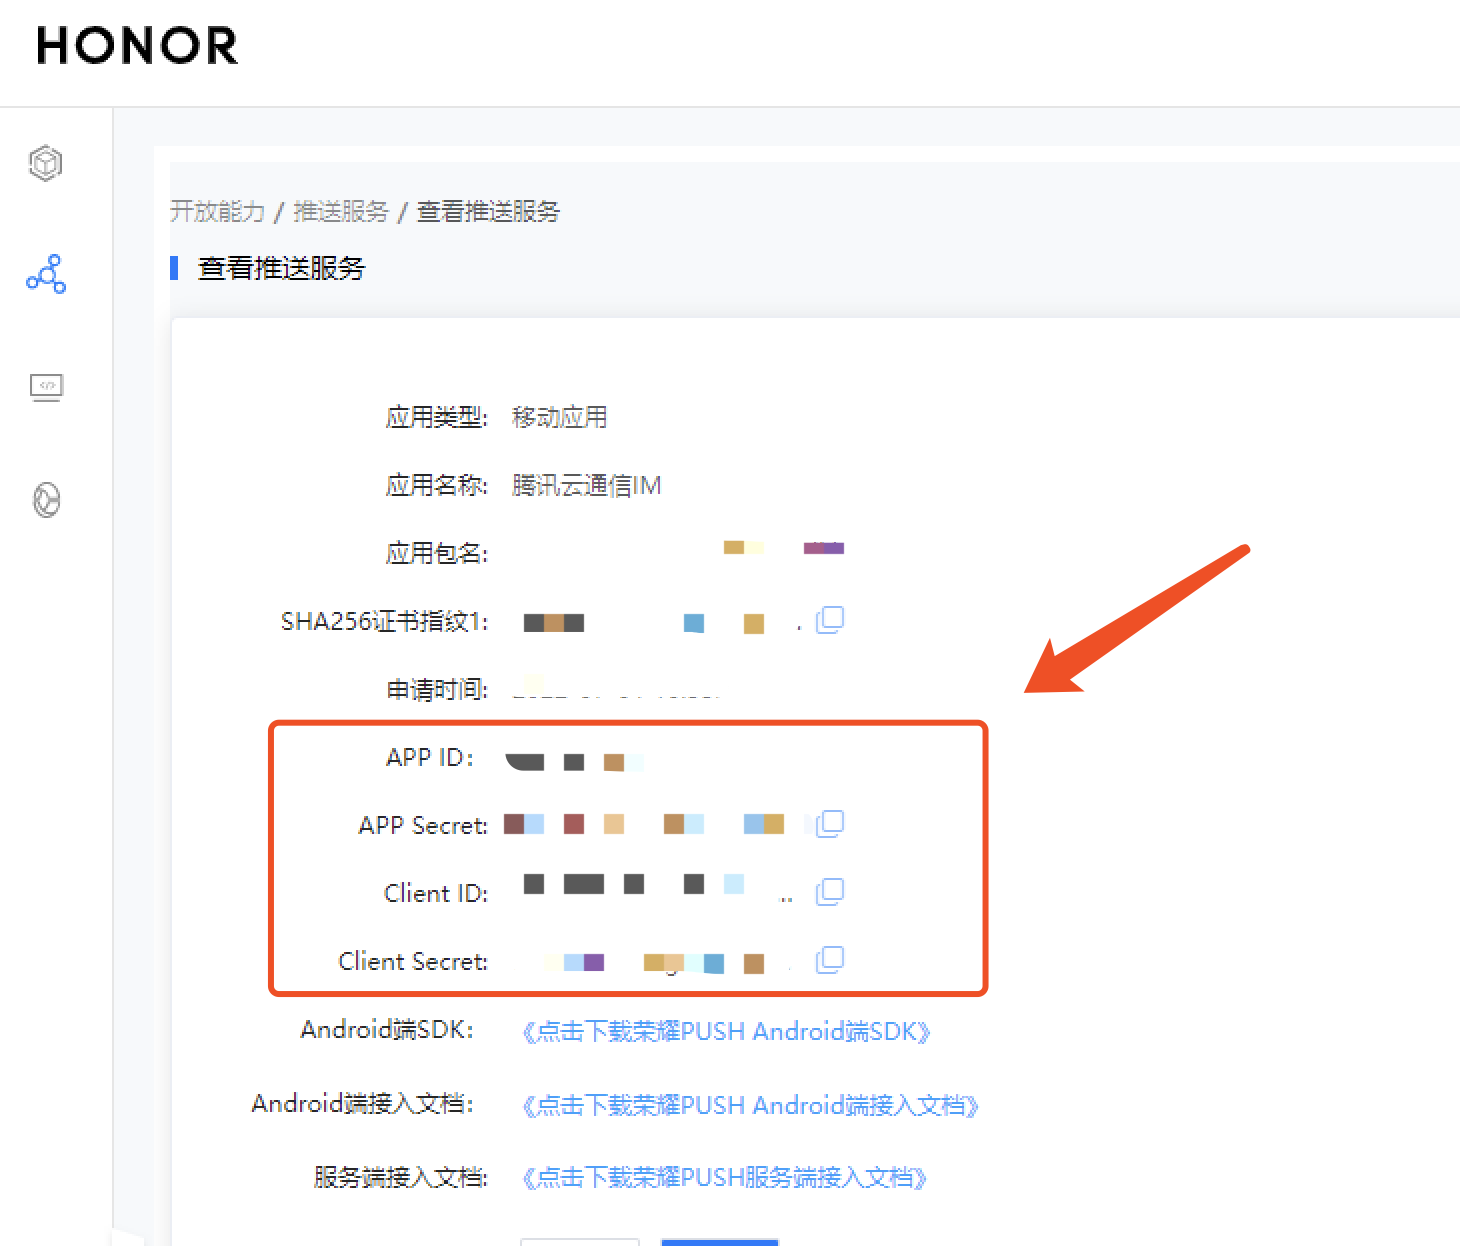
Offline push requires registering your app with each vendor's push platform to obtain parameters such as AppID and AppKey to enable the offline push feature. Currently supported mobile manufacturers are: Mi, Huawei, HONOR, OPPO, vivo, Meizu, Google FCM.
Step 2. Create resources in the Chat console
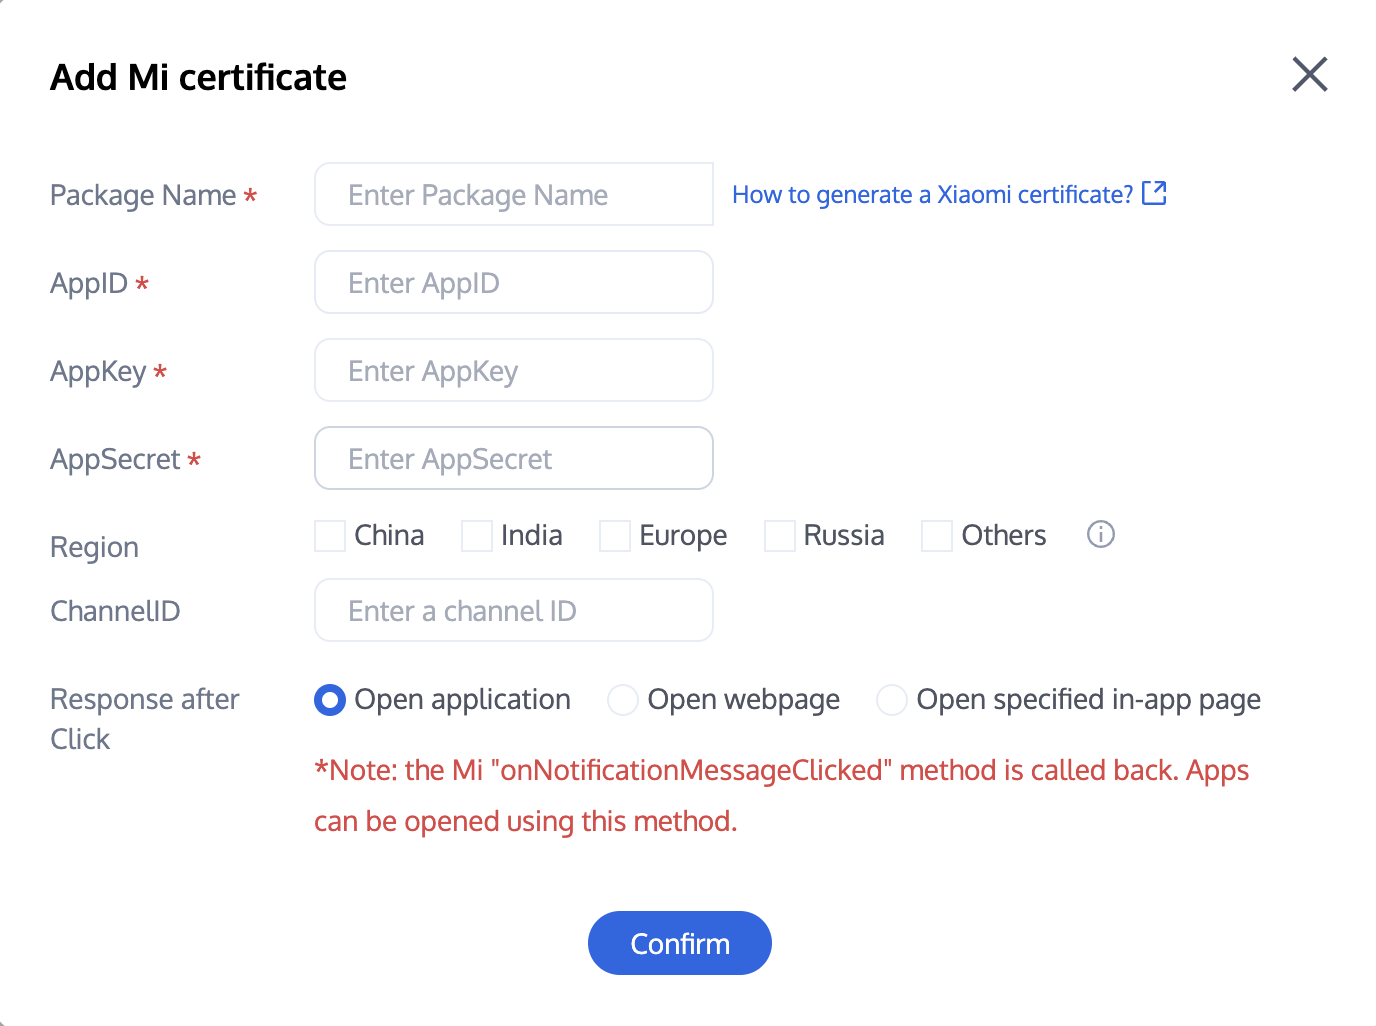
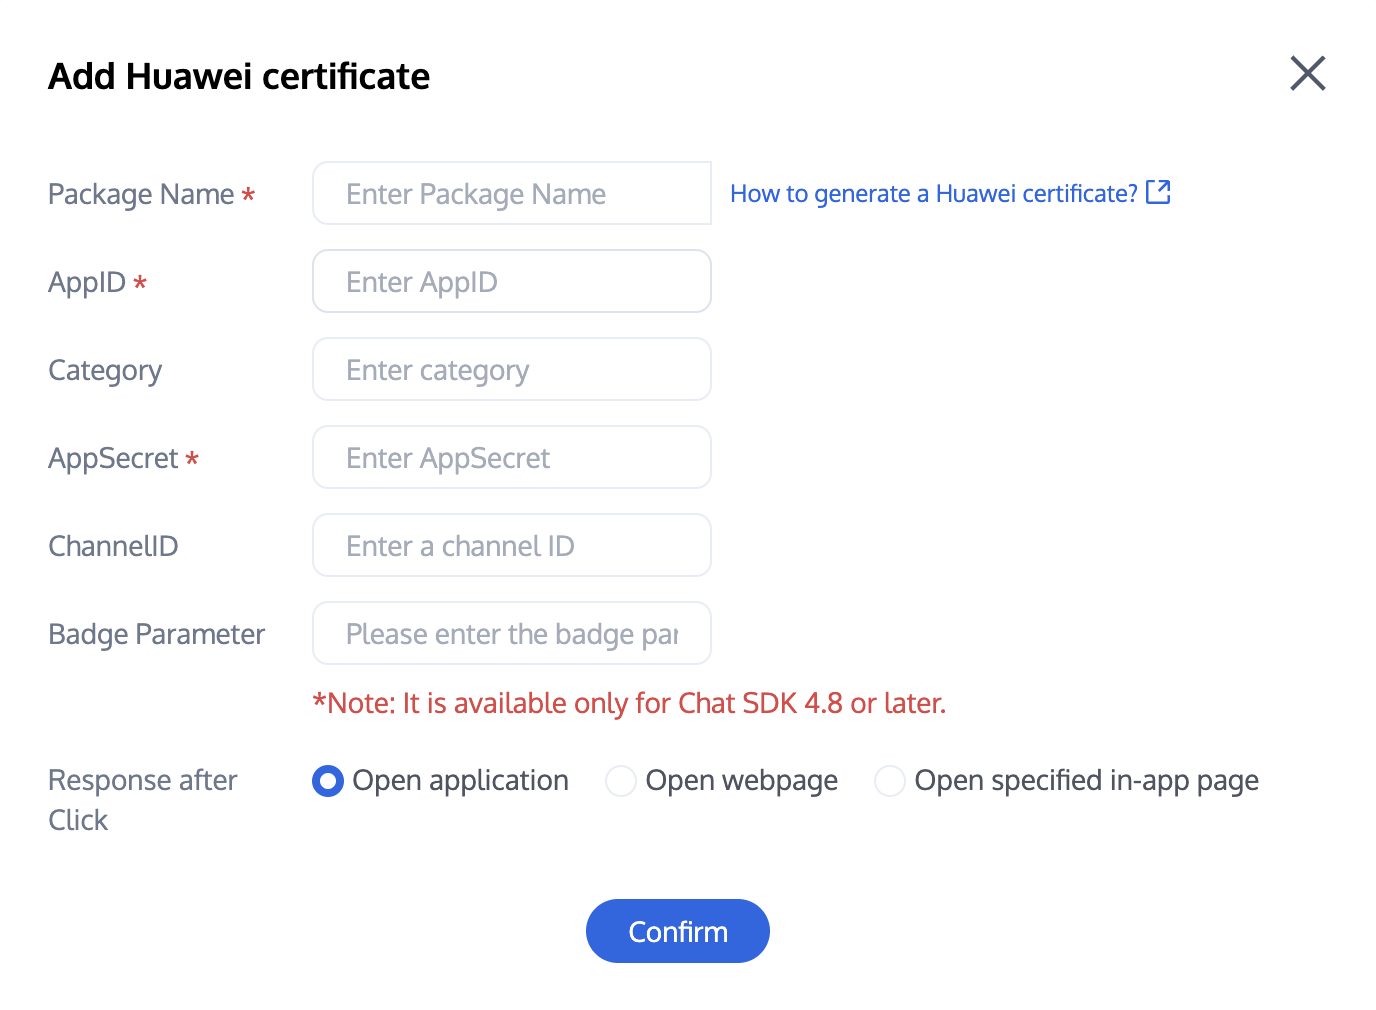
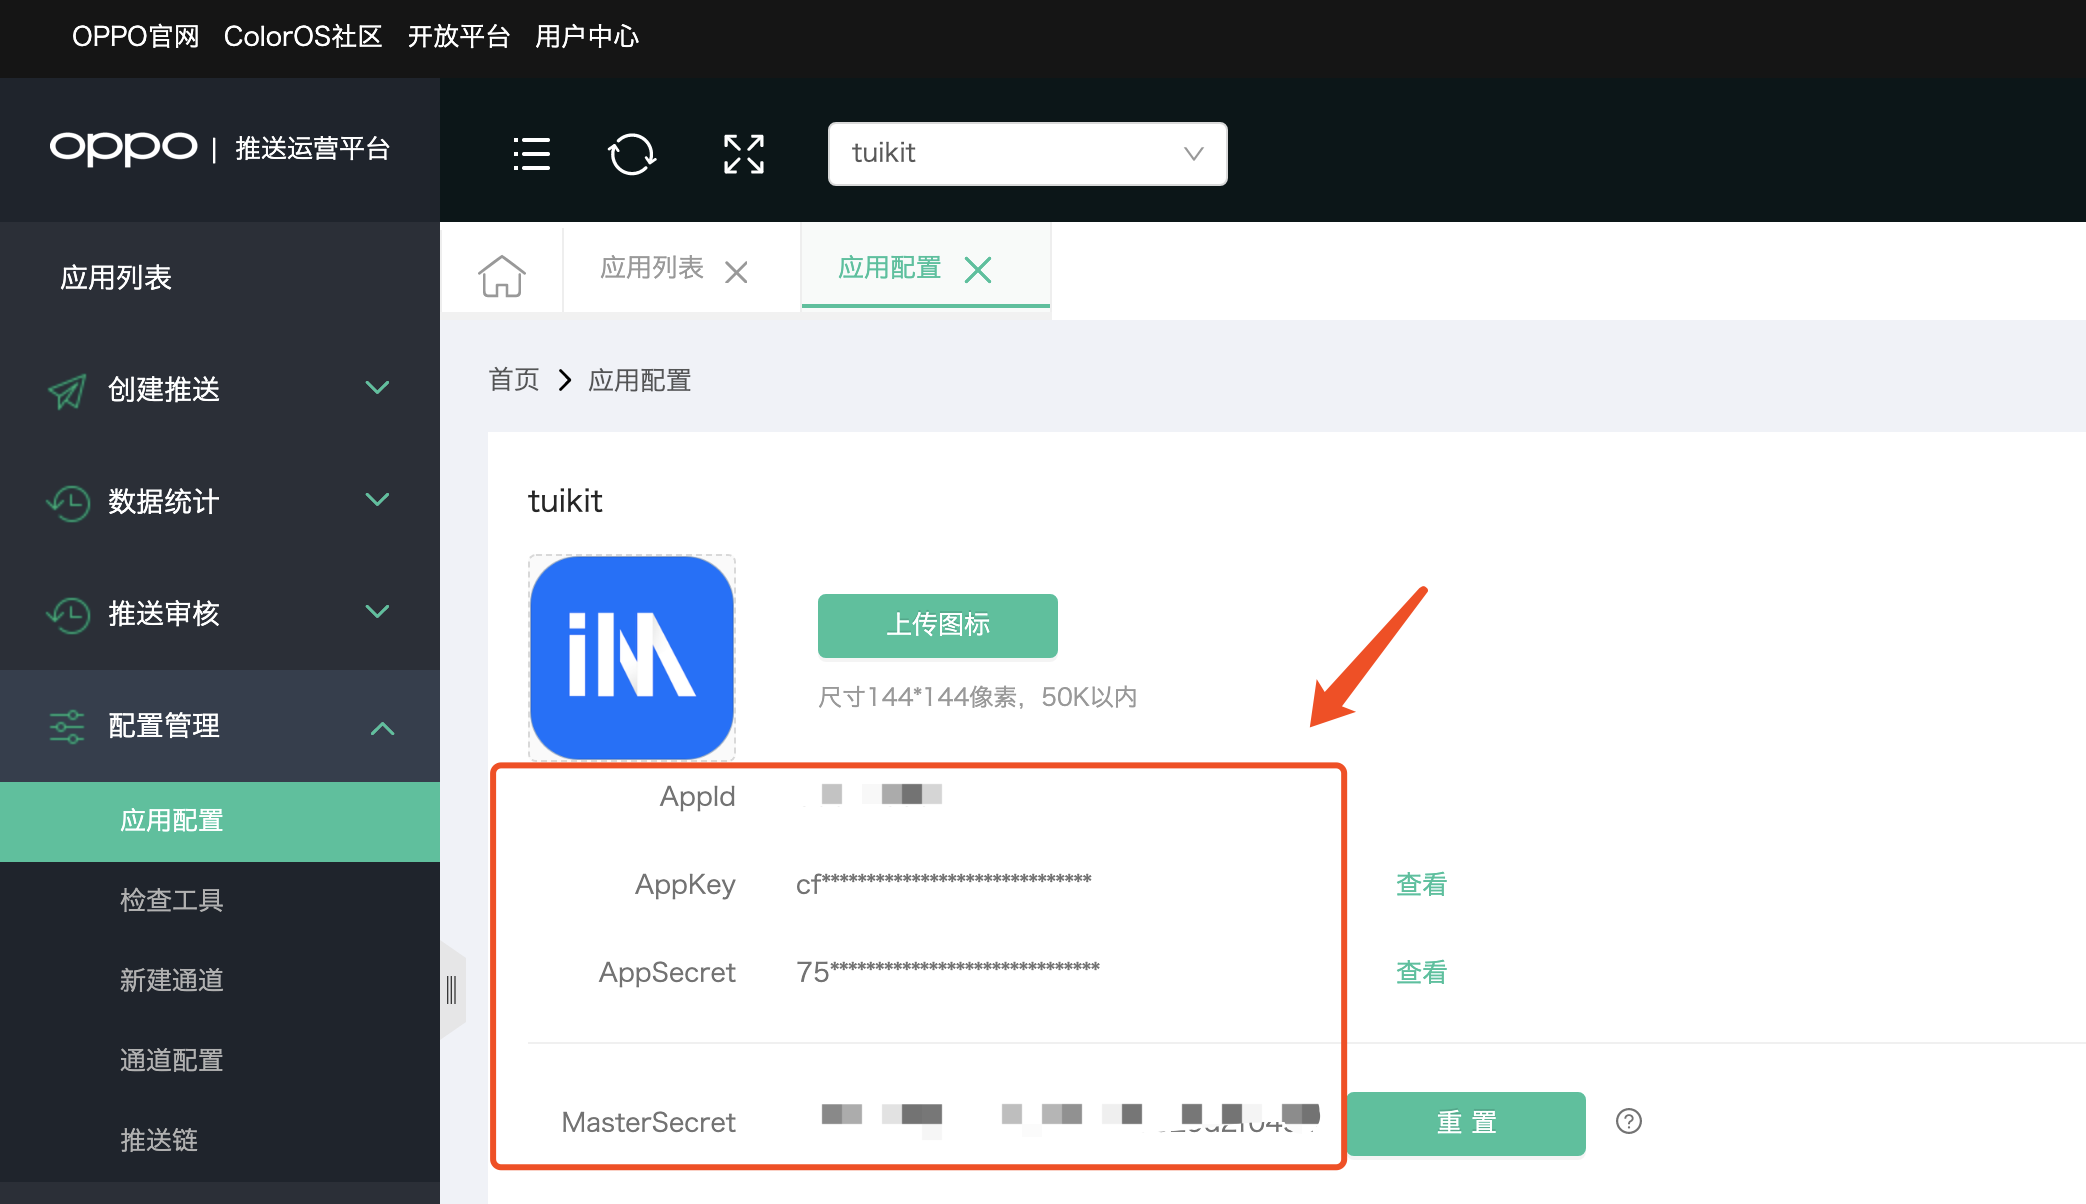
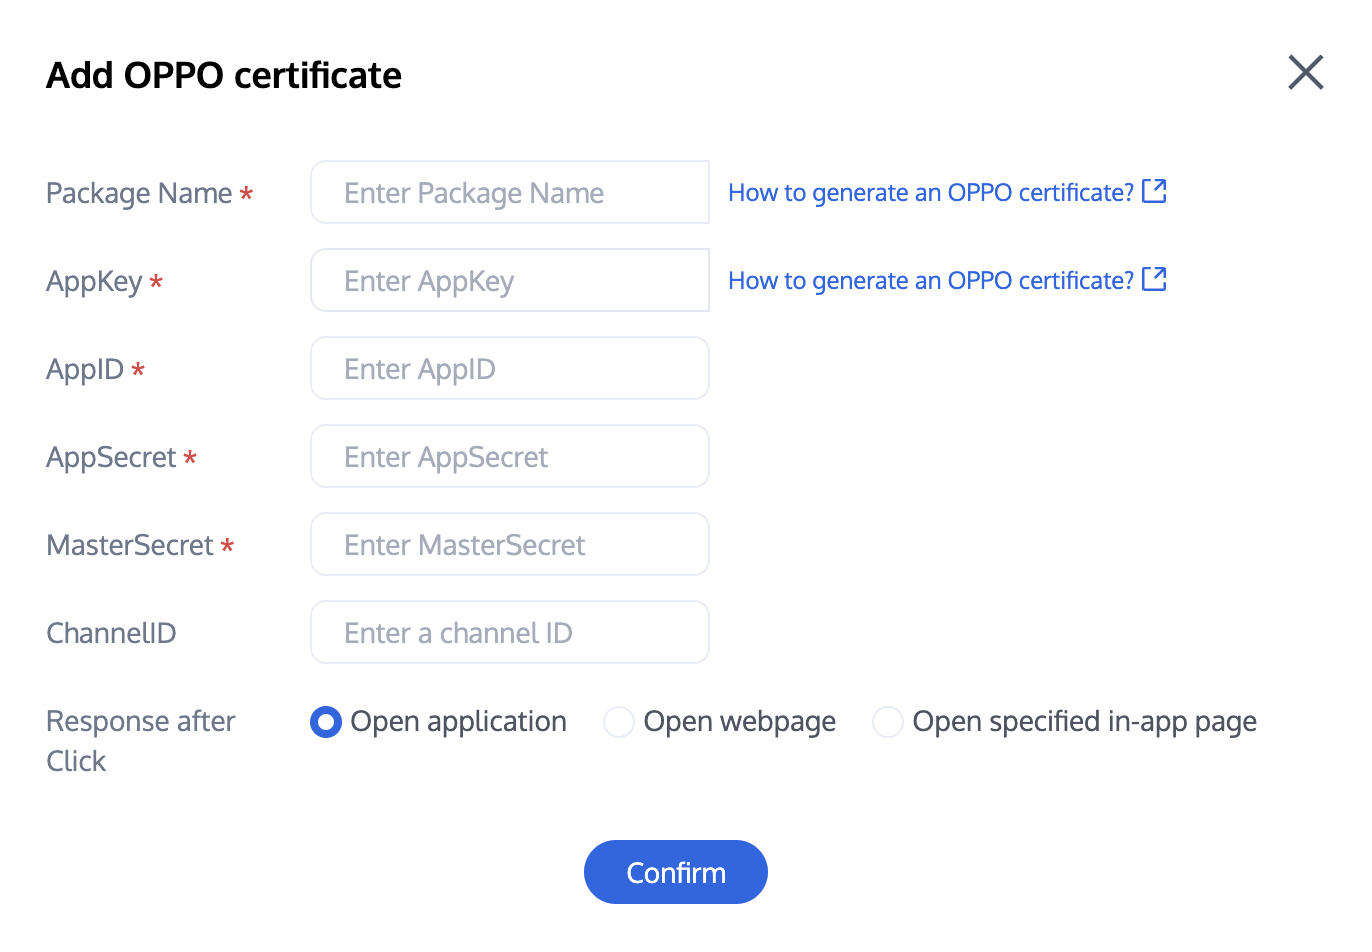
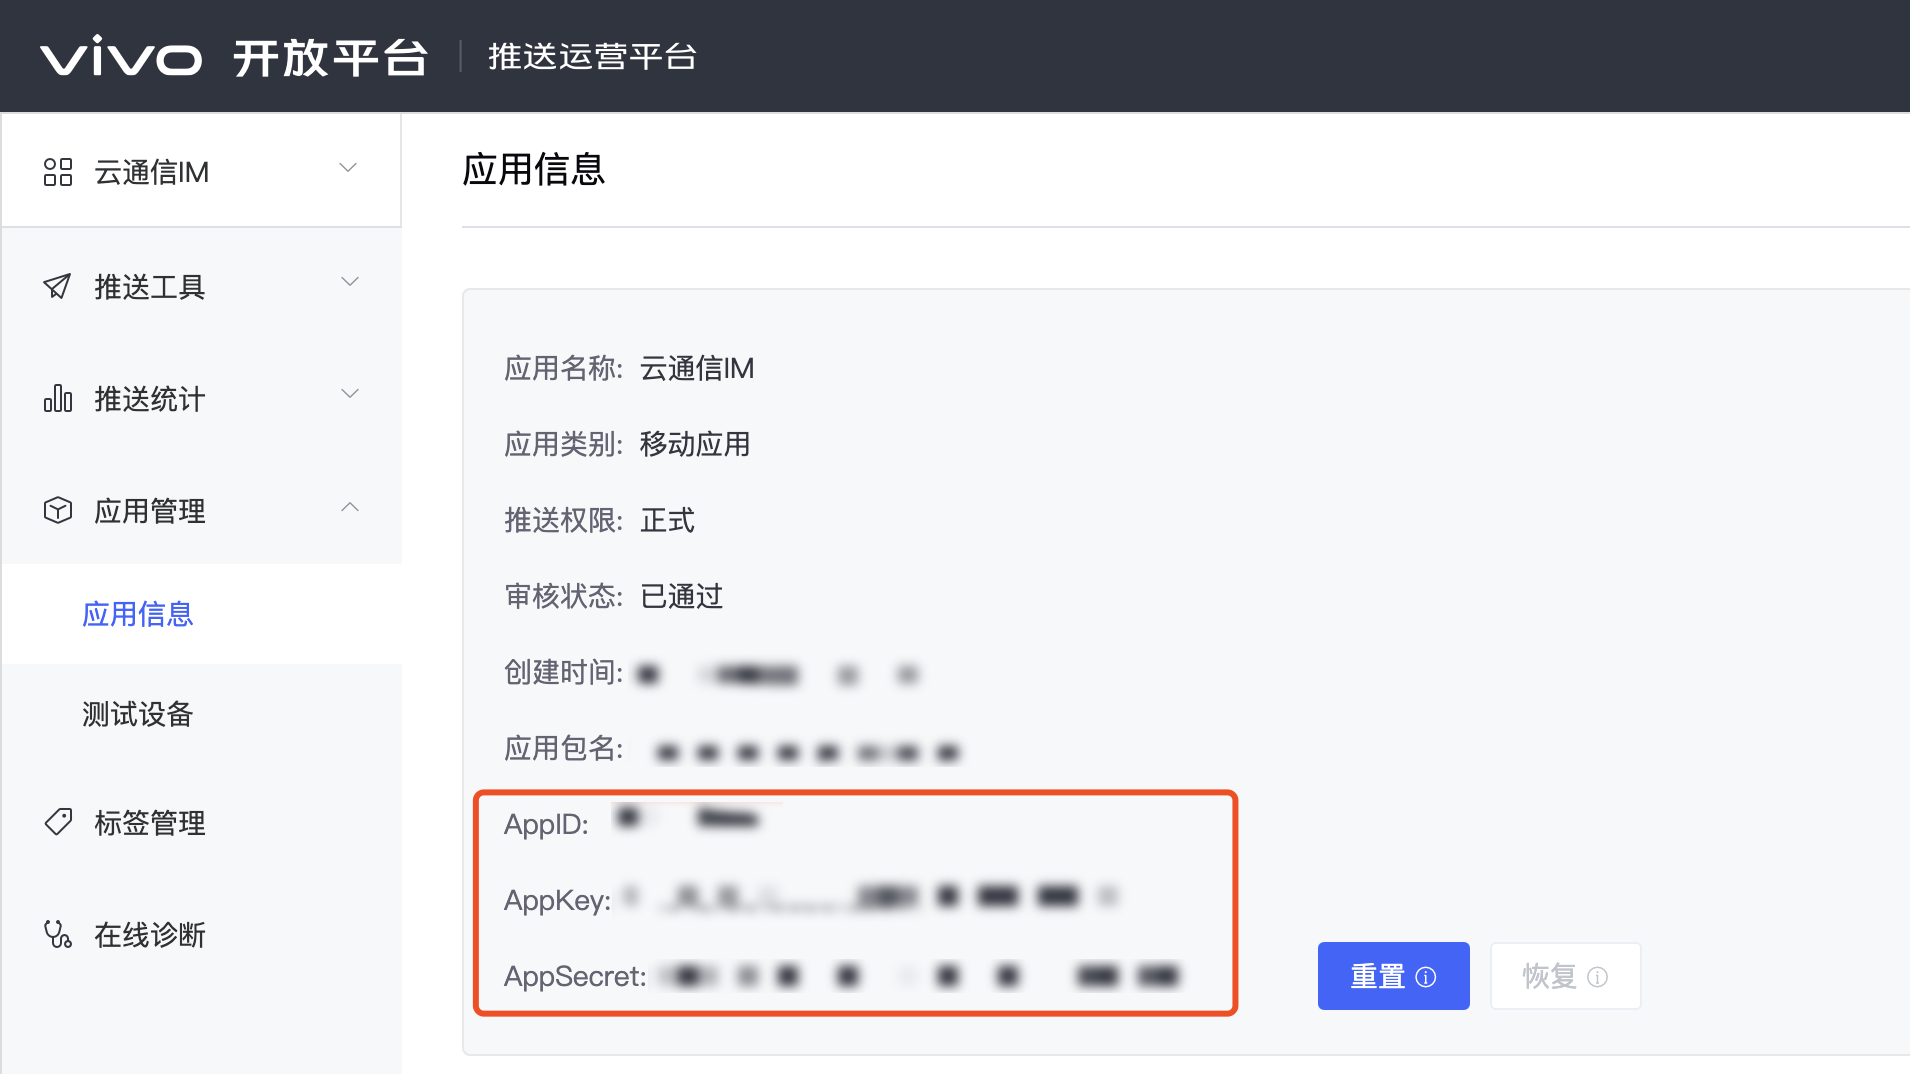
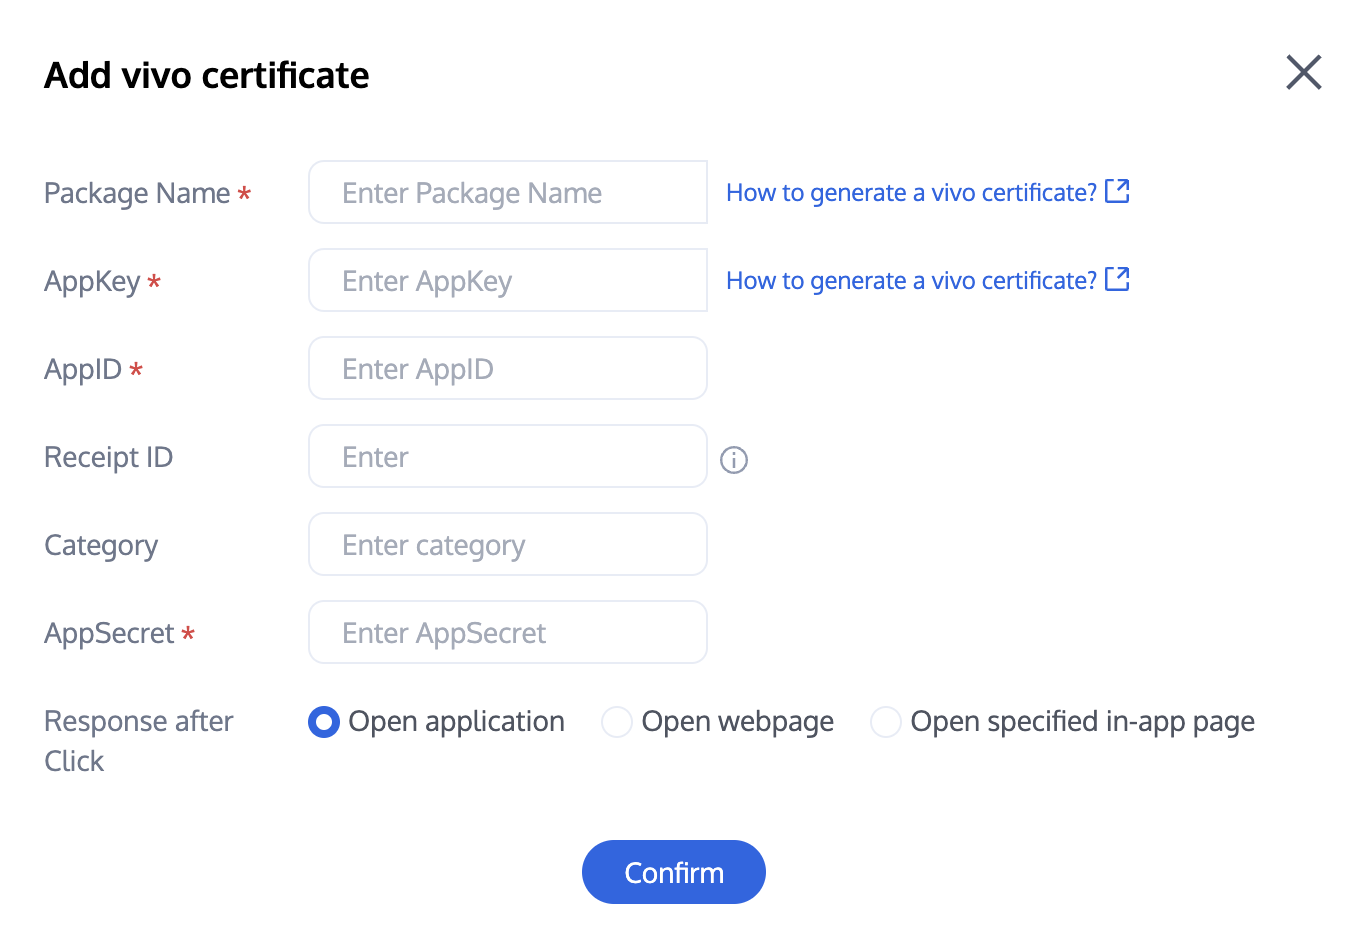
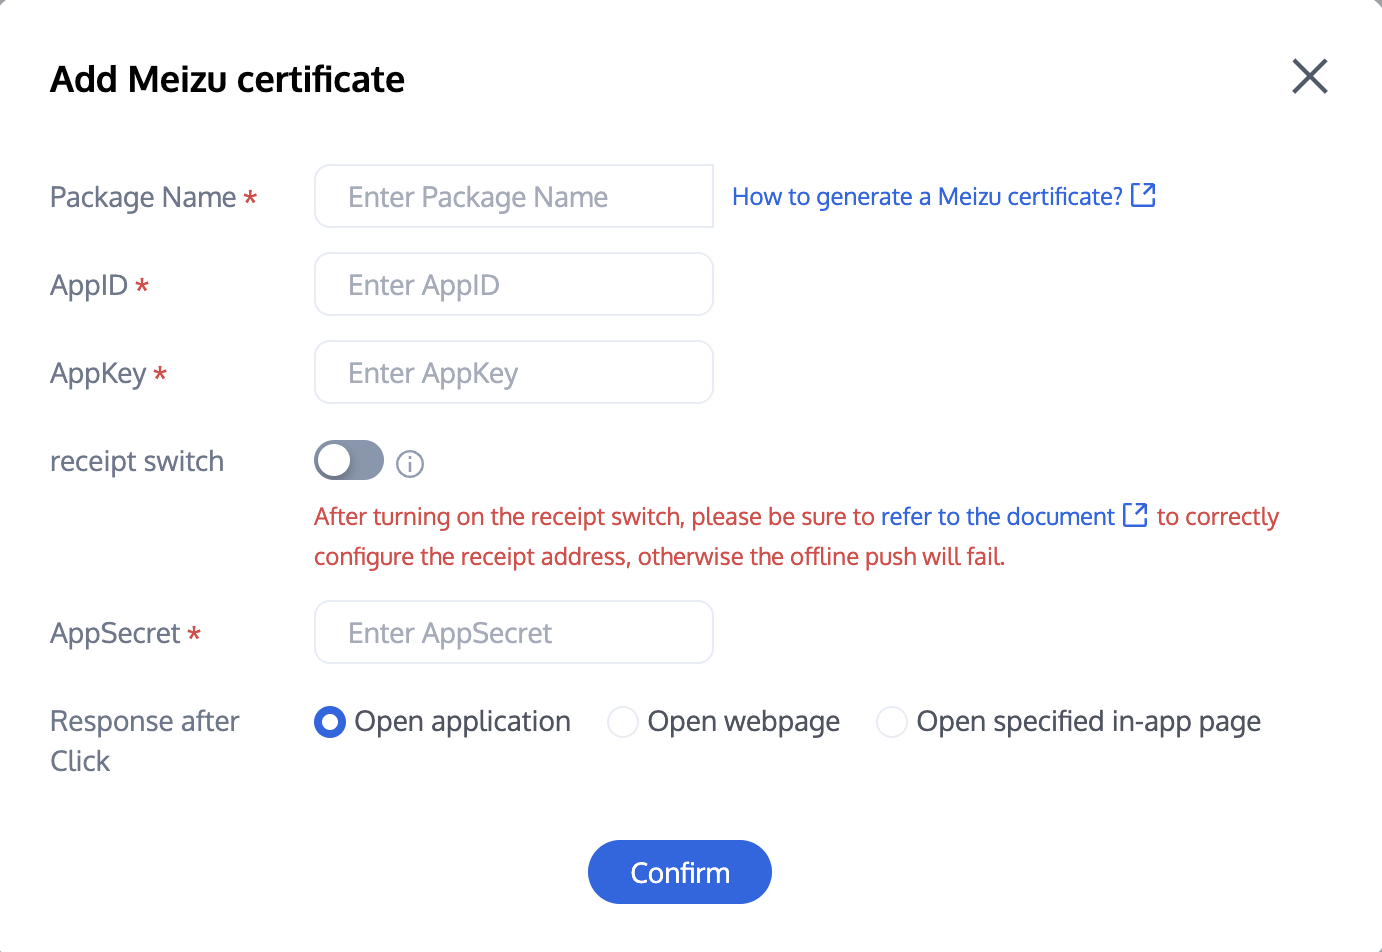
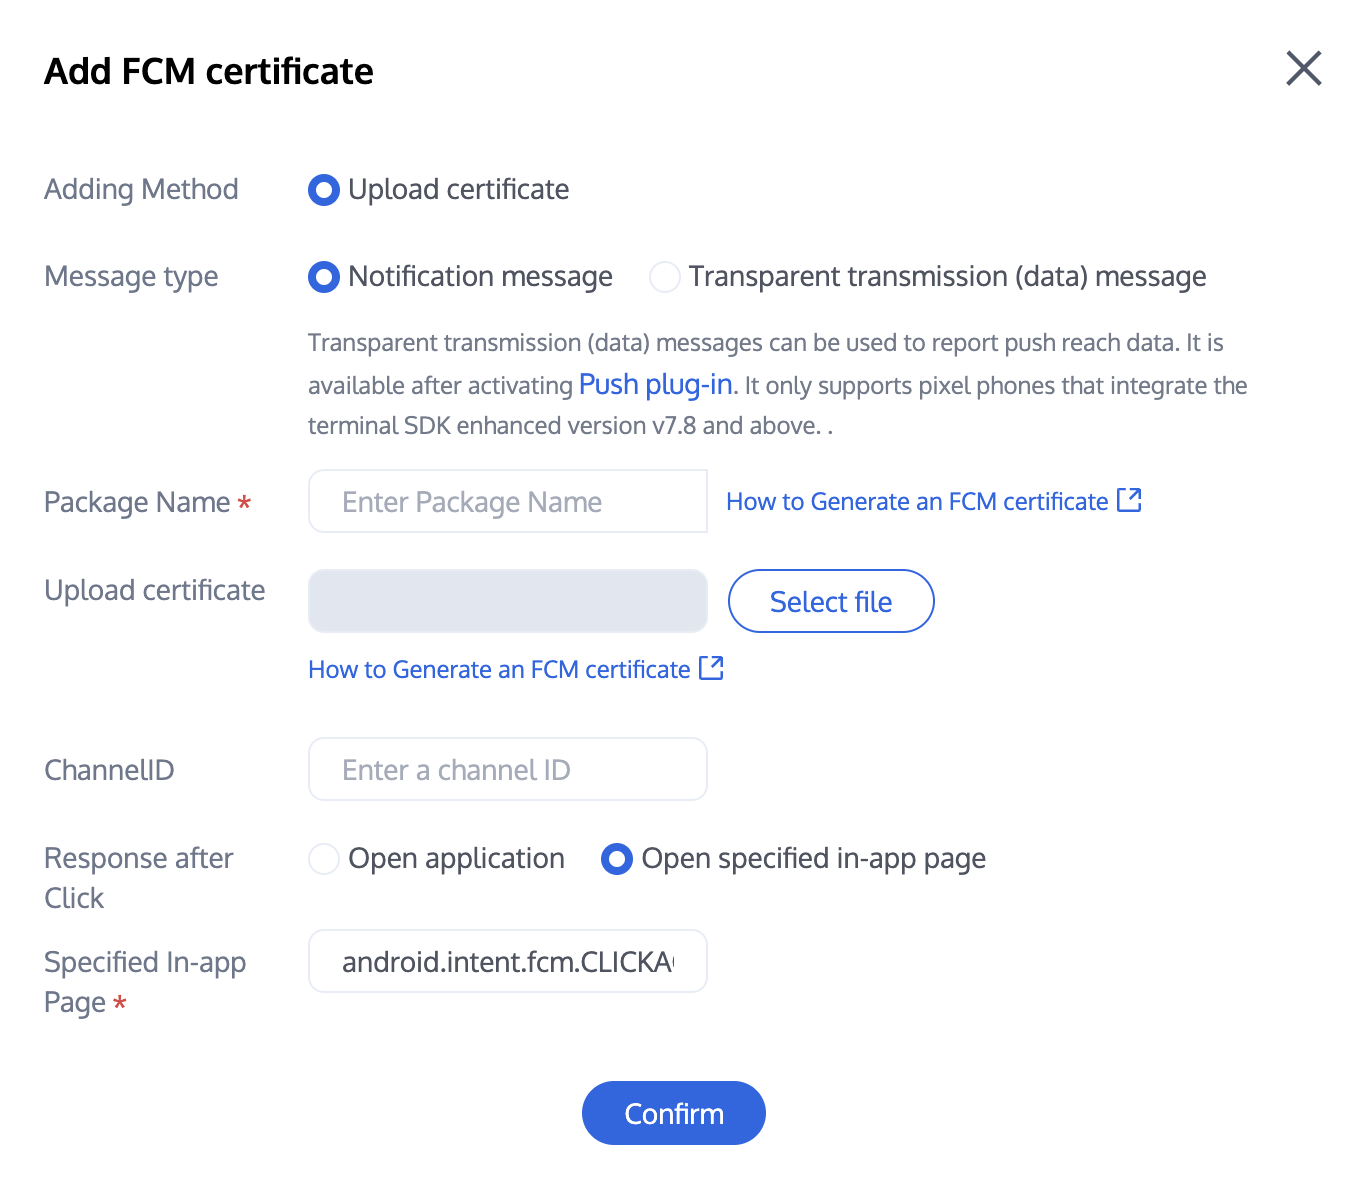
Log in to Tencent Cloud Chat Console, then in the Push Management > Access Settings feature section, add each vendor's push certificate, and configure the AppID, AppKey, AppSecret, and other parameters obtained in Step 1 to the added push certificate.
Explanation of the Subsequent Actions option:
Open Application: Clicking the notification bar launches the app, by default starting the app's Launcher interface;
Open Web Page: Clicking the notification bar will redirect to the configured web link;
Open the specified interface within the app: clicking the notification bar will redirect the interface based on the configured self Definition, see Custom Redirect on Click.
Note:
Each vendor only supports the configuration of one certificate.
Vendor Push Platform | Configuring in the Chat console |
 |  |
Vendor Push Platform | Configuring in the Chat console |
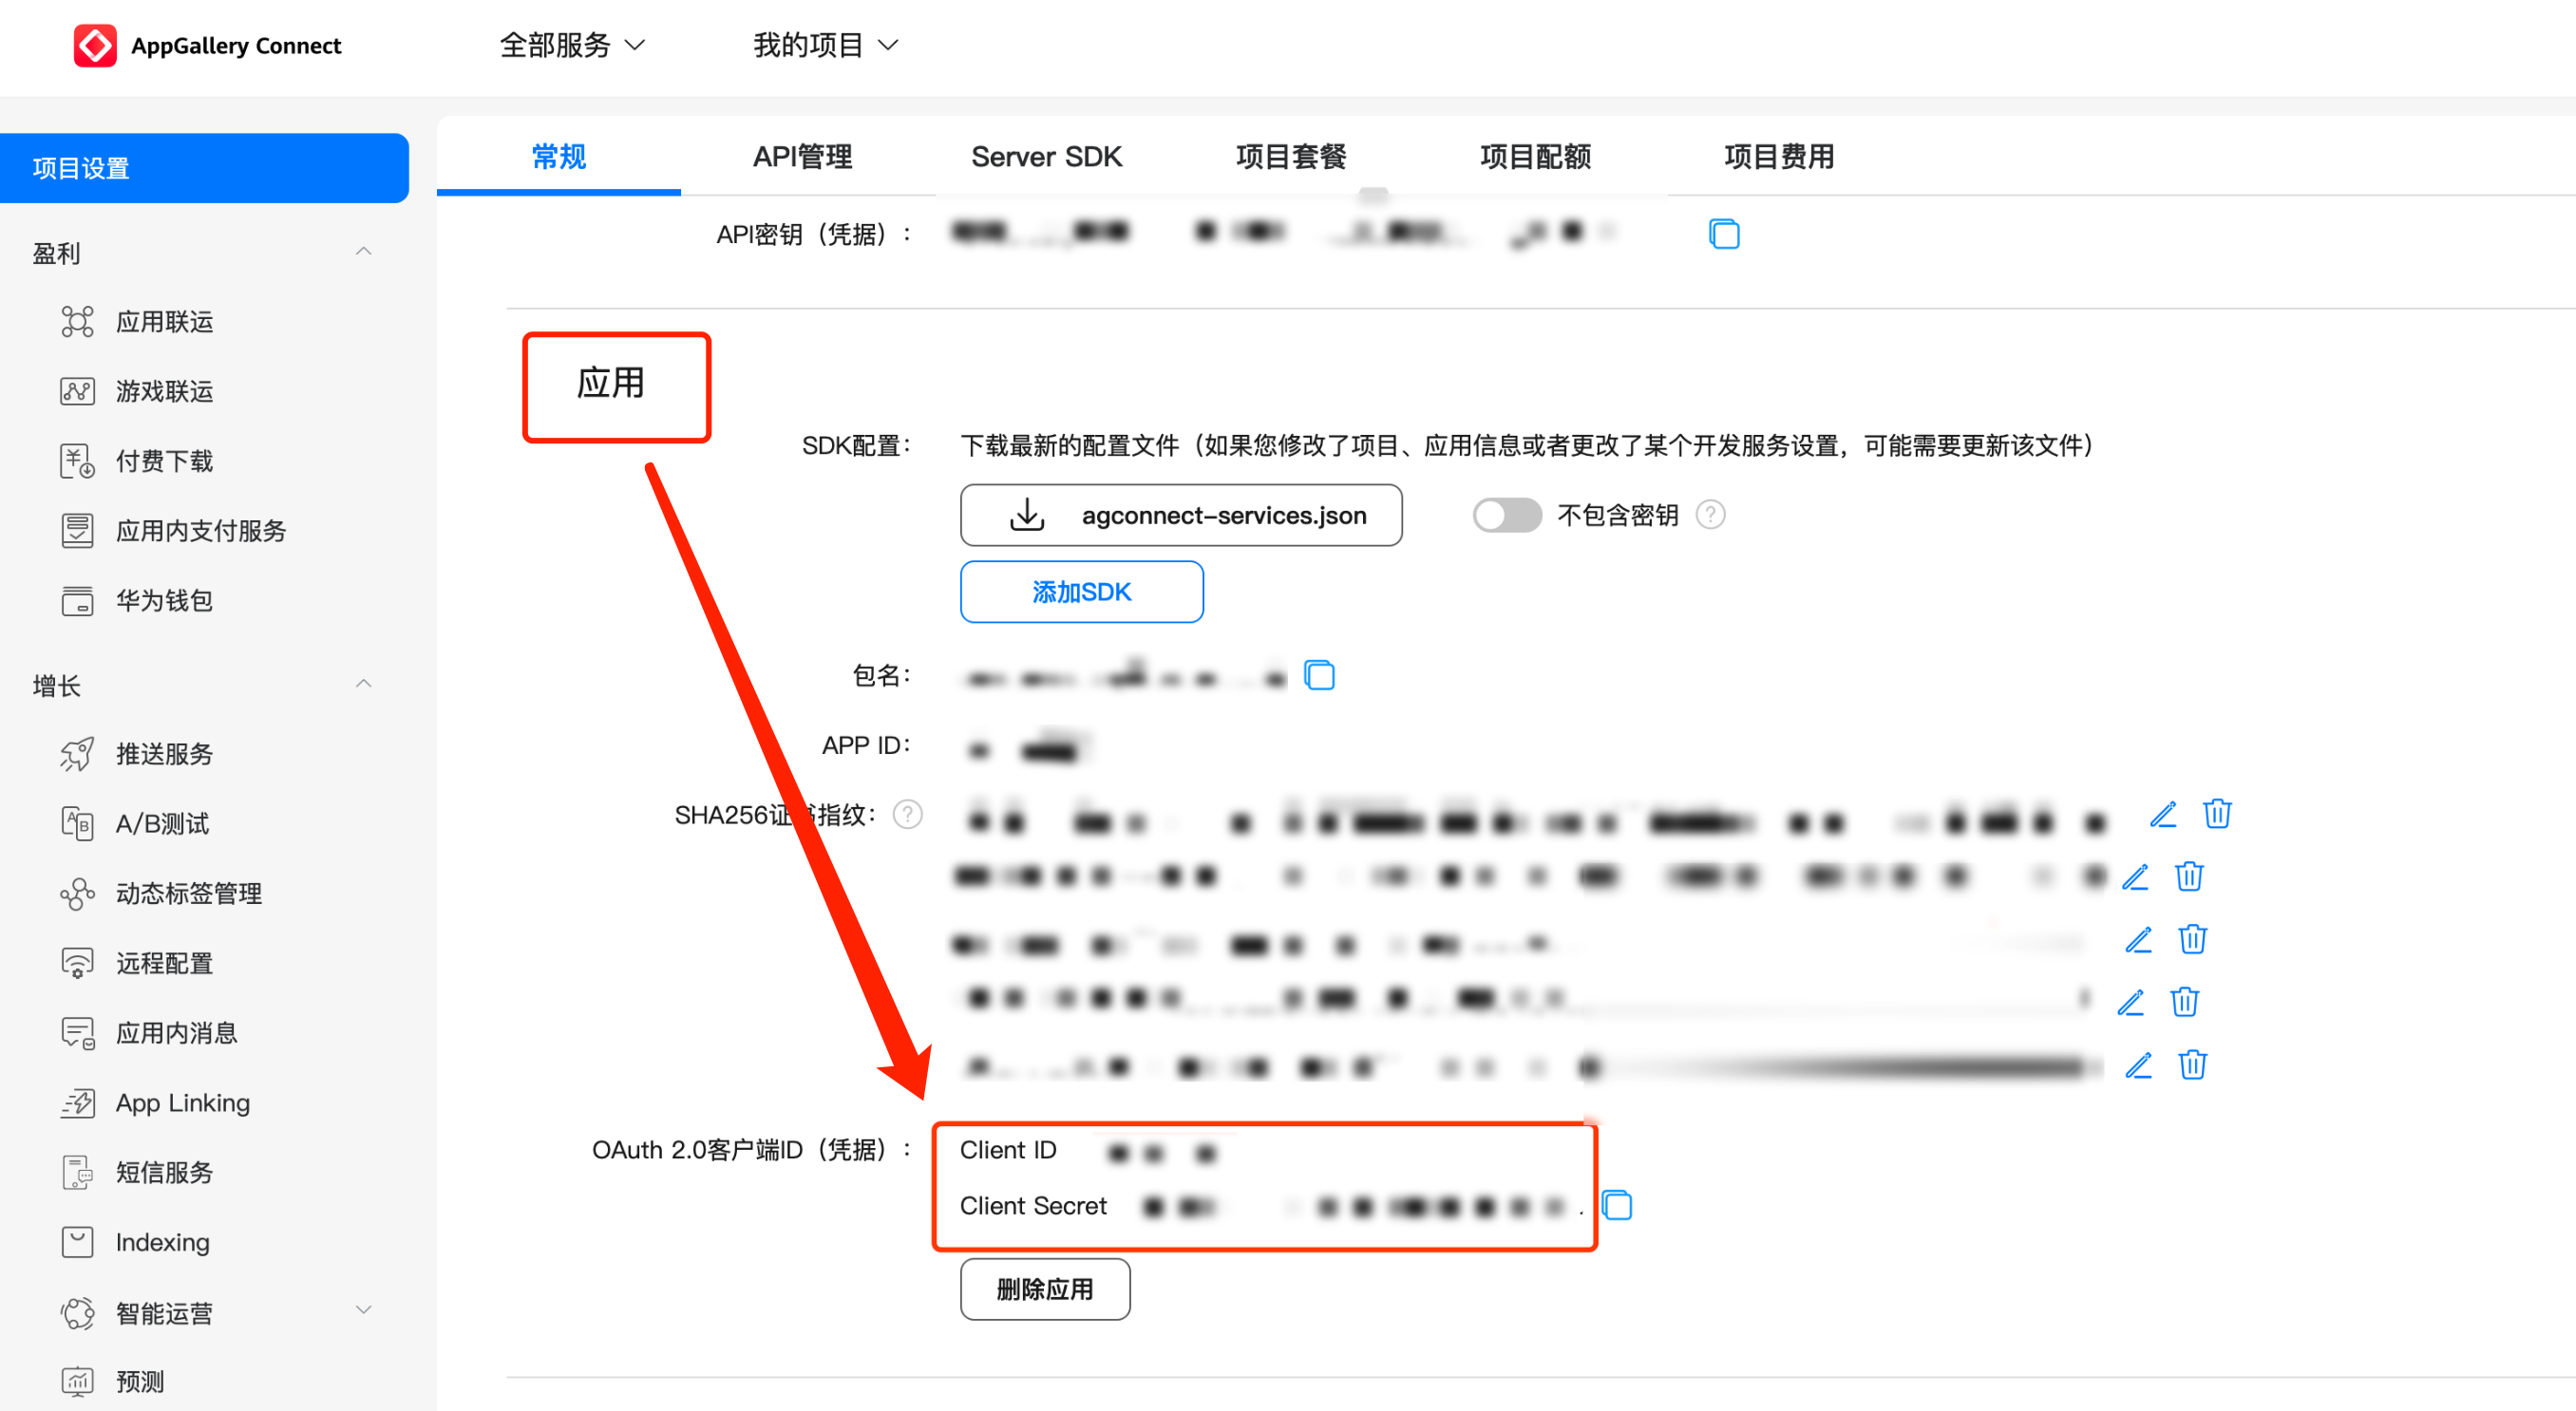 |  Note: Client ID corresponds to AppID, Client Secret corresponds to AppSecret. |
Vendor Push Platform | Configuring in the Chat console |
 |  |
Vendor Push Platform | Configuring in the Chat console |
 |  |
Vendor Push Platform | Configuring in the Chat console |
 |  |
Vendor Push Platform | Configuring in the Chat console |
 |  |
Vendor Push Platform | Configuring in the Chat console |
 |  |
Note:
Regarding Click for Subsequent Actions supports the Report Statistics feature:
1. If you choose to open an app or a web page, purchasing the plugin will by default support reporting statistics.
2. If you choose to open a specified interface within the application:
For new certificate status, please directly use the auto-fill default value to support click statistics reporting.
If there was a certificate configured previously, continue using the old certificate and modify it to the default value to support reporting statistics, or regenerate a new certificate.
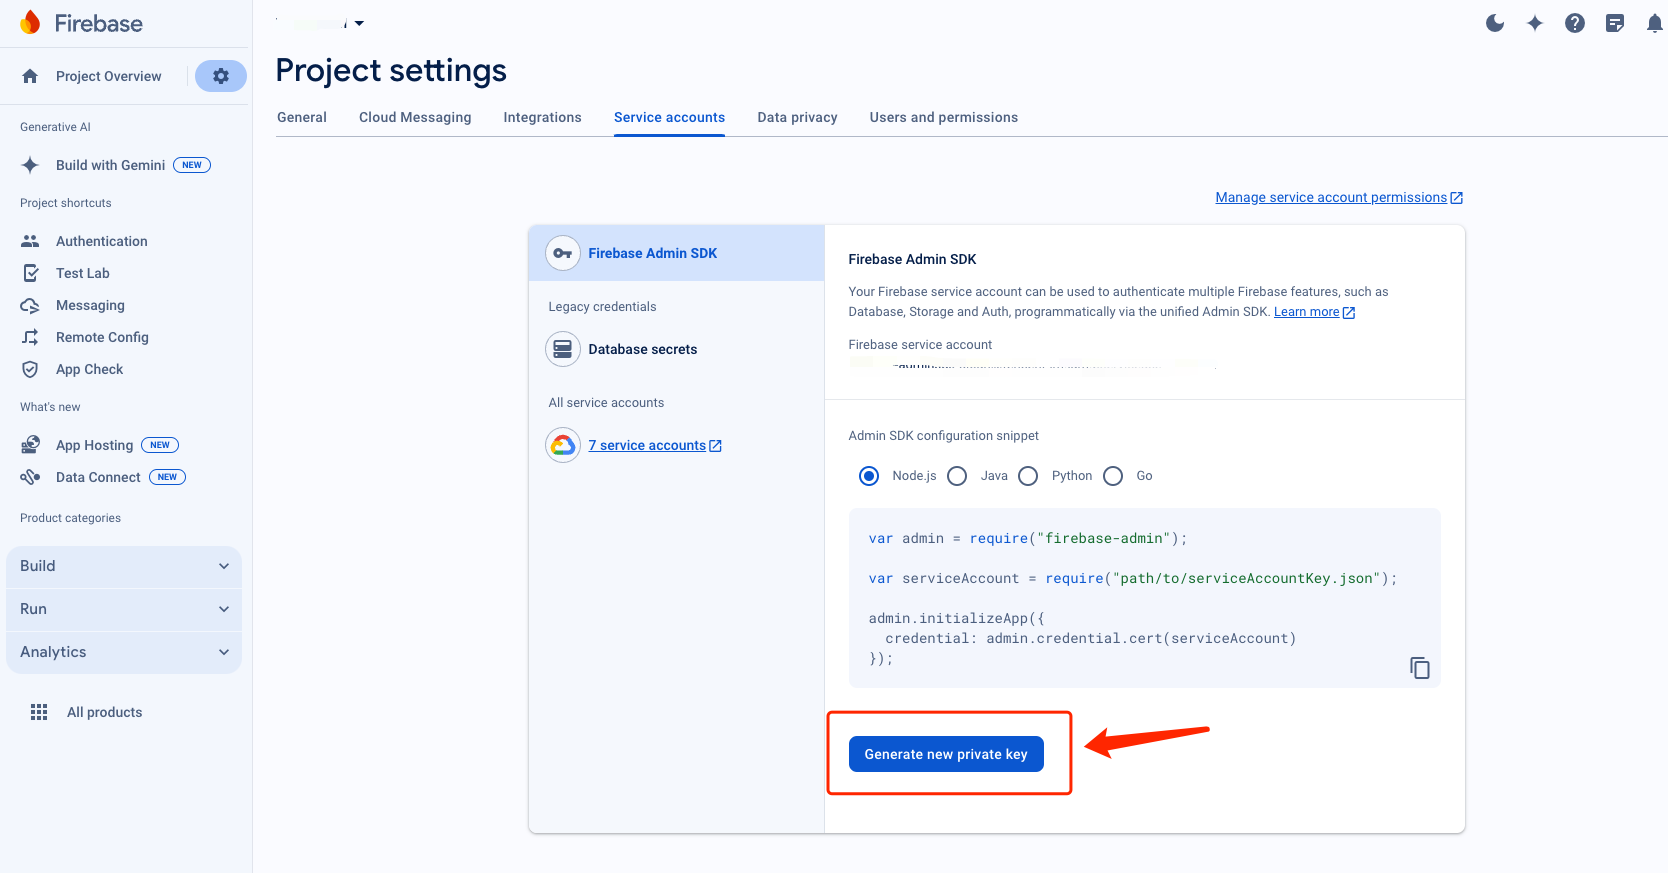
About FCM Data Messaging
FCM provides two push methods: Notification Message and Data Messaging.
Notification messages have a simple style and do not differentiate between devices. Once successfully integrated, offline push can be performed.
Data Messaging, offering rich customization for specific devices, supports reach and click reporting, and requires testing on the device before going live after integration.
The console defaults to Notification Message, and switching between modes can be done in the Chat Console:

Note:
FCM data messaging capability only supports TIMPush version 7.8 and above on pixel phones. Other manufacturers' devices need to be tested for support.
Bantuan dan Dukungan
Apakah halaman ini membantu?
Anda juga dapat Menghubungi Penjualan atau Mengirimkan Tiket untuk meminta bantuan.
masukan