基本配置
Download
聚焦模式
字号
应用套餐包信息
升级套餐包
禁用/删除应用
禁用/删除应用重要提醒:
发起自助禁用/禁用后启用/删除应用后,全量生效需要3分钟 - 5分钟,请耐心等待。
禁用操作需要 3-5 分钟完全生效。在此期间,新用户仍可进入房间,按量计费将继续。
禁用/删除生效后,应用的所有产品(Call、Conference、RTC Engine、Live、Chat 等)及其对应的所有功能将不可用。
正常状态下,无法删除应用;请先自助禁用后再删除。
体验版应用
支持手动禁用:在基本信息区域,单击状态右侧的禁用,在弹出的禁用提醒对话框中,单击确定即可禁用。
支持手动删除:在基本信息区域,单击状态右侧的删除,在弹出的删除确认对话框中,单击确定即可删除。
标准版、专业版、专业版 Plus、企业版应用
欠费24小时后自动变为禁用状态,如需删除,请 联系我们 删除该应用。
退费后自动变为禁用状态,如需删除,请 联系我们 删除该应用。
注意:
删除应用前需先禁用该应用。
删除、禁用应用后,所有子服务将会停服。

延长体验版有效期
当应用套餐包为体验版且超过一个月有效期时,应用将处于到期禁用状态。如需继续使用体验版测试开发,可在控制台对该应用进行申请延期操作。
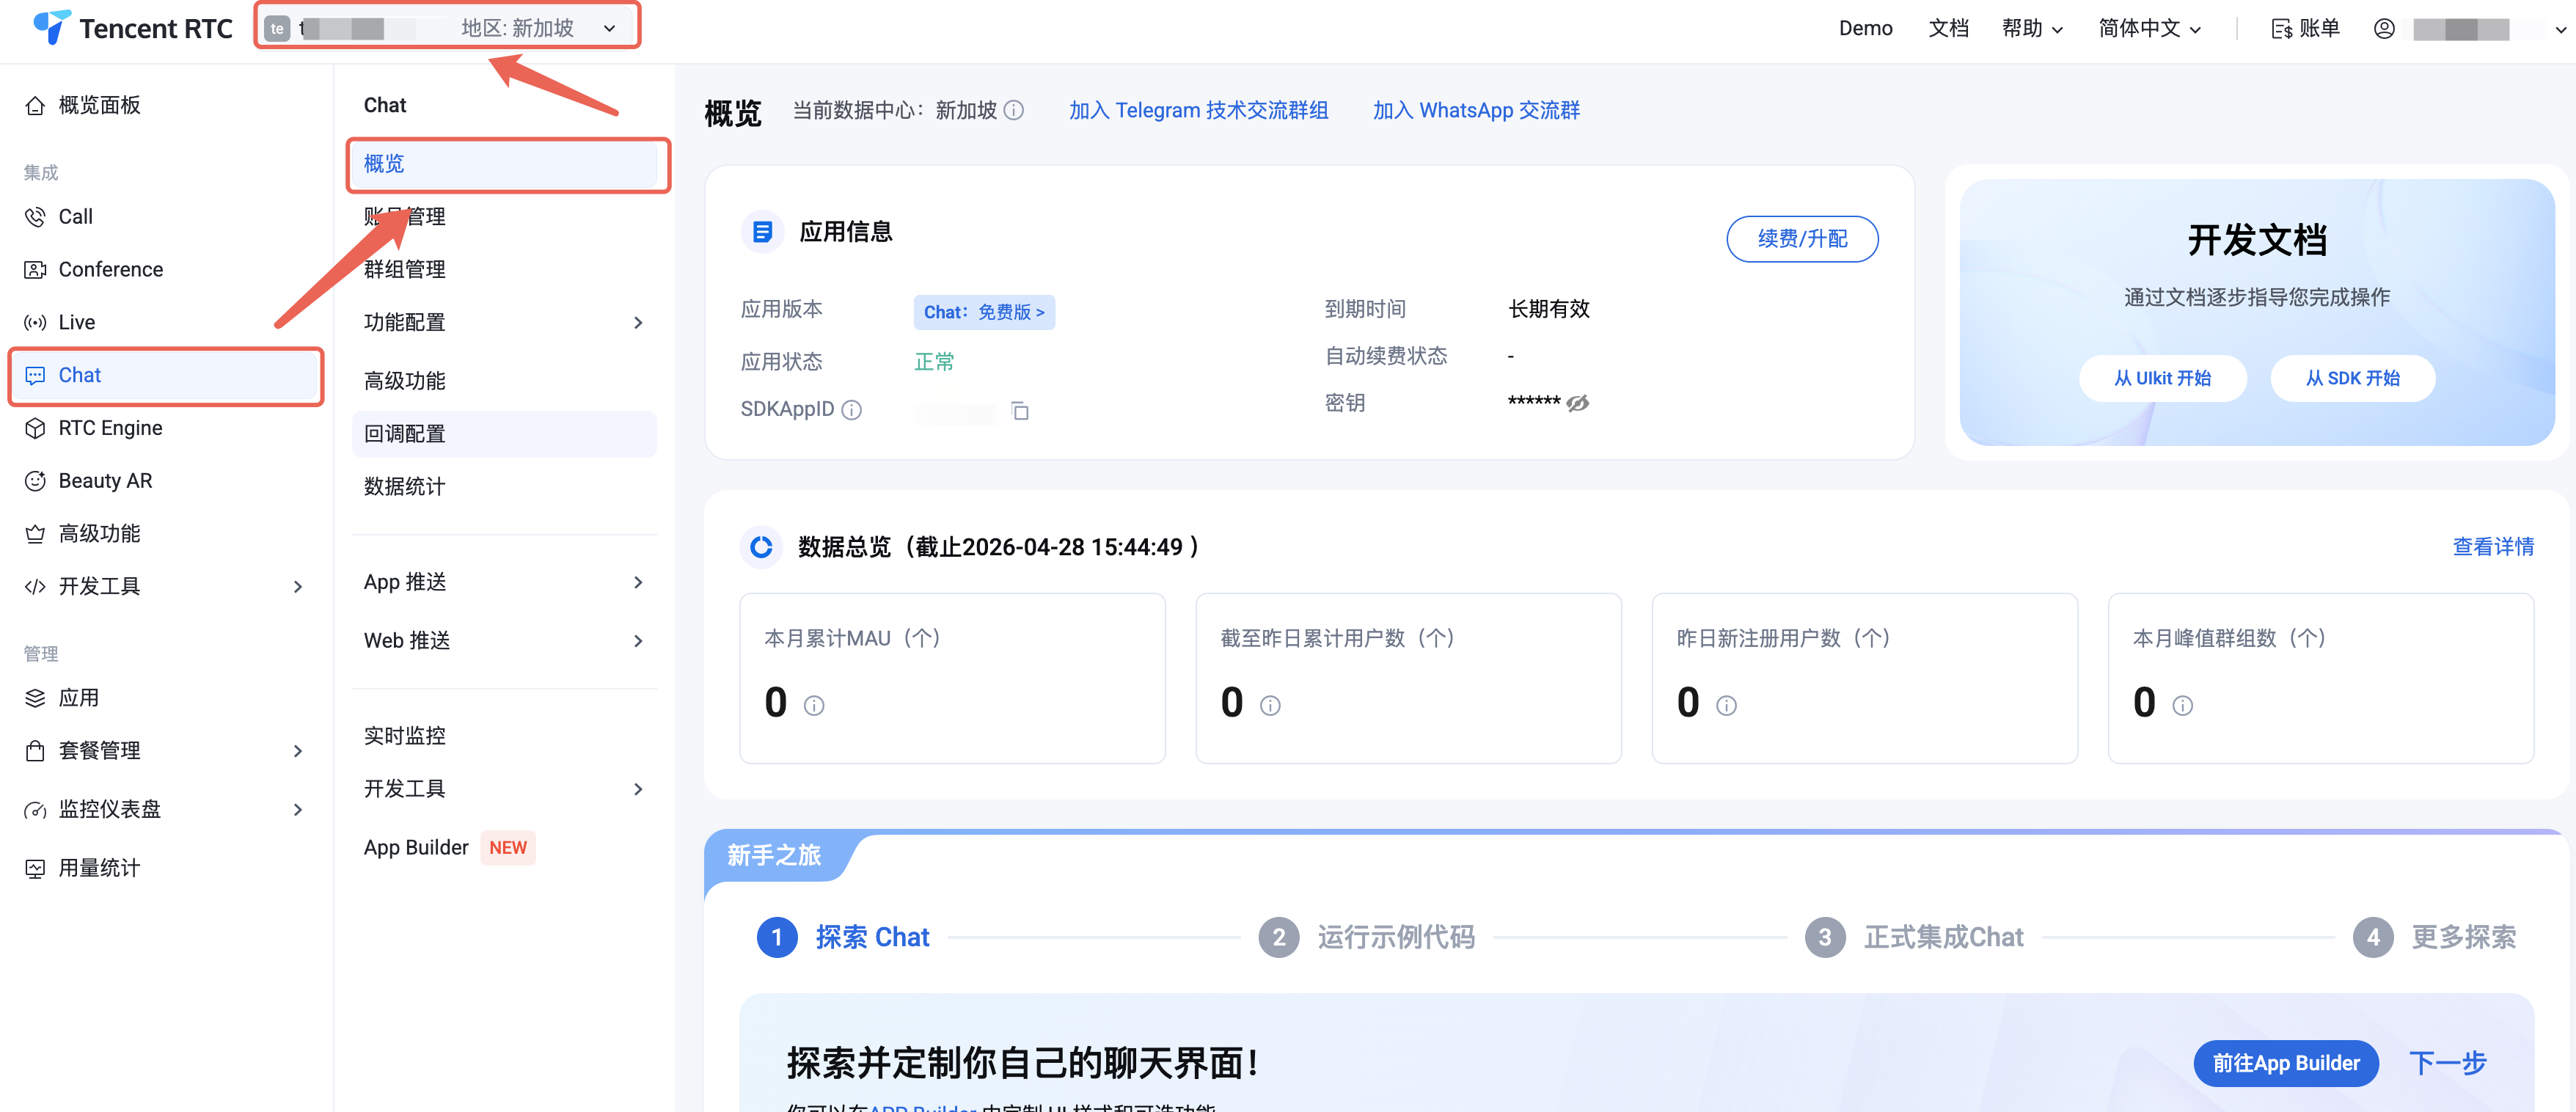
1. 前往 控制台 > Chat 应用详情页面 ,在顶部选择目标应用,进入该应用的概览页面。
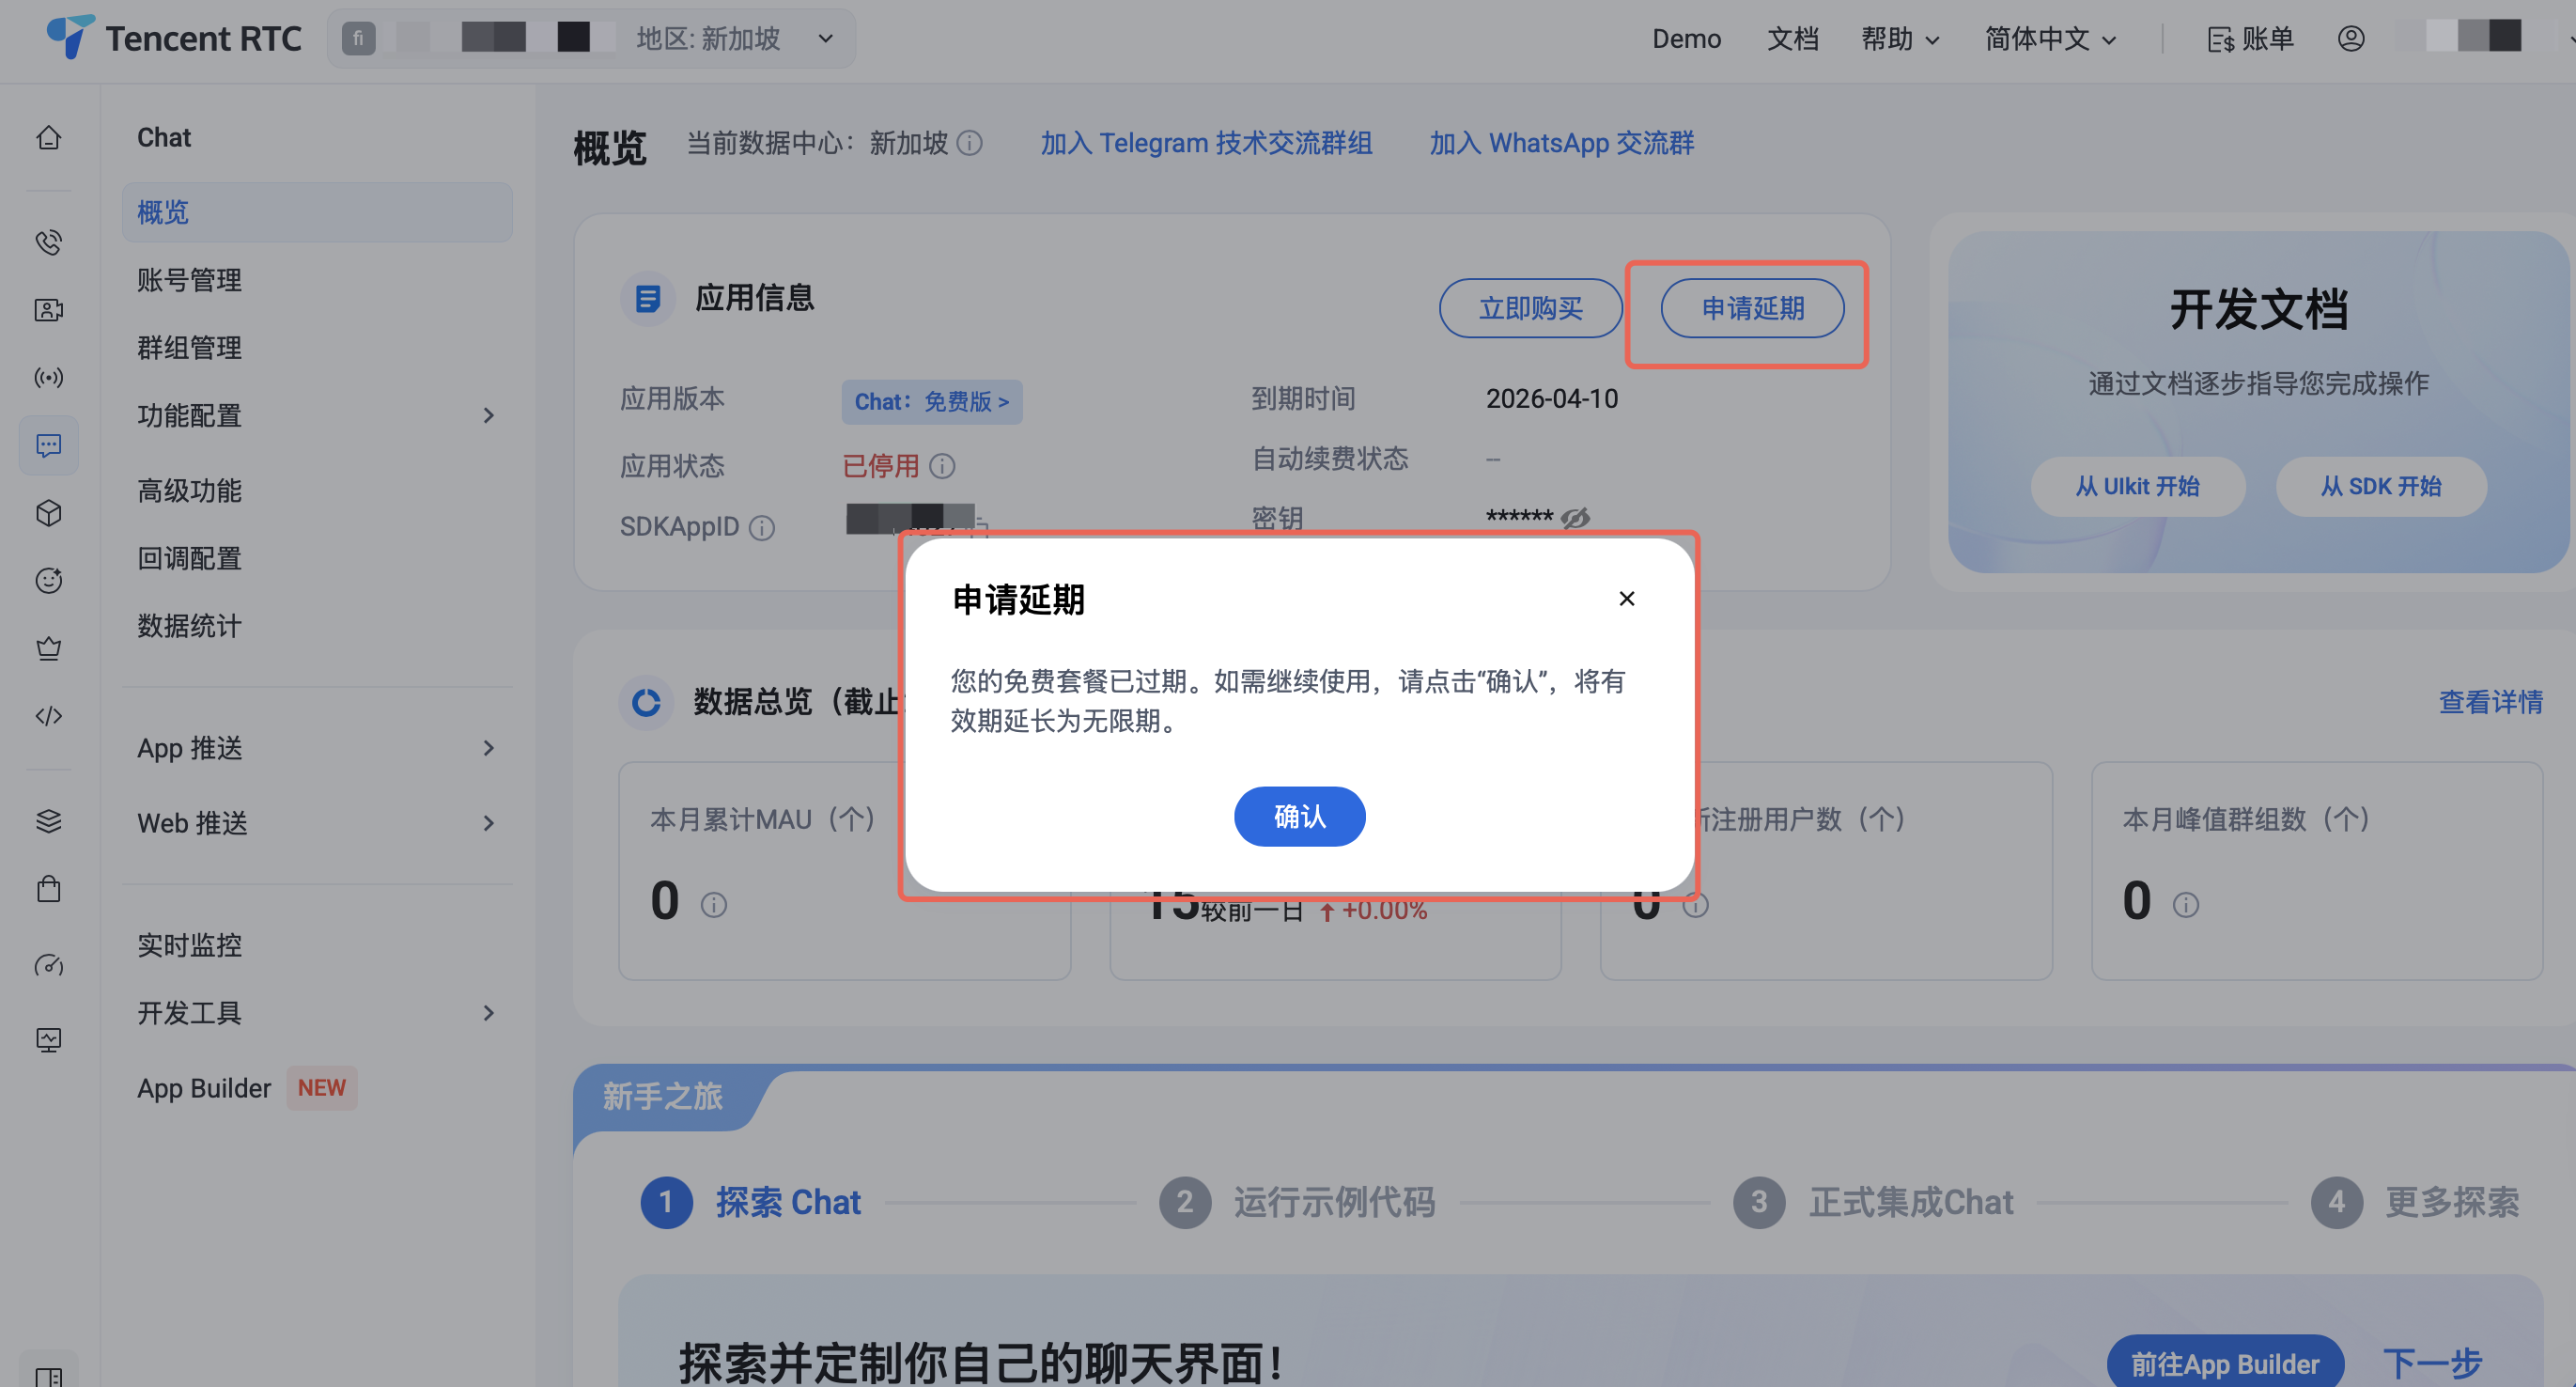
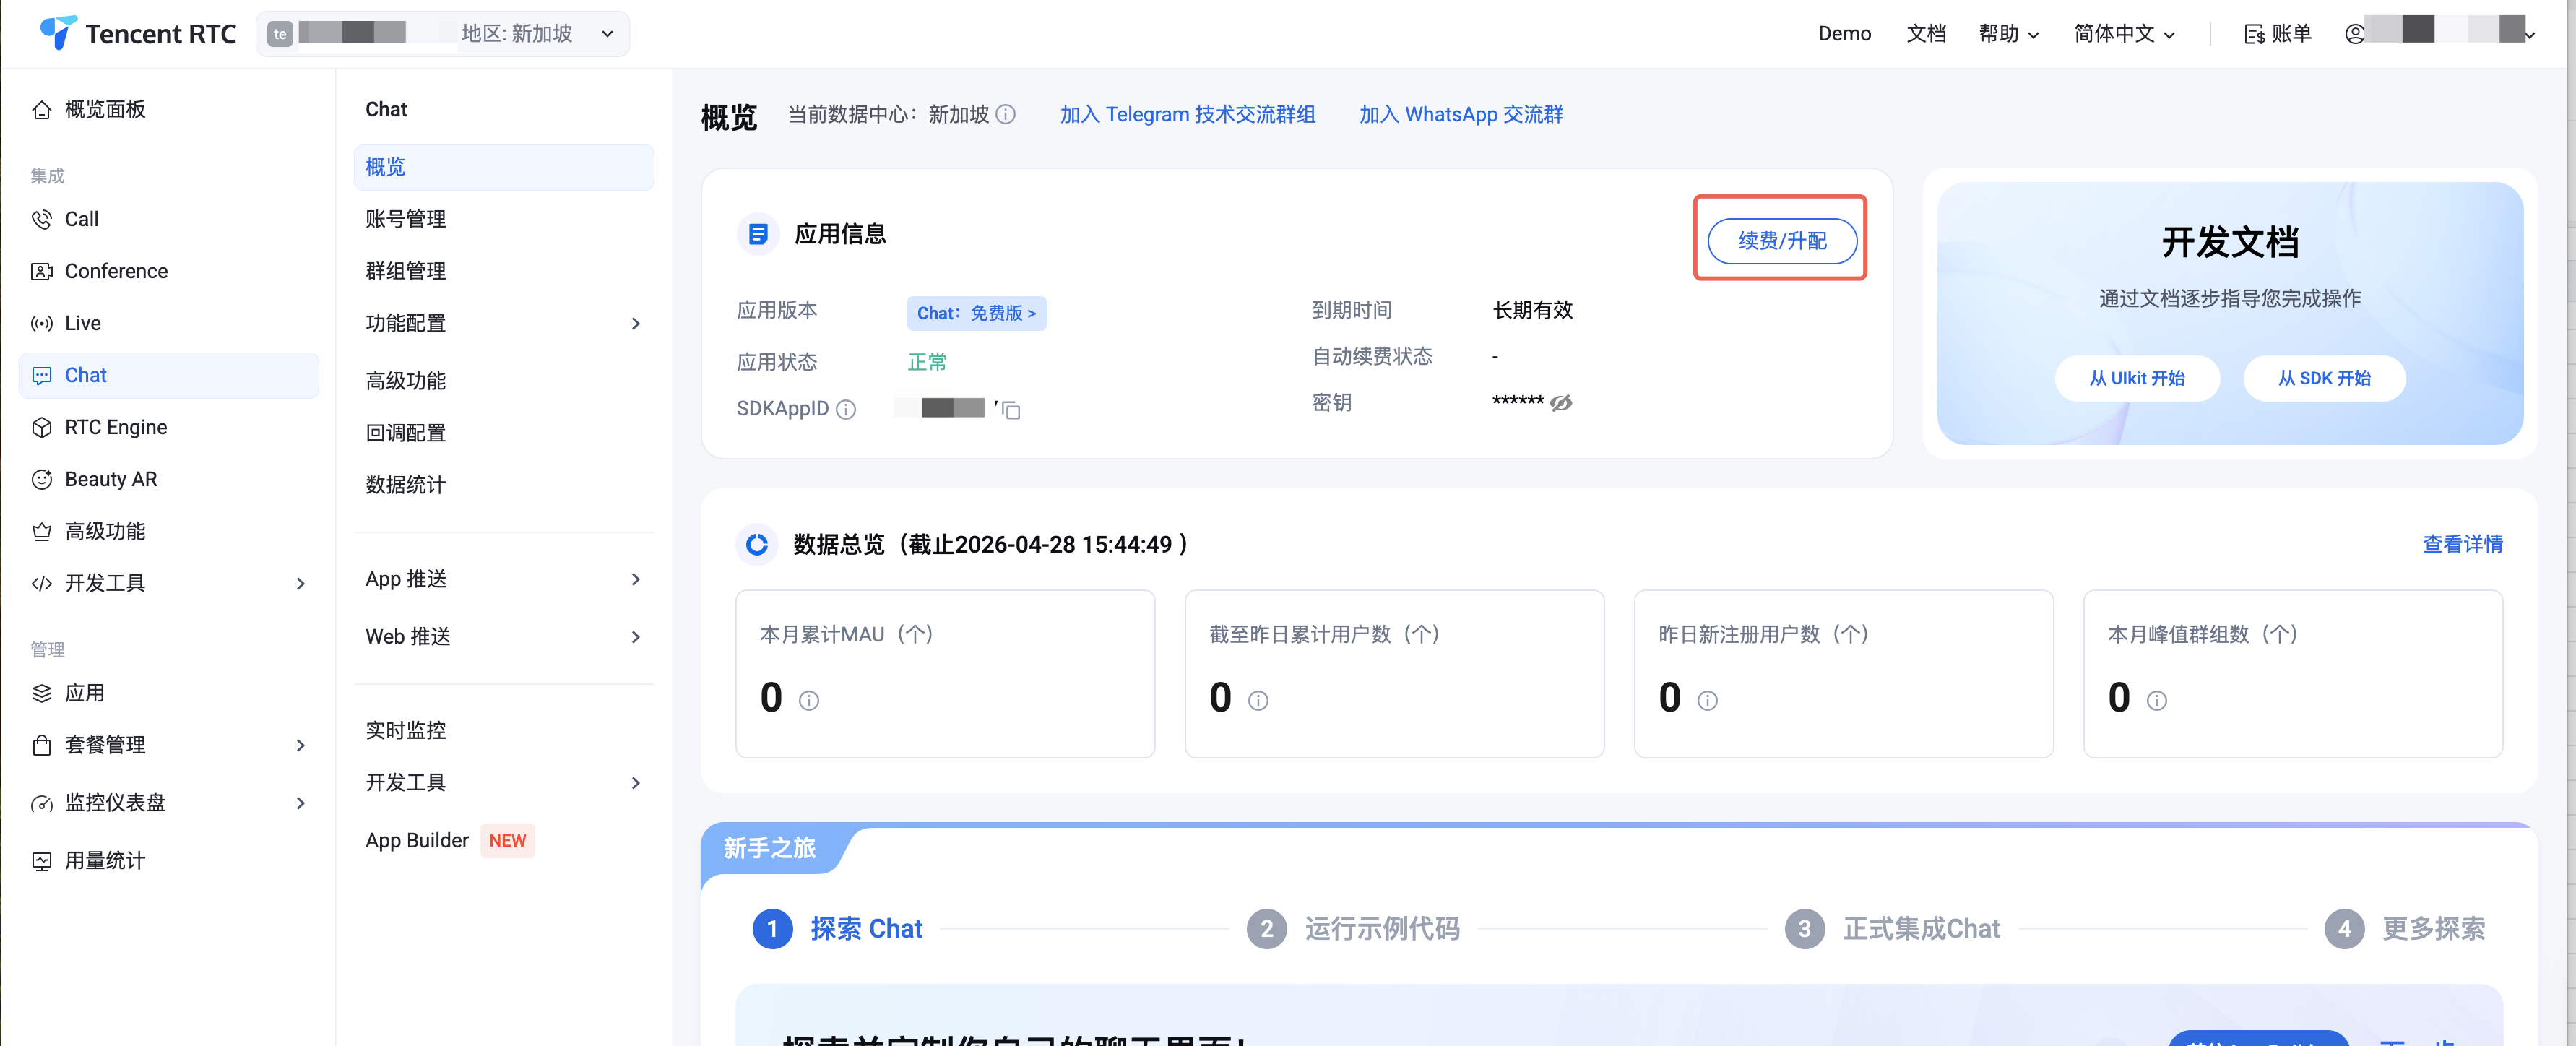
2. 单击基础信息区域的申请延期。
3. 单击确认完成体验版延长一个月有效期申请。
配置应用资料
在基础信息区域,您可以编辑该应用的基本信息,包括应用名称和描述。

编辑基本信息
1. 单击修改按钮,进入应用设置的编辑状态。
2. 您可以修改应用名称和描述。
3. 单击保存。
配置基础信息
在基础信息区域,您可以获取该应用的密钥。

获取密钥
密钥信息为敏感信息,请妥善保密,谨防泄露。2019年8月15日前创建的应用(SDKAppID)默认使用区分公钥和私钥的 ECDSA-SHA256 签名算法,您可以选择升级至 HMAC-SHA256 签名算法,升级过程不会影响现网业务。
1. 单击密钥右侧的显示密钥。
2. 单击复制即可复制并储存密钥信息。密钥可用于生成 UserSig,详细操作请参见 生成 UserSig。
管理离线推送证书
添加离线推送证书
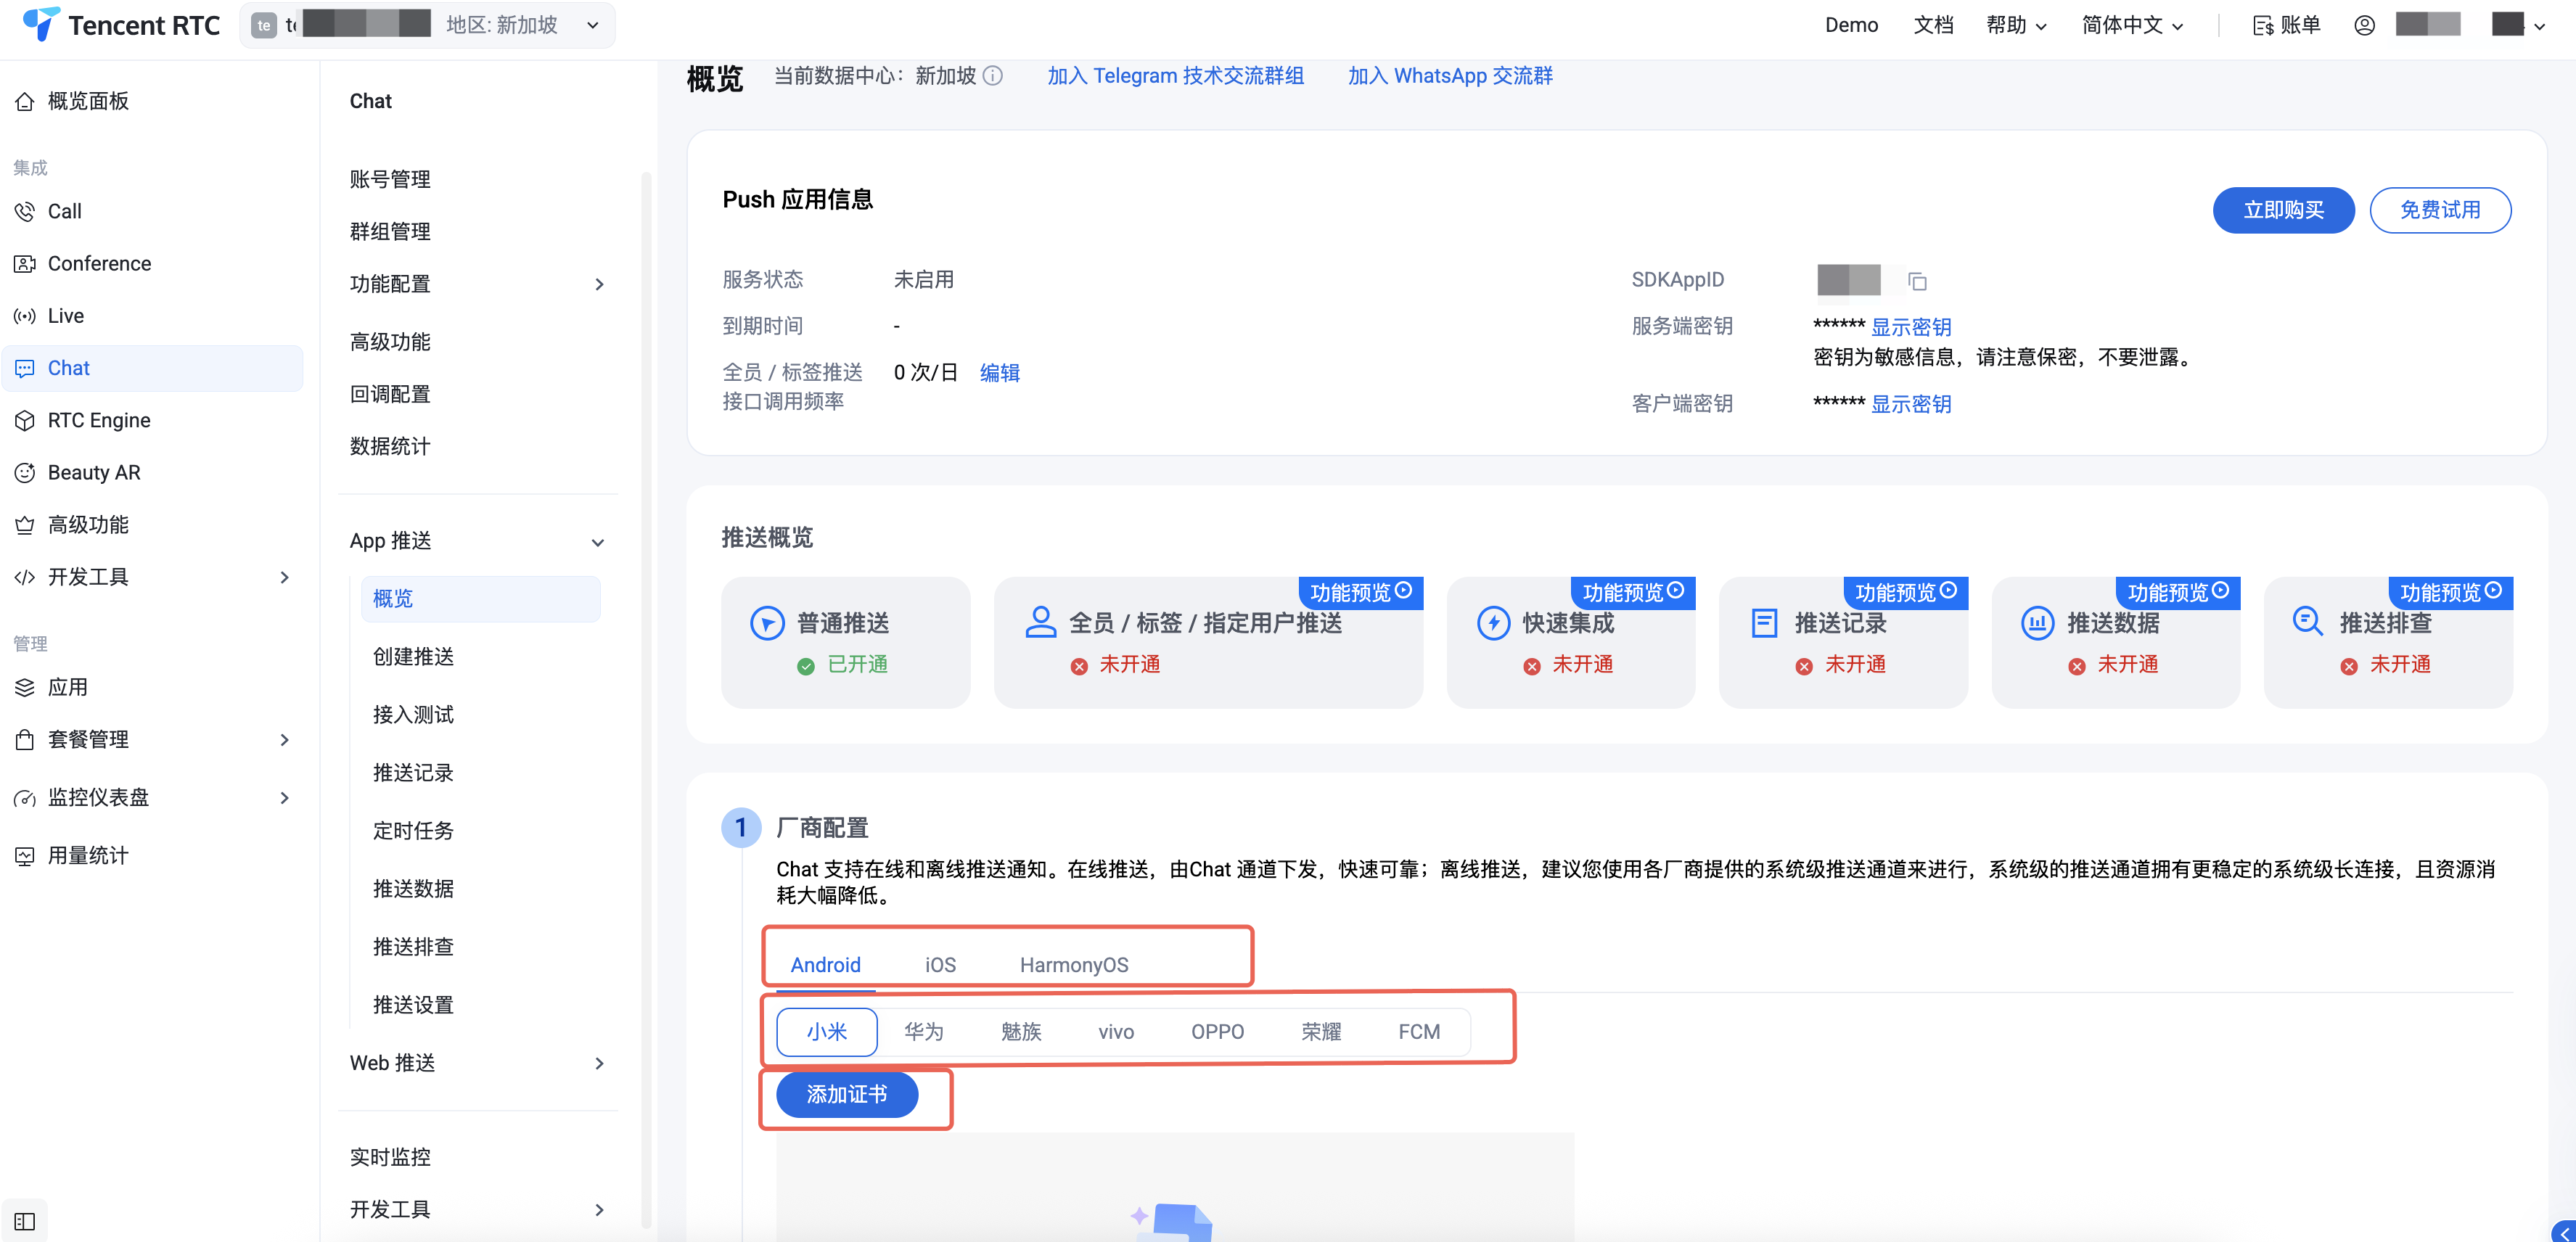
添加 Android 证书
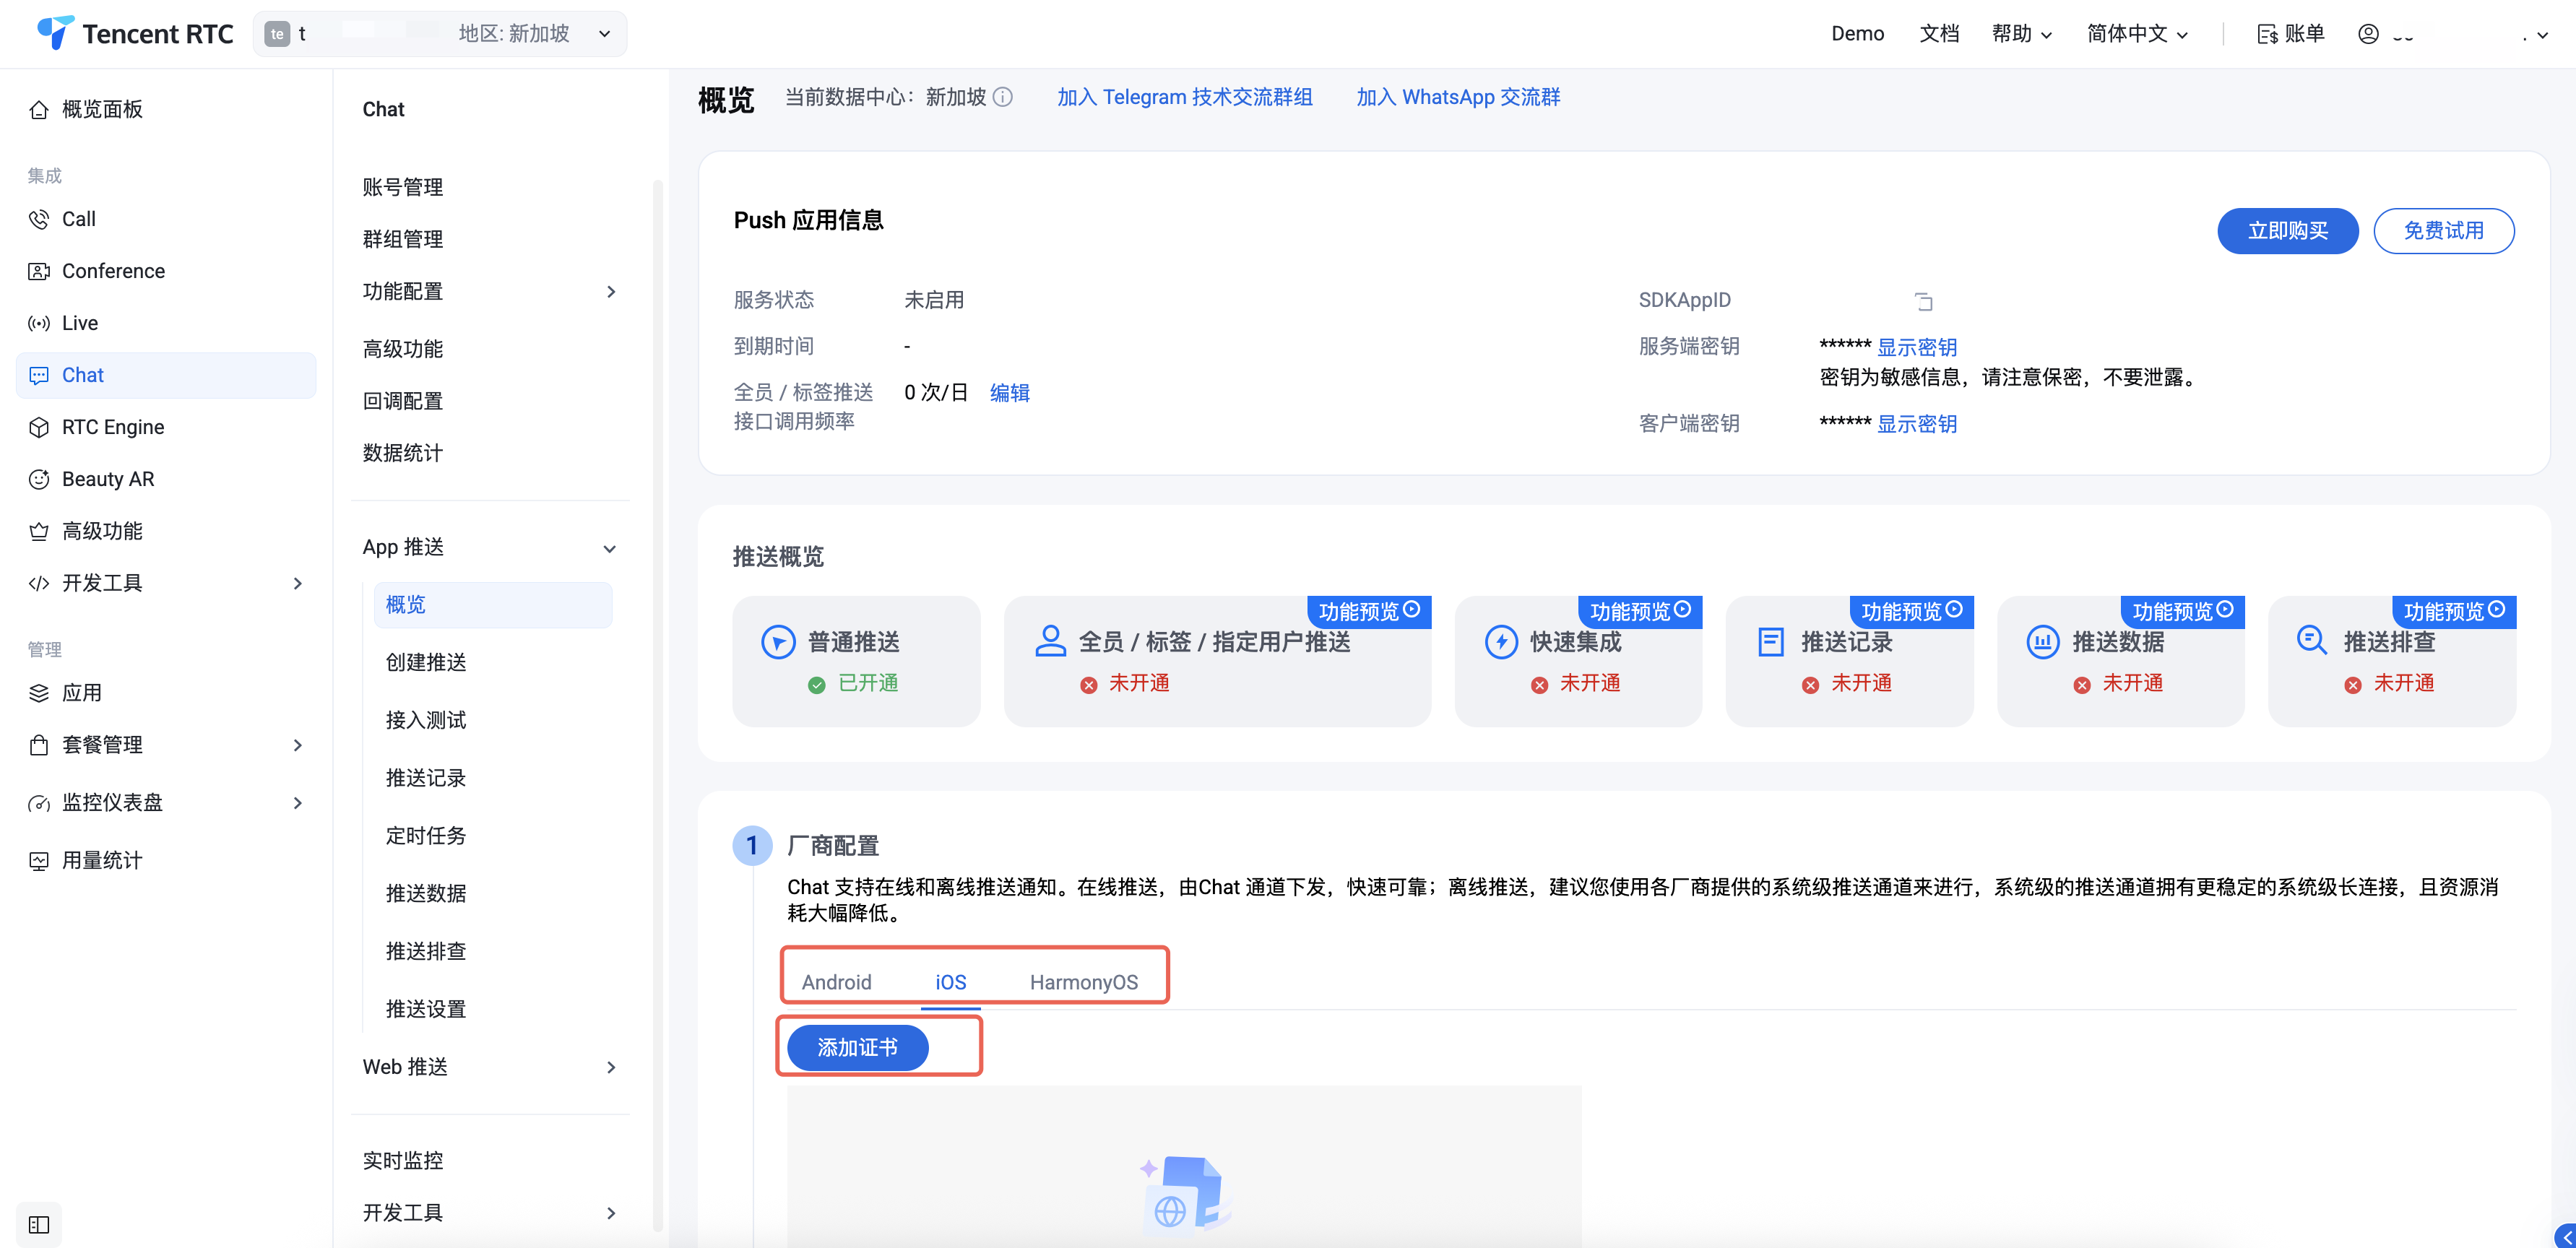
1. 访问 控制台 > Chat > App 推送 > 概览,在 Android 标签下选择目标平台,单击添加证书。
2. 在弹出的添加证书对话框,填写相关参数信息。
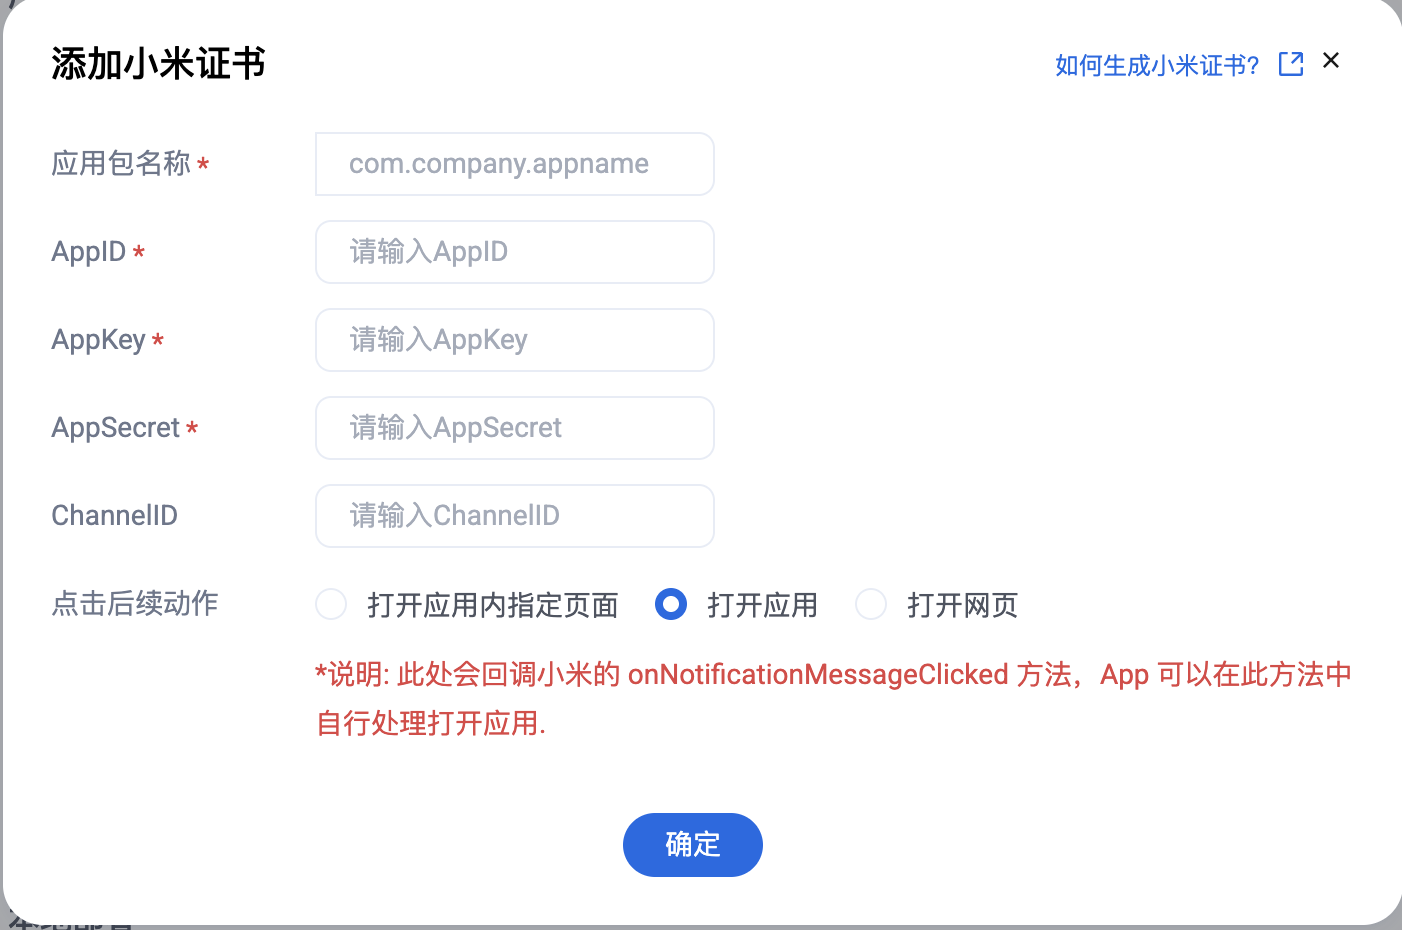
3. 单击确认保存配置。
添加 iOS 证书
1. 访问 控制台 > Chat > App 推送 > 概览,在 iOS 标签下,单击添加证书。
2. 在弹出的添加证书对话框,填写相关参数信息。
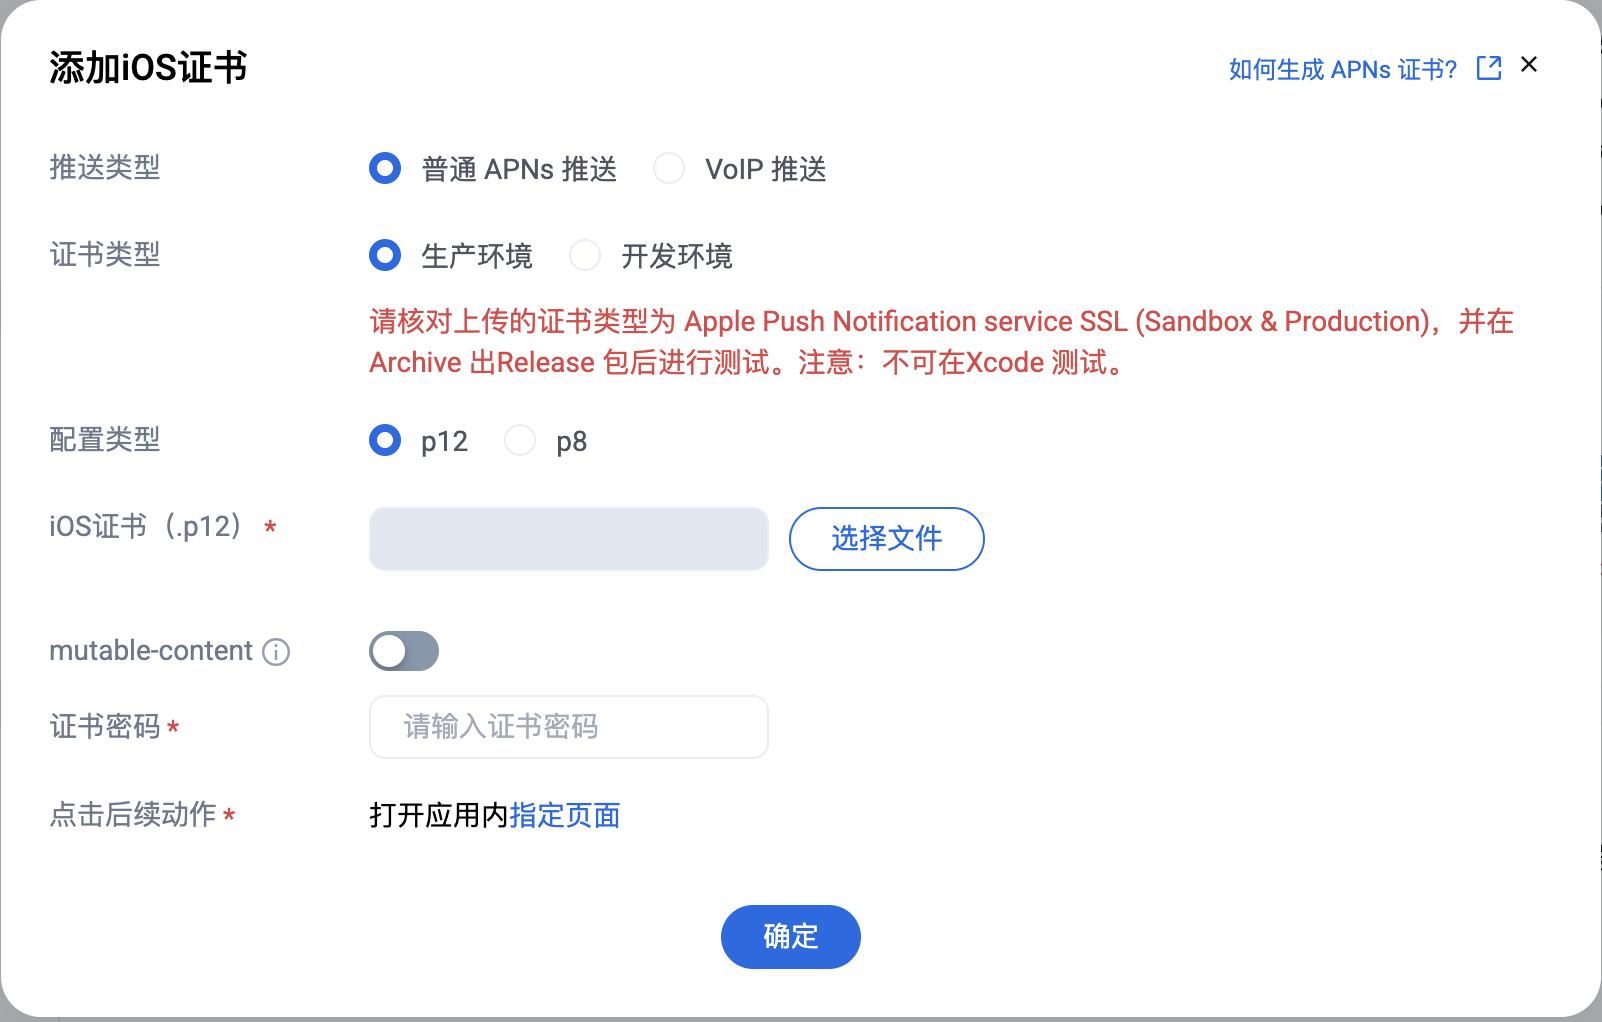
3. 单击确认保存配置。
编辑离线推送证书
1. 访问 控制台 > Chat > App 推送 > 概览,单击已有证书区域的编辑。
2. 在弹出的对话框中修改相关参数,单击确认保存配置。
删除离线推送证书
注意
删除证书会导致消息推送不可触达,且删除后数据不可恢复,请谨慎操作。
1. 访问 控制台 > Chat > App 推送 > 概览,单击已有证书区域的删除。
2. 在弹出的确认删除证书对话框中,单击确认。
文档反馈