tencent cloud

TDMQ for CKafka

Accessing CKafka via Flume

PDF
Modo Foco
Tamanho da Fonte
Última atualização: 2026-01-20 17:10:14
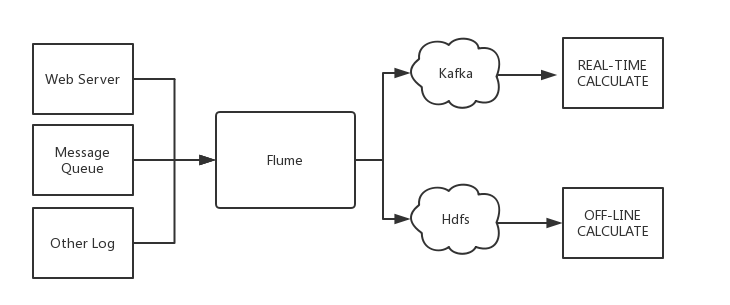
Apache Flume is a distributed, reliable, and available log collection system that supports a variety of data sources (such as HTTP, log files, JMS, and listening ports). It can efficiently collect, aggregate, and move massive log data from these data sources, and finally store the data in a specified storage system (such as Kafka, distributed file systems, or the Solr search servers).
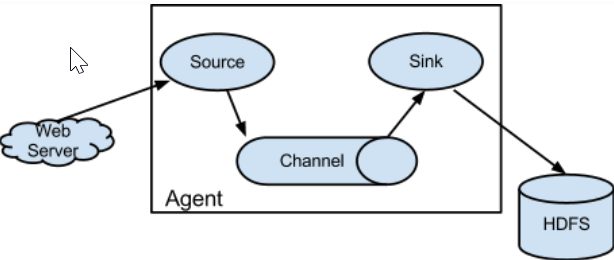
Flume is structured as follows:


Agents are the smallest units that run independently in Flume. An agent is a JVM composed of three main components: source, sink, and channel.


Flume and Kafka
When you store data in a downstream storage module or compute module such as HDFS or HBase, you need to consider various complex factors such as the number of concurrent writes, system load, and network latency. As a flexible distributed system, Flume provides various APIs and customizable pipelines. In the production process, Kafka can act as a cache when production and processing are at different paces. It has a high throughput because of the partition structure and data appending feature. It is also highly fault-tolerant because of the replication structure. Therefore, Flume and Kafka can work together to meet most requirements in production environments.

Accessing Apache Kafka via Flume

Preparations

Download Apache Flume (version 1.6.0 or later is compatible with Kafka).
Download Kafka toolkit (version 0.9.x or later is required, as version 0.8 is no longer supported).
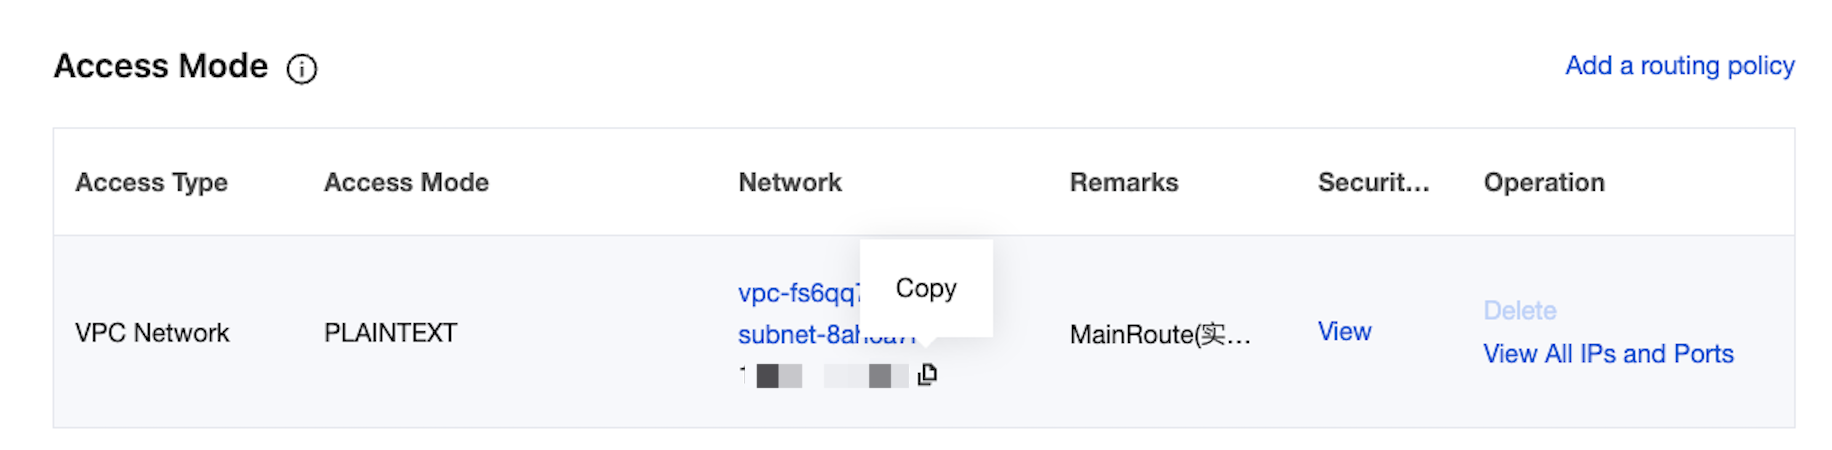
Confirm that Kafka's source and sink components are already in Flume.

Access Method

Kafka can be used as a source or sink to import or export messages.
Kafka Source
Kafka Sink
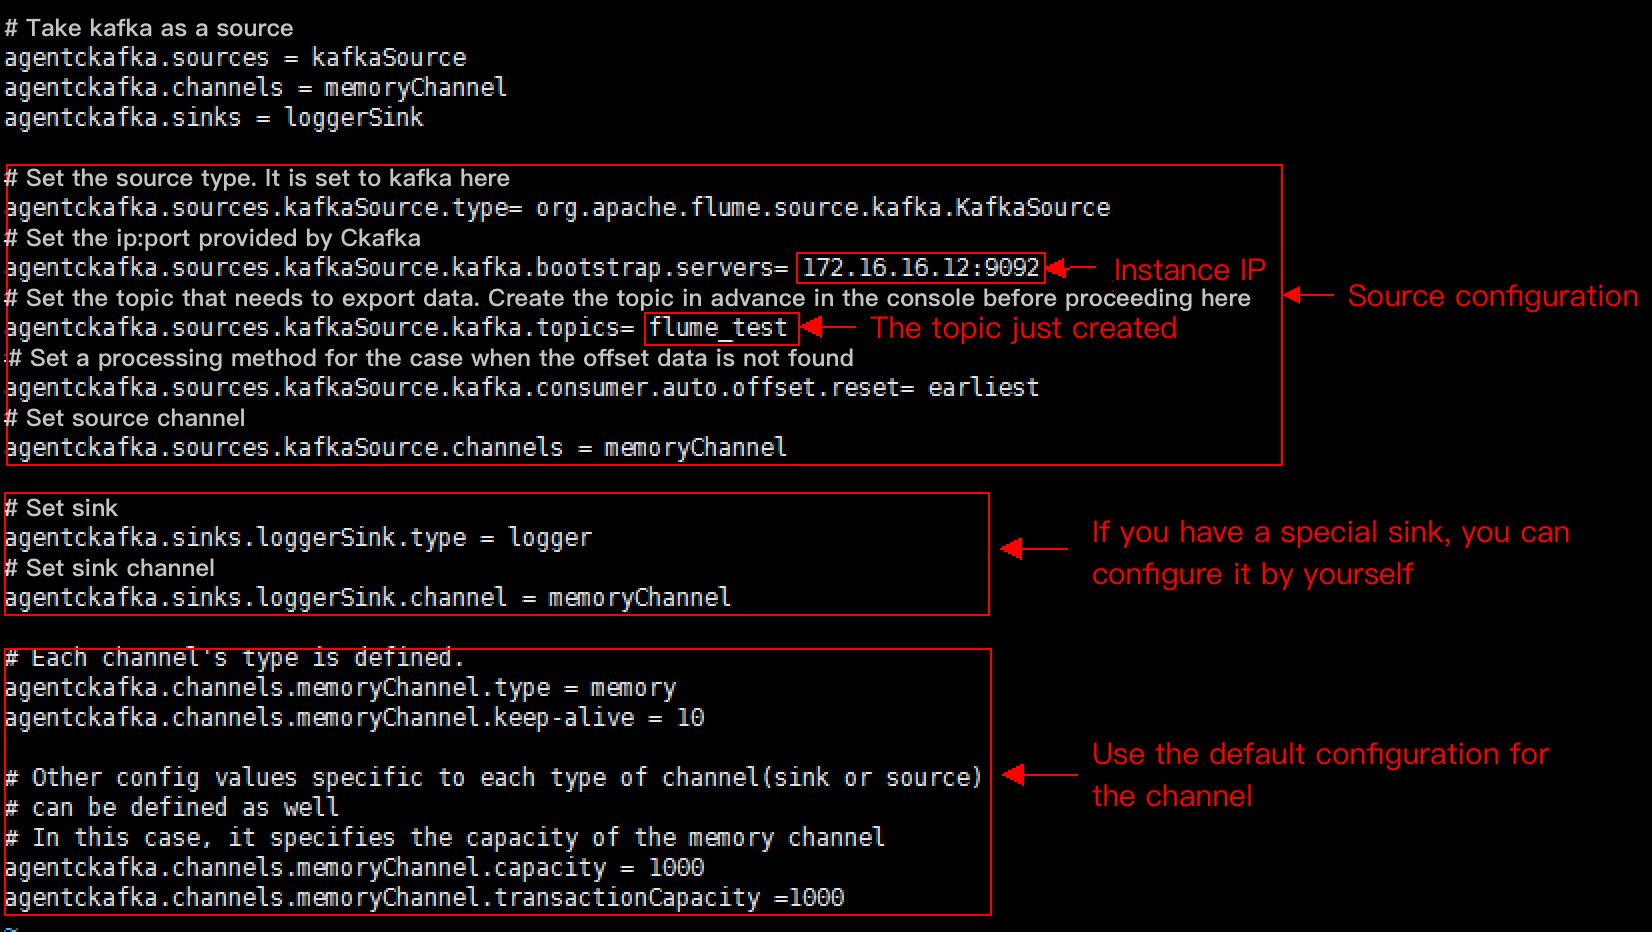
Configure Kafka as the message source, that is, pull data as a consumer from Kafka into a specified sink. The main configuration items are as follows:
Configuration Item
Description
channels
Channel configured by yourself
type
Must be org.apache.flume.source.kafka.KafkaSource
kafka.bootstrap.servers
Server address of the Kafka broker
kafka.consumer.group.id
ID of Kafka's consumer group
kafka.topics
Data target topics in Kafka
batchSize
Size of each write into the channel
batchDurationMillis
Maximum write interval
Example:
tier1.sources.source1.type = org.apache.flume.source.kafka.KafkaSource
tier1.sources.source1.channels = channel1
tier1.sources.source1.batchSize = 5000
tier1.sources.source1.batchDurationMillis = 2000
tier1.sources.source1.kafka.bootstrap.servers = localhost:9092
tier1.sources.source1.kafka.topics = test1, test2
tier1.sources.source1.kafka.consumer.group.id = custom.g.id
For more information, visit the official website of Apache Flume.
Configure Kafka as the message recipient, that is, push data to the Kafka server as a producer for subsequent operations. The main configuration items are as follows:
Configuration Item
Description
channel
Channel configured by yourself
type
Must be org.apache.flume.sink.kafka.KafkaSink
kafka.bootstrap.servers
Server of the Kafka broker
kafka.topics
Data source topics in Kafka
kafka.flumeBatchSize
Size of each written batch
kafka.producer.acks
Production policy of the Kafka producer
Example:
a1.sinks.k1.channel = c1
a1.sinks.k1.type = org.apache.flume.sink.kafka.KafkaSink
a1.sinks.k1.kafka.topic = mytopic
a1.sinks.k1.kafka.bootstrap.servers = localhost:9092
a1.sinks.k1.kafka.flumeBatchSize = 20
a1.sinks.k1.kafka.producer.acks = 1
For more information, visit the official website of Apache Flume.

Accessing CKafka via Flume

Using CKafka as a Sink
Using CKafka as a Source

Step 1: Obtaining the CKafka Instance Access Address

2. In the left sidebar, select Instance List and click the ID of the target instance to go to the basic instance information page.
3. In the Access Mode module on the basic instance information page, you can obtain the access address of the instance.


Step 2: Creating a Topic

1. On the basic instance information page, select the Topic List tab at the top.
2. On the topic management page, click Create to create a topic named flume_test.


Step 3: Configuring Flume

2. Write the configuration file flume-kafka-sink.properties. Below is a simple demo (configured in the conf folder in the decompressed directory) for Java. If there is no special requirement, simply replace the IP address and topic in the configuration file with your own instance IP address and topic. In this demo, the source is tail -F flume-test, which is the added information in the file.


The sample code is as follows:
# Demo for using Kafka as the sink.
agentckafka.source = exectail
agentckafka.channels = memoryChannel
agentckafka.sinks = kafkaSink

# Set the source type based on different requirements. For a special source, you can configure it yourself. In this case, we use the simplest example.
agentckafka.sources.exectail.type = exec
agentckafka.sources.exetail.command = tail -F ./flume.test
agentckafka.sources.exectail.batchSize = 20
# Set the source channel.
agentckafka.sources.exectail.channels = memoryChannel

# Set the sink type. In this case, it is set to Kafka.
agentckafka.sinks.kafkaSink.type = org.apache.flume.sink.kafka.KafkaSink
# In this case, set the ip:port provided by CKafka.
agentckafka.sinks.kafkaSink.brokerList = 172.16.16.12:9092 # Configure the instance IP address.
# Set the topic to which data is to be imported. Create the topic in the console in advance.
agentckafka.sinks.kafkaSink.topic = flume test #Configure the topic.
# Set the sink channel.
agentckafka.sinks.kafkaSink.channel = memoryChannel

# Use the default configuration for the channel.
# Each channel's type is defined.
agentckafka.channels.memoryChannel.type = memory
agentckafka.channels.memoryChannel.keep-alive = 10

# Other config values specific to each type of channel(sink or source) can be defined as well
# In this case, it specifies the capacity of the memory channel
agentckafka.channels.memoryChannel.capacity = 1000
agentckafka.channels.memoryChannel.transactionCapacity = 1000
3. Run the following command to start Flume:
./bin/flume-ng agent -n agentckafka -c conf -f conf/flume-kafka-sink.properties
4. Write messages to the flume-test file. At this time, the messages will be written by Flume to CKafka.


5. Start the CKafka client for consumption.
./kafka-console-consumer.sh --bootstrap-server xx.xx.xx.xx:xxxx --topic flume_test --from-beginning --new-consumer
Note
Enter the access address of the CKafka instance just created in the bootstrap-server field and the name of the topic just created in the topic field.
You can see that the messages have been consumed.


Step 1: Obtaining the CKafka Instance Access Address

1. Log in to the CKafka console.
2. In the left sidebar, select Instance List and click the ID of the target instance to go to the basic instance information page.
3. In the Access Mode module on the basic instance information page, you can obtain the access address of the instance.


Step 2: Creating a Topic

1. On the basic instance information page, select the Topic List tab at the top.
2. On the topic management page, click Create to create a topic named flume_test.


Step 3: Configuring Flume

2. Write the configuration file flume-kafka-source.properties. Below is a simple demo (configured in the conf folder in the decompressed directory). If there is no special requirement, simply replace the IP address and topic in the configuration file with your own instance IP address and topic. The sink is logger in this example.


3. Run the following command to start Flume:
./bin/flume-ng agent -n agentckafka -c conf -f conf/flume-kafka-source.properties
4. View the logger output information (the default path is logs/flume.log).


Ajuda e Suporte

Esta página foi útil?

comentários