QClaw
Download
Modo Foco
Tamanho da Fonte
QClaw is a localized AI Agent assistant developed by Tencent PC Manager based on the OpenClaw open-source ecosystem, and is affectionately known as the "Claw AI". It requires no complex setup and can be used in just three steps, with built-in security protection. QClaw supports direct WeChat binding. From anywhere, users can simply send commands via WeChat to have their computers automatically complete tasks such as spreadsheet and report processing, file transfers, and document editing. All data remains securely on the local device, making QClaw suitable for a wide range of scenarios including office work, content creation, and development.
This document describes how to configure and use the Tencent Cloud Large Language Model Token Plan in QClaw.
Prerequisites
Before starting the configuration, make sure you have completed the following preparatory work:
Steps
Step 1: Start QClaw and Configure a Custom Model
1. Start QClaw.
2. Select the model configuration at the bottom of the dialog box, and click "Custom Model".
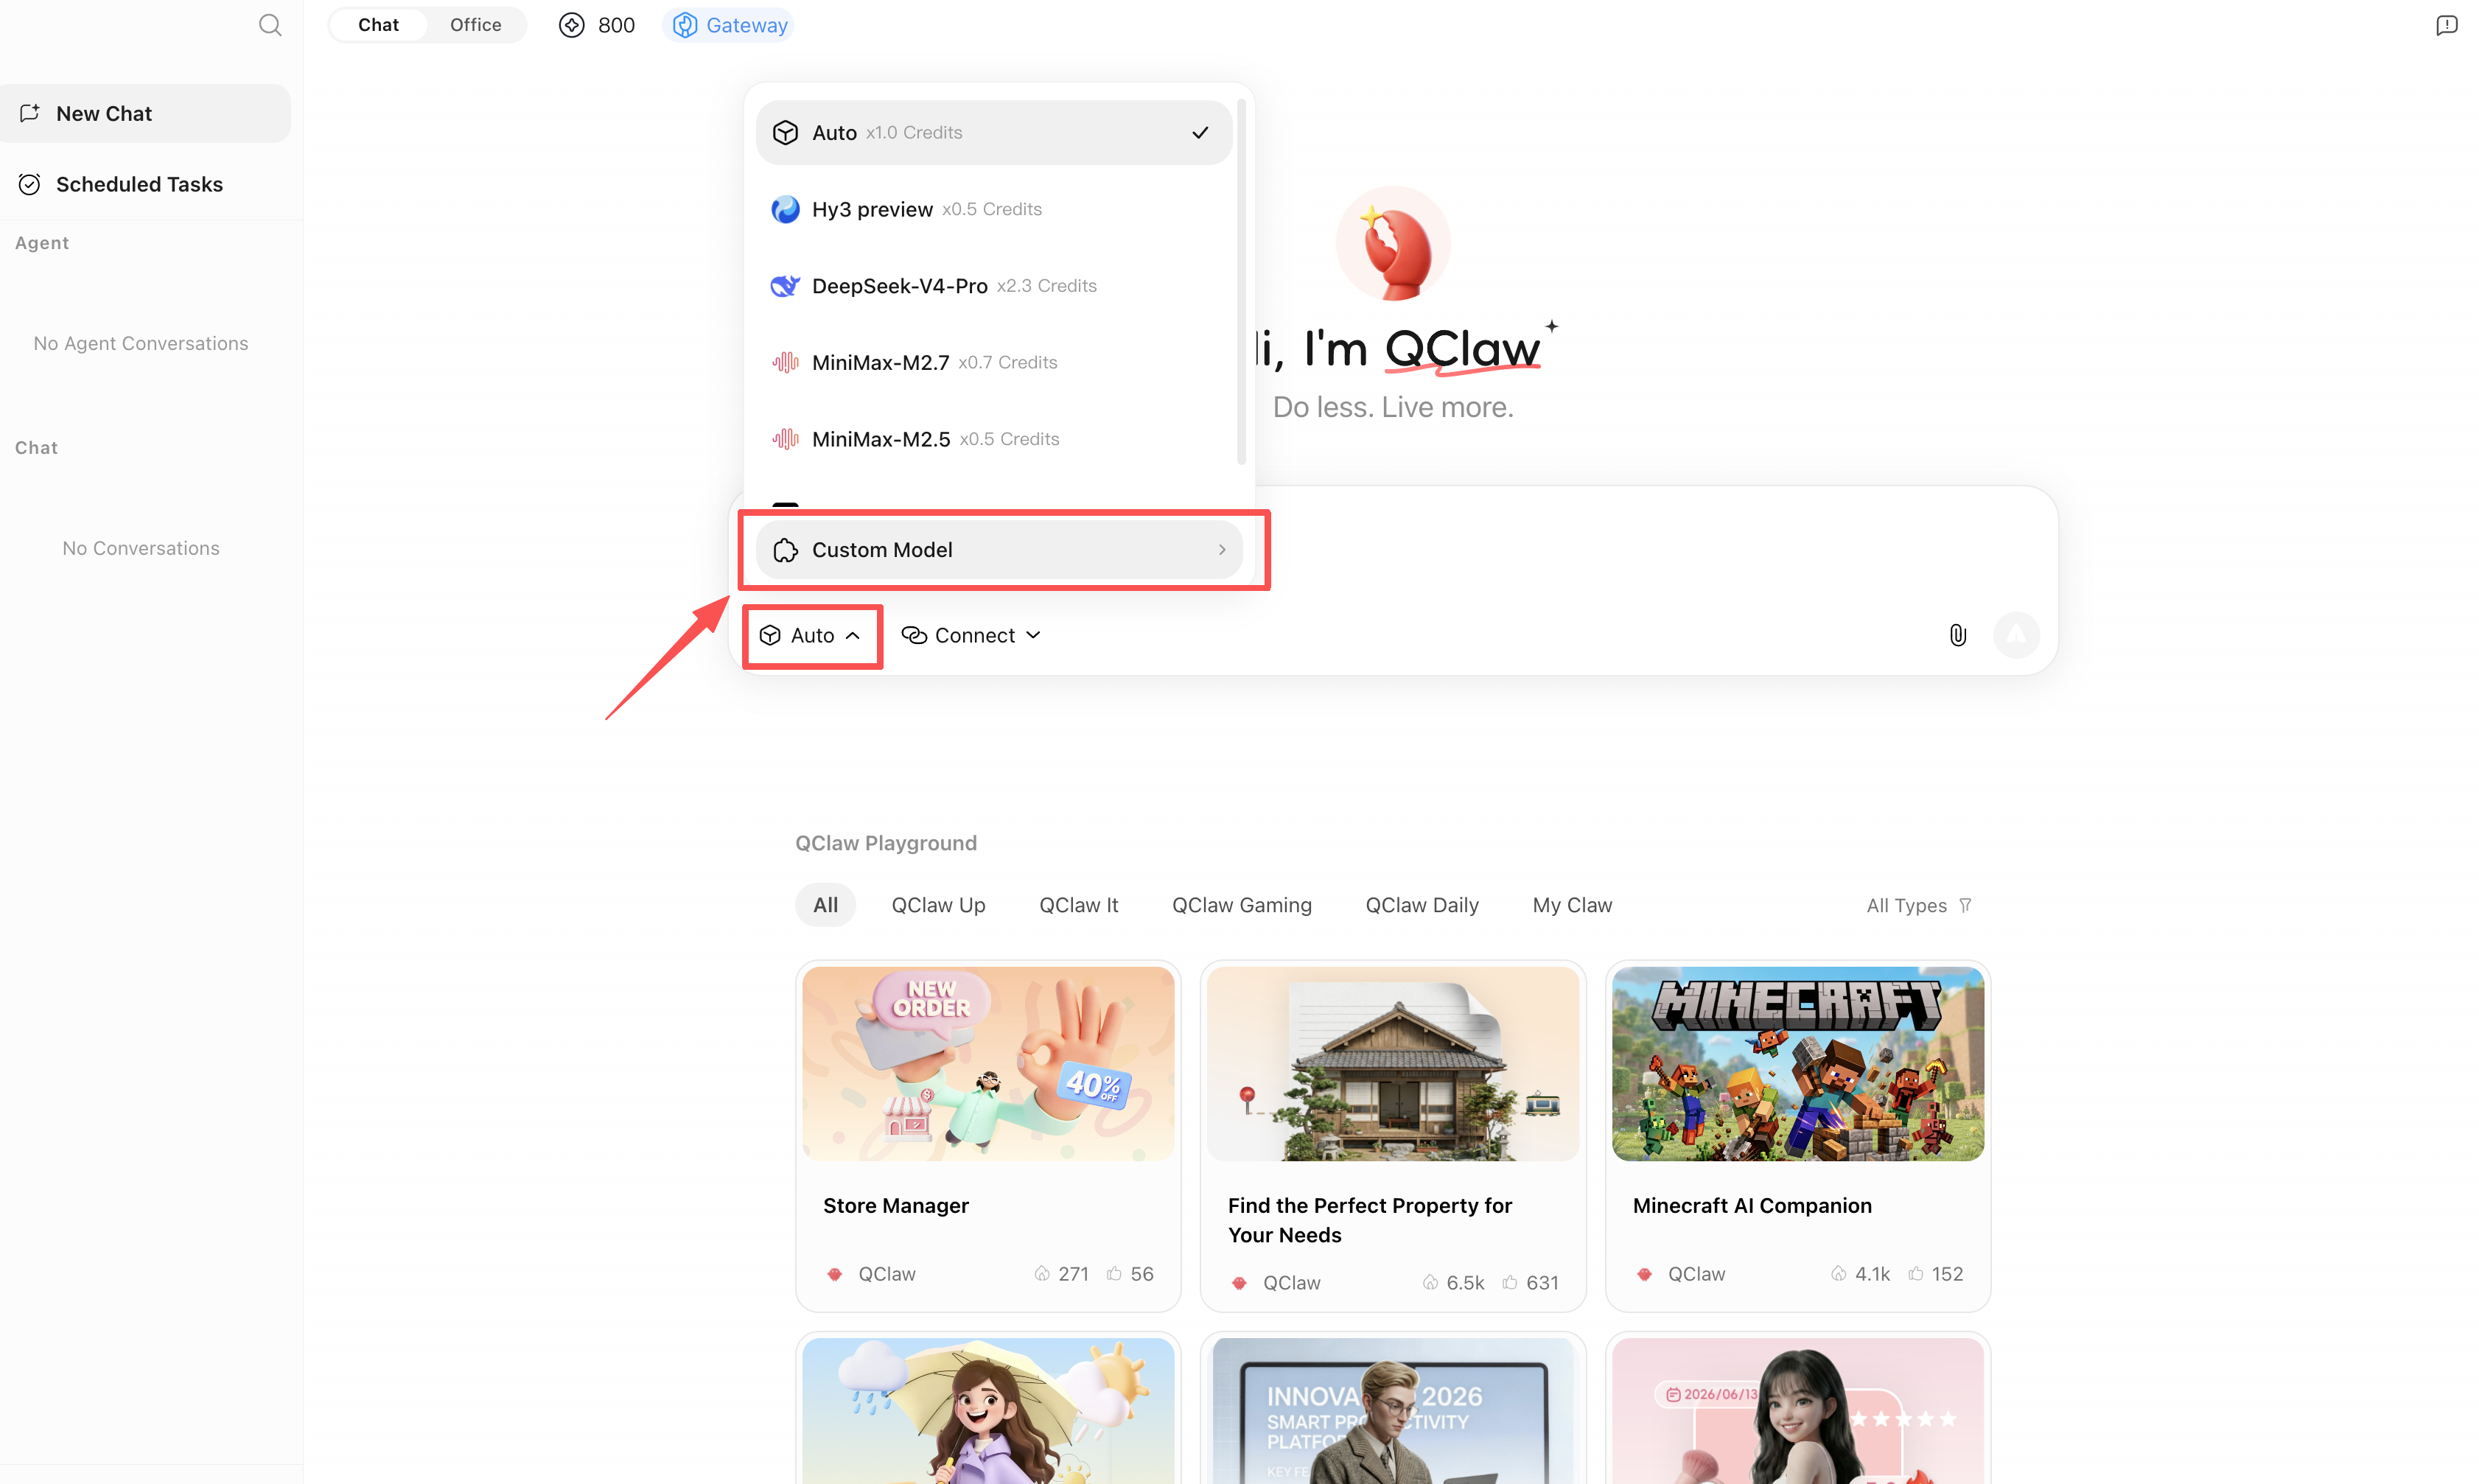
3. On the Model settings tab, click Custom model-API.
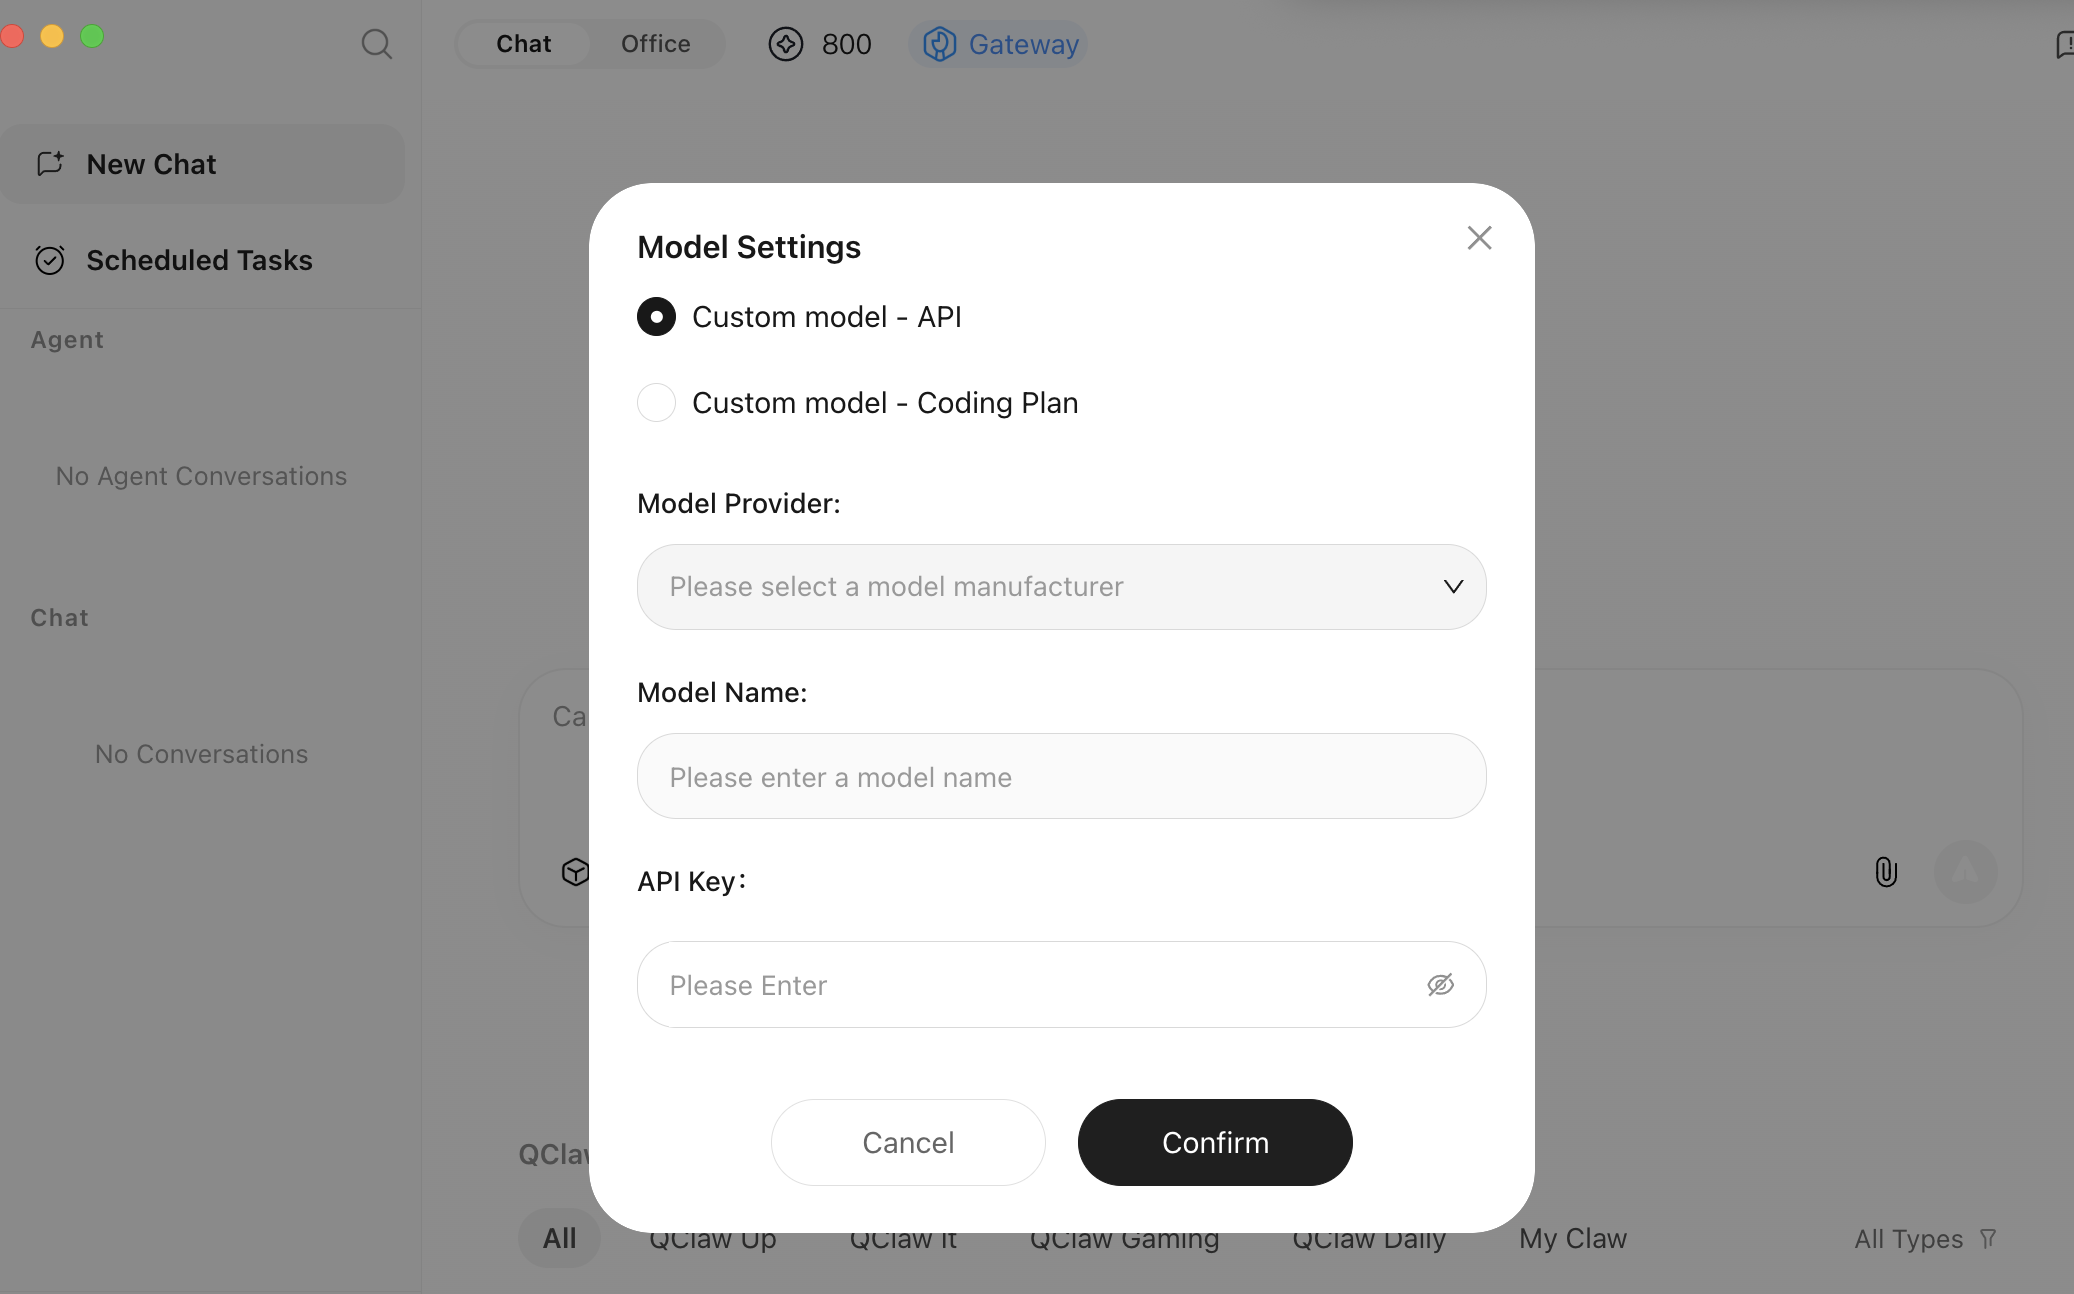
Step 2: Configure the API Endpoint, API Protocol Type, API Key, and Model
After configuring the following items, click confirm and wait for the configuration to take effect.
Configuration Item | Description |
API address | https://tokenhub-intl.tencentcloudmaas.com/plan/v3 (Copy and use directly). |
API Protocol Type | Select "OpenAI-compatible protocol". |
API Key | Enter the API Key you obtained from the Tencent Cloud console. For details, see Obtaining an API Key. |
Model Name | Enter the Model ID supported by Token Plan. For details, see Available Models and select the specific Model ID configuration. |
Note:
When configuring the model name, ensure you enter the value of the Model ID from your package.
Each model requires you to separately configure the API endpoint, API Key, and model name, and then save the settings.
Step 3: Switch to the Custom Model for Conversation
Return to the conversation page, switch to the custom model configured in the previous steps, and you can start a conversation.
Ajuda e Suporte
Esta página foi útil?
Você também pode entrar em contato com a Equipe de vendas ou Enviar um tíquete em caso de ajuda.
comentários