2. On the left sidebar, click User Management > Settings.
3. In the SCIM User Synchronization Configuration area, click
, in the pop-up window click Enable to activate SCIM synchronization.
4. After enabling, in the SCIM User Synchronization Configuration area, view or copy the SCIM service address, which will be used to configure SCIM synchronization in the external IdP.
China site: https://scim.tencentcloudsso.com/scim/v2
International site: https://scim.tencentcloudssointl.com/scim/v2
Step 2: Create SCIM Key
1. In the SCIM User Synchronization Configuration area, click Generate New SCIM Key.
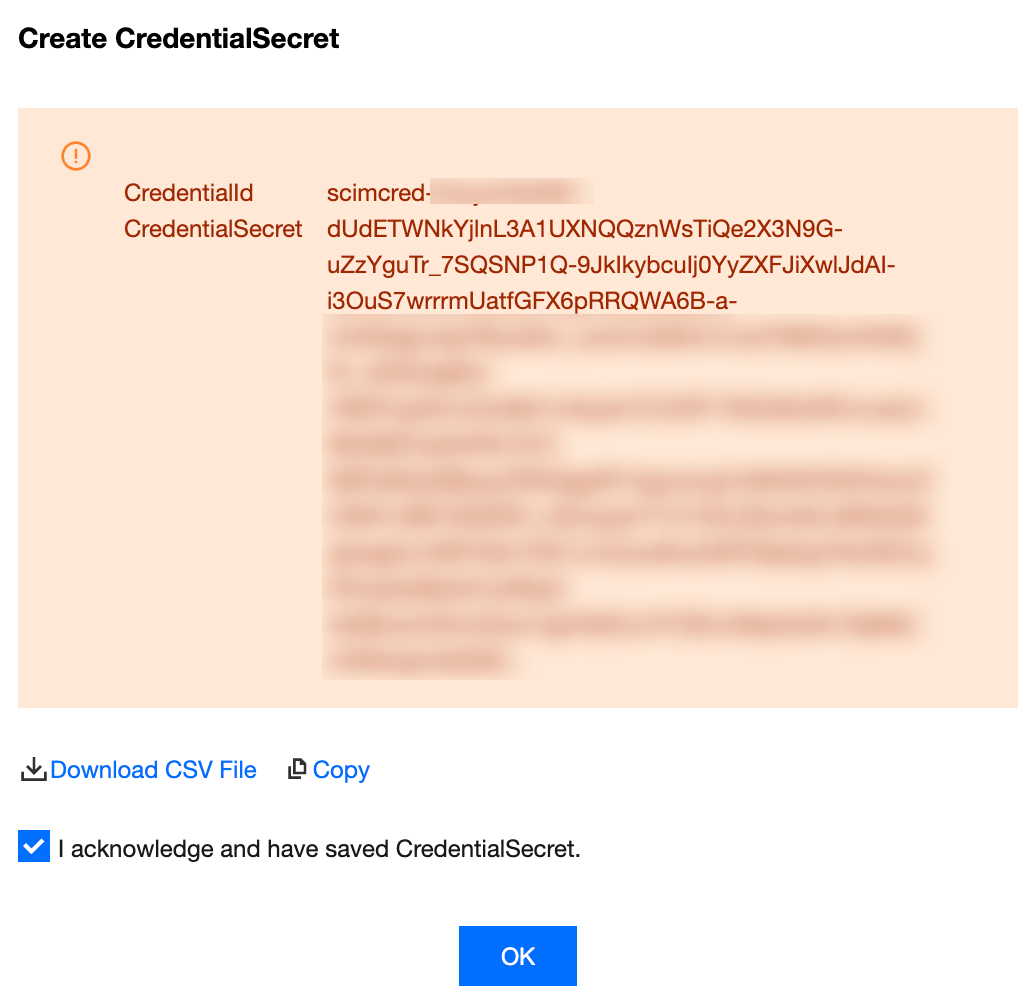
2. In the Create CredentialSecret dialog box, you can save the SCIM key by Download CSV File or Copy it. After saving the key, click OK.
Note:
In IdP, paste only the CredentialSecret part, not the CredentialId. Please check Note.
Managing SCIM Sync Users in Onelogin
Configuring SCIM Sync Users in Onelogin
Deleting SCIM Sync Users in Onelogin
Step One: Creating an Application
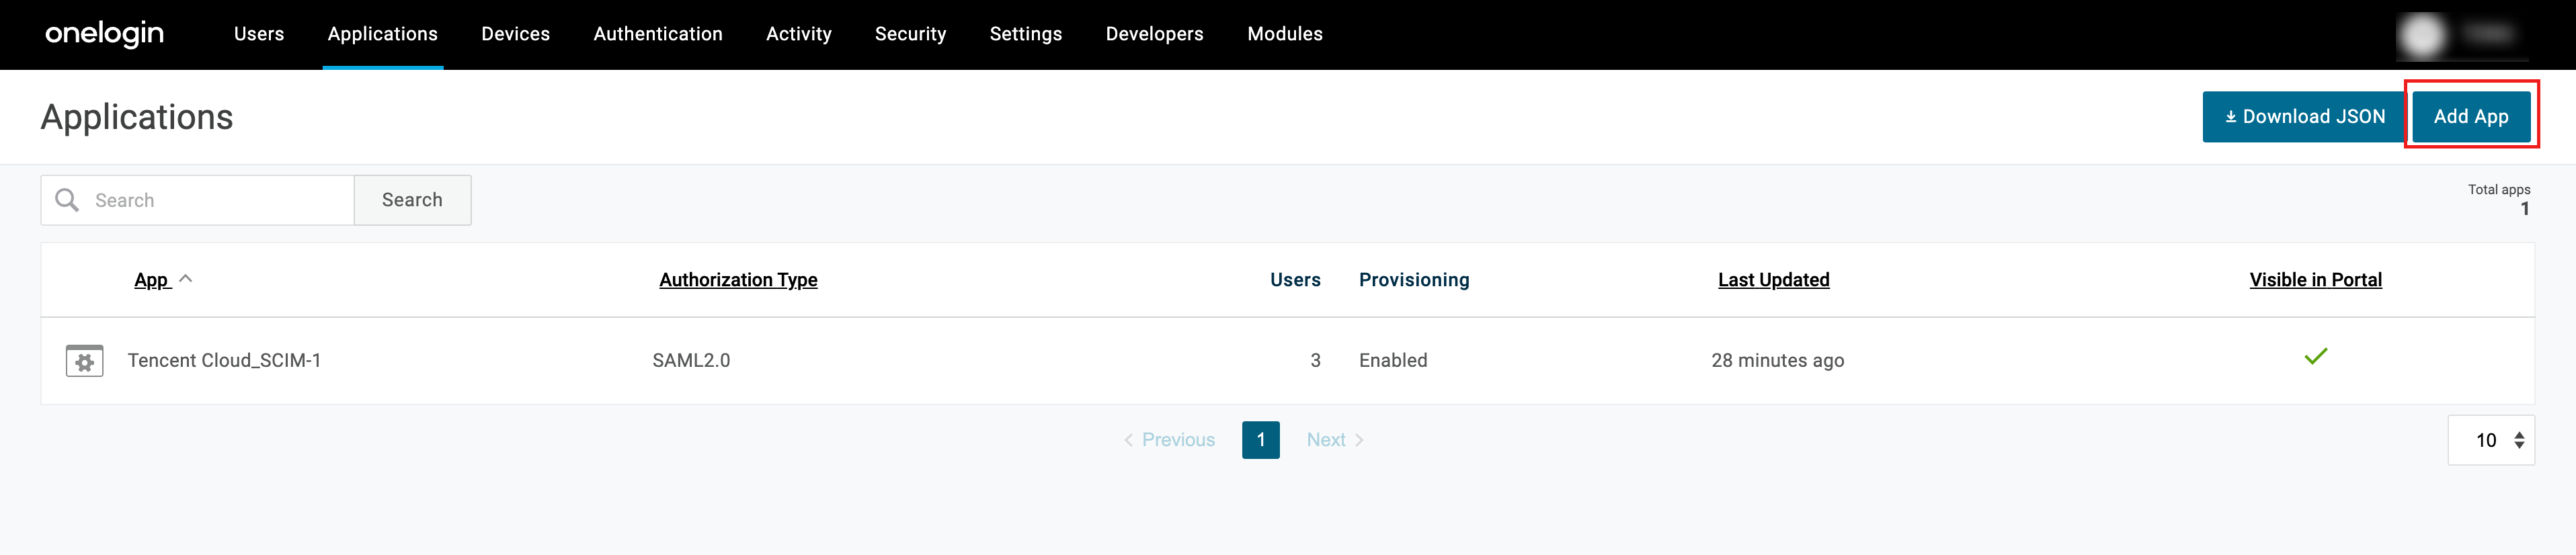
1. Admin logs in to Onelogin, select Applications > Applications from the top menu.
2. On the Applications page, click Add App.
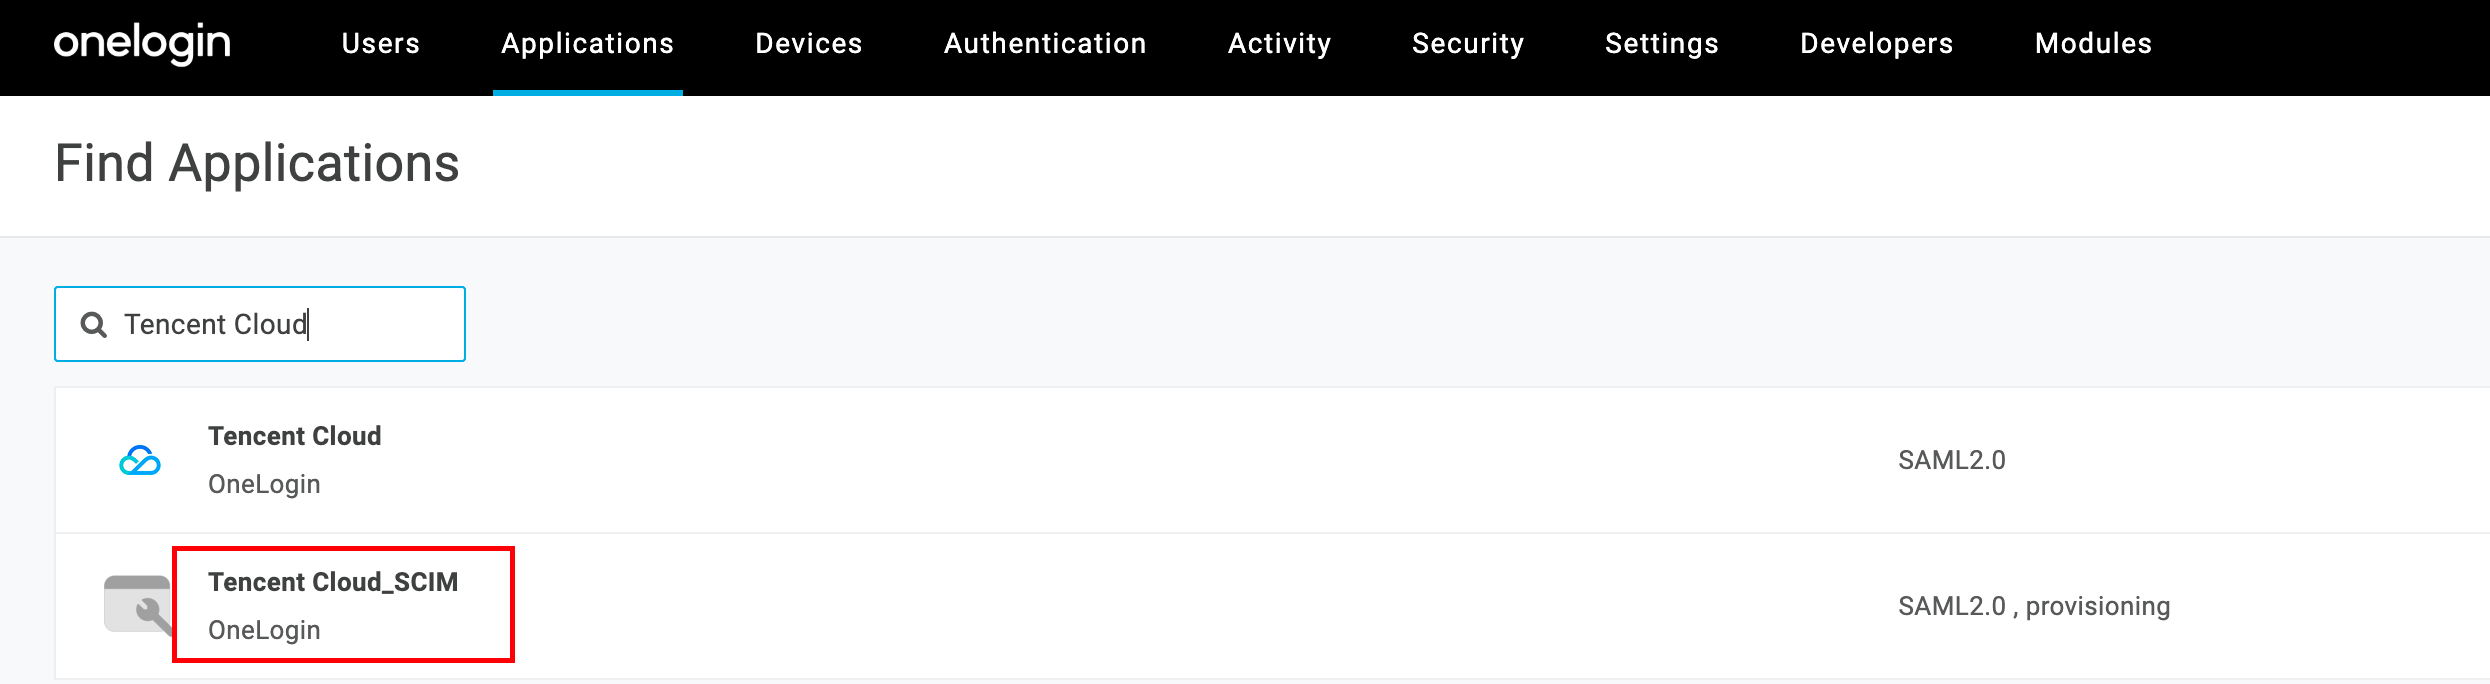
3. On the Find Applications page, click to select Tencent Cloud_SCIM.
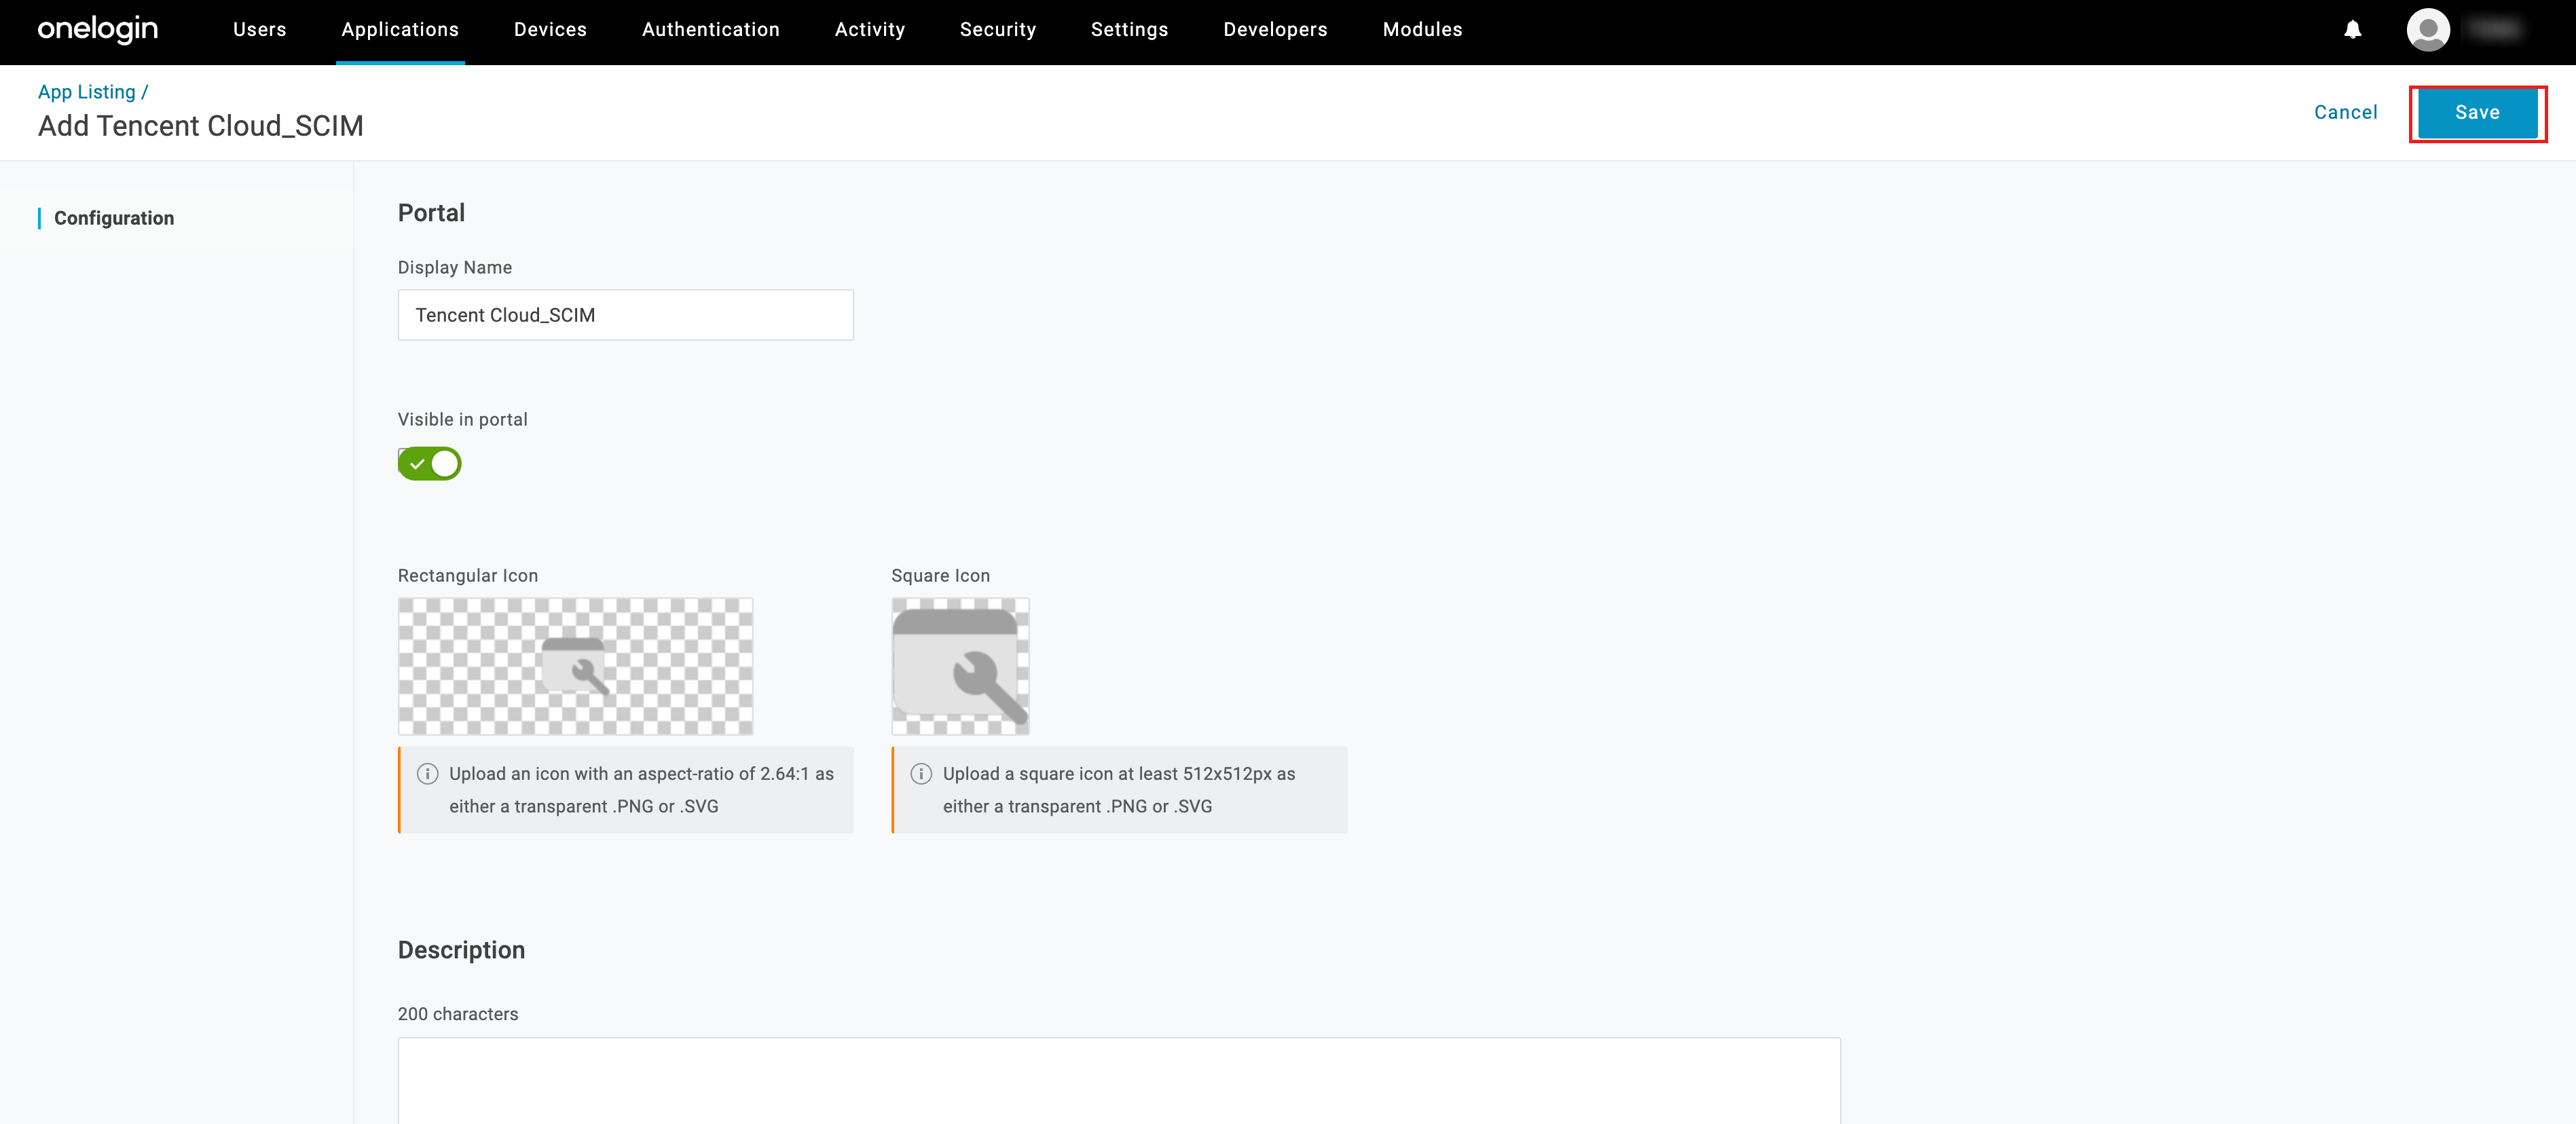
4. Enter the Tencent Cloud_SCIM application, rename it, and click Save.
5. After creation, you can view it in the list.
Step Two: Configuring an Application
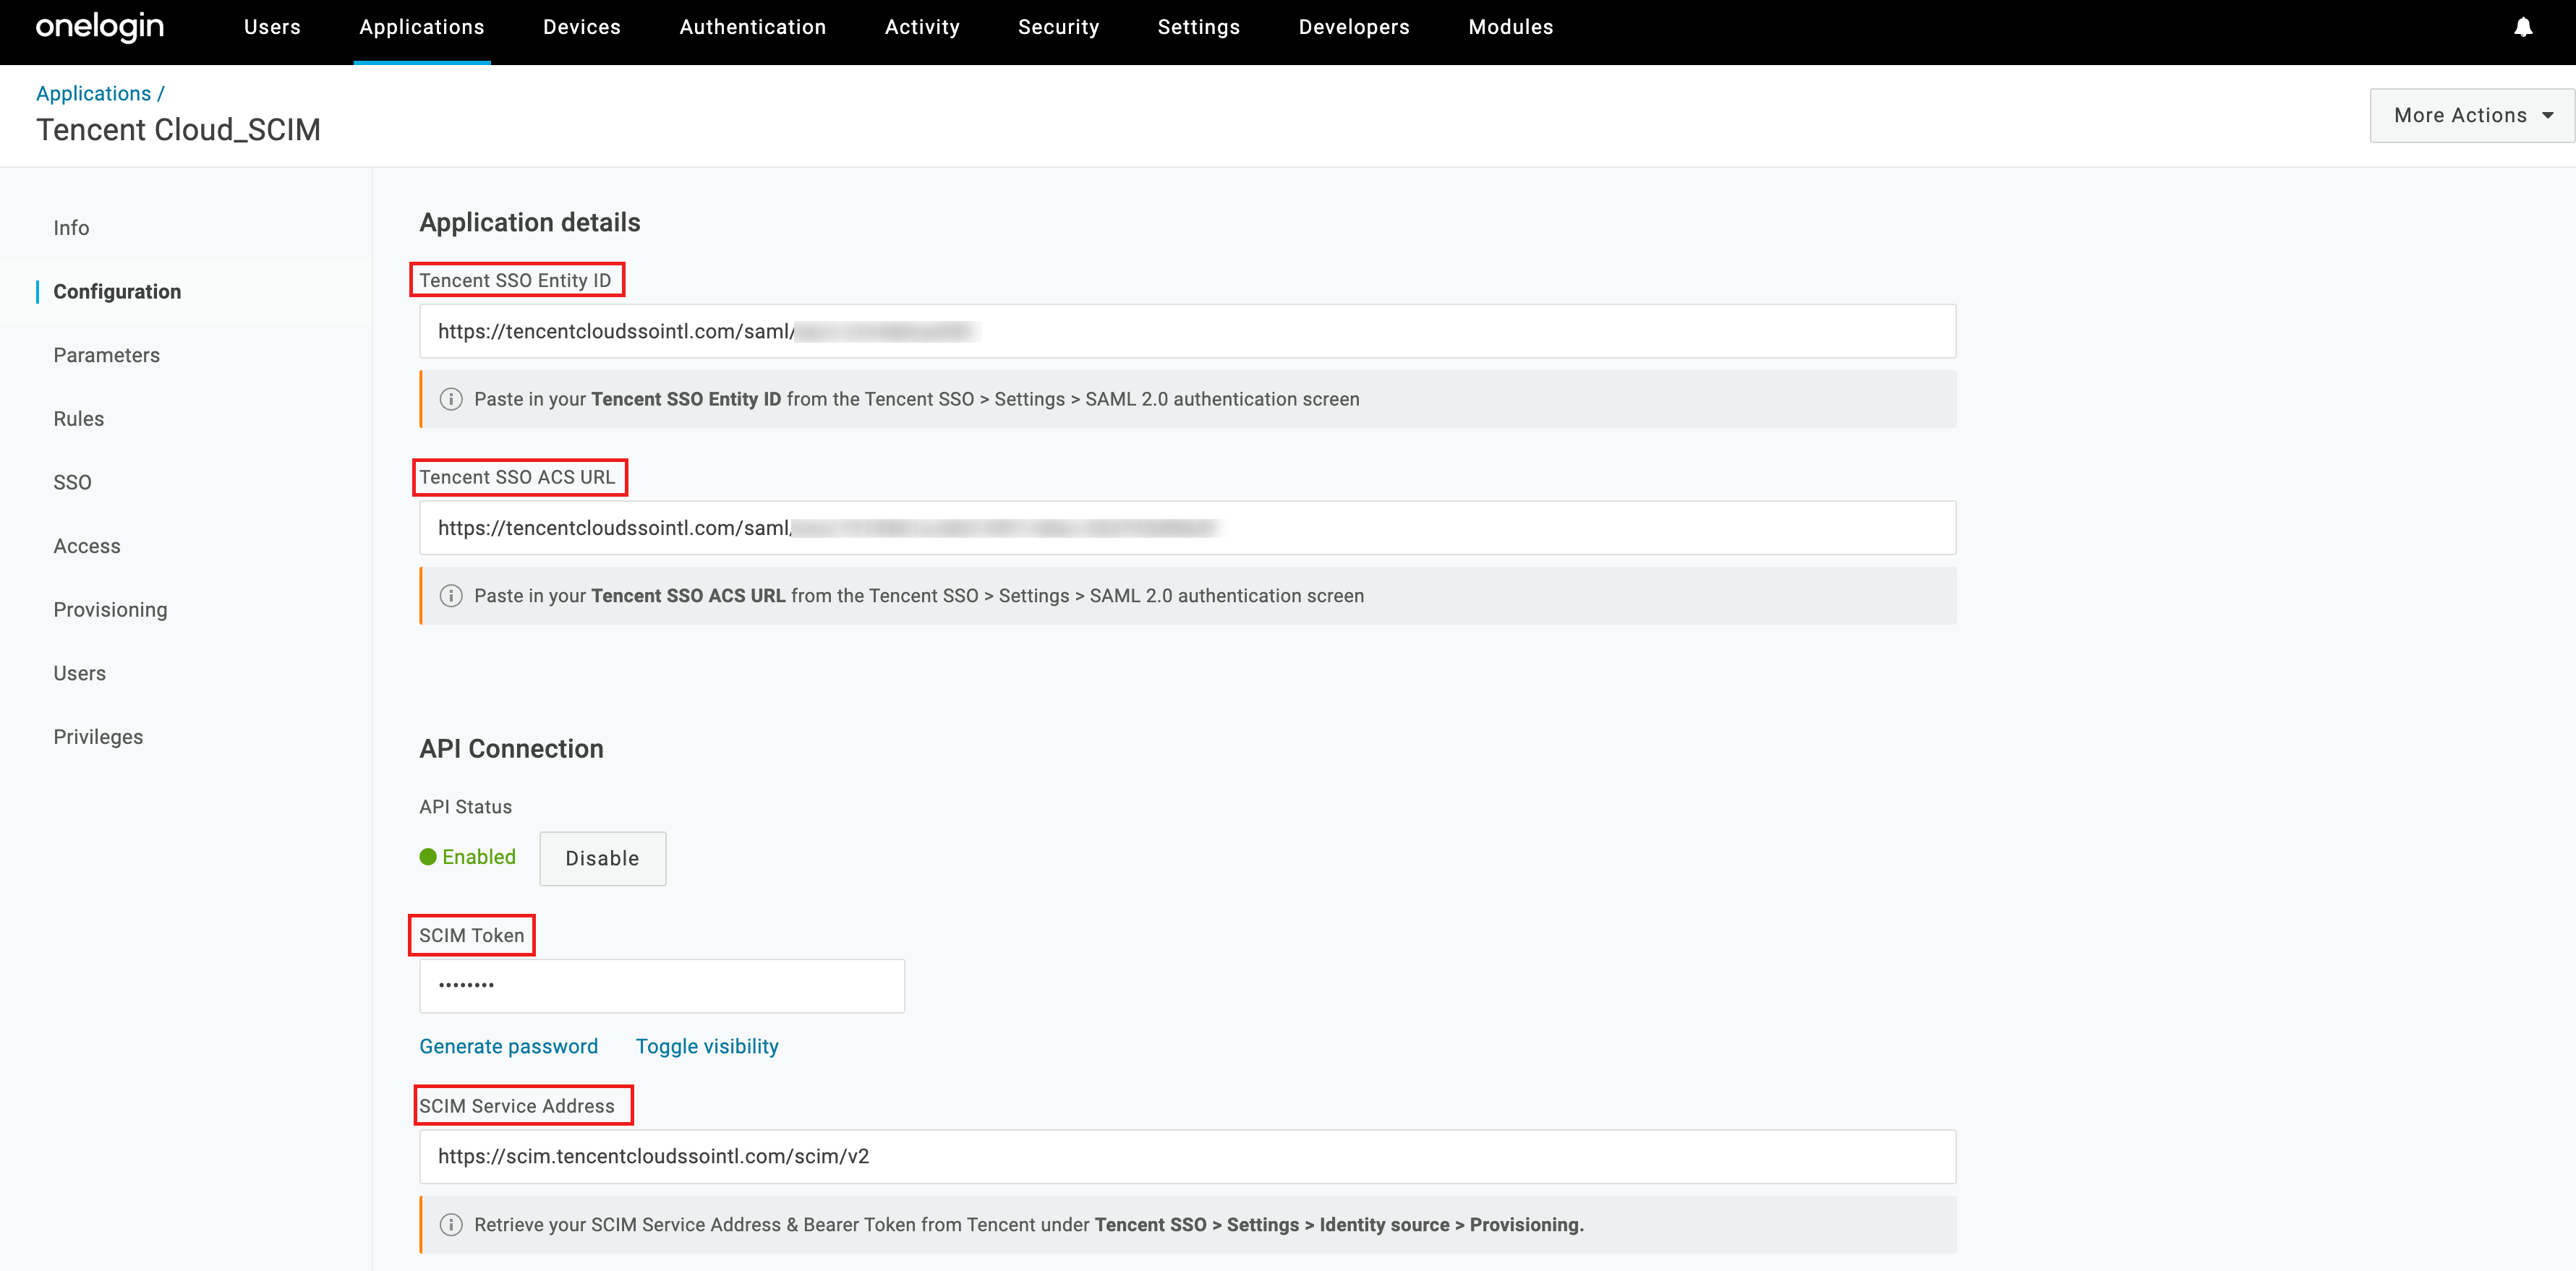
1. On the Configuration page, fill in the information as follows:
In the Applications details section, enter ACS URL, Entity ID.
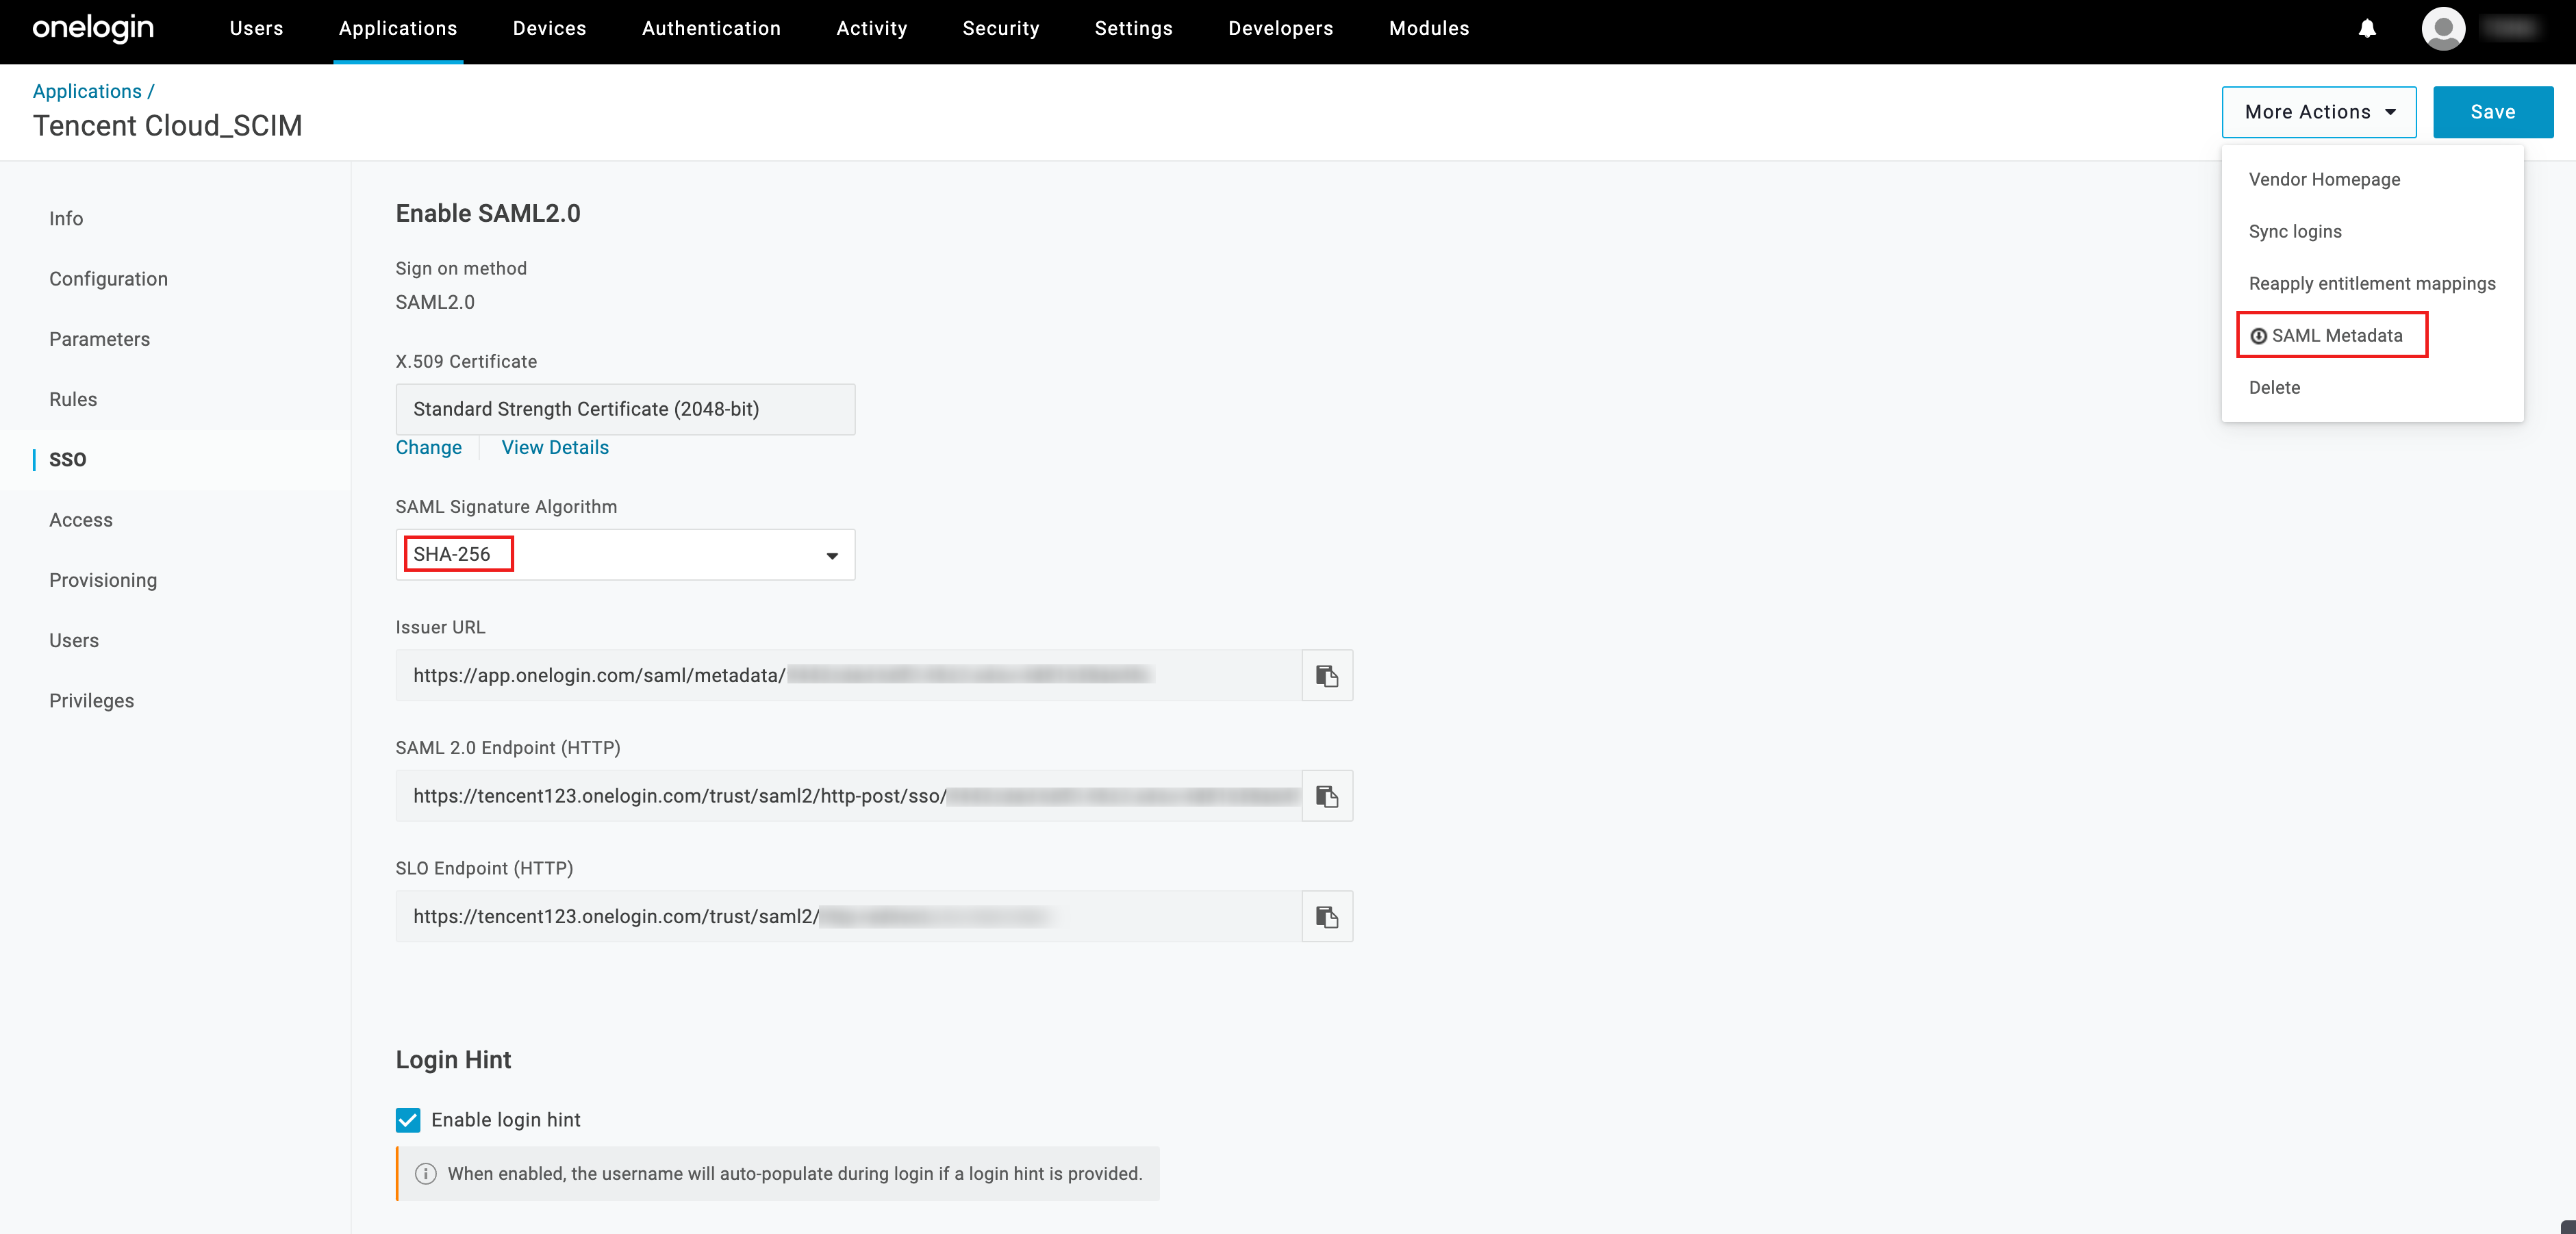
2. In SSO, switch the SAML Signature Algorithm protocol to SHA-256 (default is SHA-1, identity management does not support this protocol).
2.1 Click Save, and download SAML Metadata in More Actions.
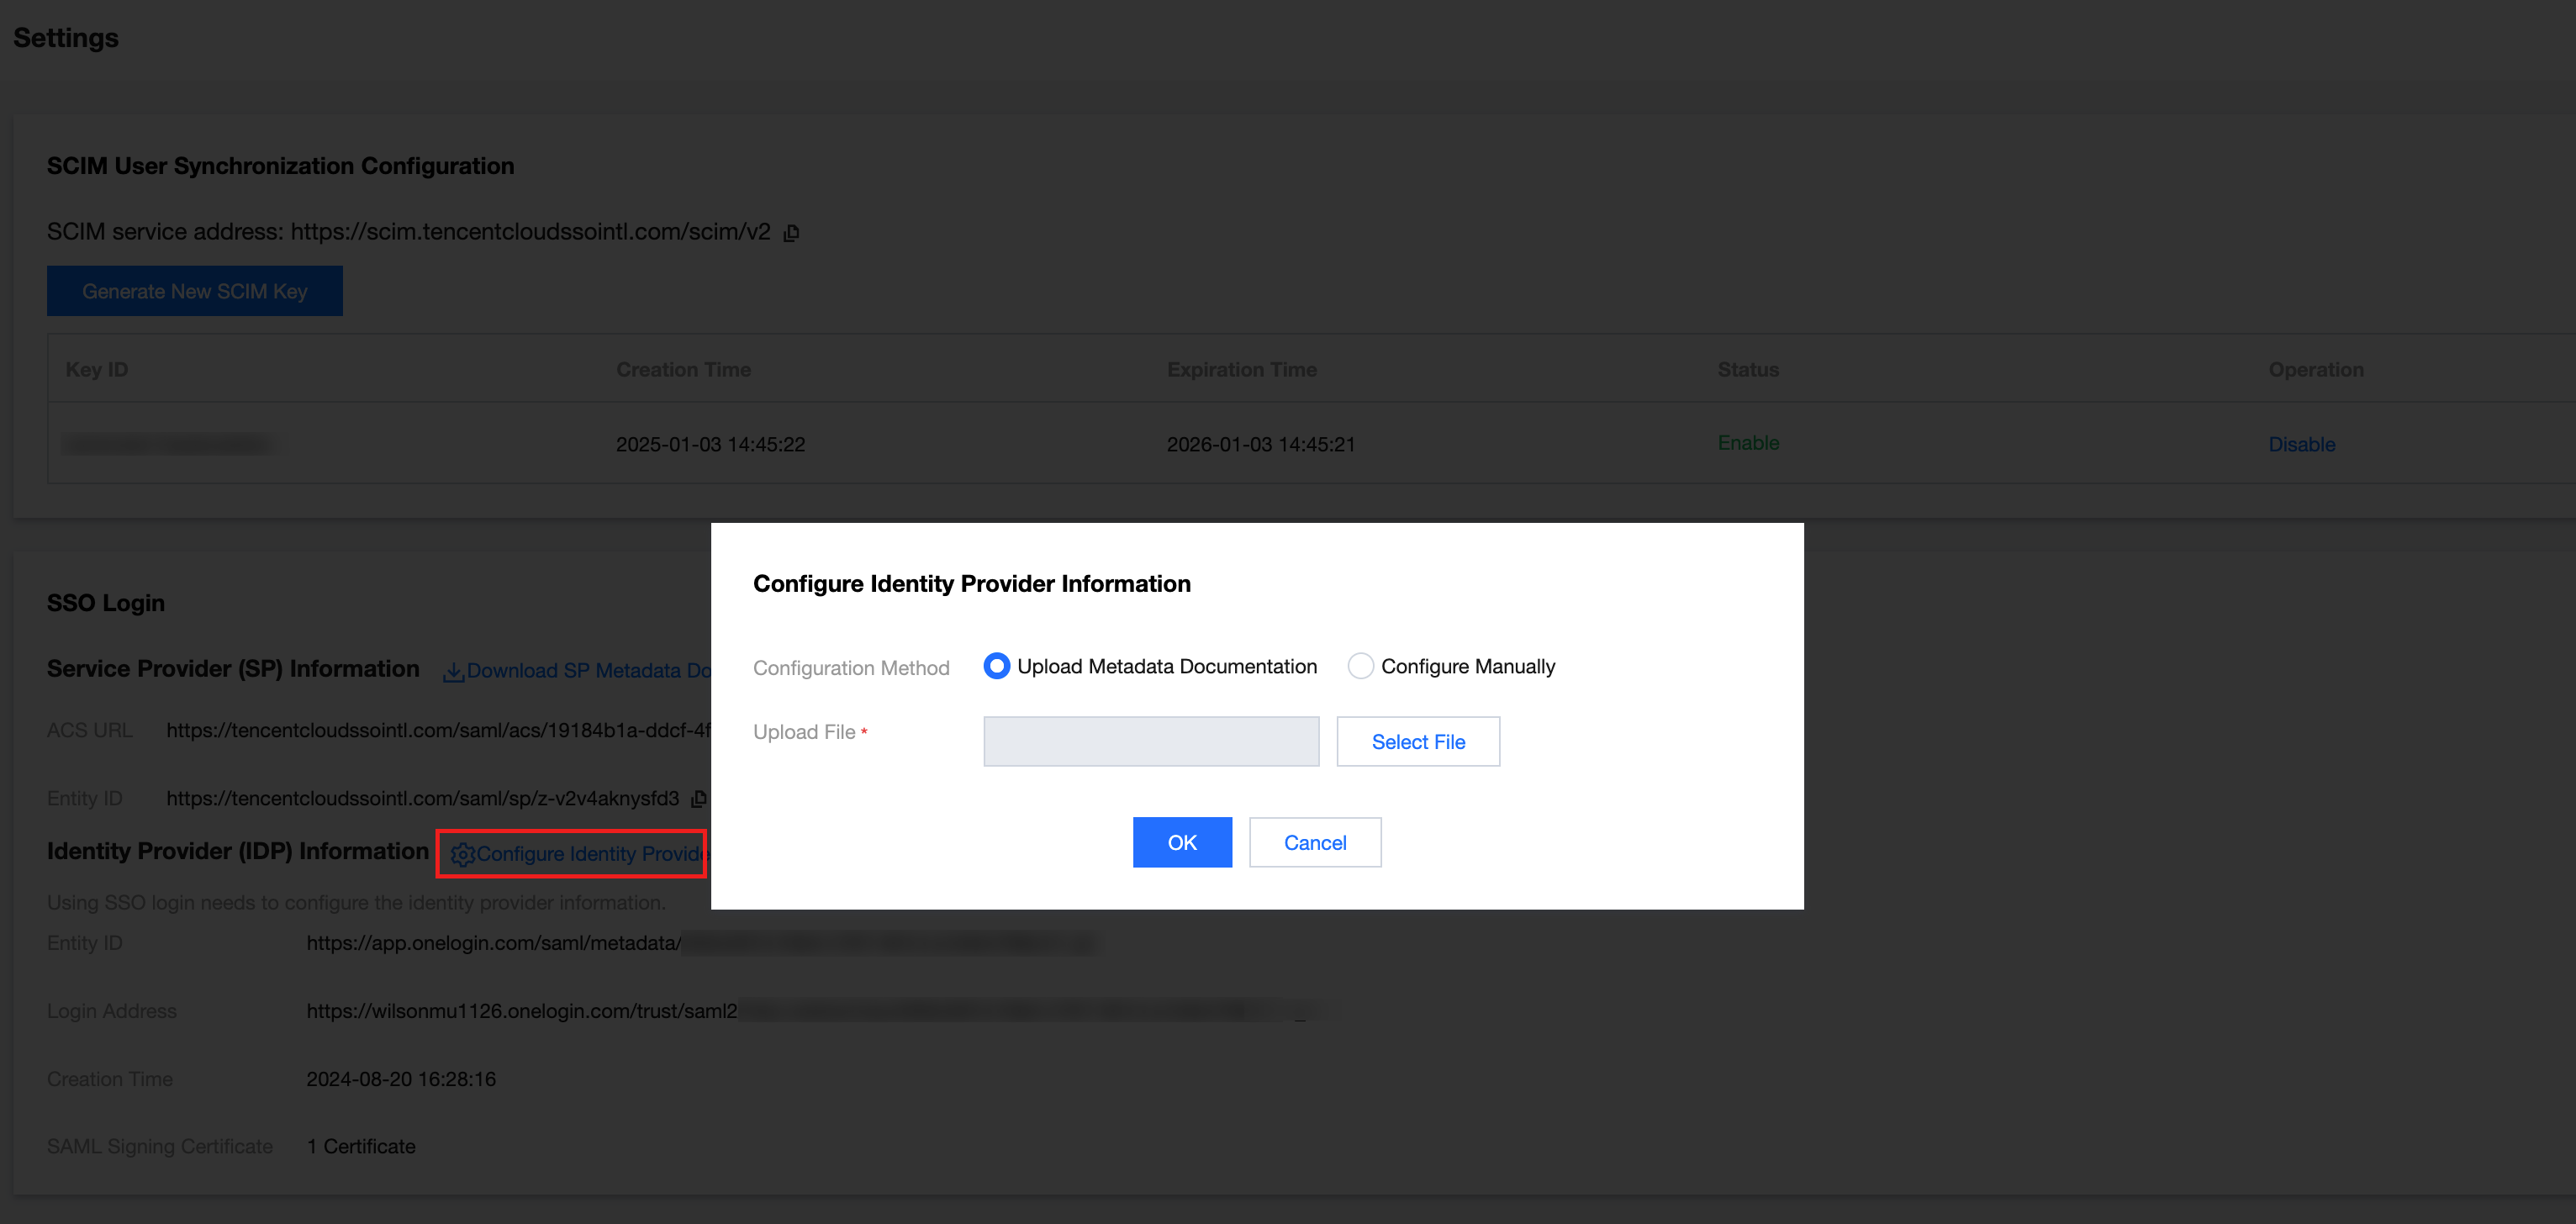
2.2 In TCO > Identity Management > Settings > SSO Login, upload the metadata document and select the SAML Metadata file downloaded in the Back step.
2.3 This completes the SSO configuration and SCIM configuration for the association between identity management and Onelogin.
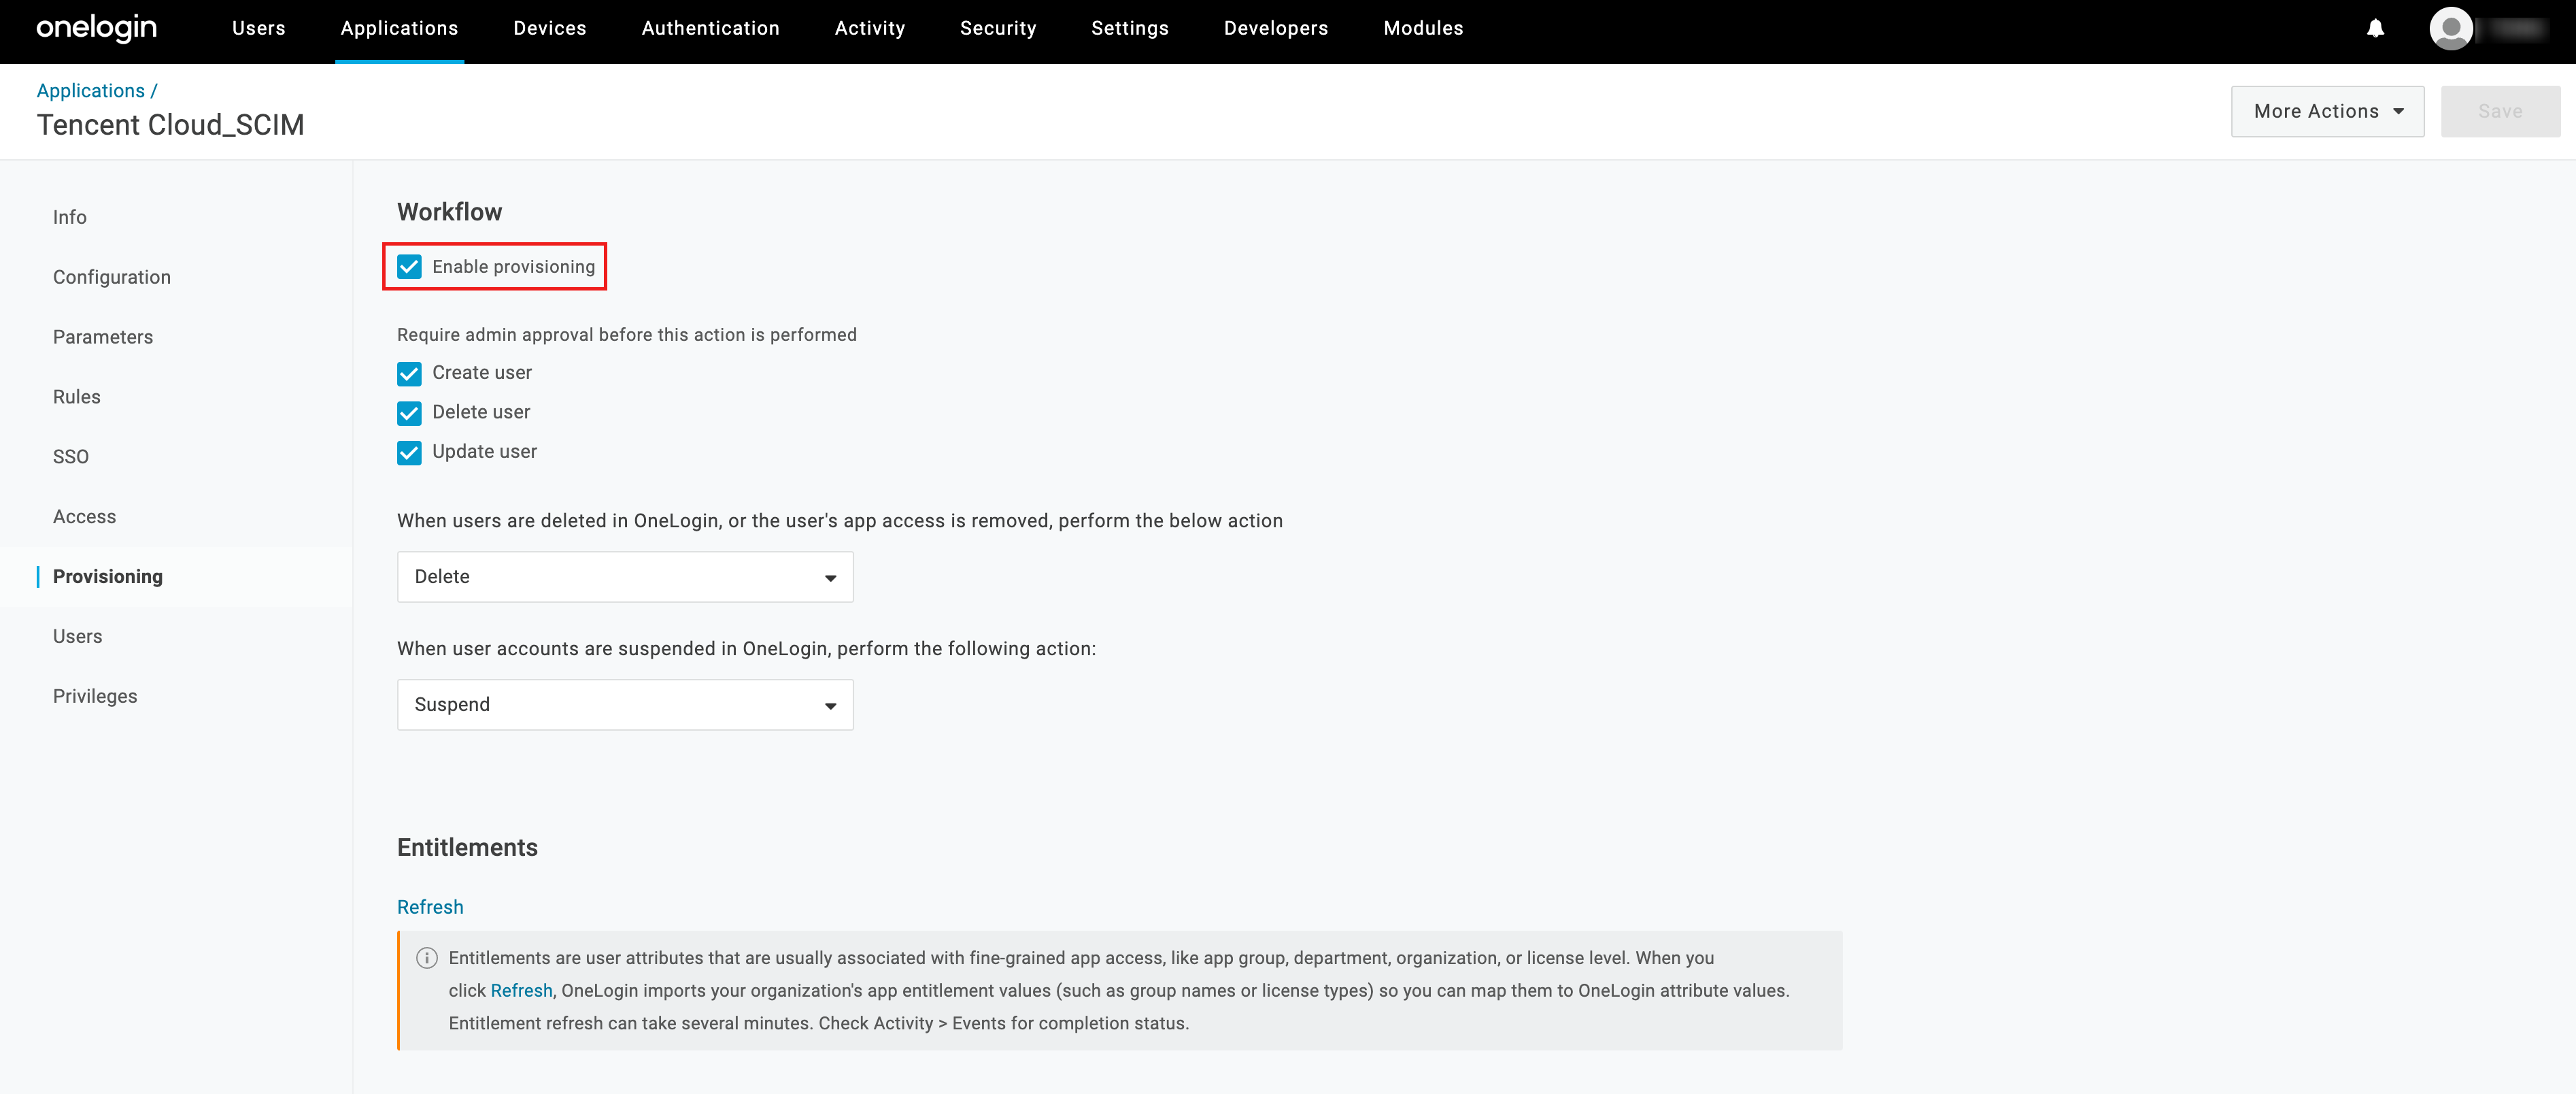
3. In Provisioning, turn on the auto-sync toggle: check Workflow and Enable Provisioning, then click Save.
Step Three: Syncing Users
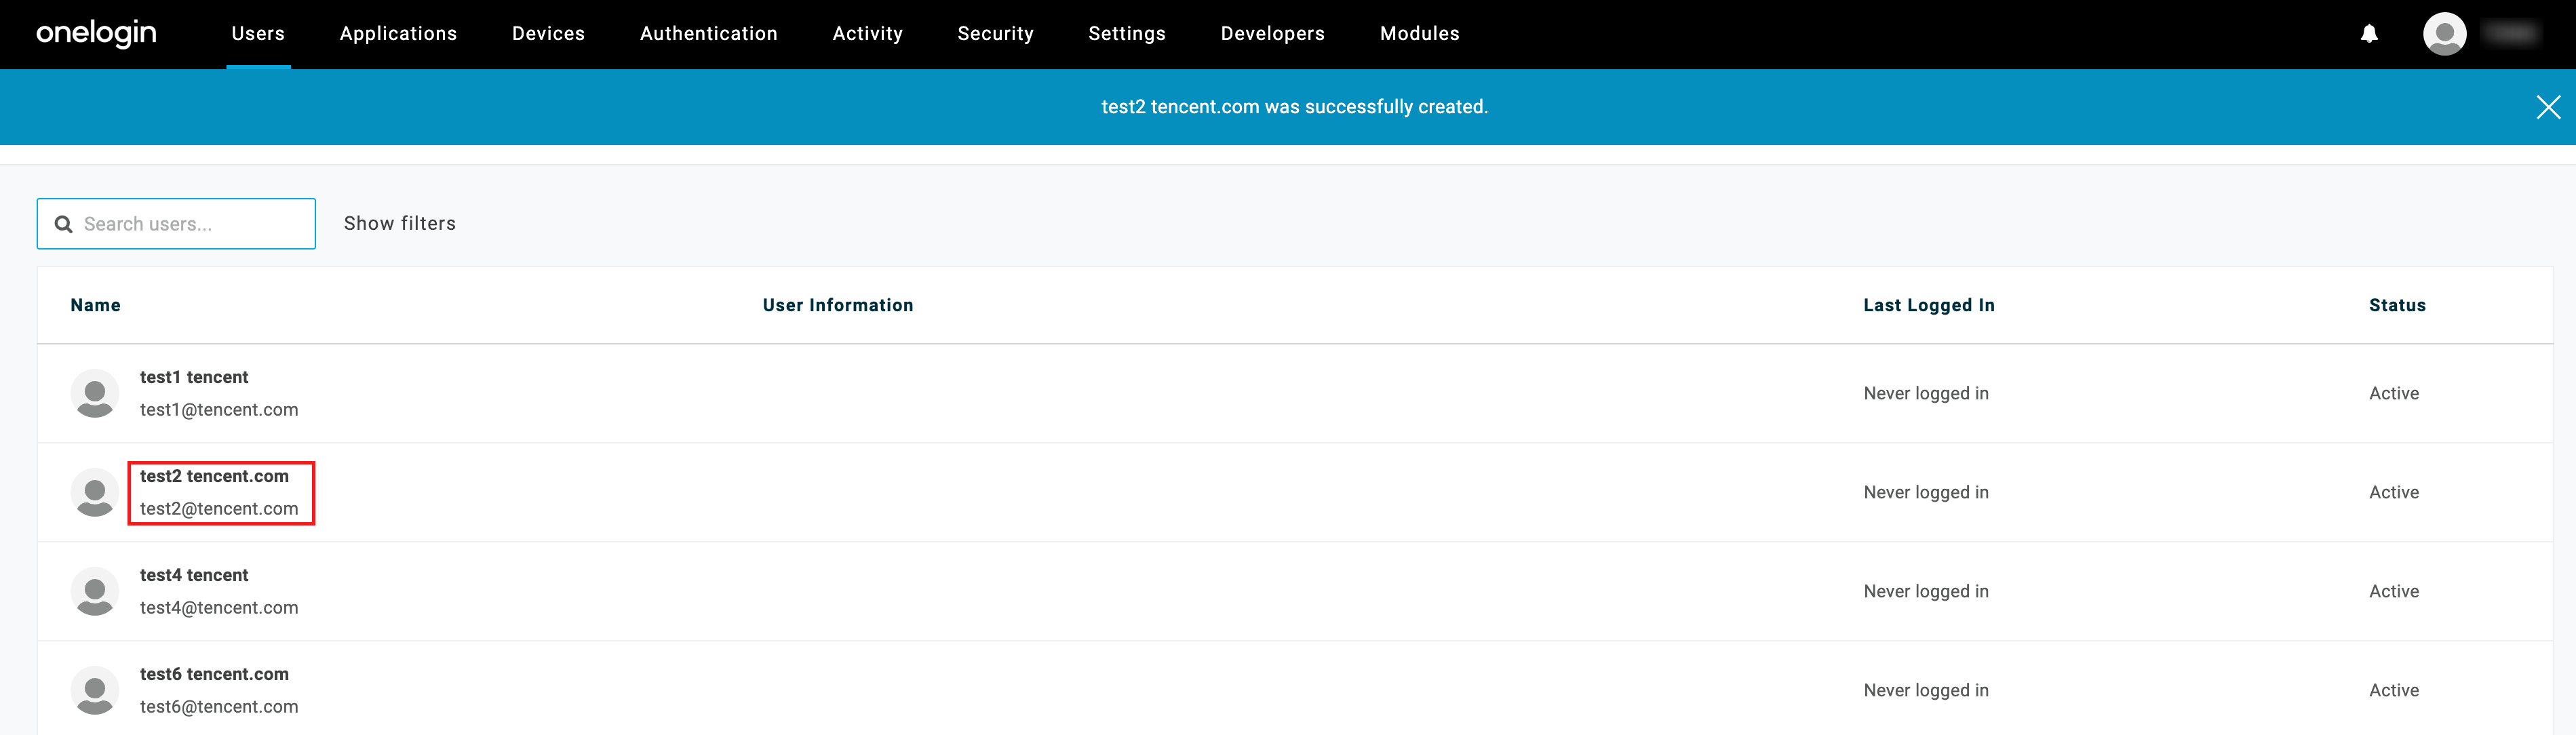
1. In the Users > Users list of user, click the username to be synced to enter user details page. Here, select user test2.
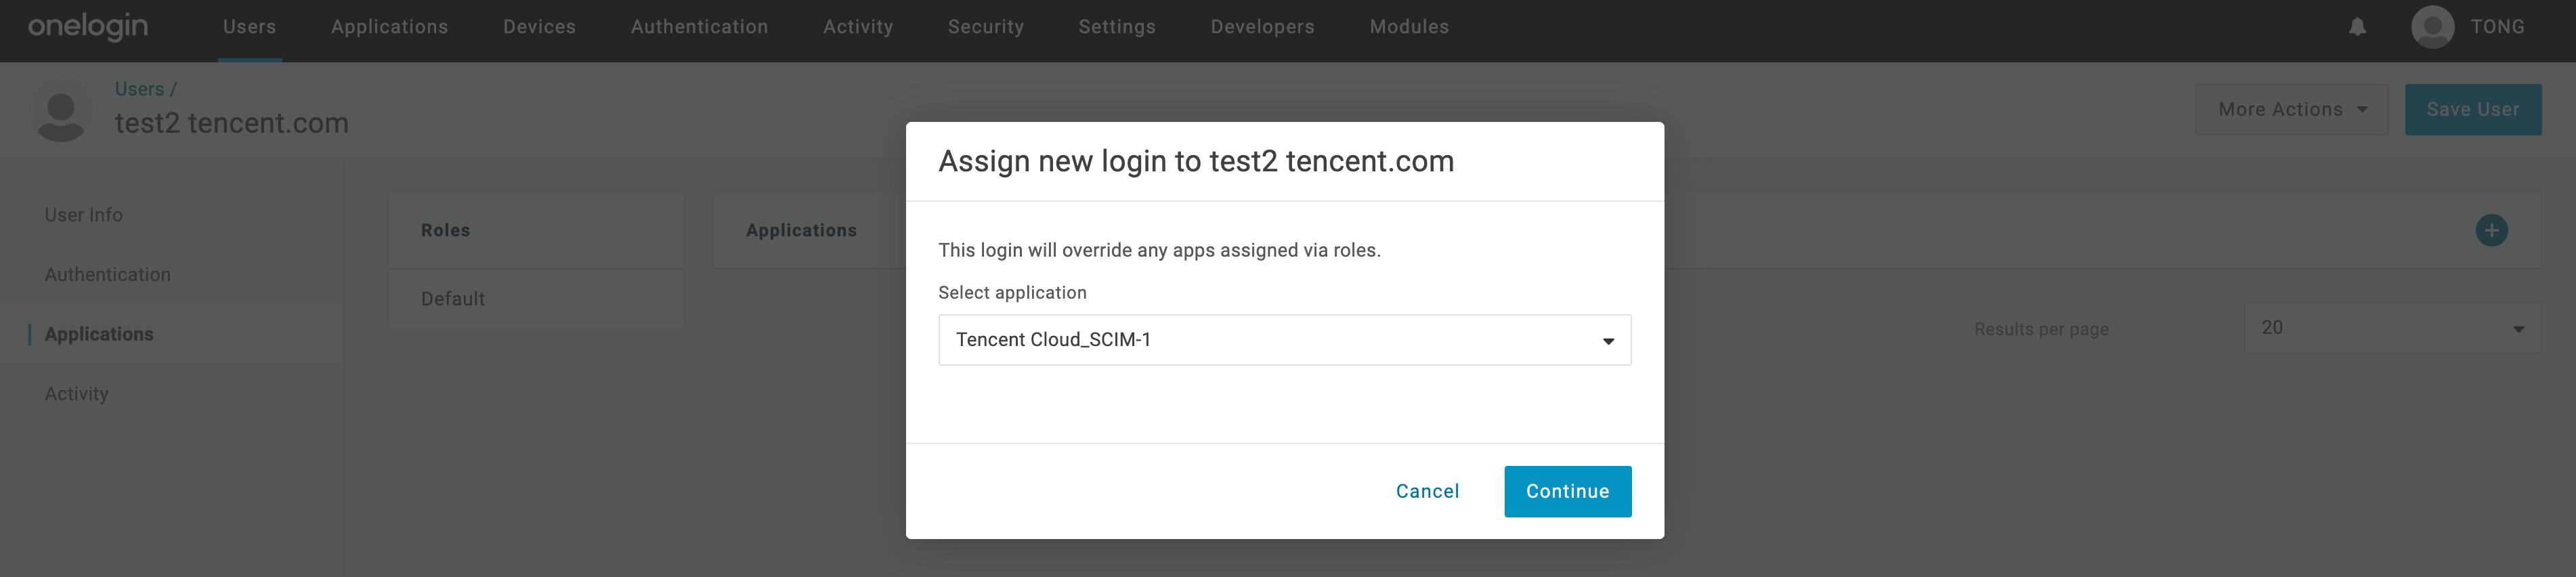
2. On the Applications page, click +, and assign test2 to the target application.
3. In Select application, choose the application created in Step One, and click Continue.
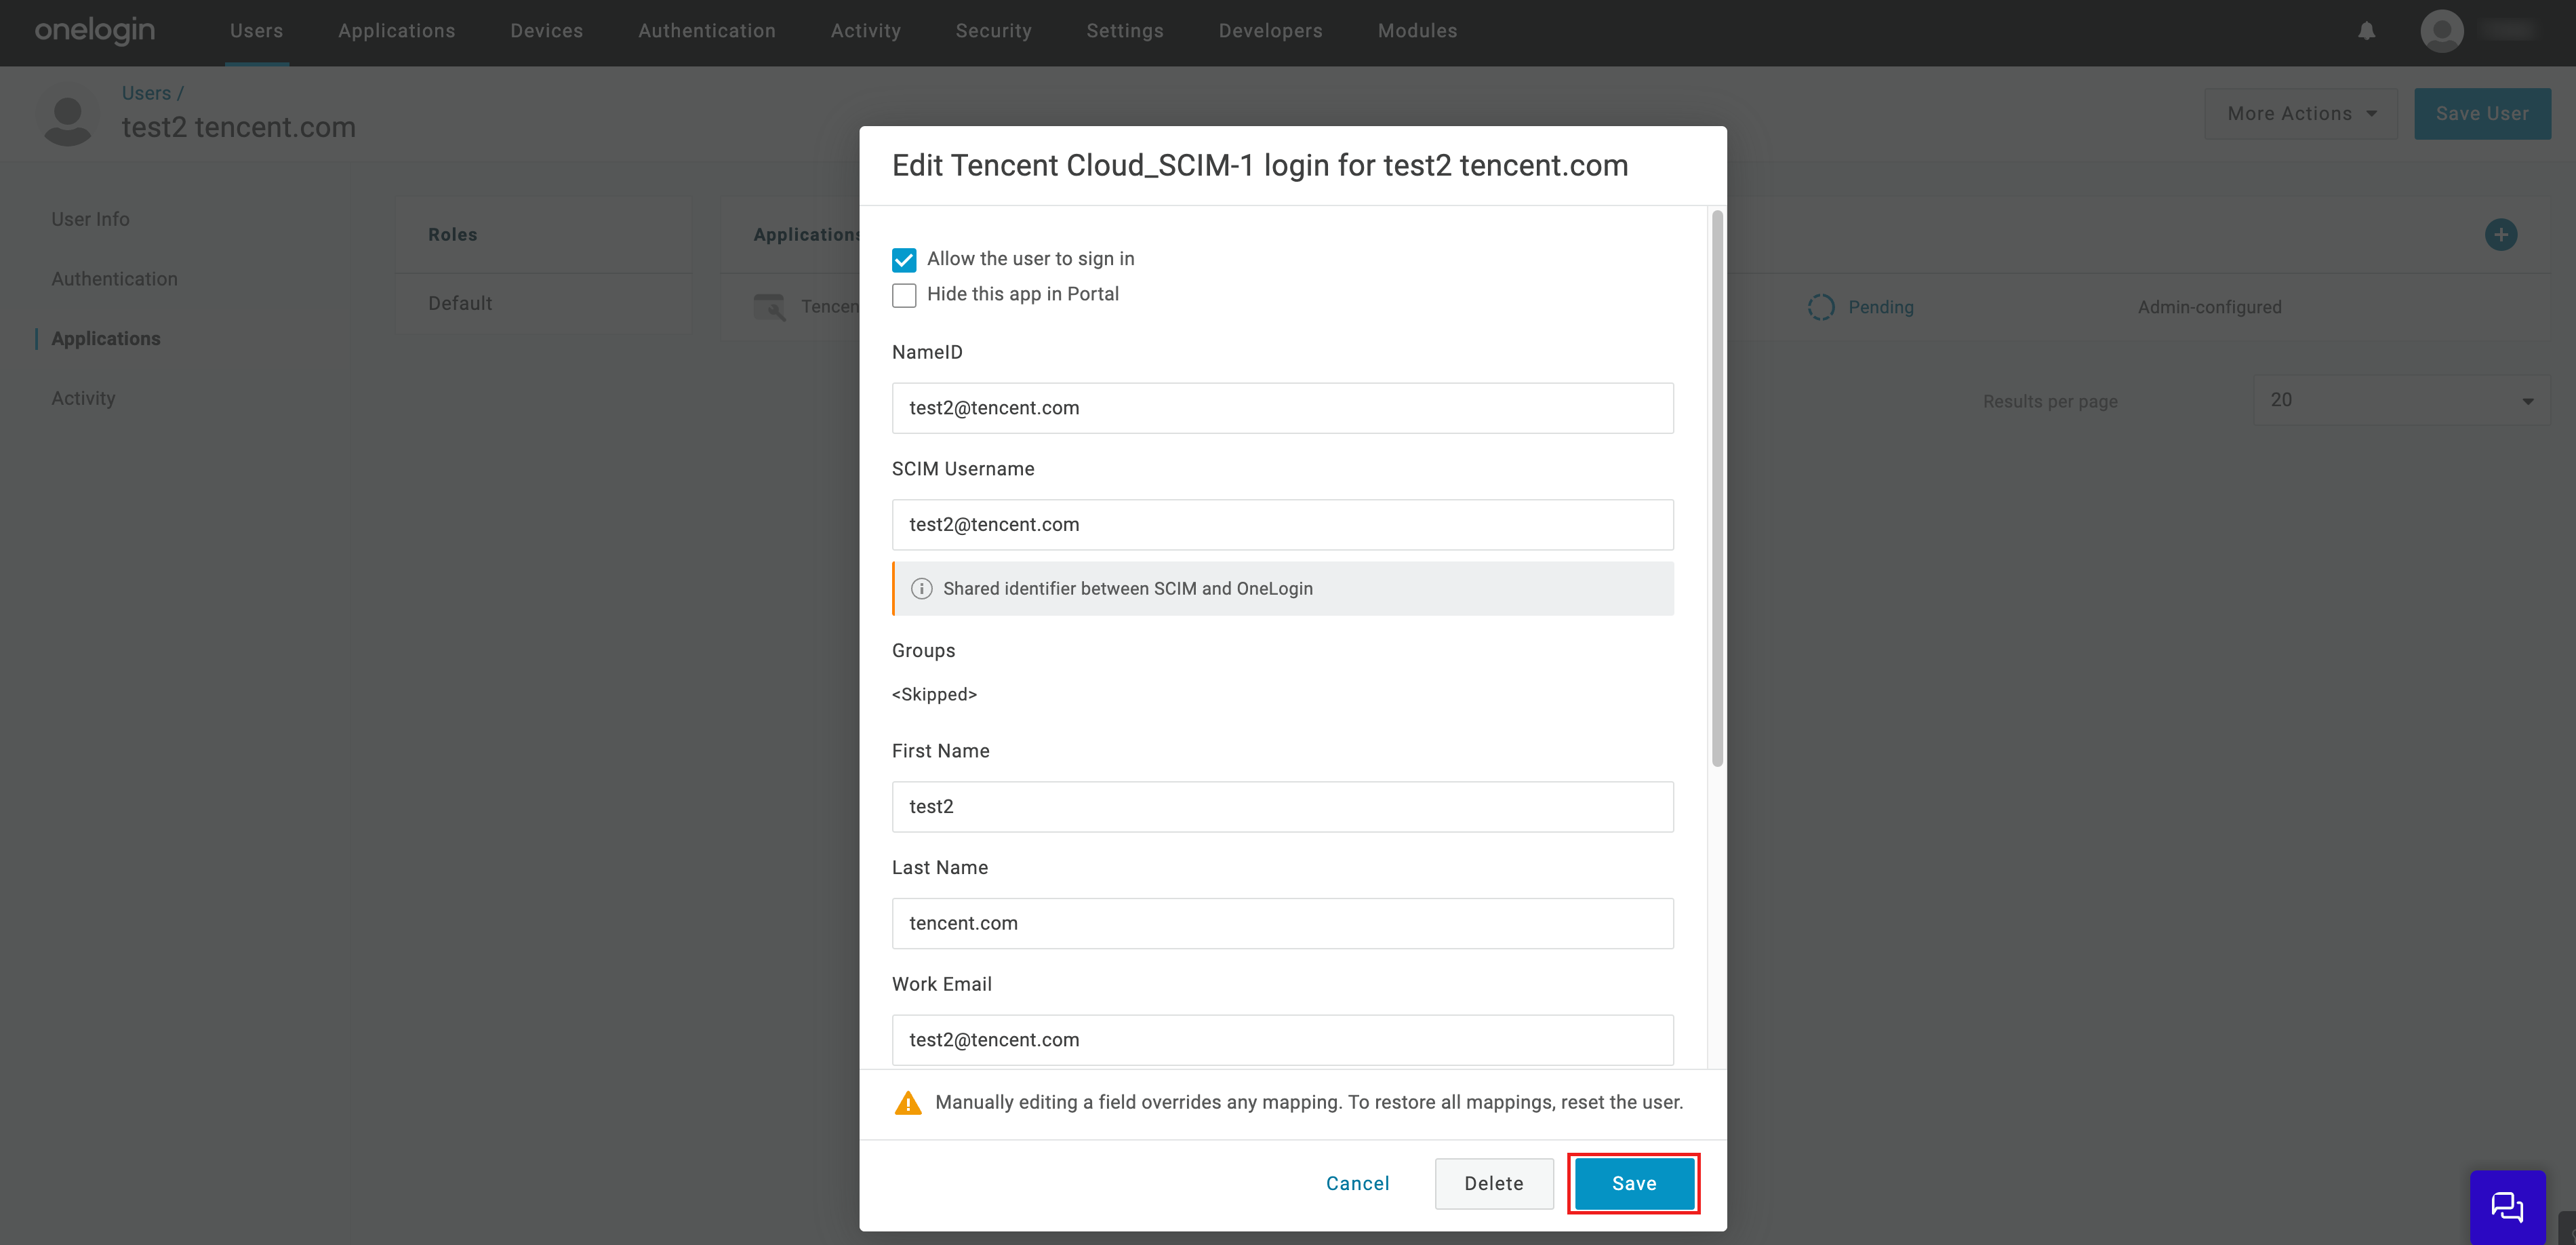
4. In the edit form, modify the username, email, etc. (optional), and click Save.
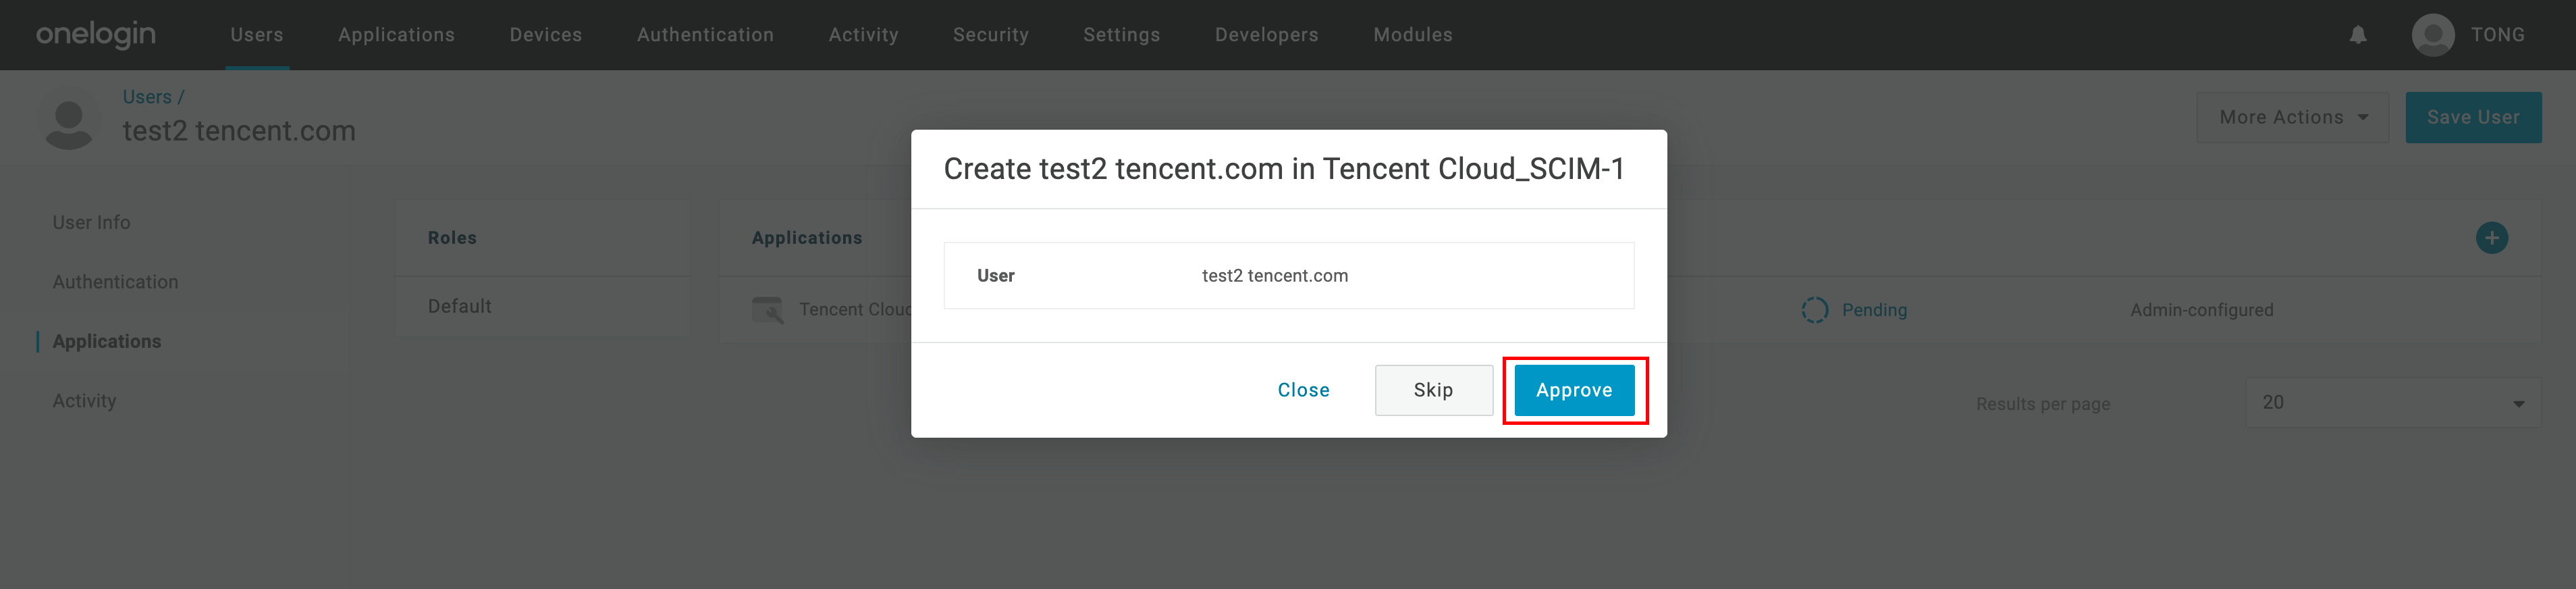
5. At this point, the synchronization status is Pending, click Pending.
6. Confirm sync information, click Approve.
7. Wait for the status to change from Provisioning to Provisioned, indicating synchronization successful.
8. In Identity Management > User Management>Users, check the sync result, test2 sync successful, source is External Import.
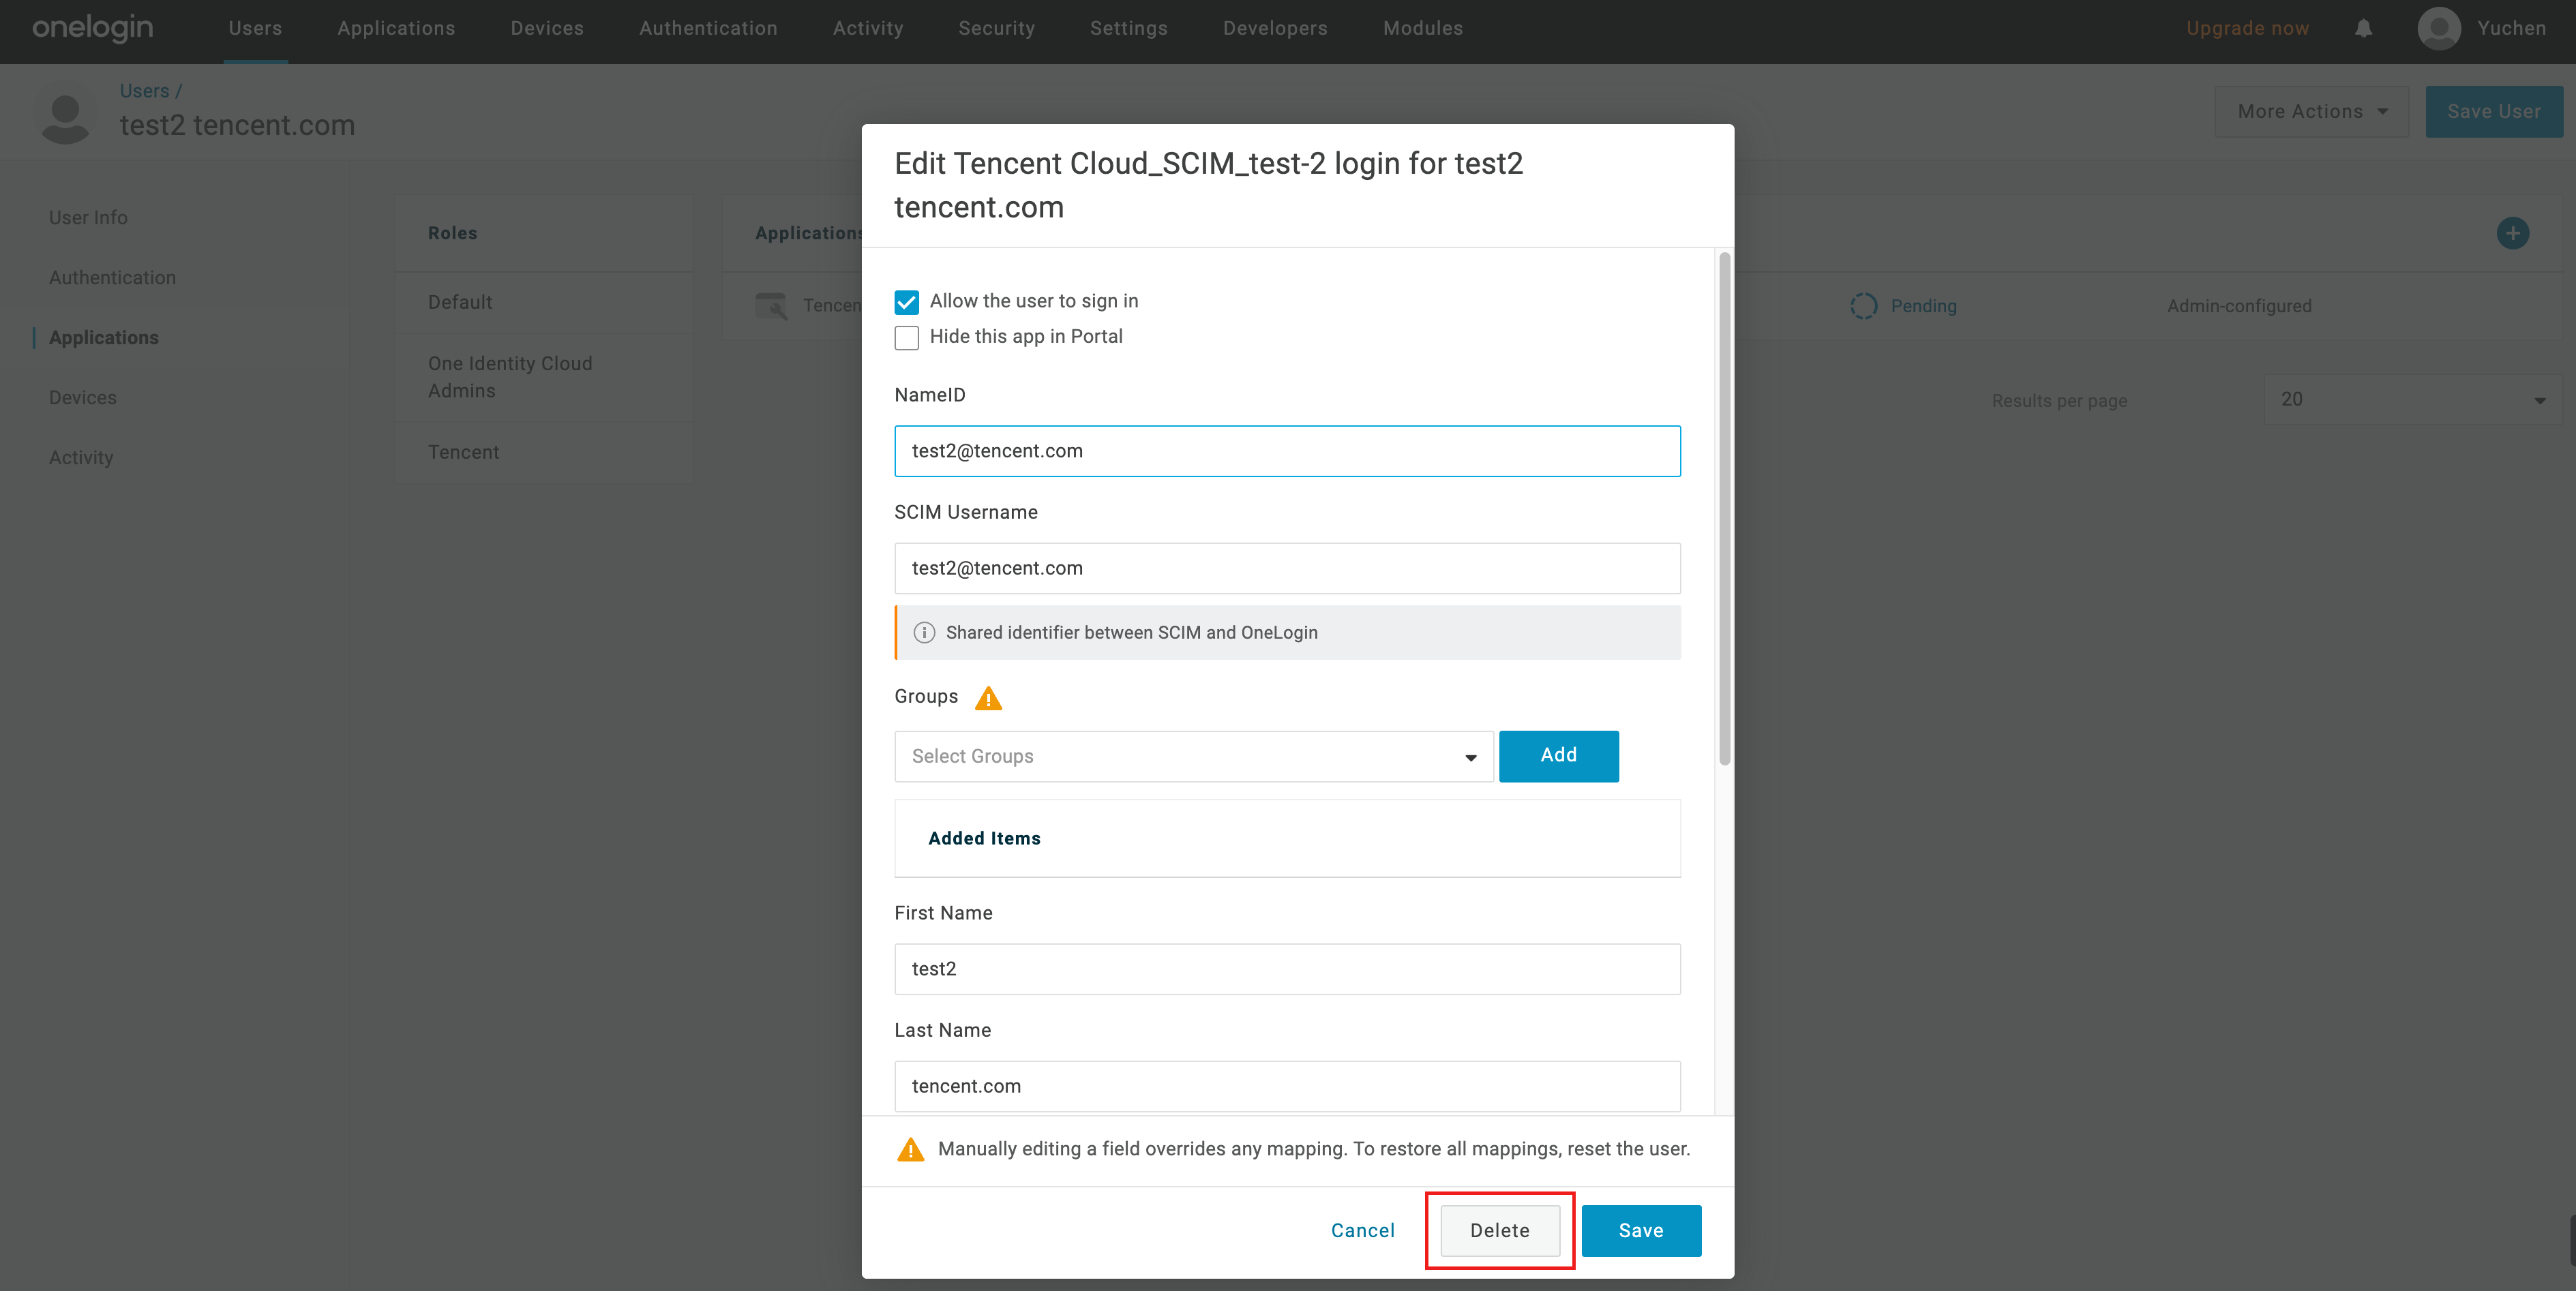
1. Admin logs in to Onelogin, goes to Users > Users, enters the details page of user test2, selects Applications on the left, and click Delete in the Tencent Cloud_SCIM application pop-up.
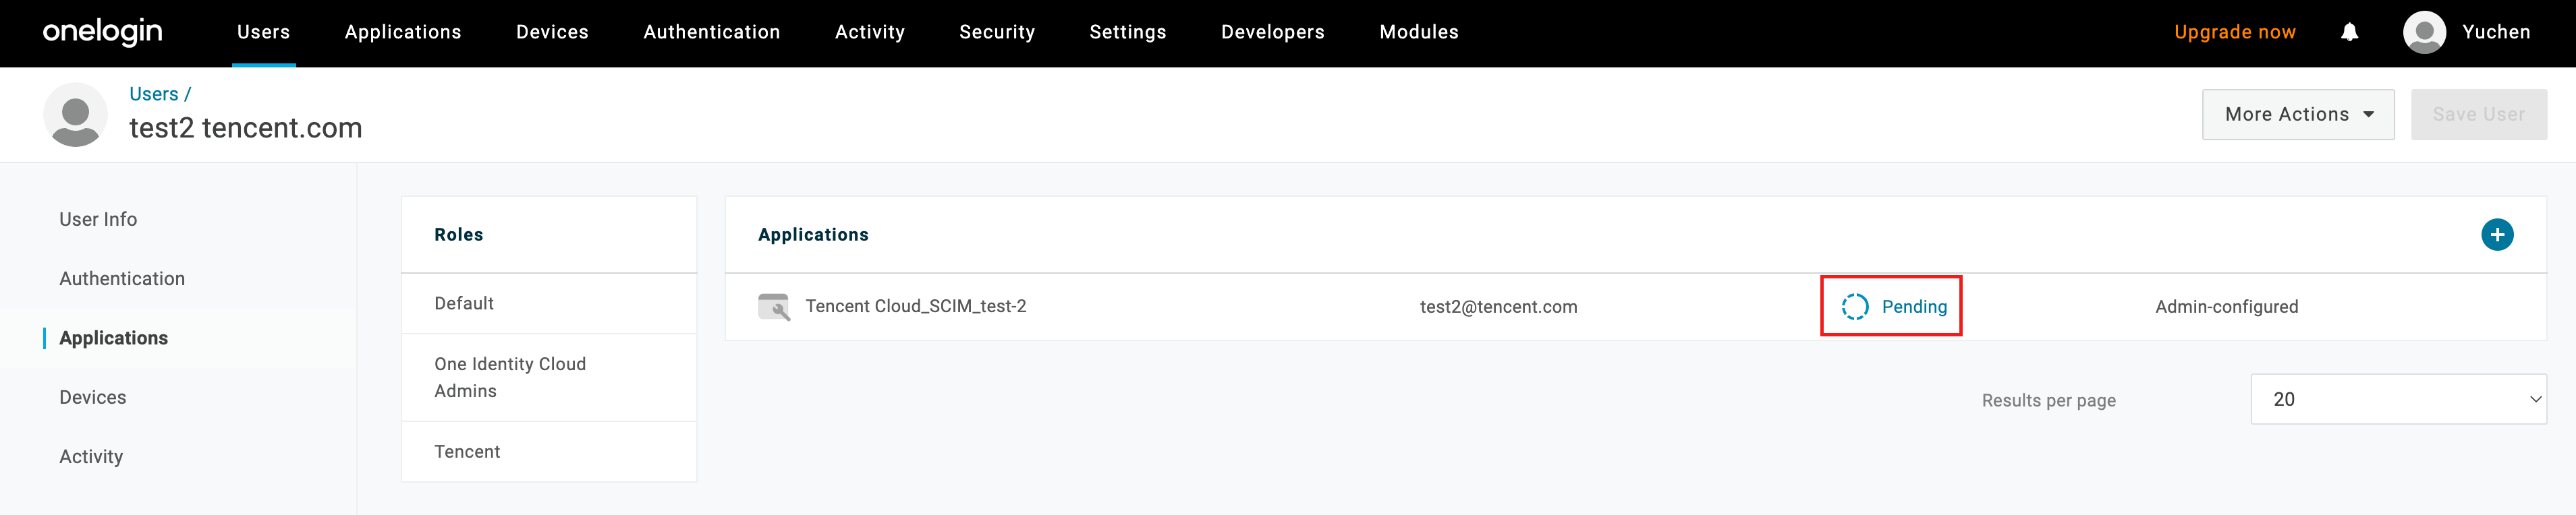
2. A deletion failed message appears, at this point, you need to refresh the page.
3. After refreshing, click the Pending area.
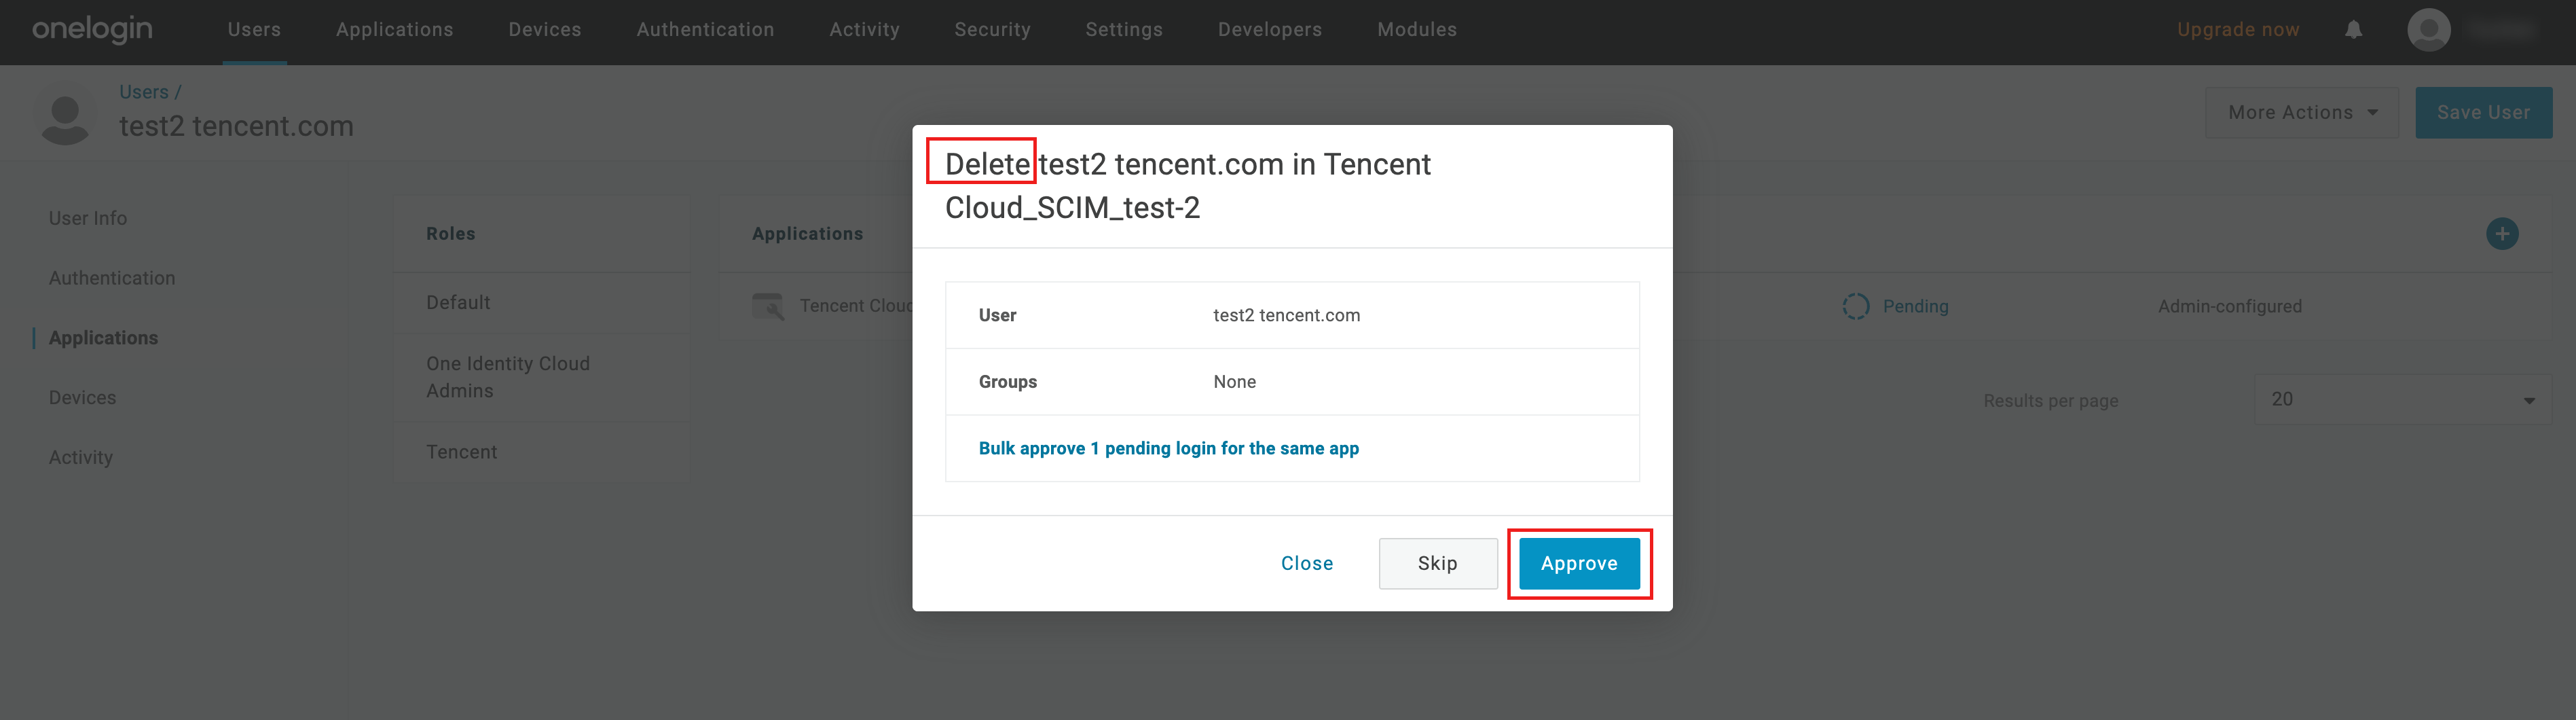
4. In the Delete pop-up, confirm the information and click Approve.
5. Task successful, status changed to Deleting.
6. After deletion, the application is empty.
7. In Identity Management> User Management > User, check the deletion result, test2 deleted successfully.