Web React
Download
포커스 모드
폰트 크기
This guide helps you run a full-featured TUILiveKit live streaming demo on your local machine in under 10 minutes.
Once setup is complete, you can try it as a viewer: watch HD live streams, join in with bullet chat, and send gifts.
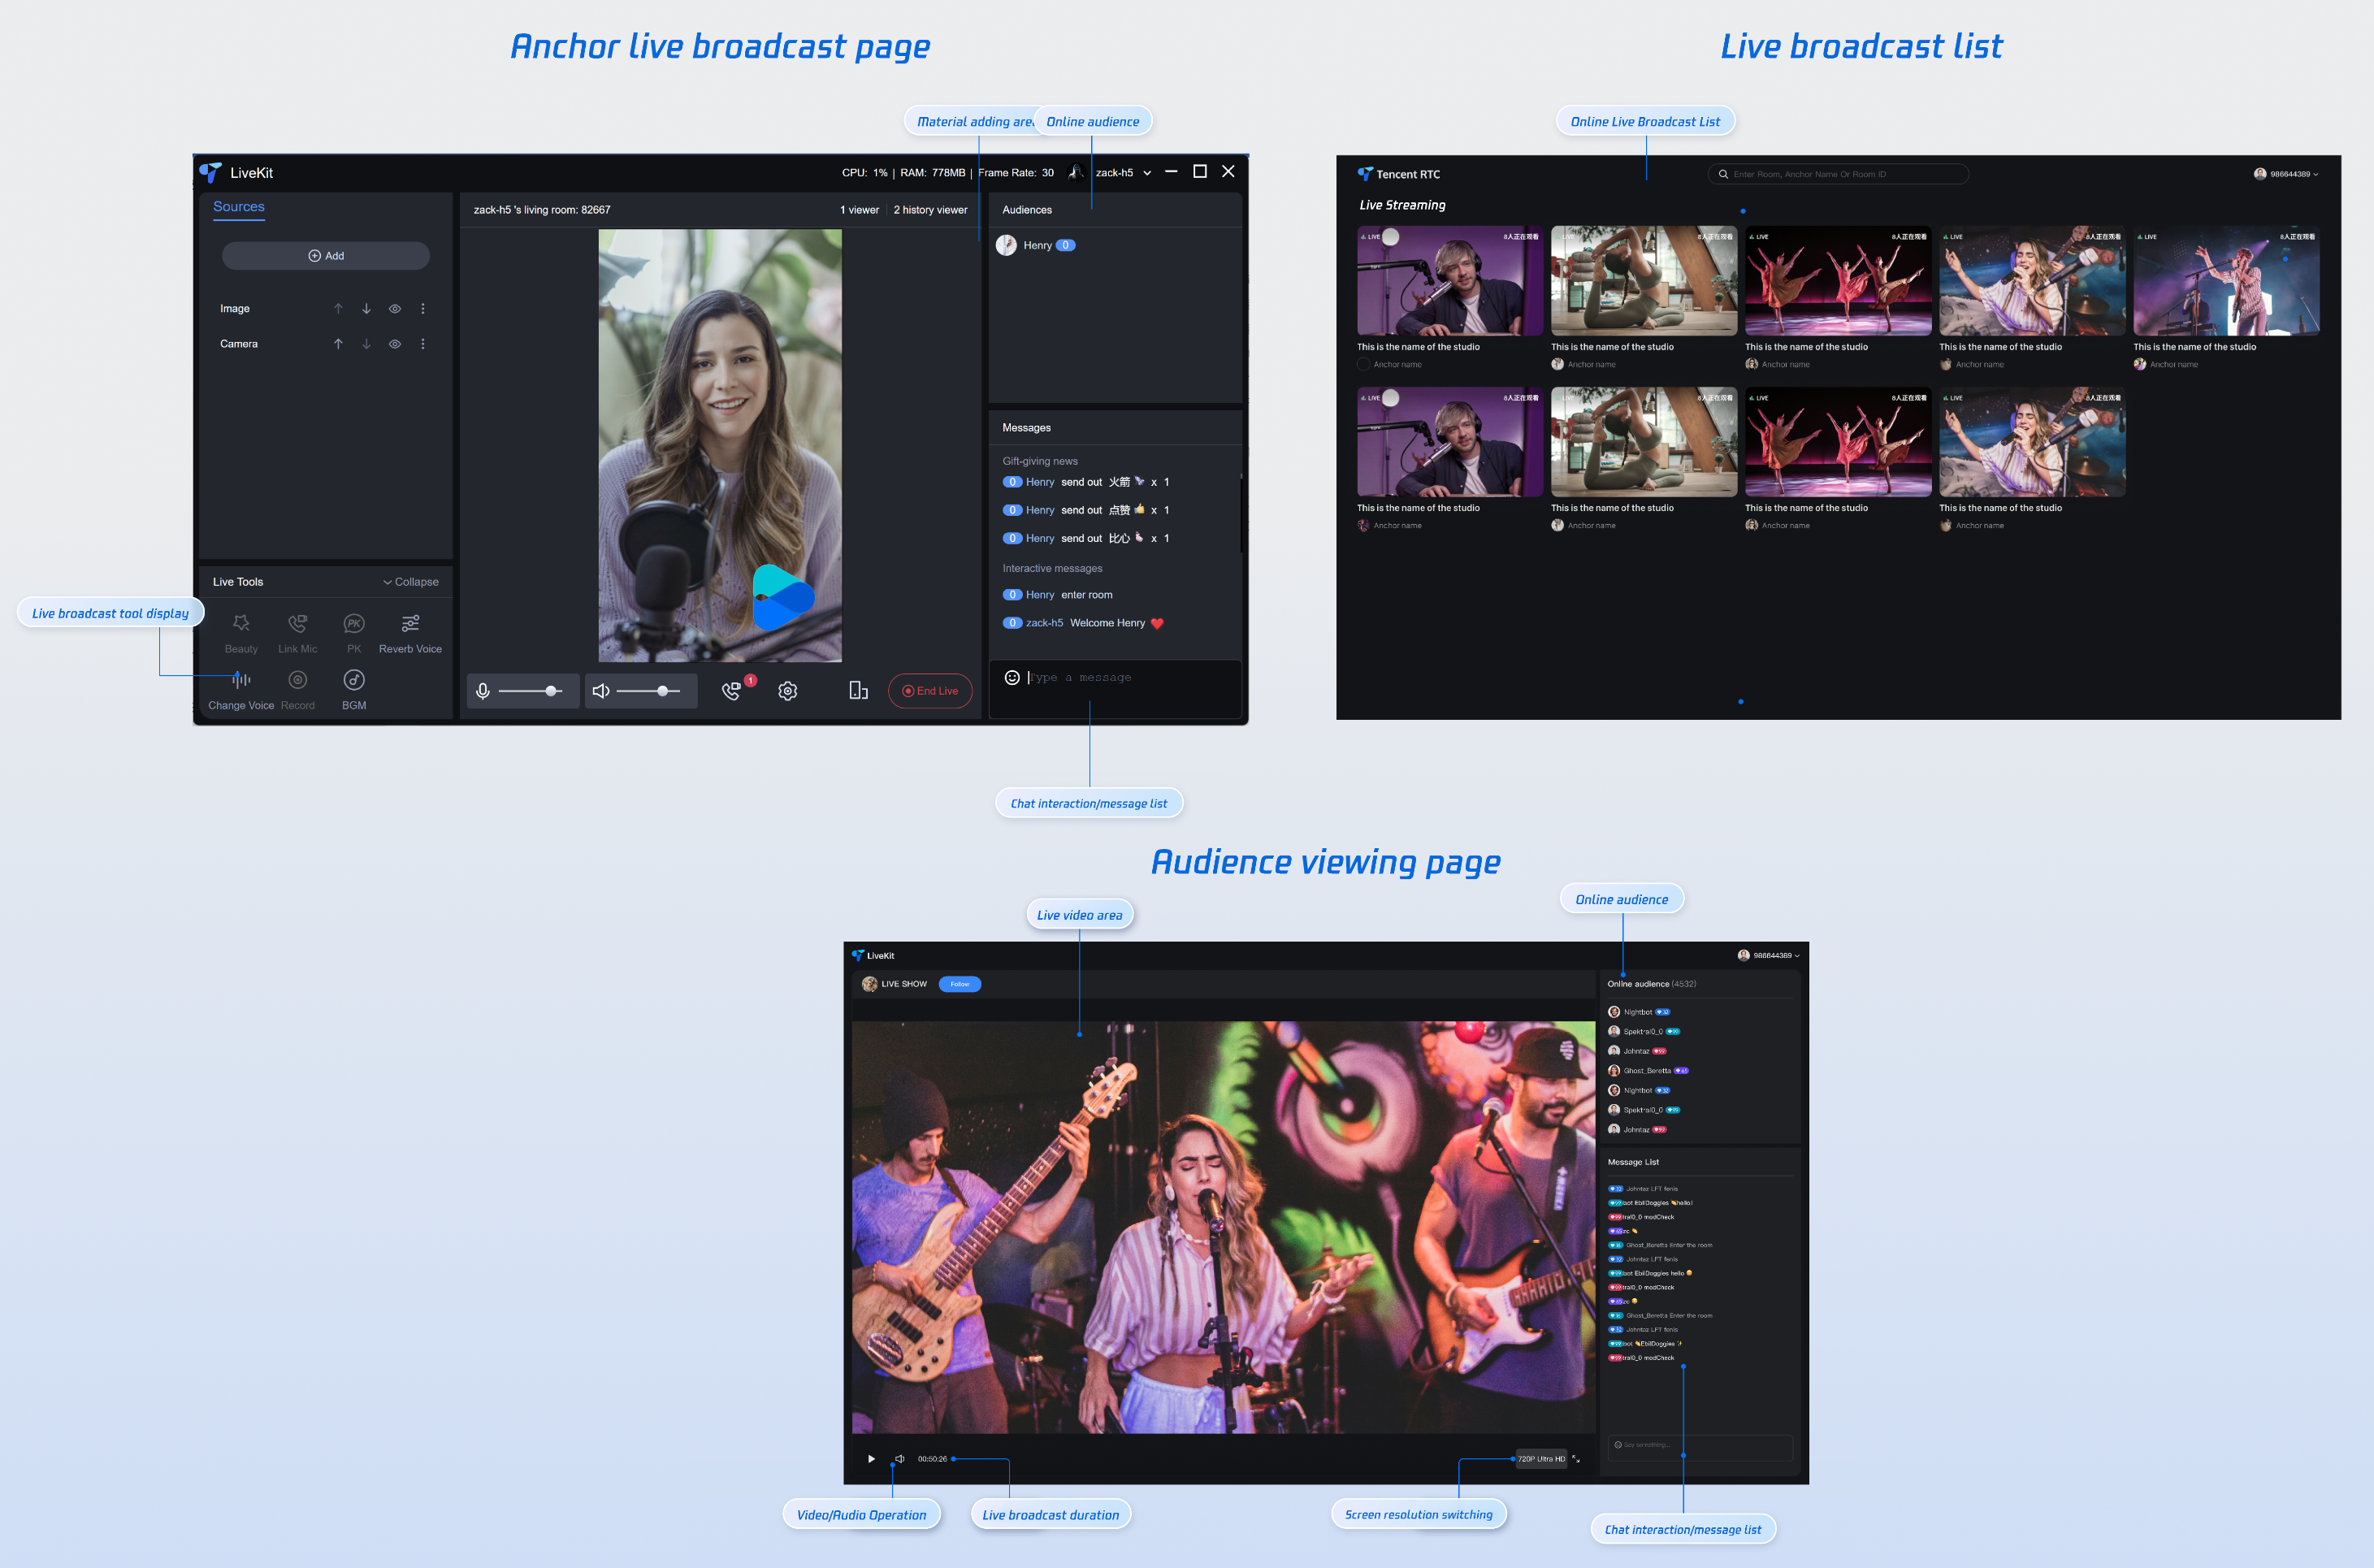
Once successfully launched, you will experience:
As a host: A comprehensive broadcasting interface featuring professional stream-mixing layouts, device controls, and real-time interaction capabilities.
As a viewer: Watching high-definition live streams, interacting via real-time comments (danmu), and sending virtual gifts.
Prerequisites
Enable the Service
Refer to Enable the Service to obtain a TUILiveKit trial version. Then, go to the Console for application management, and get the following:
SDKAppID: Application identifier (required). TRTC uses SDKAppId for billing and details.SDKSecretKey: Application secret key, used to initialize the configuration file with secret information.Environment Preparation
Modern Browser: A modern browser that supports WebRTC APIs.
Devices: Camera, microphone, and speakers.
Node.js: ≥ 18.19.1 (Official LTS version recommended, check your current version with
node -v command).Implementation Steps
Get the Demo
1. Download the TUILiveKit React Demo source code from GitHub, or run the following command directly in the
command line:git clone https://github.com/Tencent-RTC/TUIKit_React.git
2. Navigate to the demo project and install dependencies:
cd TUIKit_React/demos/live-vite-reactnpm install
Configure the Demo
In the project root directory, open the
src/config/basic-info-config.js file and enter the SDKAppID and SDKSecretKey obtained when activating the service: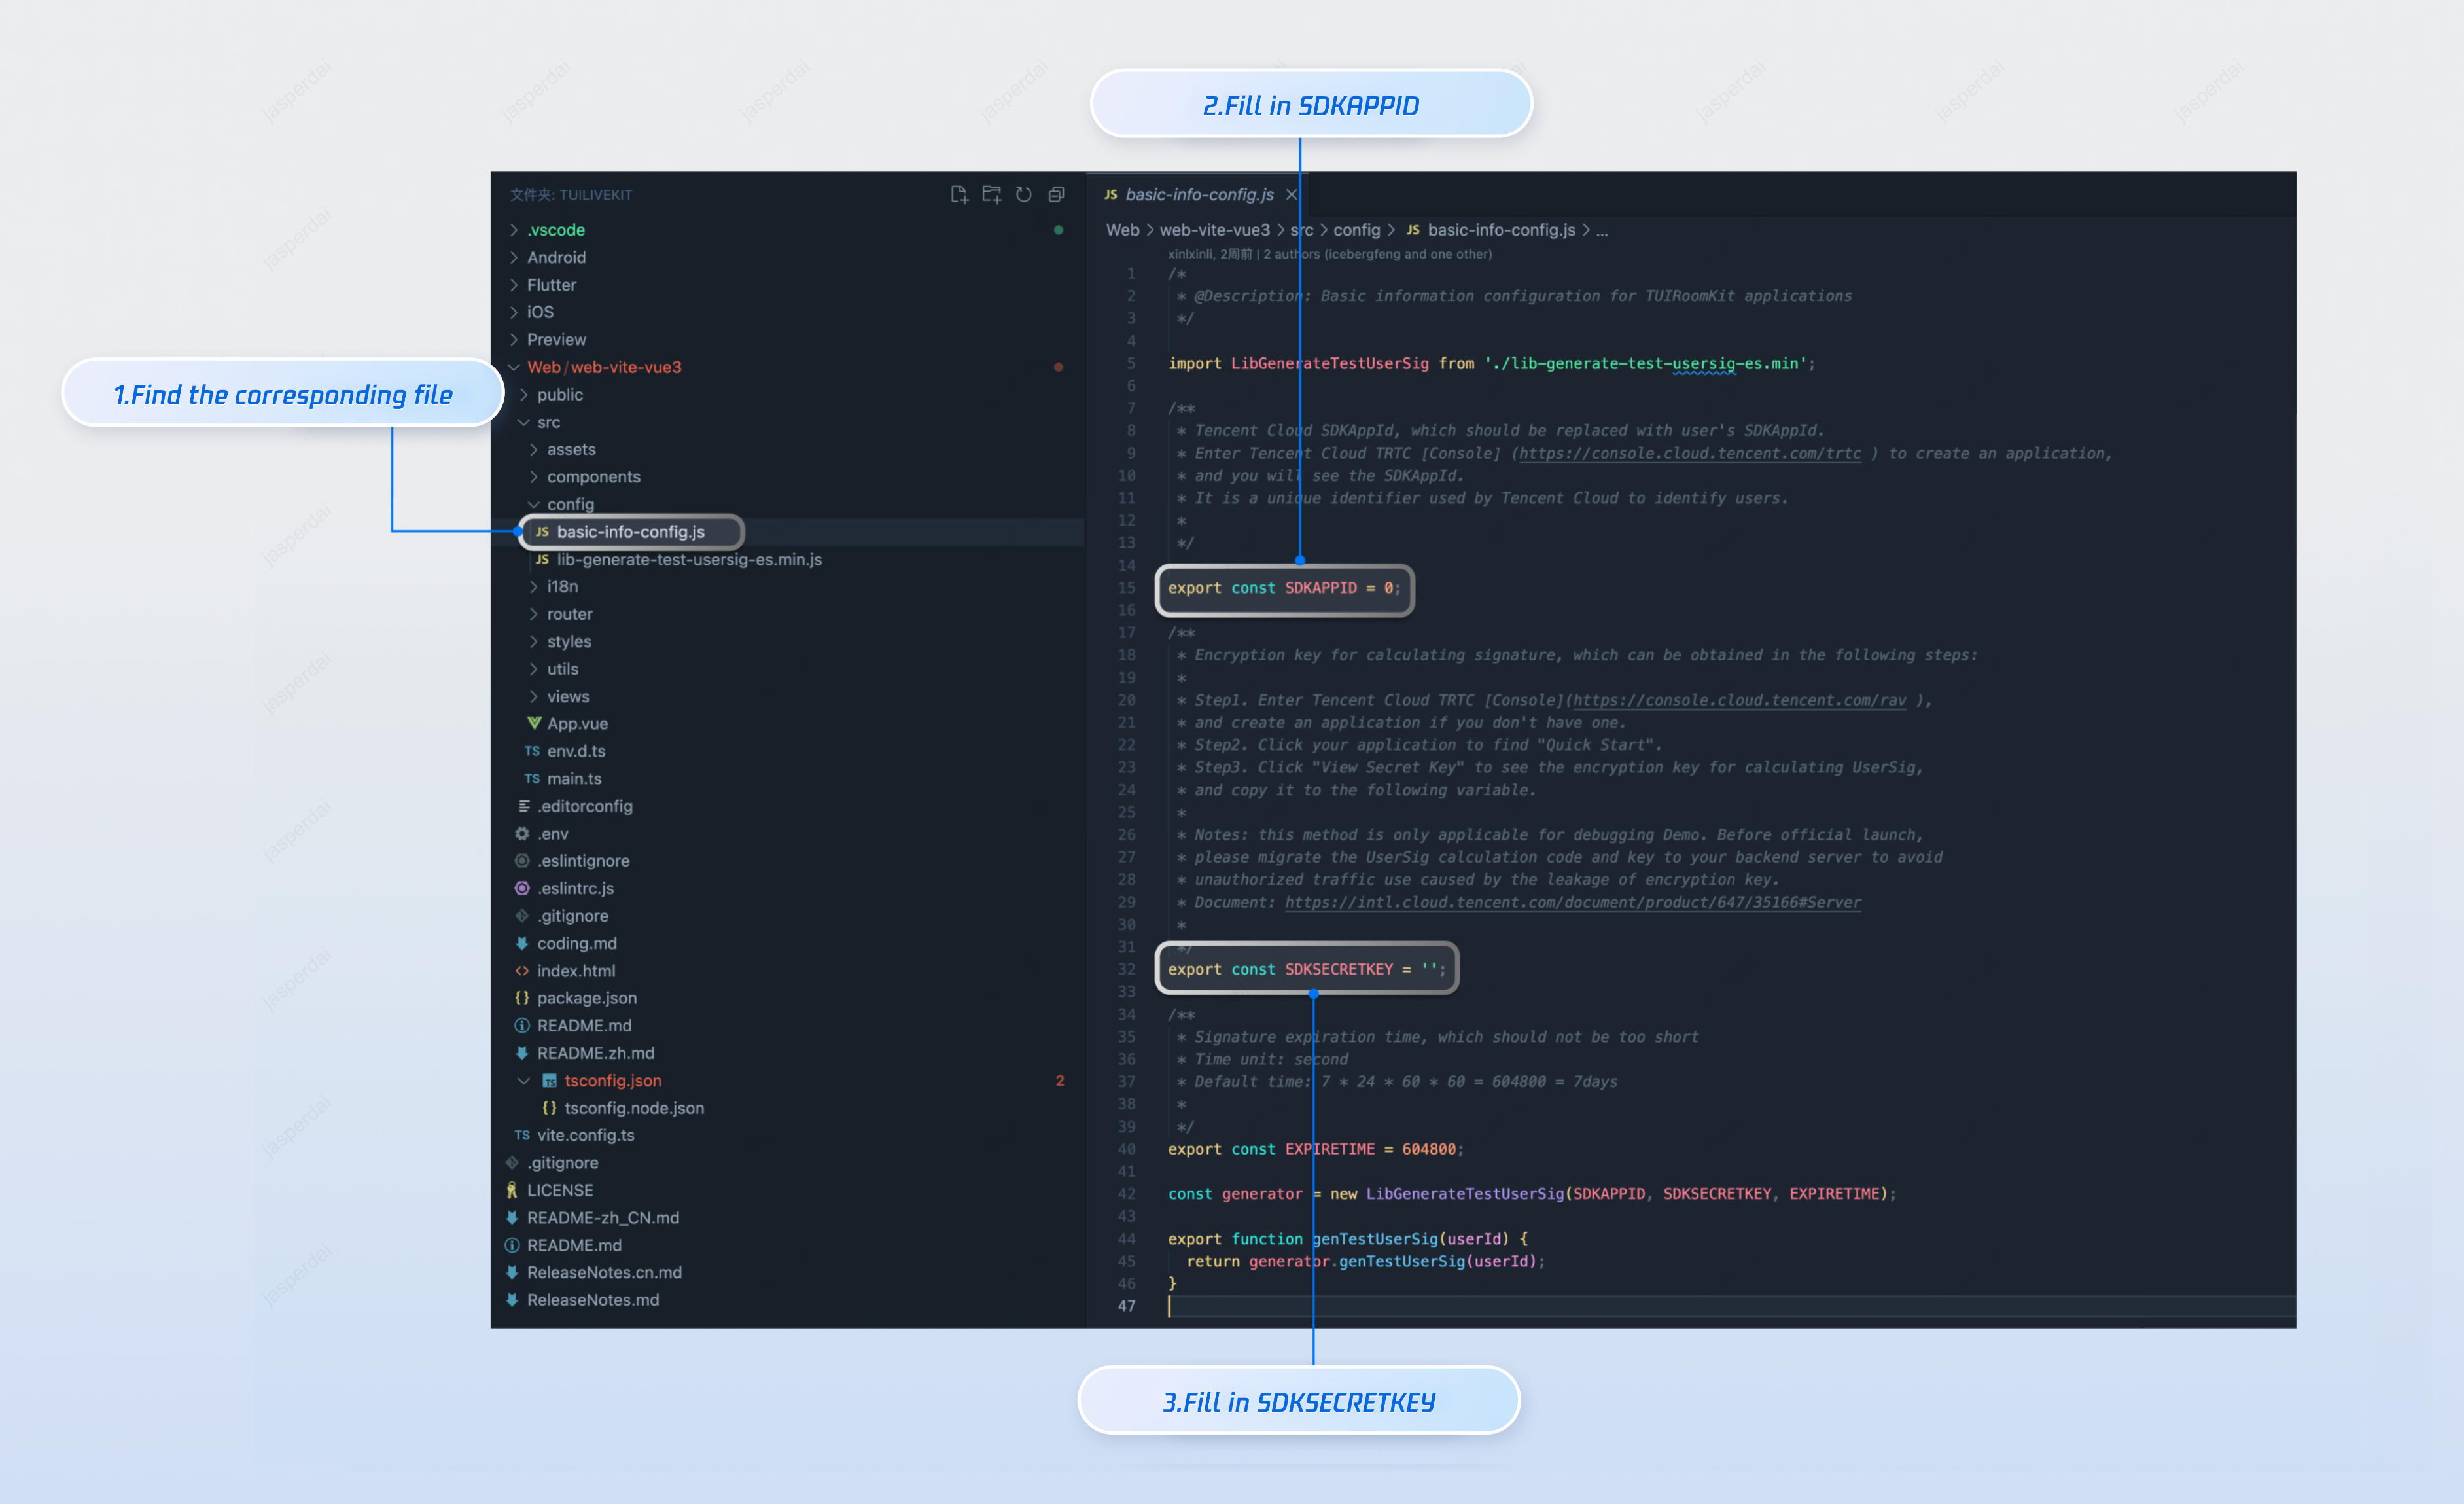
Build and Run the Demo
npm run dev
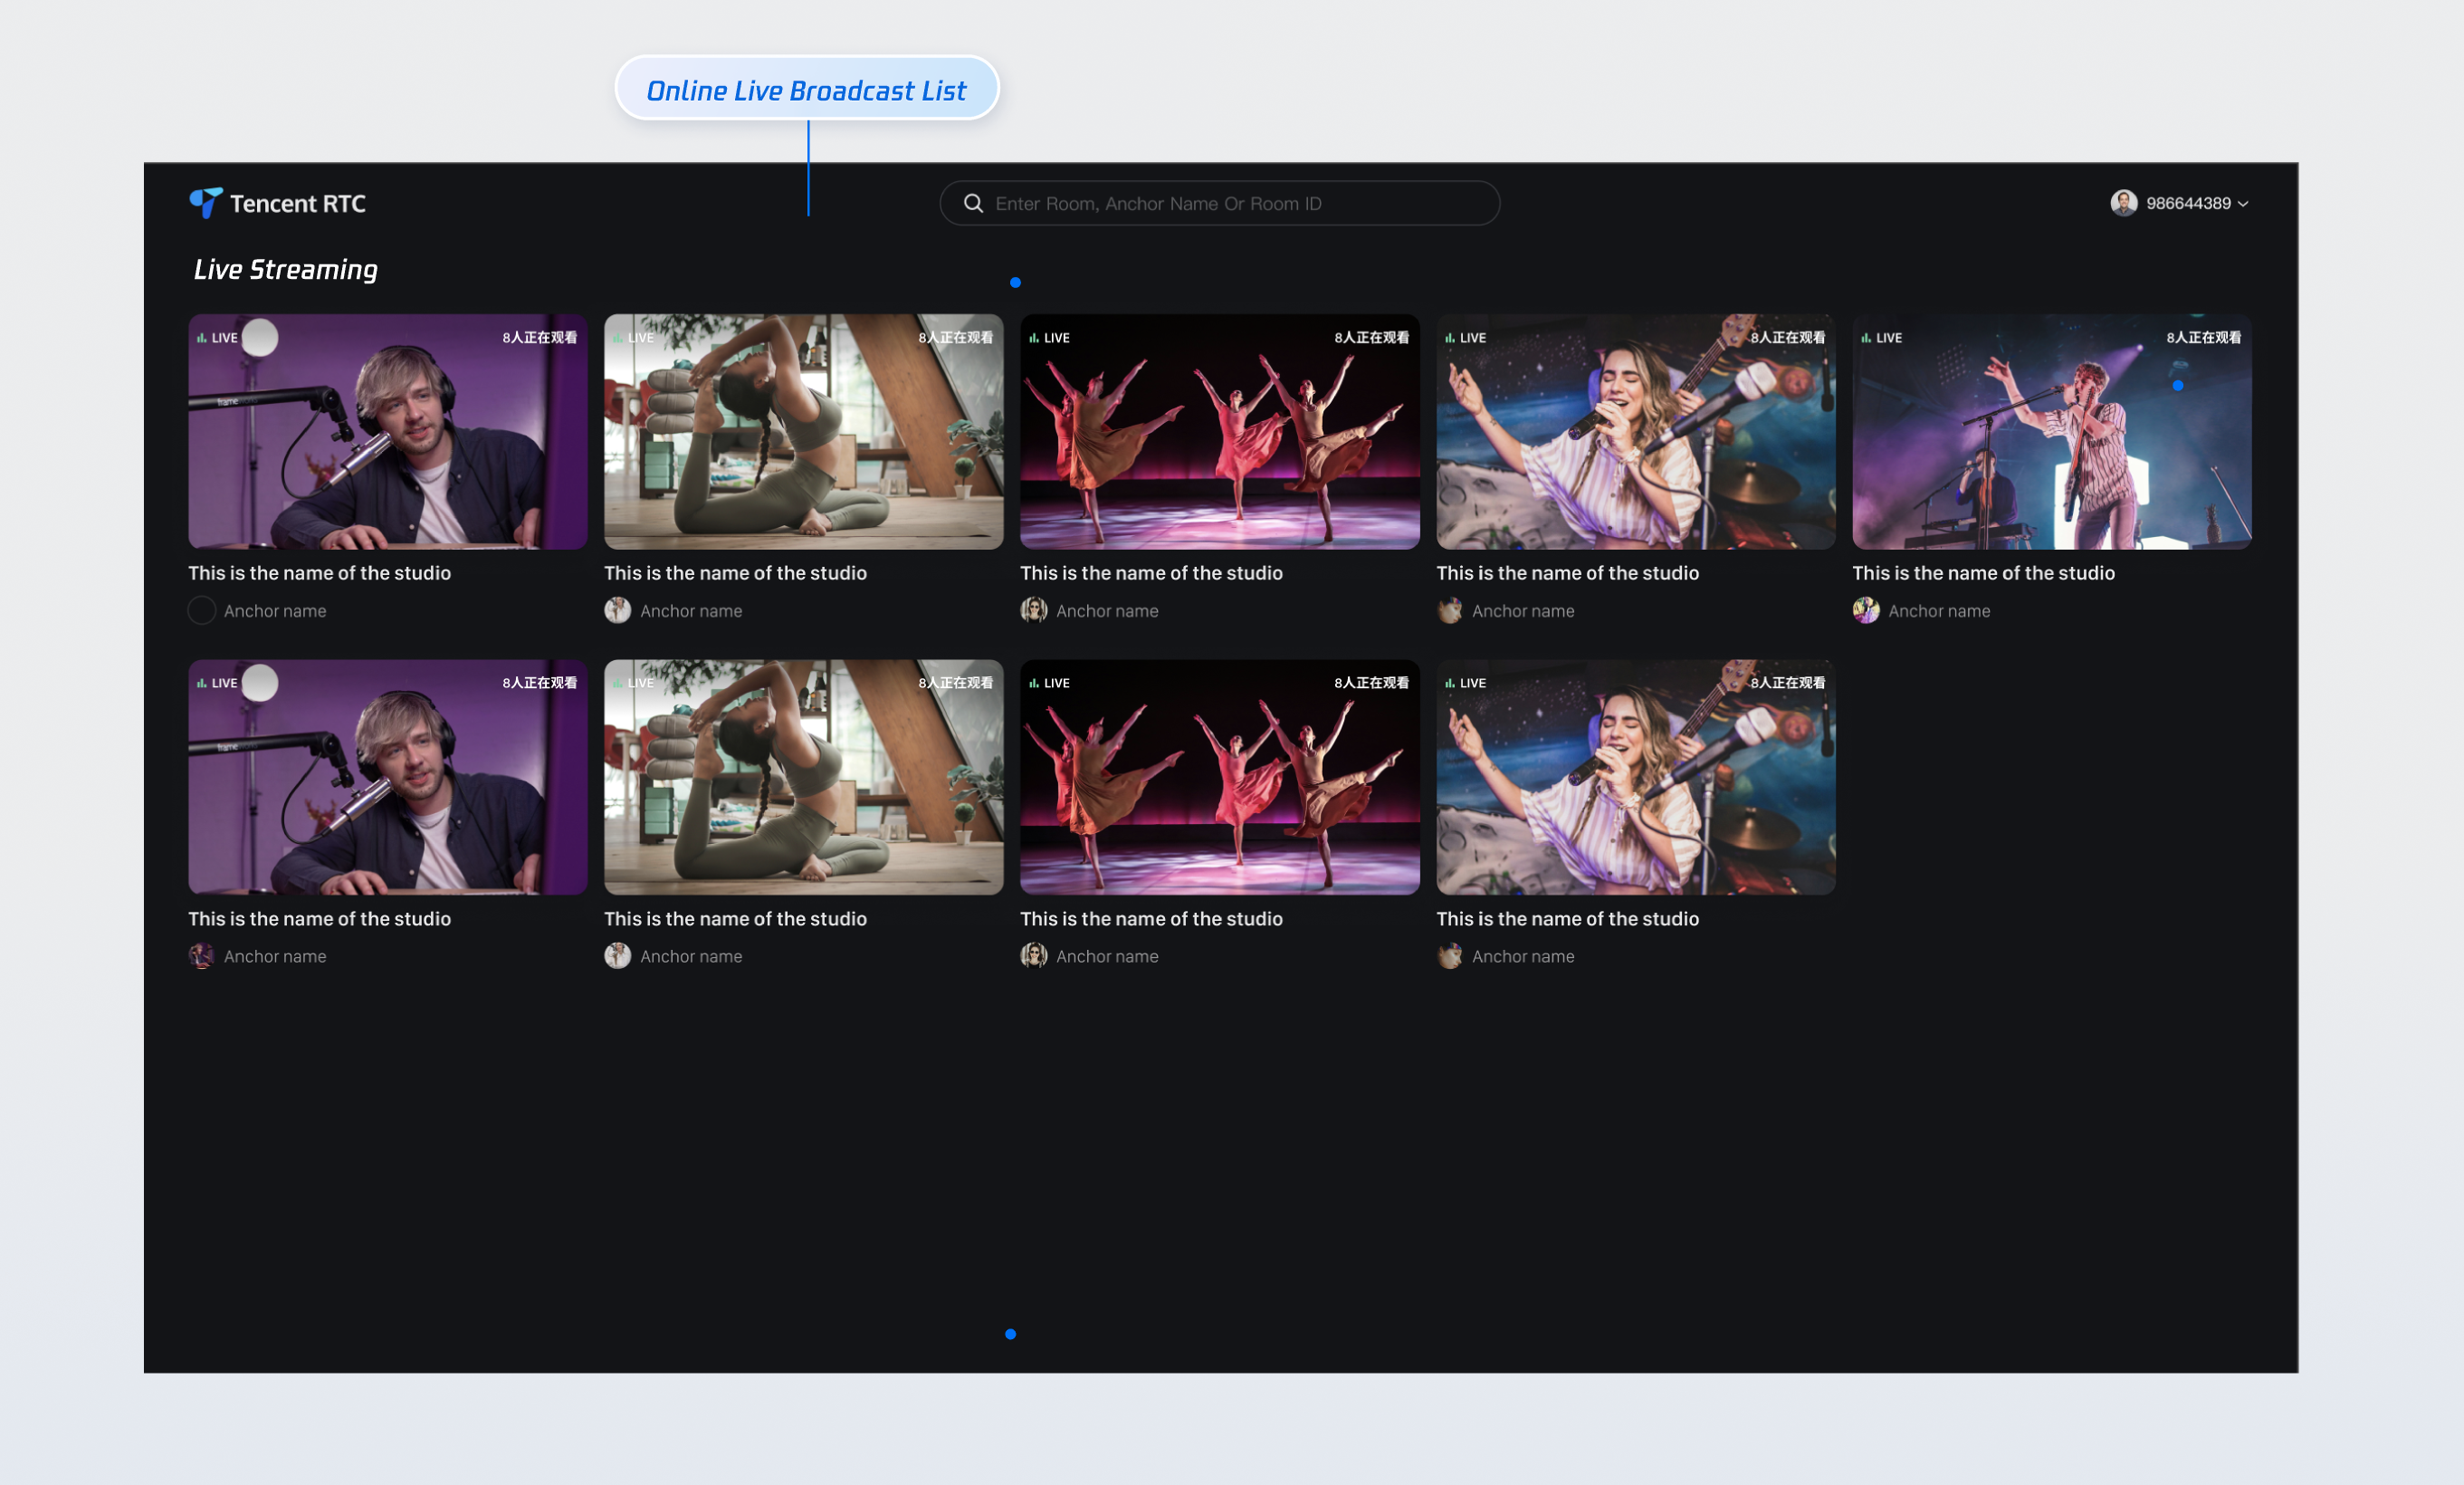
After the project runs successfully, a browser will automatically open and navigate to the live stream list page. At this point, you may see an empty live stream list page as no one is streaming in your application.
Live Streaming and Viewing
Upon launch, the application defaults to the login page; enter a user ID (e.g., "host") to log in. Once logged in, you will be directed to the live stream list. Upon the first run, the list will typically be empty as no streams are currently active; you can tap the "Start Live Stream" button in the top-right corner to access the broadcast setup page.
Watching the Live Stream via the React Demo
Once the live stream has successfully started, refresh the browser page launched via the `npm run dev` command (typically `http://localhost:5173`). The live stream you just initiated will appear; simply click on it from the list to enter the viewing page.
Starting a Live Stream as a Host
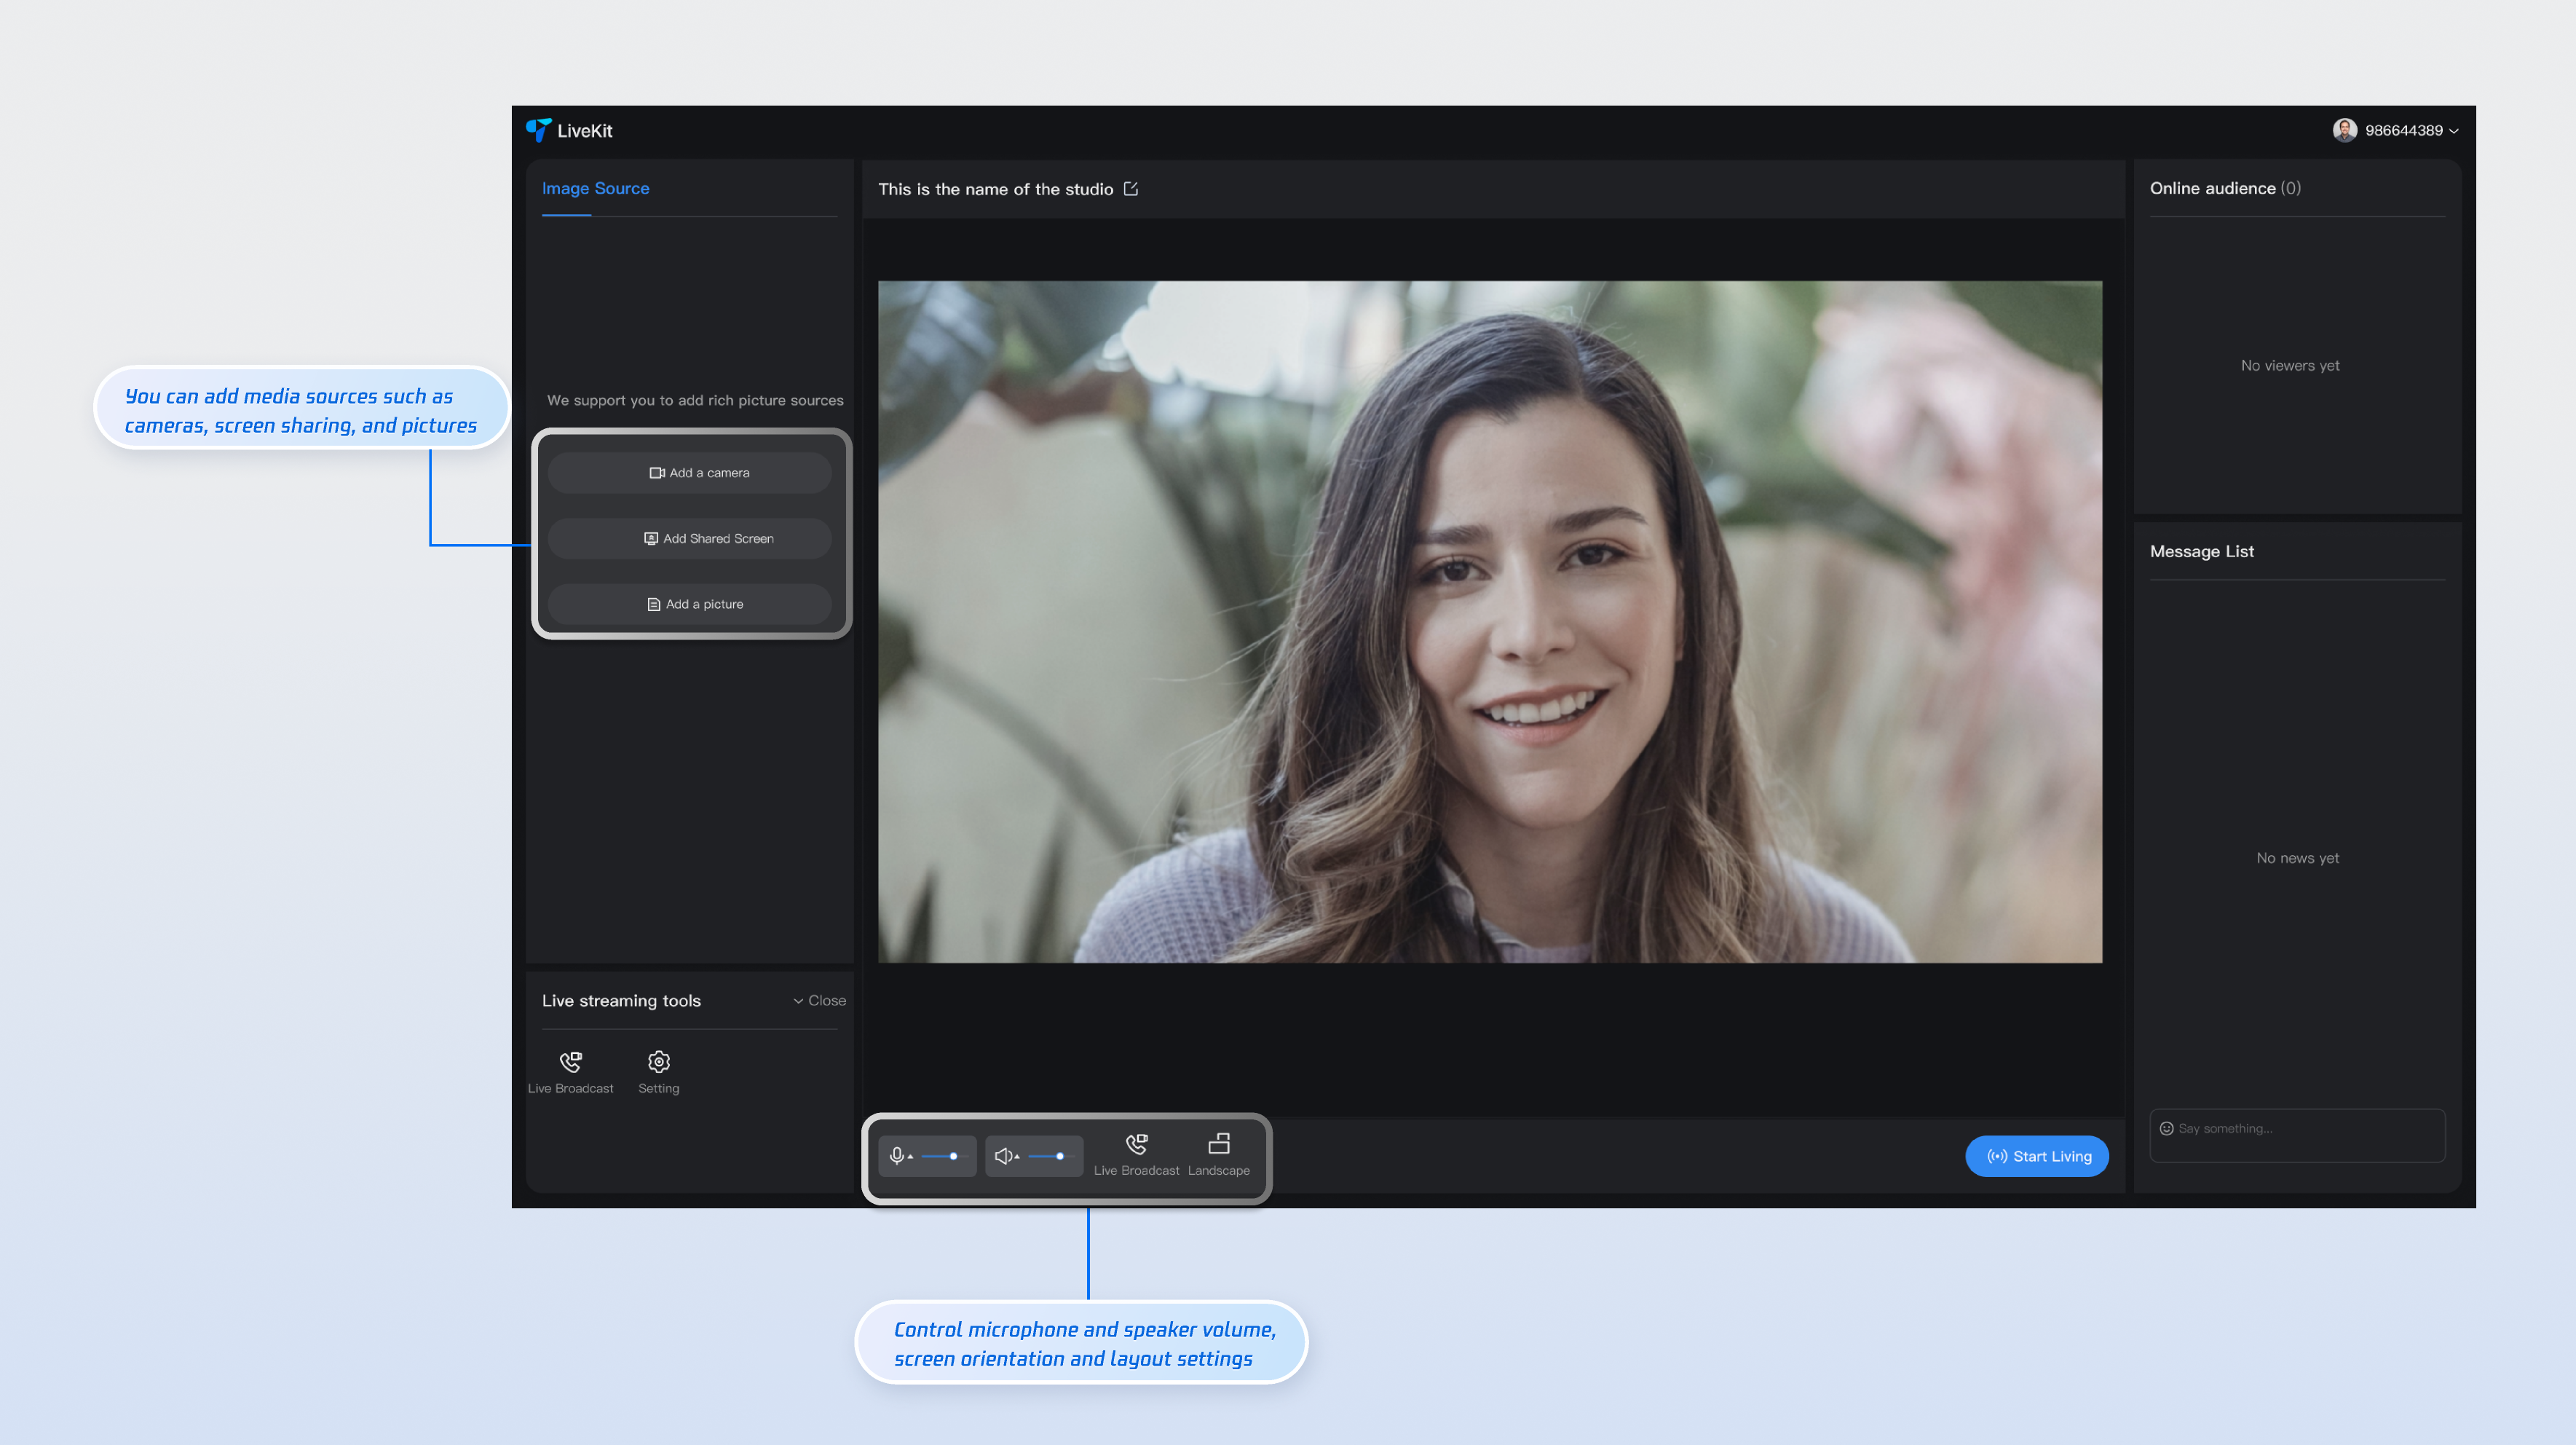
On the broadcast setup page (shown below), first add video sources in the left-hand panel, then arrange the layout in the central area, and finally click the "Start Live Stream" button at the bottom to begin streaming.
In the left-hand source panel, you can add inputs such as your camera, screen sharing, window sharing, and local images.
The central layout area allows you to drag, resize, and adjust the layering of the added video sources.
The right-hand interaction panel enables you to send and receive text and emoji messages, as well as view the audience list.
Watching the live stream as a viewer
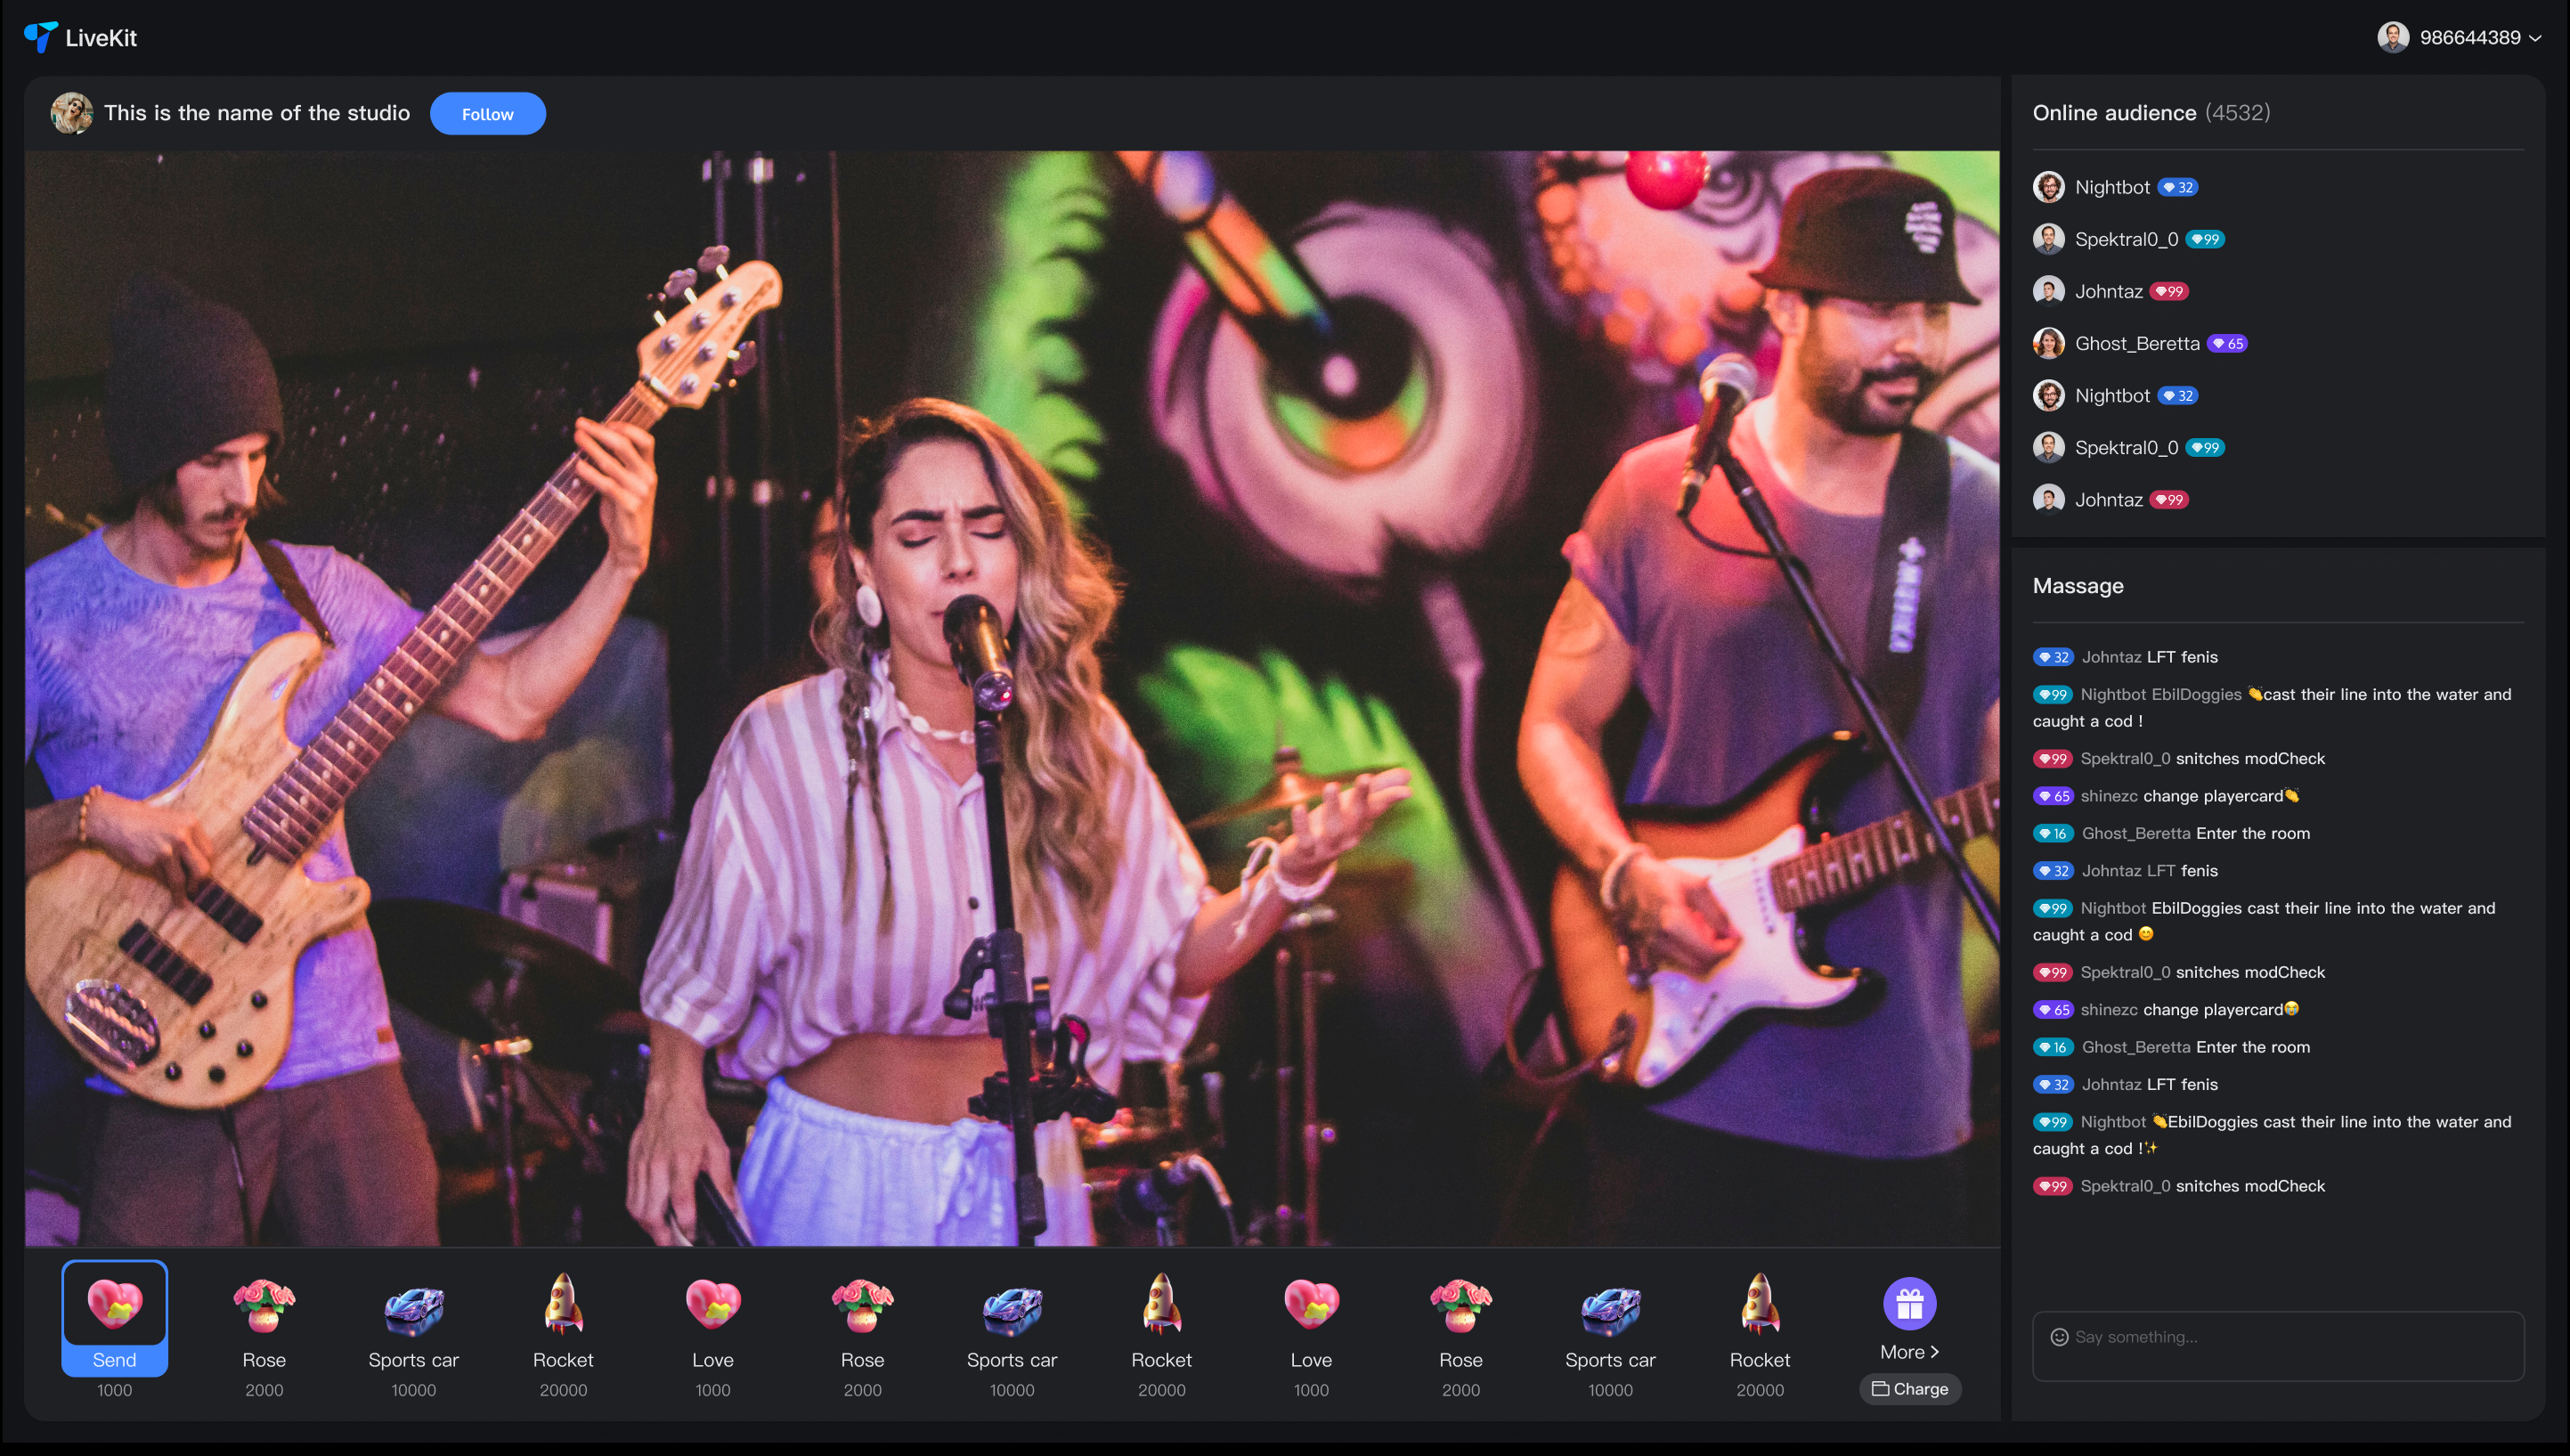
Open an incognito browser window or a different browser application and log in using a different user ID (e.g., "guest"). Once logged in, locate the live stream that has just started and click on it from the list to enter.
After entering the live stream, you can watch the video, follow the current streamer, send chat messages, view the audience list, and perform other actions.
Note:
To fully experience the live streaming features, we recommend using different `userId`s to simulate multiple viewers:
You can open multiple viewing pages across different browsers or in incognito/private browsing modes, using a unique `userId` for each (e.g., `viewer001`, `viewer002`, `viewer003`, etc.).
Each `userId` represents a distinct viewer identity, allowing you to experience the stream from different perspectives.
Different viewers can simultaneously perform actions such as sending chat messages (danmaku), following the streamer, or requesting to join a live conversation (co-hosting), thereby simulating a realistic multi-user interactive scenario.
Now that the demo is running, use the integration guides below to add the features you need to your project:
Page | Document Link |
Preparation | |
Audience Viewing | |
Live Stream List |
Contact Us
If you have any questions or suggestions during running the demo or usage, join our Telegram technical group or contact us for support.
피드백