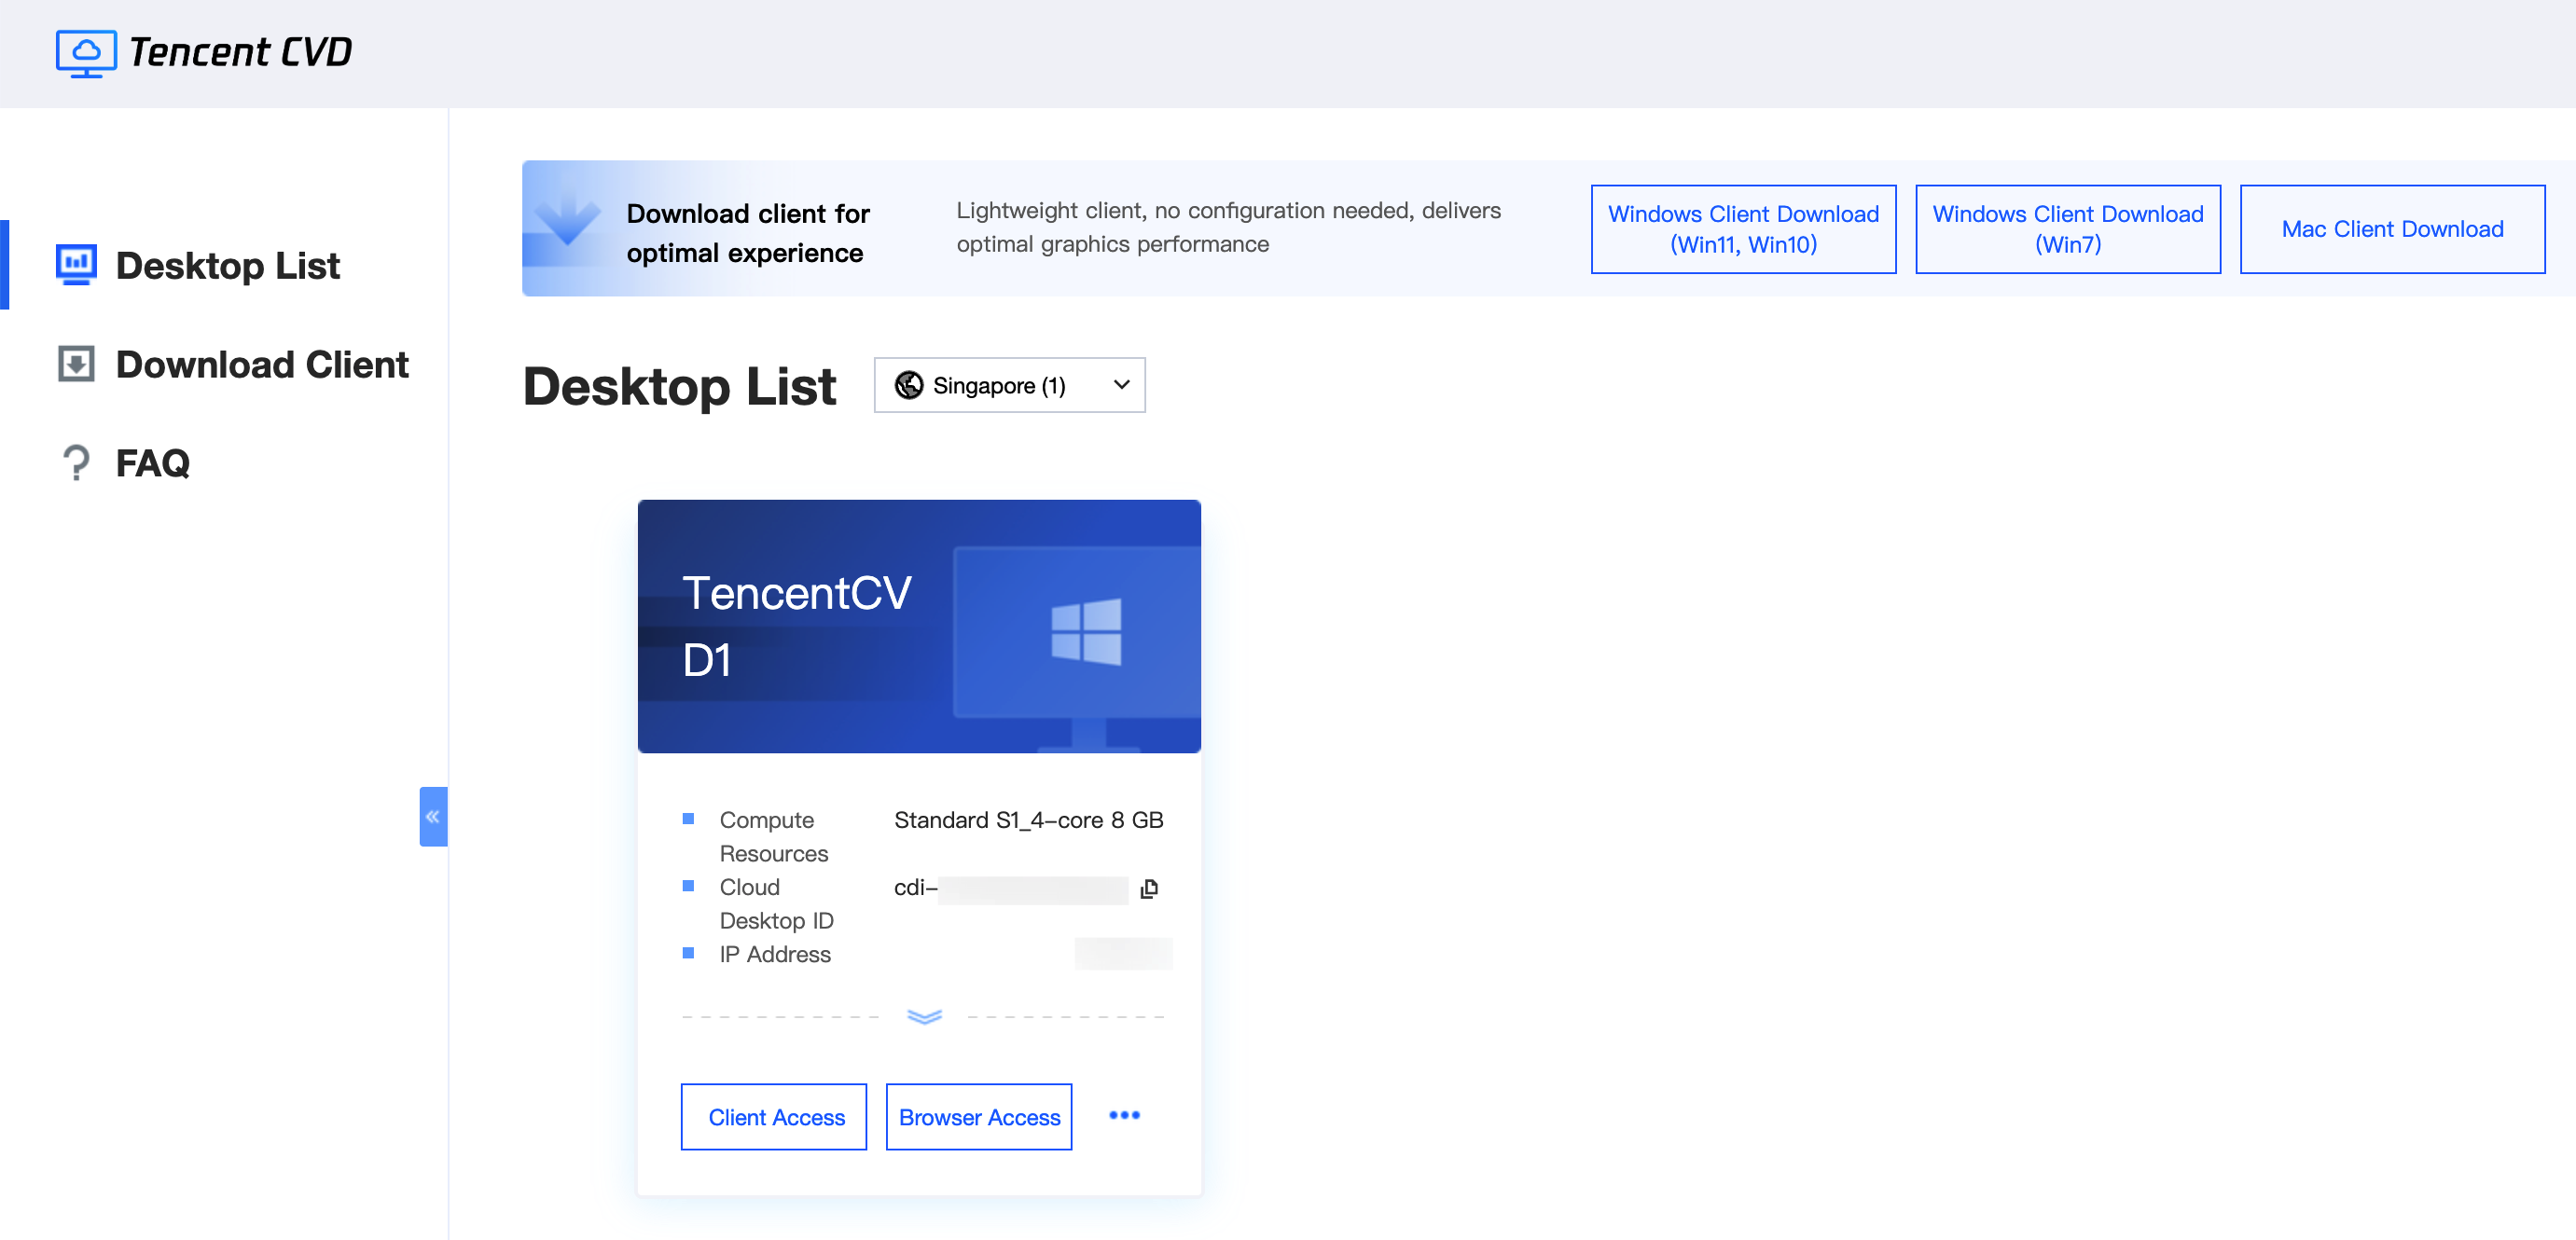
Accessing a CVD Instance
Note:
To ensure a better CVD experience, it is recommended to use the client access method.
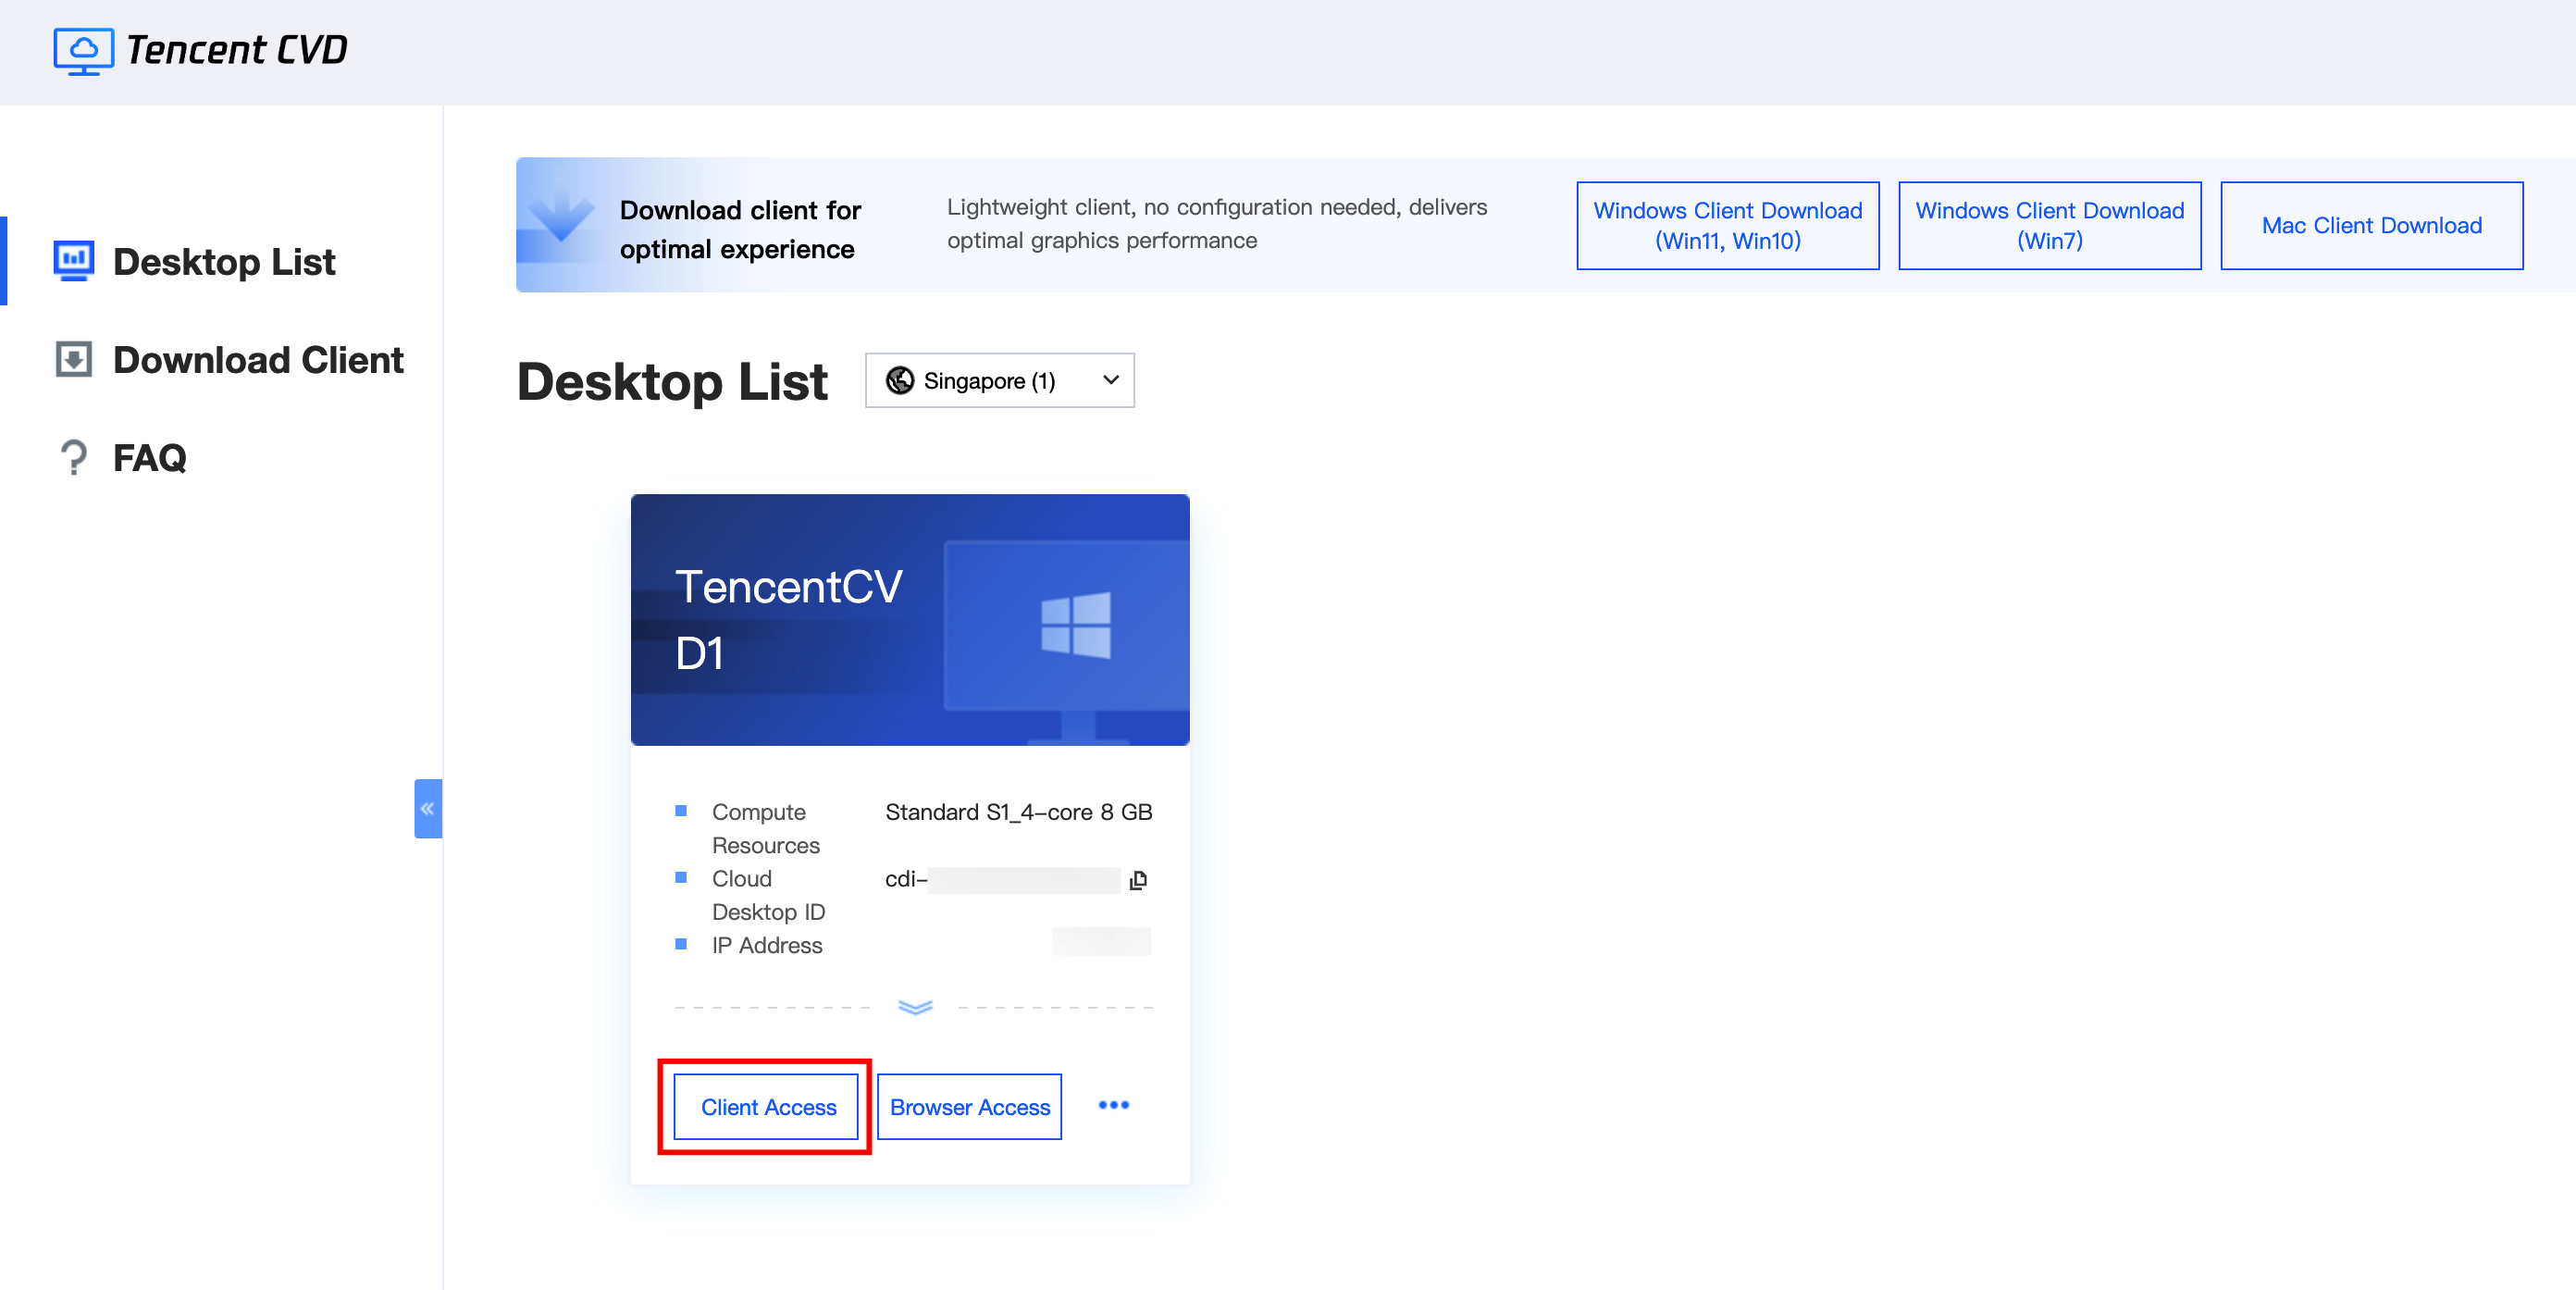
Client Access
This method launches the CVD instance by invoking a local client, providing the best graphical performance and an immersive desktop experience.
1. Download and install the CVD client plugin. If the client is already installed on your computer, skip this step.
Note:
If clicking the download link produces no response, your browser may be blocking pop-up windows. The browser typically displays a message indicating a blocked pop-up window. You can adjust your browser settings to allow pop-up windows.
Citrix Workspace is a lightweight client that enhances the CVD access experience, offering optimal performance.
2. Install the client.
Note:
After the client installation is complete, close the client, then return to the CVD portal, and click Client Access. The CVD portal will automatically invoke the client plugin to launch the CVD instance.
After the client is installed, if it prompts you to set up an account or enter a username, simply close the prompt.
To upload files using the client, browse to local disk files in the File Explorer of the CVD instance and use copy-paste.
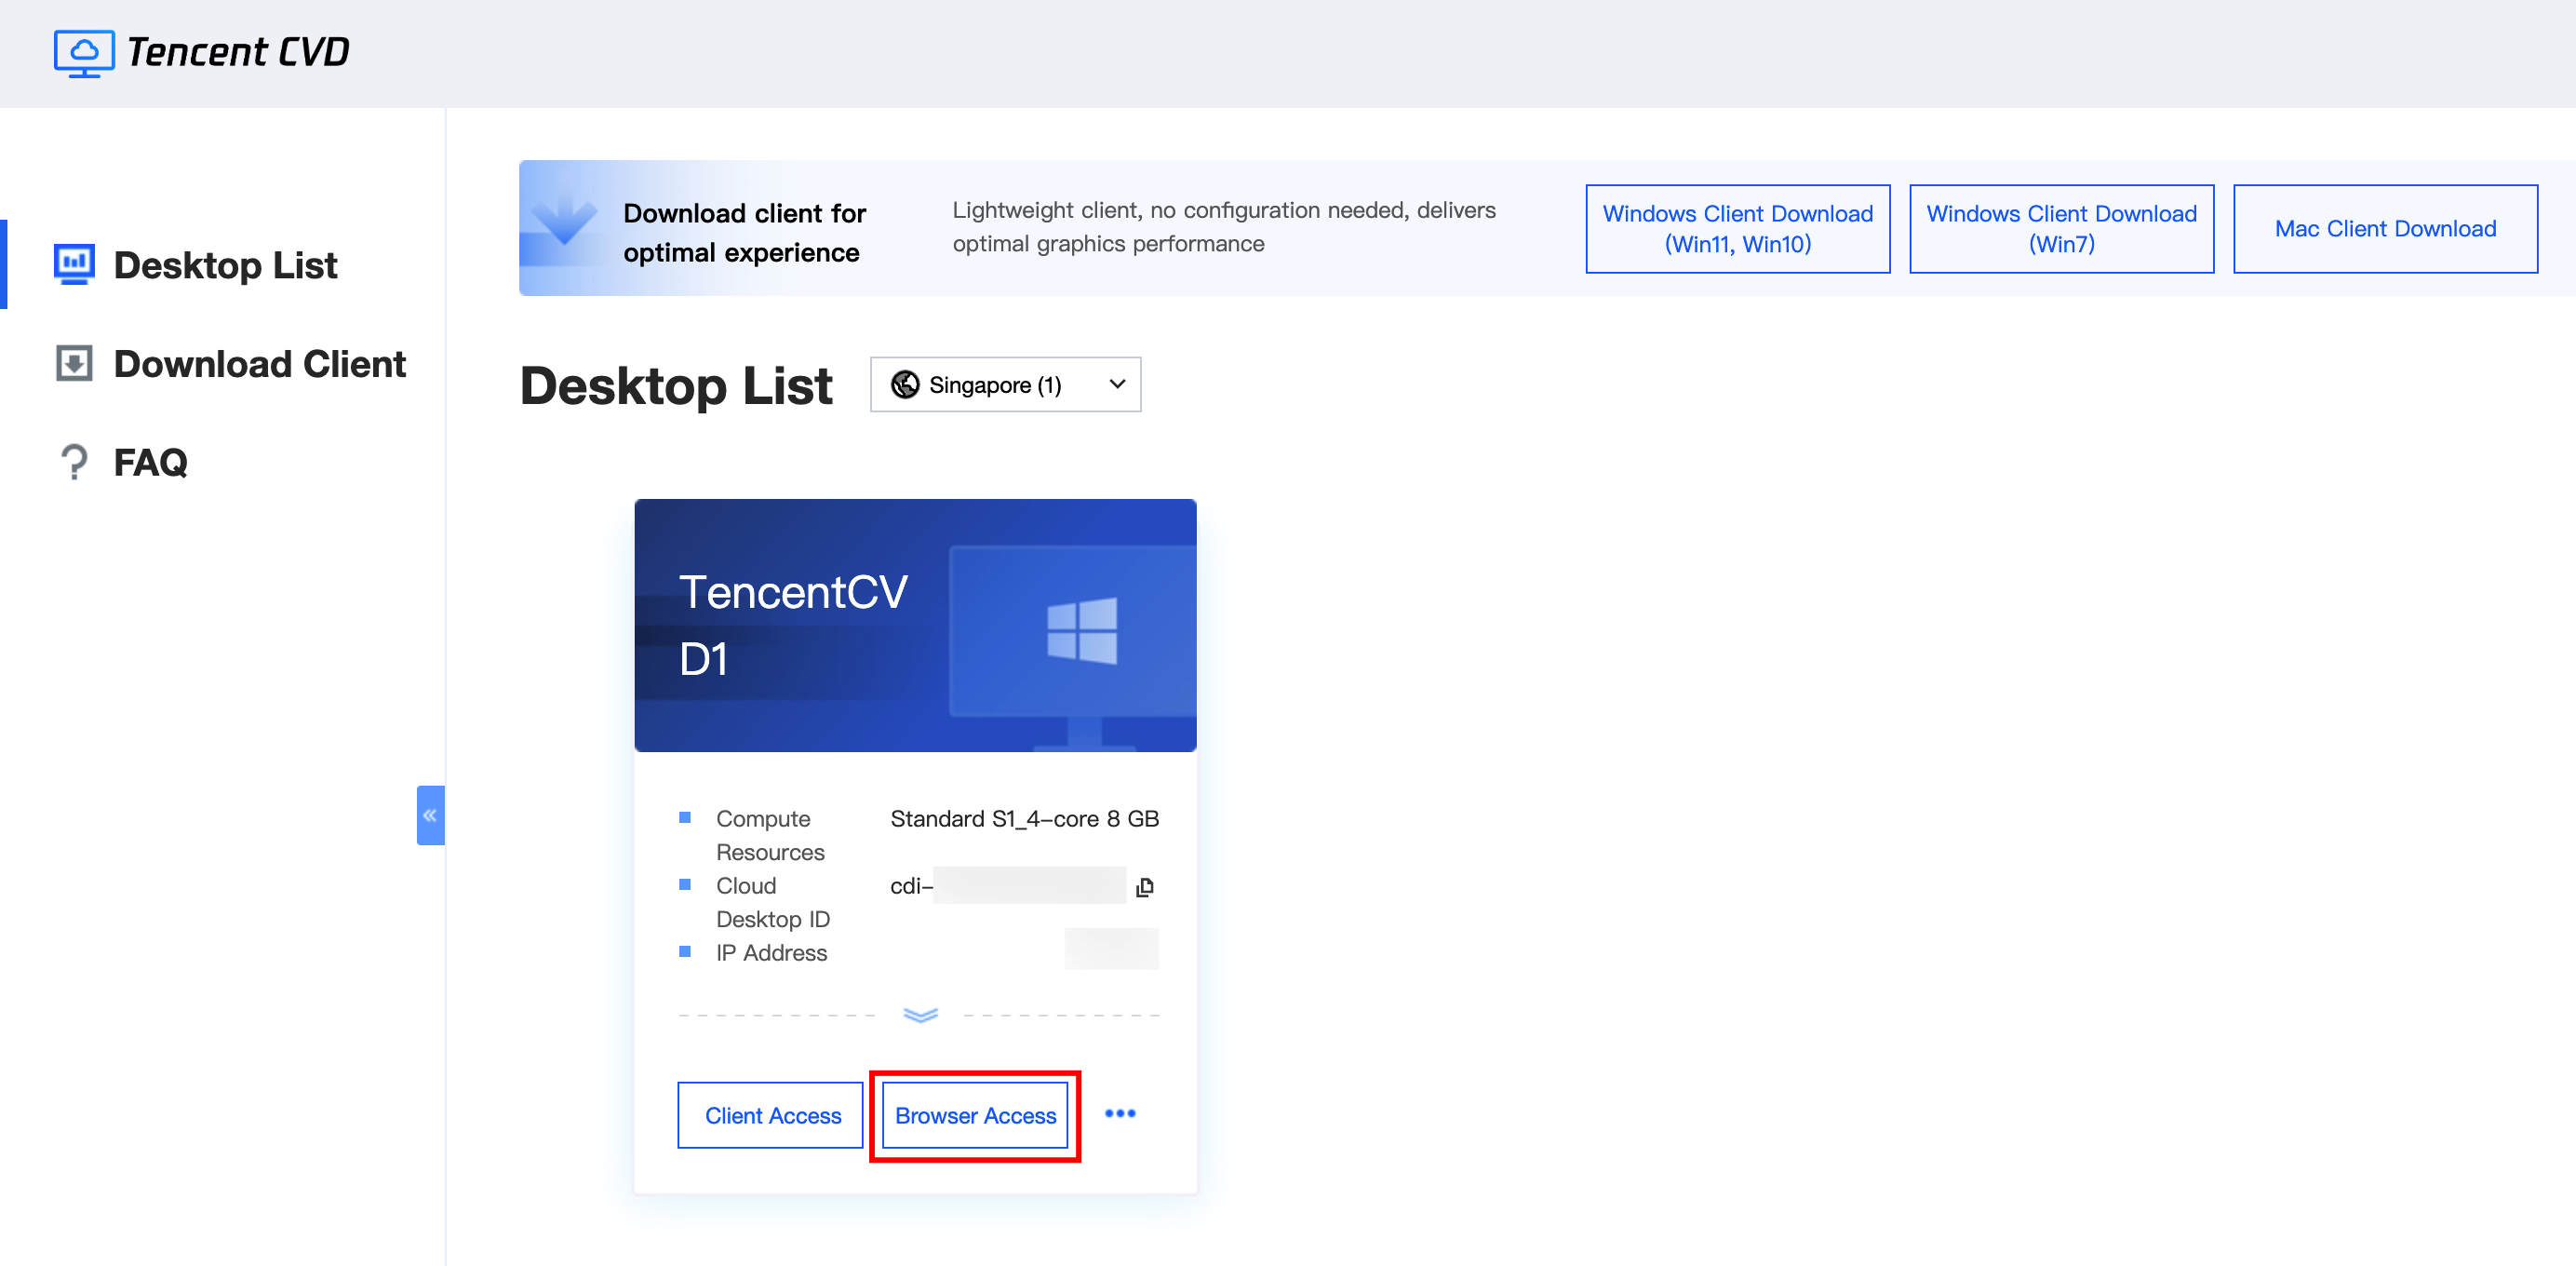
Browser Access
This method provides lightweight access to a CVD instance using HTML5 via a browser. This requires no client download or installation, allowing for quick launch and use.
Note:
If browser access fails, check your local network quality and ensure your browser supports HTML5. If the issue persists, your browser may be blocking pop-up windows. Adjust the settings to allow pop-up windows.
2. Click Browser Access. A new browser tab will automatically pop up and launch the CVD instance, after which you can access its resources.
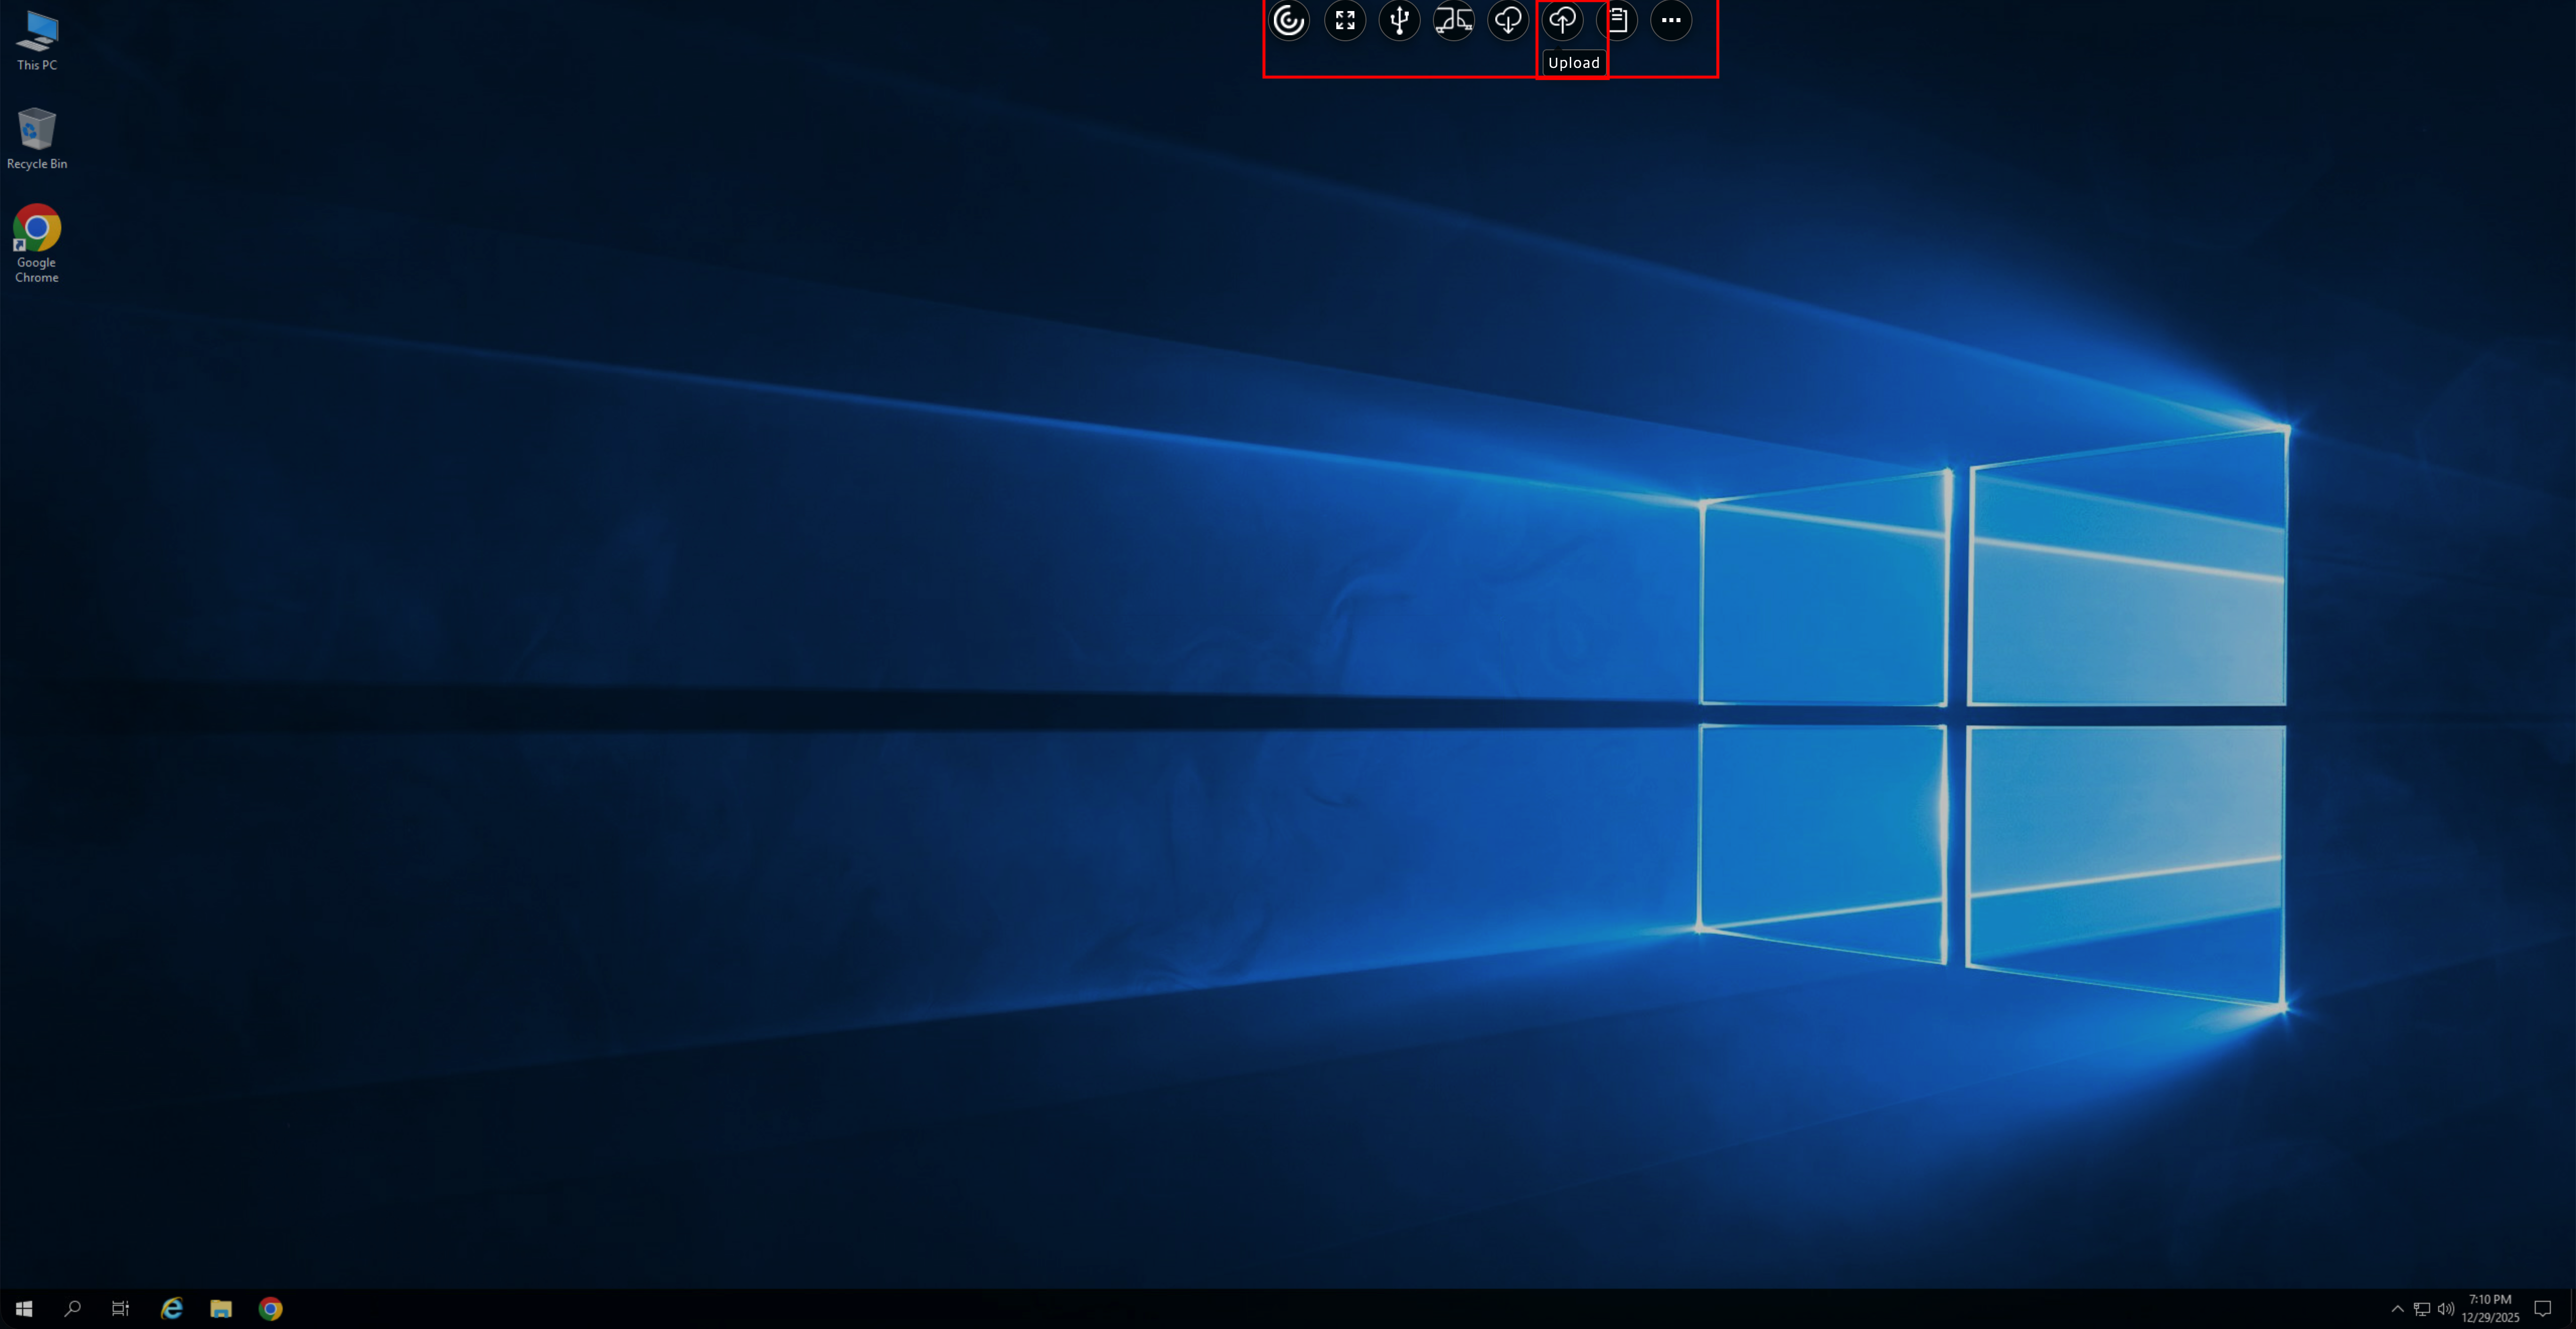
3. After login, you can perform operations such as uploading local files using the top toolbar.
Note:
This method has some limitations. For example, each file uploaded to the CVD instance is limited to under 2 GB, each file downloaded from the CVD instance to the local terminal is limited to under 250 MB, and some peripheral drivers cannot be mapped to the CVD instance.