Using the 4.x SDK to Send and Receive Normal Messages for 5.x Clusters
Download
フォーカスモード
フォントサイズ
Scenarios
RocketMQ 5.0 introduces a new-generation 5.x SDK based on the gRPC protocol. This new SDK version is more lightweight and offers improved multi-language support, making it the recommended choice for new projects. Meanwhile, the TDMQ for RocketMQ 5.x series remains compatible with existing 4.x SDKs for legacy systems. This document uses the 4.x Java SDK as an example to demonstrate how to send and receive normal messages using the open-source SDK.
Prerequisites
You have created TDMQ for RocketMQ cluster resources.
You have prepared the Linux server and configured the environment by referring to Preparations.
Operation Steps
Step 1: Installing the Java Dependency Library
Introduce related dependencies into the Java project. Taking the Maven project as an example, add the following dependencies to pom.xml:
<!-- in your <dependencies> block --><dependency><groupId>org.apache.rocketmq</groupId><artifactId>rocketmq-client</artifactId><version>4.9.7</version></dependency><dependency><groupId>org.apache.rocketmq</groupId><artifactId>rocketmq-acl</artifactId><version>4.9.7</version></dependency>
Step 2: Producing Messages
1. Create and run a program for sending normal messages in the created Java project.
// Instantiate a message producer.DefaultMQProducer producer = new DefaultMQProducer(groupName,new AclClientRPCHook(new SessionCredentials(accessKey, secretKey)) // ACL permissions.);// Set the NameServer address, which is an access address in the format similar to xxx.tencenttdmq.com:8080.producer.setNamesrvAddr(nameserver);// Start the producer instance.producer.start();for (int i = 0; i < 10; i++) {// Create a message instance and set the topic and message content.Message msg = new Message(topic_name, ("Hello RocketMQ " + i).getBytes(RemotingHelper.DEFAULT_CHARSET));// Send messages.SendResult sendResult = producer.send(msg);System.out.printf("%s%n", sendResult);}
Parameter | Description |
accessKey | Role token. You can copy it from the AccessKey column on the Cluster Permission page in the console.  |
secretKey | Role name. You can copy the role name from the SecretKey column on the Cluster Permissions page in the console. |
nameserver | Cluster access address. You can obtain the access address from the Access Information module on the Cluster Basic Information page in the console. 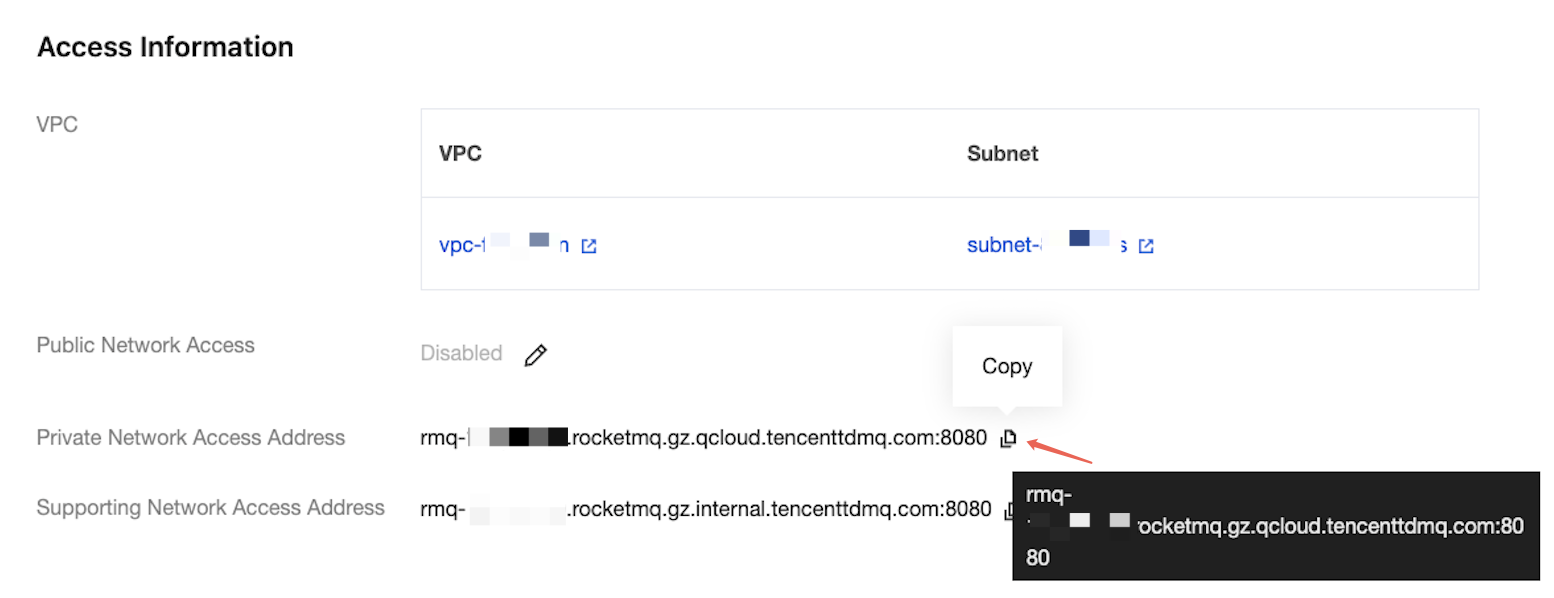 |
topic_name | Topic name. You can copy the name from the Topic Management page in the console.  |
2. The result is as follows:
SendResult [sendStatus=SEND_OK, msgId=0100017D1DC818B4AAC202F388CF0000, offsetMsgId=null, messageQueue=MessageQueue [topic=yourTopic, brokerName=broker-a, queueId=3], queueOffset=250]SendResult [sendStatus=SEND_OK, msgId=0100017D1DC818BD1CAC202F388CF0001, offsetMsgId=null, messageQueue=MessageQueue [topic=yourTopic, brokerName=broker-a, queueId=0], queueOffset=251]...SendResult [sendStatus=SEND_OK, msgId=0100017D1DC818B4AAC202F388CF0009, offsetMsgId=null, messageQueue=MessageQueue [topic=yourTopic, brokerName=broker-a, queueId=2], queueOffset=259]
Step 3: Consuming Messages
1. Create and run a program to subscribe to normal messages in the created Java project. The following sample code takes Push Consumer as an example. For other types, see the more detailed usage documentation for 4.x.
// Instantiate a consumer.DefaultMQPushConsumer pushConsumer = new DefaultMQPushConsumer(groupName,new AclClientRPCHook(new SessionCredentials(accessKey, secretKey))); // ACL permissions.// Set the NameServer address.pushConsumer.setNamesrvAddr(nameserver);// Subscribe to a topic.pushConsumer.subscribe(topic_name, "*");// Register a callback implementation class to handle messages pulled from the broker.pushConsumer.registerMessageListener((MessageListenerConcurrently) (msgs, context) -> {// Message processing logic.System.out.printf("%s Receive New Messages: %s %n", Thread.currentThread().getName(), msgs);// Mark the message as successfully consumed and return an appropriate status.return ConsumeConcurrentlyStatus.CONSUME_SUCCESS;});// Start the consumer instance.pushConsumer.start();
Parameter | Description |
accessKey | Role token. You can copy it from the AccessKey column on the Cluster Permission page in the console.  |
secretKey | Role name. You can copy the role name from the SecretKey column on the Cluster Permissions page in the console. |
nameserver | Cluster access address. You can obtain the access address from the Access Information module on the Cluster Basic Information page in the console. 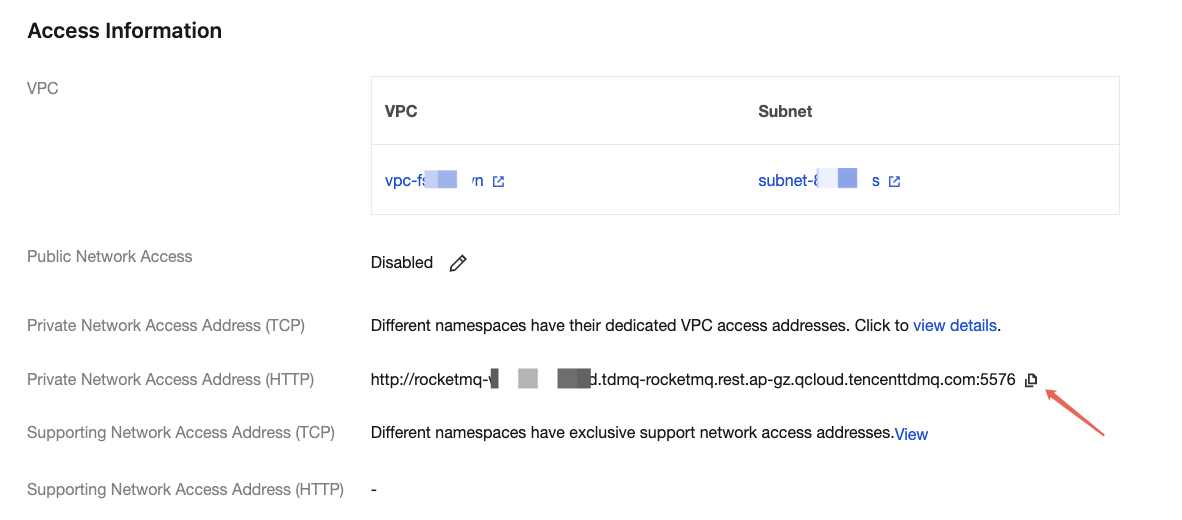 |
groupName | Consumer group name. You can copy the name from the Group Management page in the console.  |
topic_name | Topic name. You can copy the name from the Topic Management page in the console.  |
2. After you send messages:
ConsumeMessageThread_1 Receive New Messages: [MessageExt [queueId=3, storeSize=287, queueOffset=250, sysFlag=0, bornTimestamp=1698765432100, bornHost=/192.168.1.100:53902, storeTimestamp=1698765432200, storeHost=/192.168.1.200:10911, msgId=0100017D1DC818B4AAC202F388CF0000, commitLogOffset=156789, bodyLength=16, body=Hello RocketMQ 0, topic=yourTopic, properties={MIN_OFFSET=0, MAX_OFFSET=251, CONSUME_START_TIME=1698765432300, UNIQ_KEY=0100017D1DC818B4AAC202F388CF0000, CLUSTER=DefaultCluster}, tags=null]]ConsumeMessageThread_2 Receive New Messages: [MessageExt [queueId=0, storeSize=287, queueOffset=251, sysFlag=0, bornTimestamp=1698765432110, bornHost=/192.168.1.100:53902, storeTimestamp=1698765432210, storeHost=/192.168.1.200:10911, msgId=0100017D1DC818BD1CAC202F388CF0001, commitLogOffset=157045, bodyLength=16, body=Hello RocketMQ 1, topic=yourTopic, properties={MIN_OFFSET=0, MAX_OFFSET=252, CONSUME_START_TIME=1698765432310, UNIQ_KEY=0100017D1DC818BD1CAC202F388CF0001, CLUSTER=DefaultCluster}, tags=null]]
フィードバック