Configure MCP Server
Download
フォーカスモード
フォントサイズ
Step 1: Get your credentials
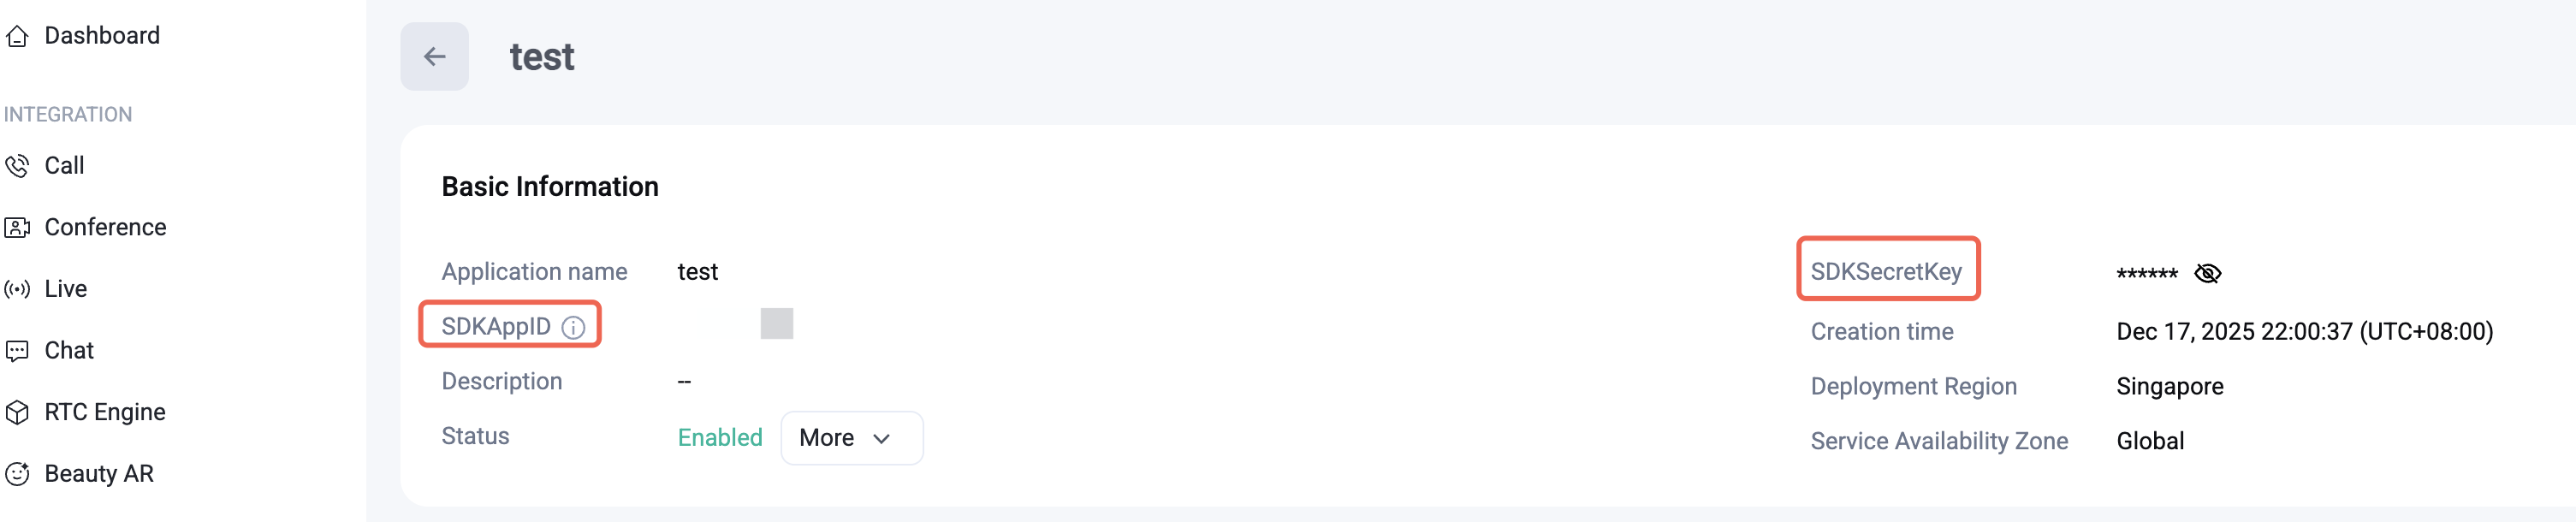
1. Open the Tencent RTC Console
2. Copy SDKAppID and SDKSecretKey
From the application details page, copy both values. You'll paste them into the config below.
Caution:
SECRET_KEY is a sensitive credential. Never commit it to a repository or share it publicly. For local development it's safe to store in your MCP config file — but before going to production, move UserSig generation to your backend. See Generate UserSig on your server.Step 2: Configure MCP Server
MCP config scoped to a project lives at
.cursor/mcp.json inside your project directory. For a global config that applies to all projects, use ~/.cursor/mcp.json.1. Download Cursor (If already downloaded, skip this step).
2. Navigate to your project root.
3. Create or update
.cursor/mcp.json with the following, and fill in your SDKAPPID and SECRETKEY, and save your changes:{"mcpServers": {"tencent-rtc": {"command": "npx","args": ["-y", "@tencent-rtc/mcp@latest"],"env": {"SDKAPPID": "YOUR_SDKAPPID","SECRETKEY": "YOUR_SECRET_KEY"}}}}
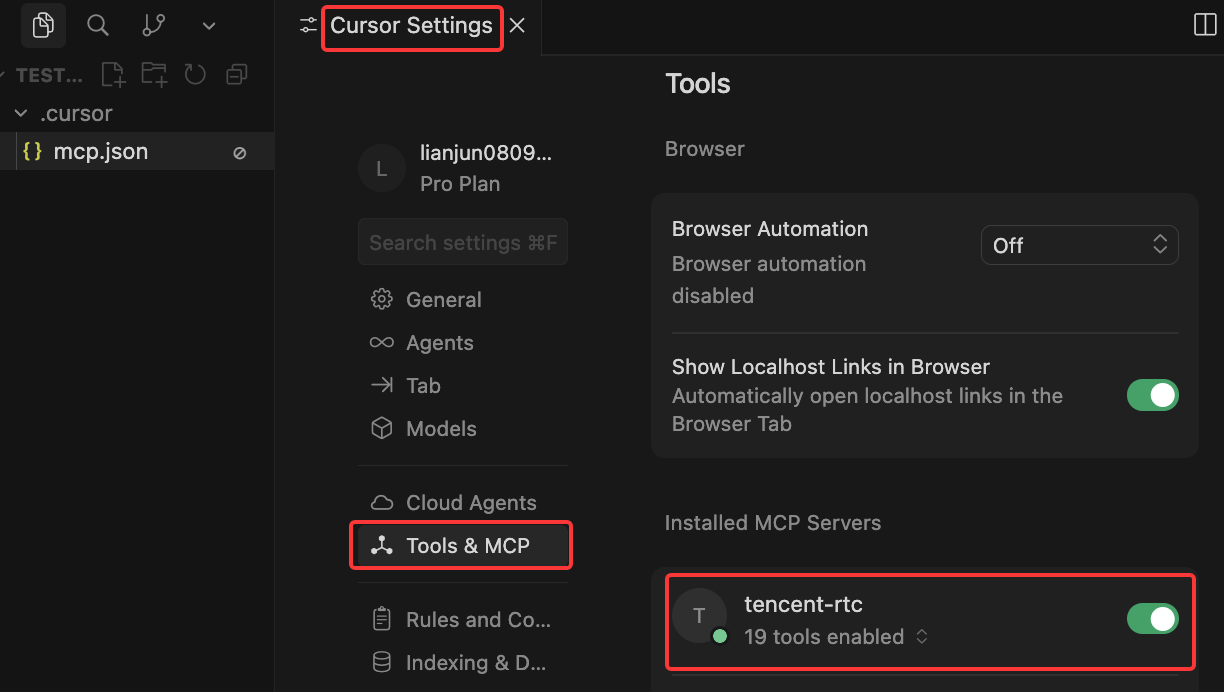
4. Go to Settings - Tools & MCP in Cursor to check if the MCP tool has been enabled successfully.
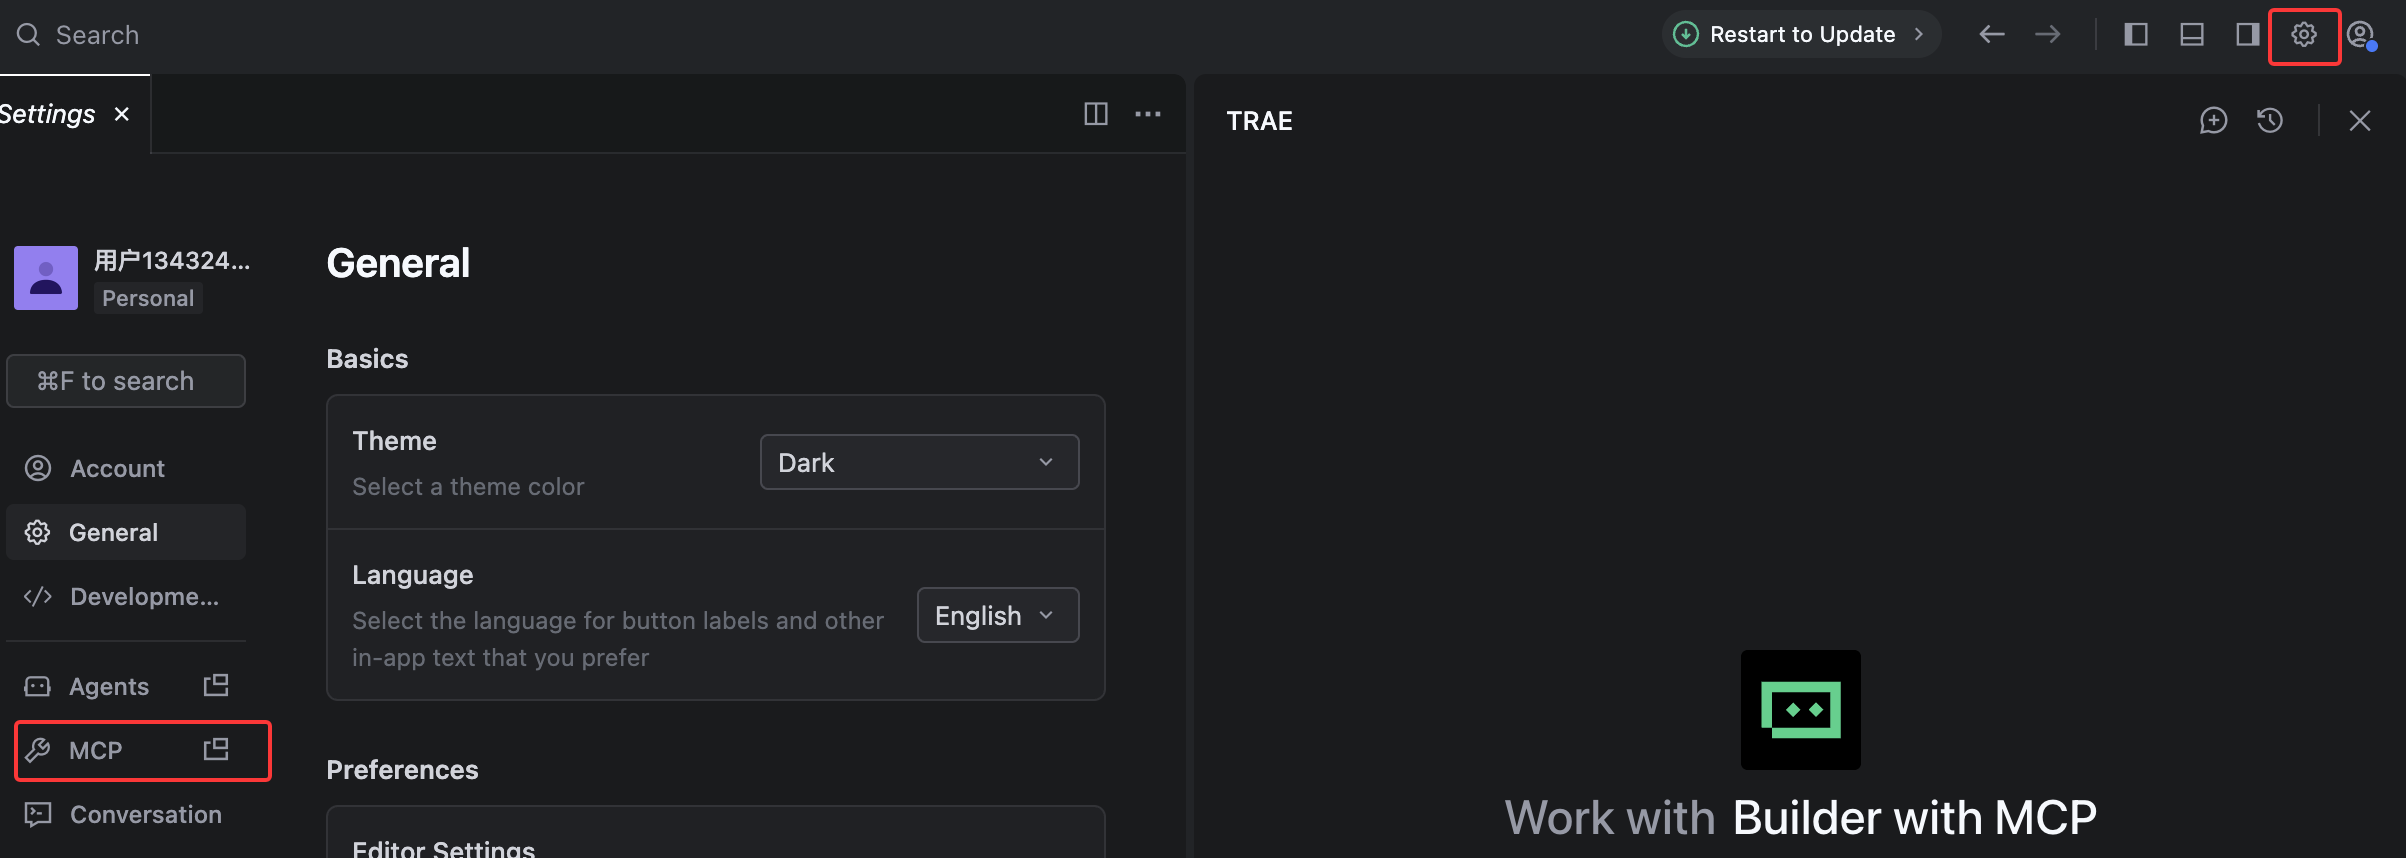
1. Download Trae(If already downloaded, skip this step).
2. Click Settings > MCP.
3. Click Add > Configure Manually, and then click Raw Config (JSON) to update the
mcpServers section.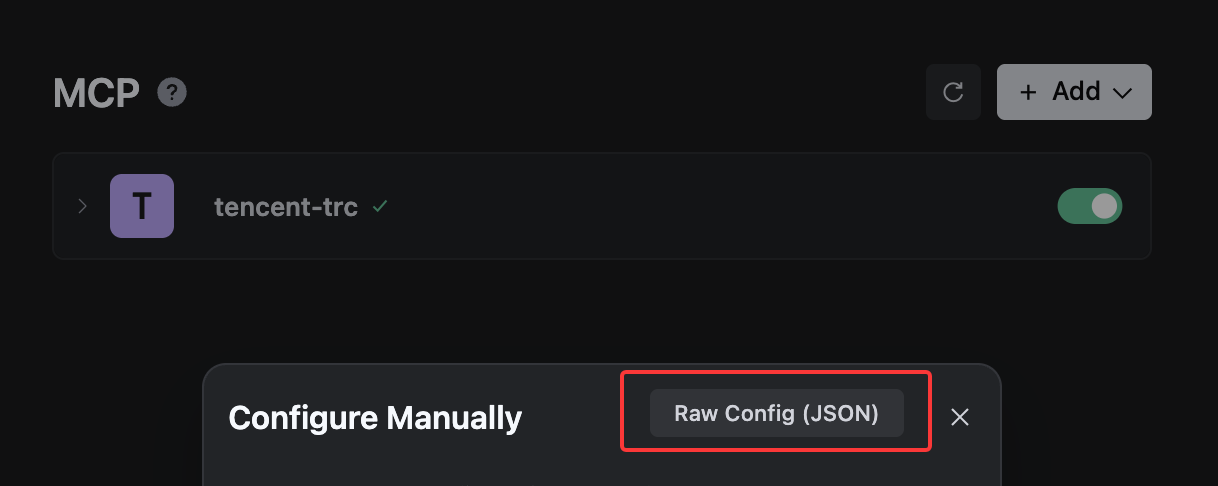
{"mcpServers": {"tencent-rtc": {"command": "npx","args": ["-y", "@tencent-rtc/mcp@latest"],"env": {"SDKAPPID": "YOUR_SDKAPPID","SECRETKEY": "YOUR_SECRET_KEY"}}}}
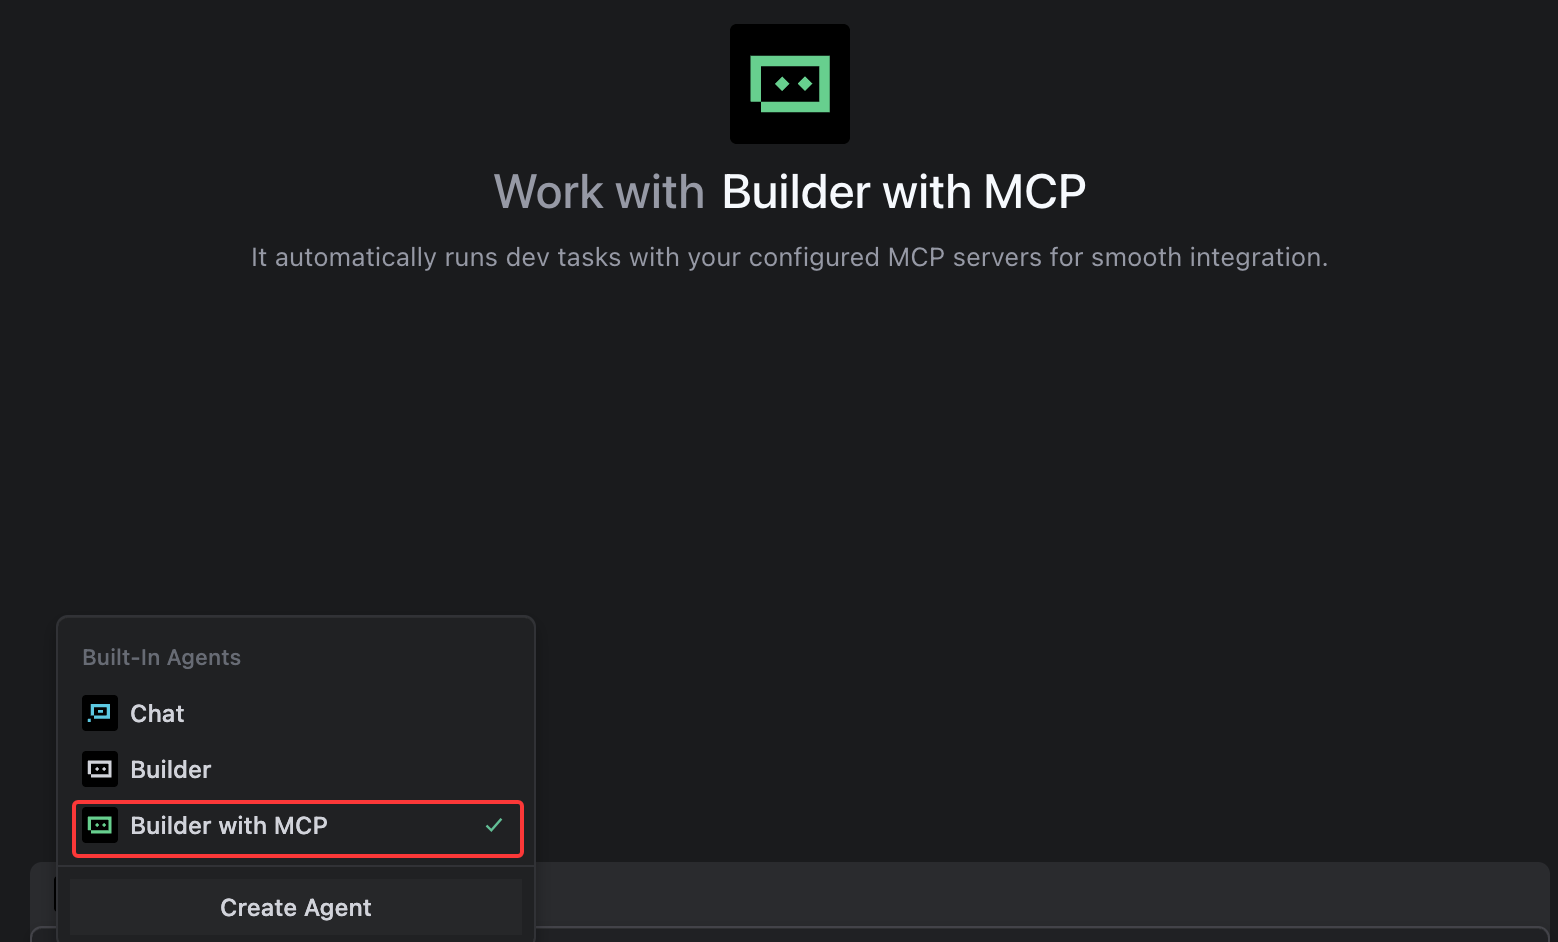
4. Save your changes. Select the editor's default Builder with MCP or add MCP to your custom Builder.
1. Download CodeBuddy (If already downloaded, skip this step).
2. Go to Settings > Add MCP to open
settings.json and configure MCP.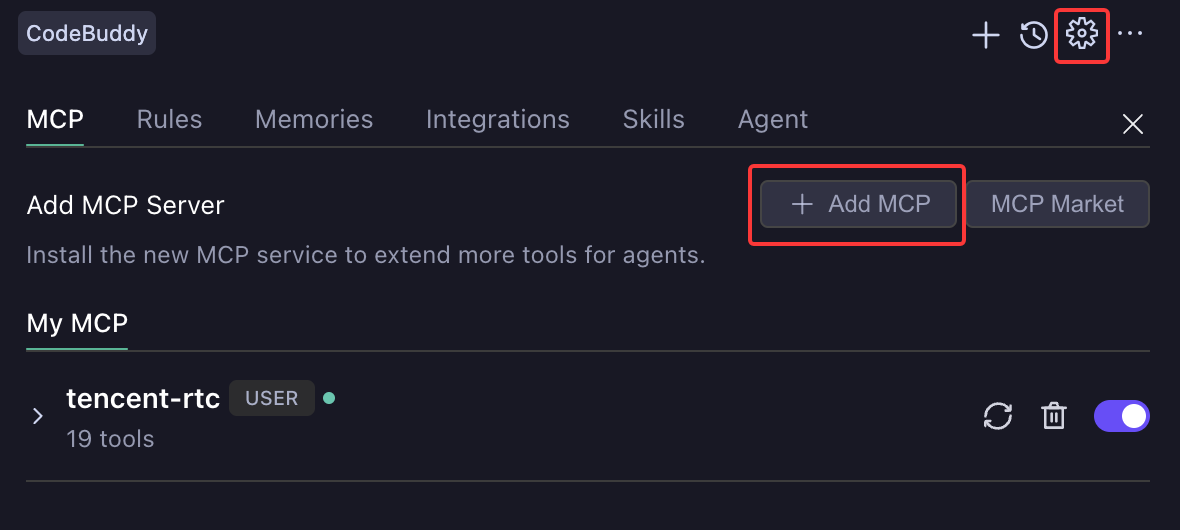
3. Update the
mcpServers section and save the changes.{"mcpServers": {"tencent-rtc": {"command": "npx","args": ["-y", "@tencent-rtc/mcp@latest"],"env": {"SDKAPPID": "YOUR_SDKAPPID","SECRETKEY": "YOUR_SECRET_KEY"}}}}
4. Check whether the MCP tool is successfully loaded to tools.

1. Run this command to add the server with credentials in one step:
claude mcp add tencent-rtc -e SDKAPPID=YOUR_SDK_APP_ID -e SECRETKEY=YOUR_SECRET_KEY -- npx -y @tencent-rtc/mcp@latest
This writes to
~/.claude.json. For project-scoped config, add --scope project — it writes to .mcp.json at your project root.2. Verify with
claude mcp list to confirm tencent-rtc appears.1. Run this command to add the server with credentials in one step:
codex mcp add tencent-rtc --env SDKAPPID=YOUR_SDK_APP_ID --env SECRETKEY=YOUR_SECRET_KEY -- npx -y @tencent-rtc/mcp@latest
This writes to
~/.codex/config.toml. For project-scoped config, create .codex/config.toml at your project root.2. Verify with
codex mcp list to confirm tencent-rtc appears.Step 3: Verify the setup
Send this prompt in your AI chat to confirm the MCP server is working:
Use the tencent-rtc MCP tool to generate a userSig for test001
A successful response returns JSON with
SDKAppID, userID, and userSig fields.Next steps
Install Agent Skills, describe what you need in plain language, and the AI will automatically detect the product and platform and guide you through integration, troubleshooting, or documentation lookup. See Skills for details.
フィードバック