This document describes how to migrate data in the console or with the command line tool.
Data Migration Through Console
There are two modes for migrating data through the console: physical backup and logical backup. For more information, see the following documents:
1. Generate the SQL file to be imported with the MySQL command line tool "mysqldump" in the following way:
Note:
The data files exported using mysqldump must be compatible with the SQL specification of your purchased TencentDB for MySQL version. You can log in to the database and get the MySQL version information by running the select version(); command. The name of the generated SQL file can contain letters, digits, and underscores but not "test".
Make sure that the same source and target database versions, source and target database character sets, and mysqldump tool versions are used. You can specify the character set using the parameter --default-character-set.
If data import fails, it might be caused by a permission problem. You can generate the import file by setting the parameter --set-gtid-purged to OFF.
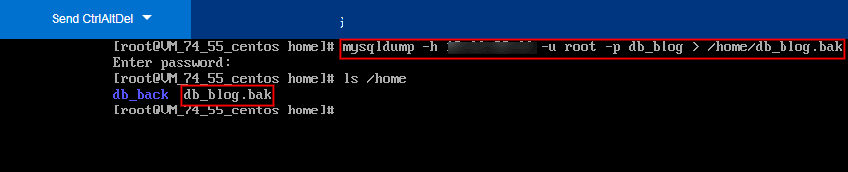
shell > mysqldump <options> <db_name> <tbl_name ...> > <bak_pathname>
<options>: It indicates export options or parameters. Commonly used options include -h, -u, and -p. A commonly used parameter is --default-character-set.
<db_name>: It indicates a database name and needs to be replaced with the actual database name.
<tbl_name>: It indicates a table name and needs to be replaced with the name of an actual table in the database.
<bak_pathname>: It indicates an export path name and needs to be replaced with the actual file generation path.
2. Import data to the target database with the MySQL command line tool as follows:
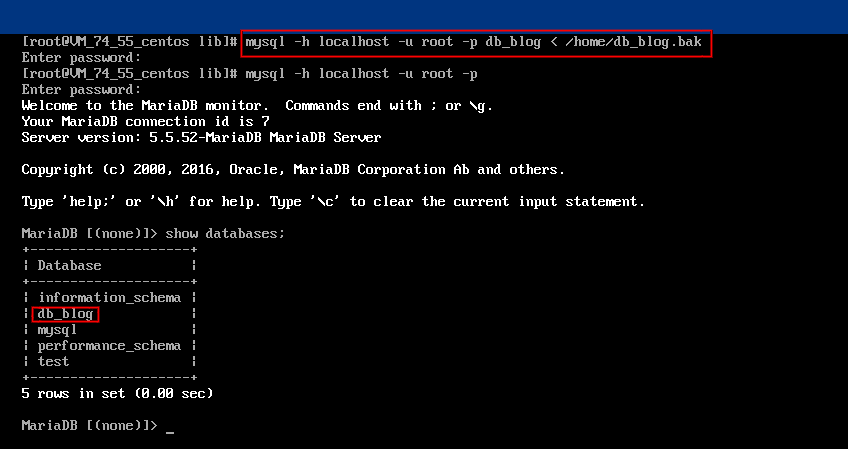
shell > mysql -h <hostname> -P <port> -u <username> -p < <bak_pathname>
<hostname>: It needs to be replaced with the name of the destination host for data recovery.
<port>: It needs to be replaced with the port of the destination host.
<username>: It needs to be replaced with the database username of the destination host.
<bak_pathname>: It needs to be replaced with the full path of the backup file.
Migrating data (Windows)
2. Enter the command prompt and import the data into the target database with the MySQL command line tool.
Migrating data (Linux)
This document uses a Linux CVM instance as an example. For more information on how to access a database from a CVM instance, see Accessing MySQL Database. 1. Log in to the CVM instance and generate the SQL file to be imported with the MySQL command line tool "mysqldump". Take the db_blog database in TencentDB as an example:
2. Use the MySQL command line tool to restore the data to the target database.
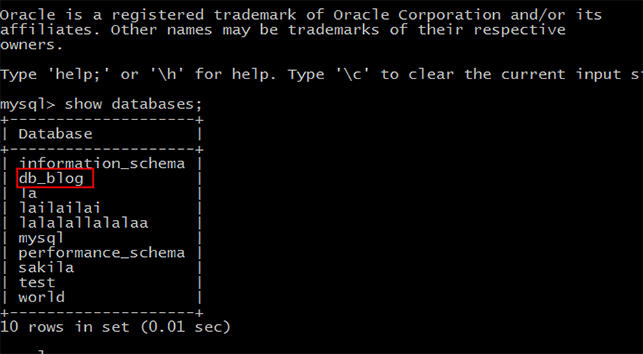
3. Log in to the target MySQL database, run the show databases; command, and you can see that the backup database has been imported into the target database.
Issues with Character Set of Imported Data Files
1. If no character set is specified during data file import into TencentDB, the one set by the database will be used.
2. Otherwise, the specified character set will be used.
3. If the specified character set is different from that of TencentDB, garbled text will be displayed.
For more information, see the character set description in Use Limits. Hot Issues
The following error is reported when I use the data import feature: wait err=exit status 255, busi errmsg=import sql file failed, err=ERROR 1227 (42000) at line 24: Access denied. What should I do?
If a 42000 error is reported when you use the data import feature, it indicates that an access denial error occurred during SQL file import, which caused an SQL file import failure. The current user may have insufficient permissions. It is recommended to handle it in the following two ways:
Use the MySQL command line tool mysqldump to regenerate the SQL file to be imported, with the referenced parameter --set-gtid-purged set to OFF. Then, try importing the file again. For the command to generate the SQL file, see Data Migration with Command Line Tool. Manually comment out related lines according to the error message to avoid permission problems during import. The example is as follows:
SET @MYSOLDUMP TEMP LOG BIN = COSESSION.SQL LOG BIN;
SET @@SESSION.SQL LOG BIN = 0;
SET @@GLOBAL.GTID PURGED=