Step 1: Creating a Cluster and Obtaining VPC Access Points
Download
Focus Mode
Font Size
Scenarios
Before using the SDK to send and receive messages, you need to create clusters and configure the network in the TDMQ for MQTT console, and configure information about related resources when running the client.
Prerequisites
Creating a Cluster
1. Log in to the TDMQ for MQTT console.
2. In the left sidebar, choose Resource > Cluster, select a region, and click Create Cluster to go to the cluster purchase page.
Configuration | Description |
Billing Mode | Supports Yearly/monthly subscription and Pay as you go modes. Yearly/monthly subscription: requires payment before resource usage. This billing mode is suitable for scenarios with steady and long-term usage requirements. Pay-as-you-go: Pay for resources after usage. This billing mode is suitable for testing or scenarios with unpredictable traffic peaks. |
Region | Select a region near your client to minimize network latency and improve access speed. Cloud products in different regions cannot communicate over the private network, and the region cannot be changed after purchase, so proceed with caution. |
Cluster Specification | Select Pro Edition. The Basic Edition is sold out. Differences between versions can be checked in the Product Series. |
TPS Specification | Select an appropriate TPS specification based on business traffic requirements. Subsequent configuration changes can be made quickly in the console. The TPS specification includes the sum of production messages and consumption messages. Each message is counted based on configurations. For details, see Billing Overview. |
Number of Client Connections | In the Pro Edition, the number of free connections varies by TPS specification. Additional connections can be purchased separately as needed. |
VPC | Authorize binding the access point domain name of the newly purchased cluster to the Virtual Private Cloud (VPC). |
Public Network Access | Enabling public network bandwidth will incur additional fees. You can disable it on the cluster basic information page after activation. For pricing details, refer to Billing Overview. |
Cluster Name | Enter a cluster name that complies with the naming rules: It must be 3 to 64 characters in length and can only contain digits, letters, hyphens (-), and underscores (_). |
Tag | Tags are used to categorize and manage resources from different dimensions. |
3. After confirming that the cluster information is correct, click Buy Now. After completing the payment on the order payment page, wait for 3 to 5 minutes for the new cluster to appear in the cluster list on the Cluster Management page.
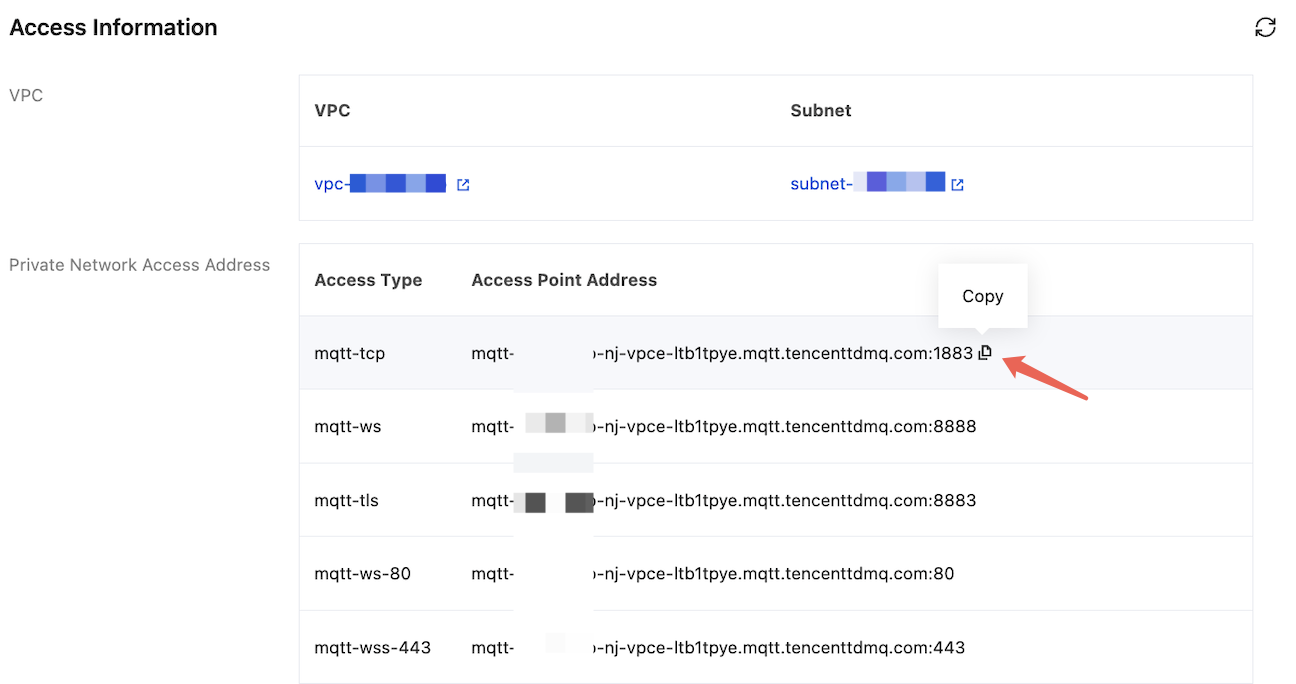
Retrieving VPC Access Point Addresses
1. Click the ID of the created cluster to enter the Basic Information page.
2. On the cluster basic information page, get the VPC access point addresses in the Access Information module. For differences between different access points, refer to Network Connection Instructions.
Help and Support
Was this page helpful?
You can also Contact sales or Submit a Ticket for help.
Help us improve! Rate your documentation experience in 5 mins.
Feedback