The Business Intelligence (BI) resource migration feature enables the migration of specific resources (dashboards, pages, and data) across projects, accounts, and environments. This feature supports use cases including project migration, page reuse, and resource sharing. A complete resource migration involves resource export (selecting projects, specifying resources, generating resource packages, and exporting resource packages) and resource import (selecting projects, uploading resource packages, and connecting data sources).
Feature limits: This feature is only available to Professional Edition users. Resource migration for projects can only be performed by the enterprise administrators or project administrators.
Feature Entry
1. Go to the "Resource migration" feature in the "Toolbox".
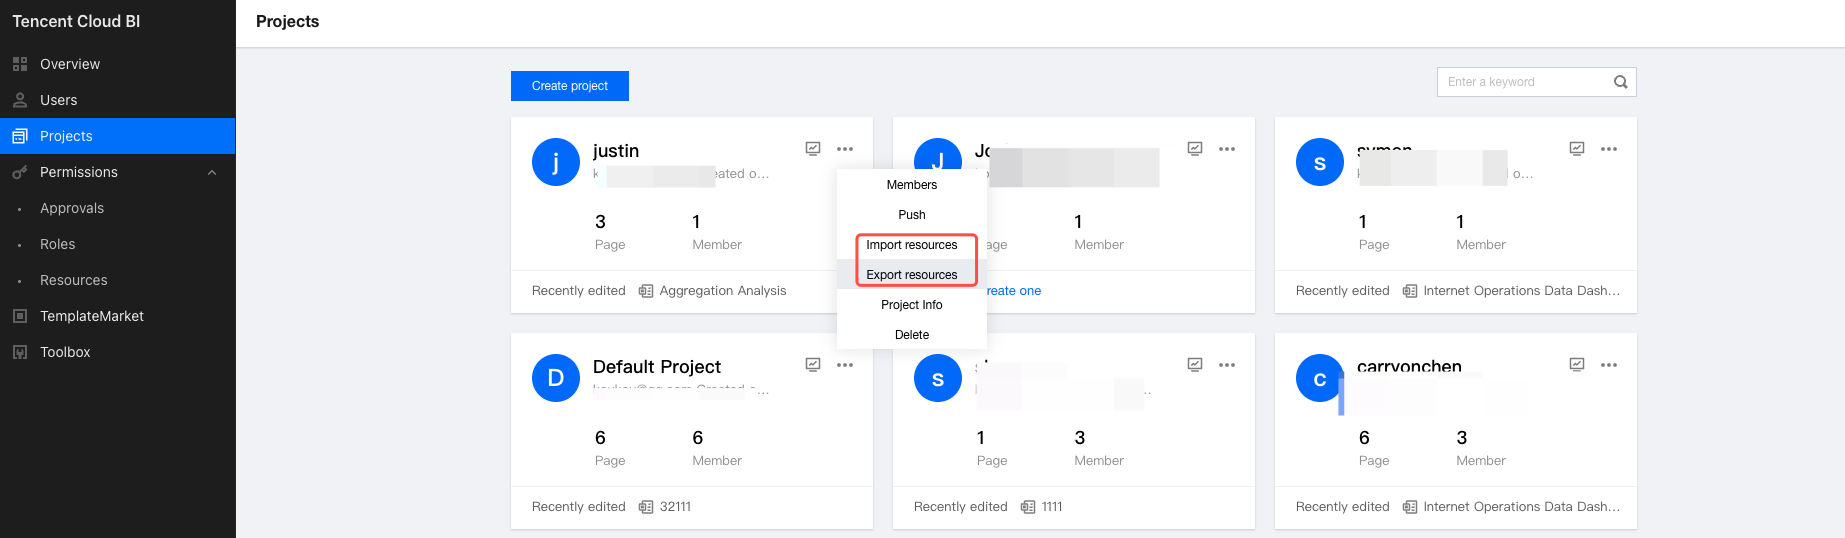
2. Select resource import and resource export through "More Operations" in the project (only the enterprise administrators or project administrators can perform this operation).
Resource Export
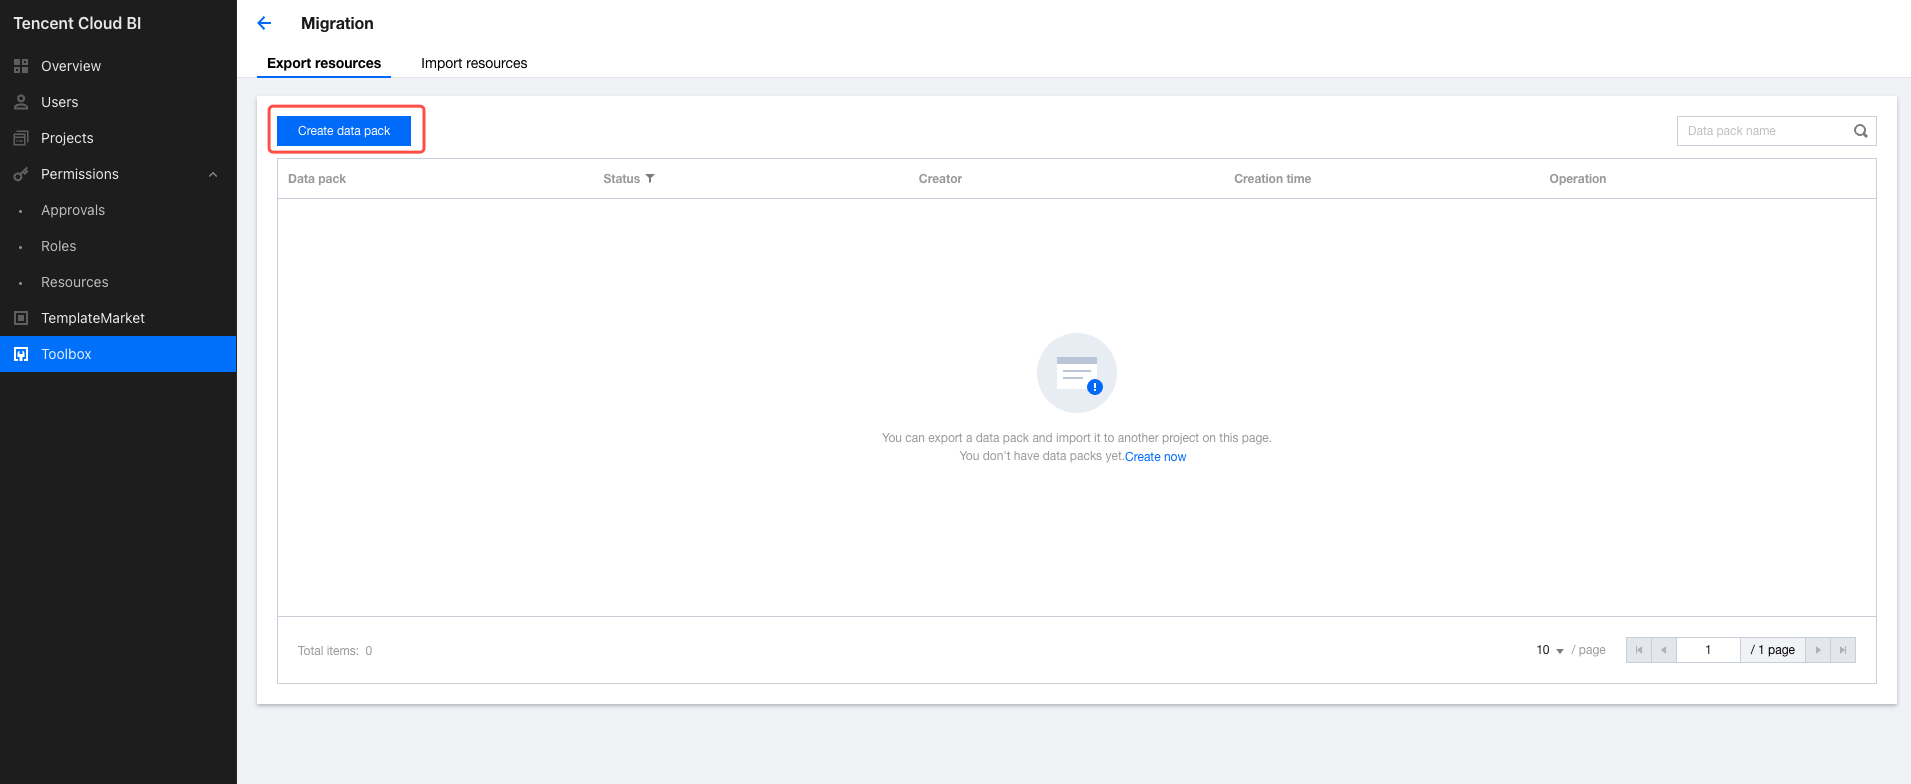
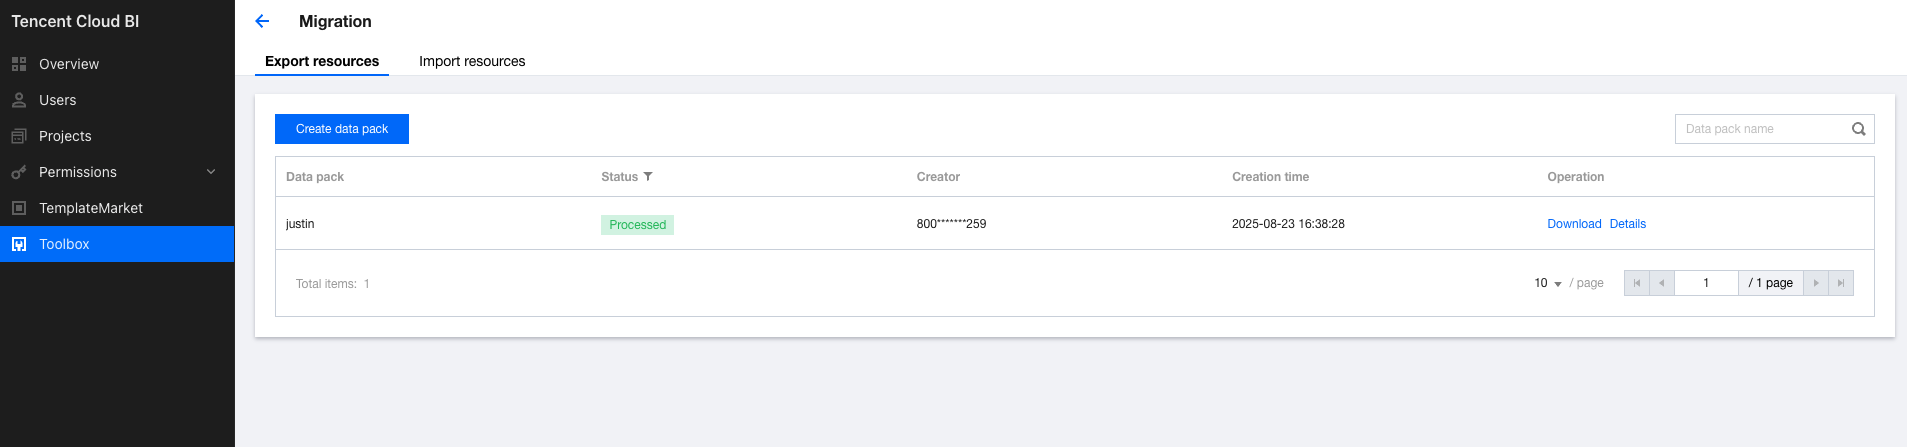
1. On the "Resource Export" page, click the "Create Resource Package" button.
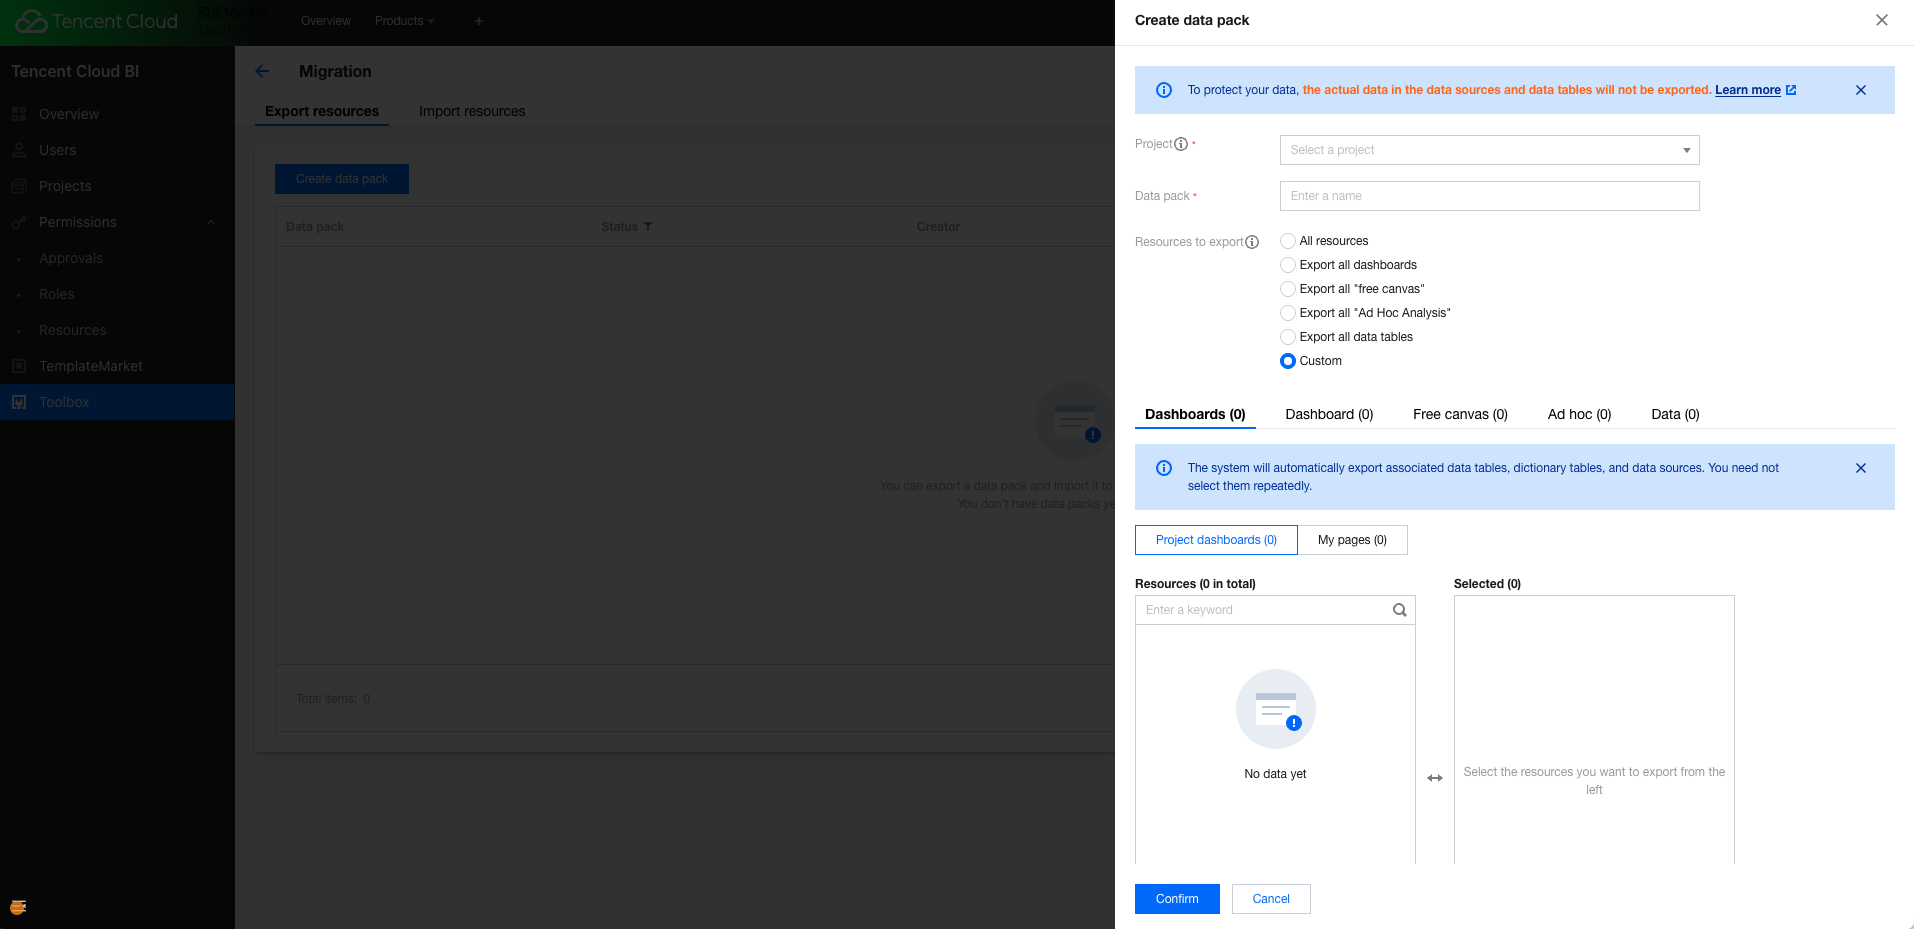
2. In the "Creating Resource Packages" pop-up window, select the method for creating the resource package. When selecting "Customize export range", you can customize the selection of resources from dashboards, pages, or data.
To guarantee users' data security, detailed data in the data resource will not be exported when exporting (only export partial connection information of the data source, table structure, etc.).
After confirming the export range of the resource package, a corresponding "Processing" record will be added to the export list. You can refresh the list to check whether the resource package has been processed. Once processing is complete, you can proceed with the download.
Note: The downloaded file is in .zip format./ This package should be used directly for import later.
Resource Import
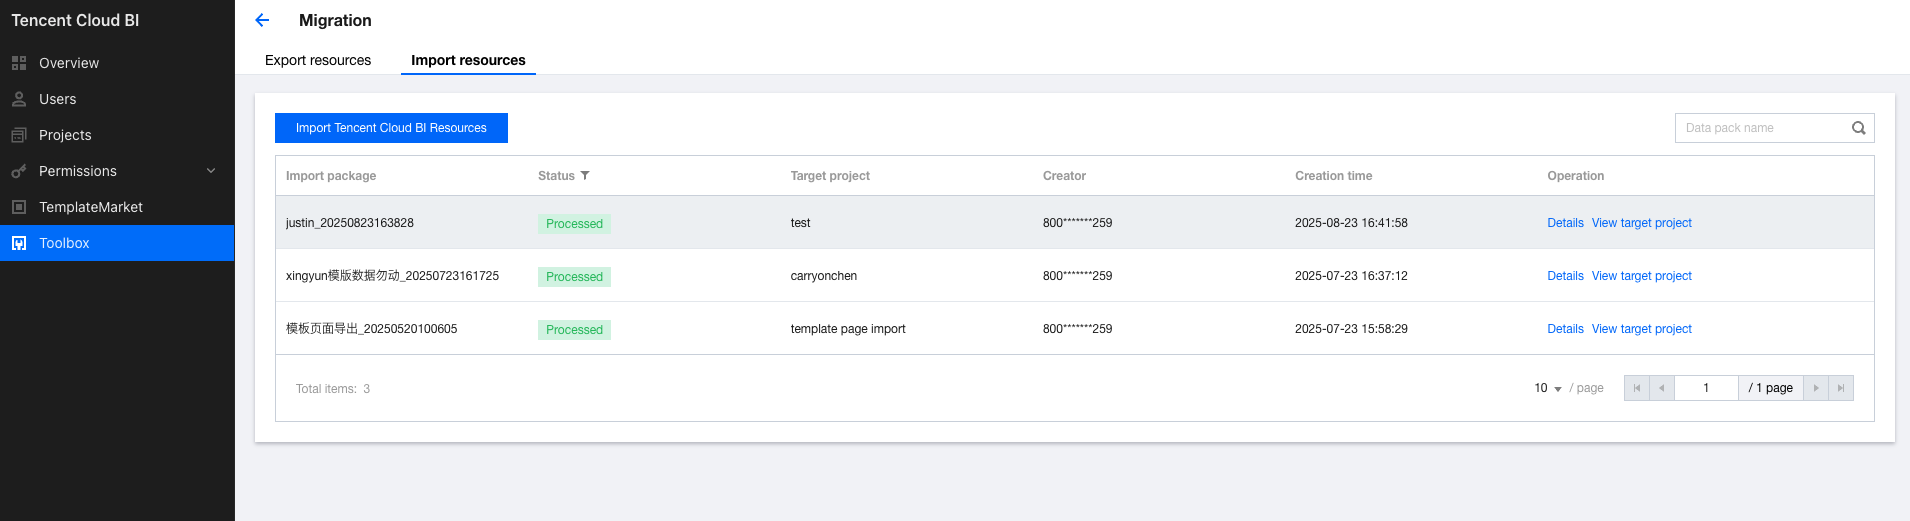
1. Switch to the "Resource Import" page in the toolbox to create an import task.
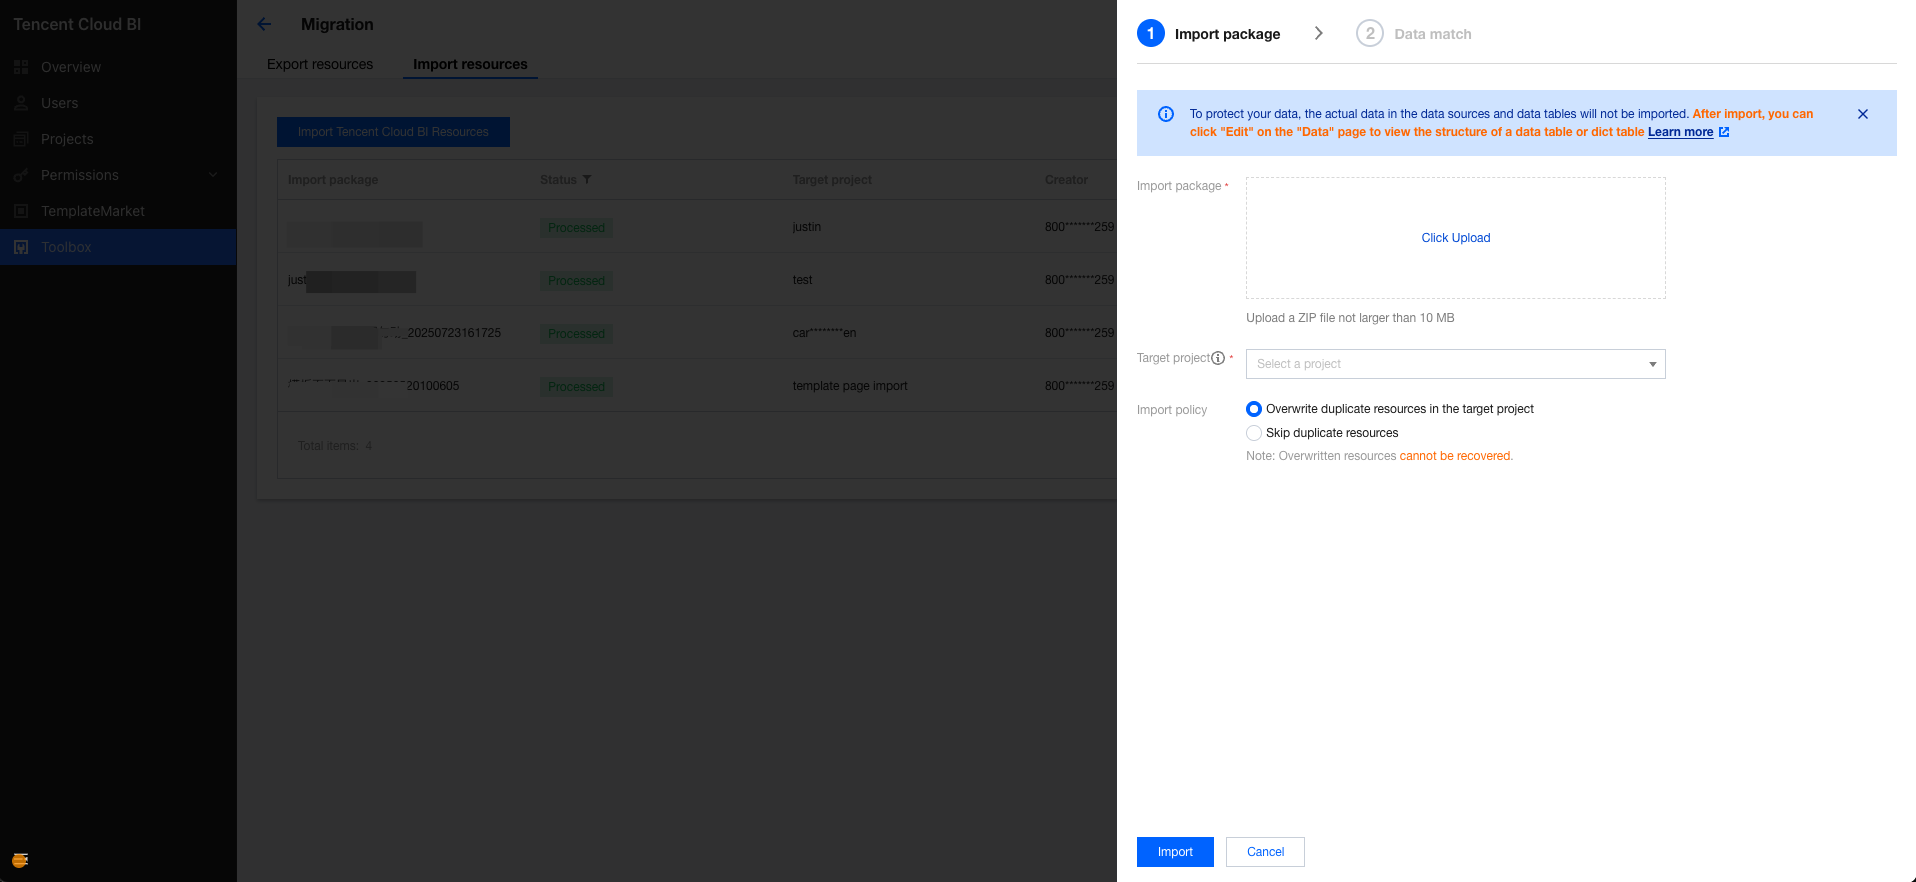
2. Upload the resource package file (in .zip format) and select the project to which the resources will be imported. Different policies are supported for handling duplicate imports.
Overwrite duplicate resources in the target project: If resources in the import package duplicate existing resources in the project, the package resources will be imported and overwrite the existing duplicate resources in the project.
Do not import duplicate resources from the resource package: If resources in the import package duplicate existing resources in the project, the duplicate resources will not be imported, and only the non-duplicate resources will be imported.
Once all fields are entered, click to start the import process.
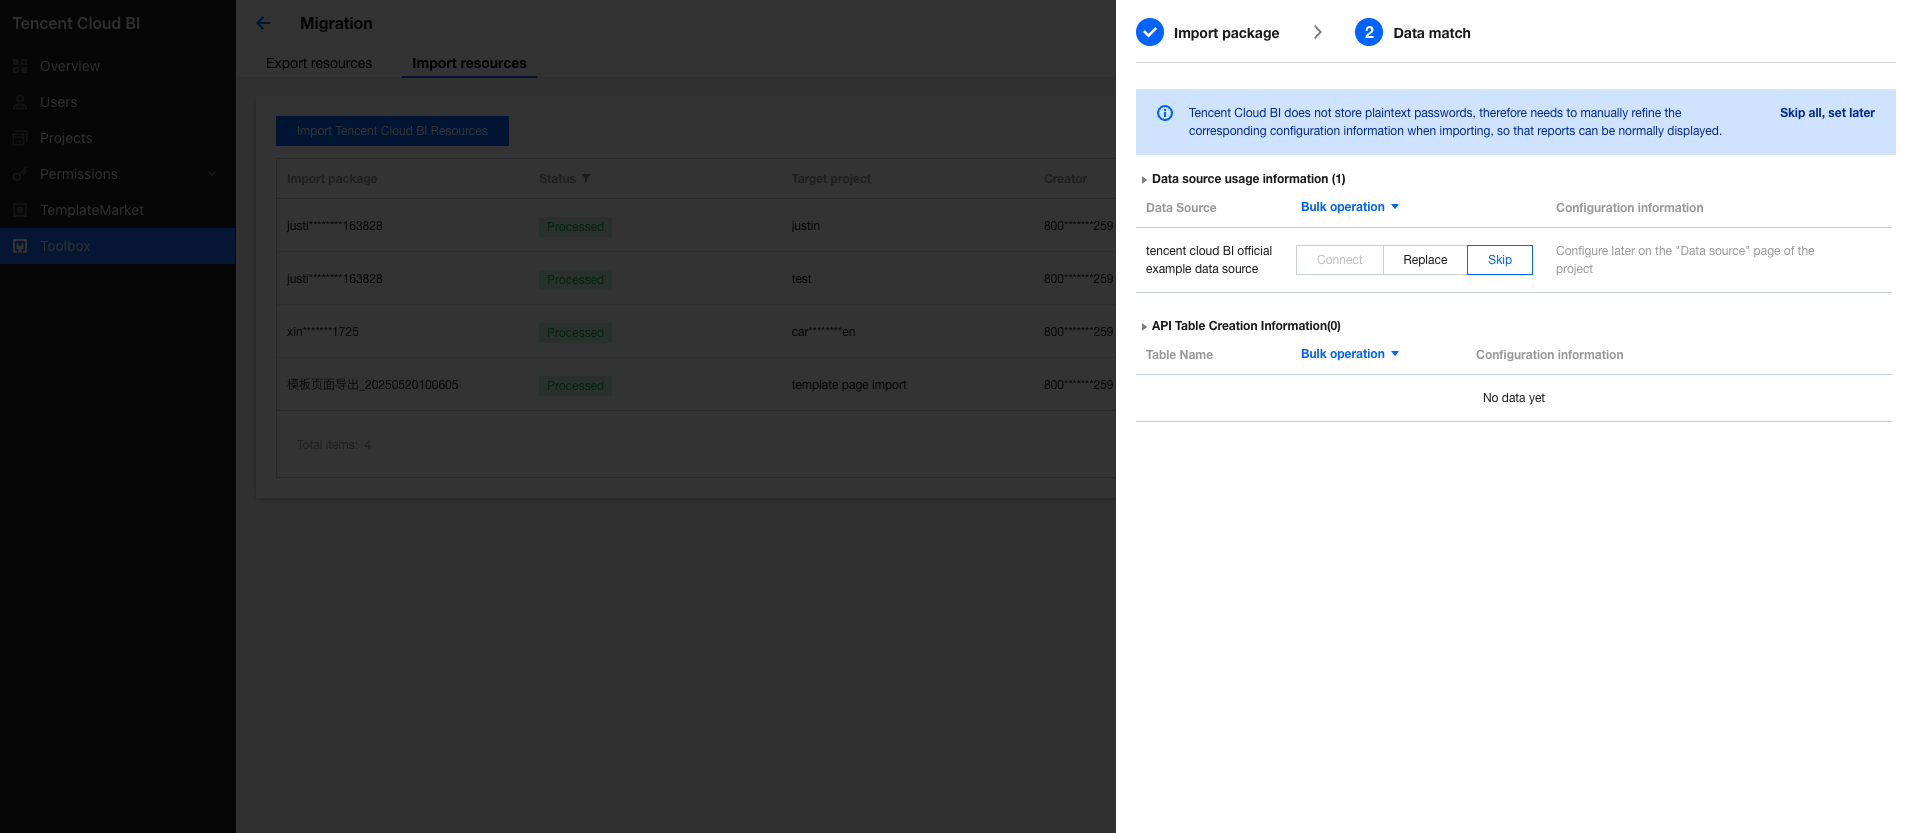
3. After the import is complete, quick data source matching is supported (choose to skip if you do not need to connect to a data source on this page for now). To ensure user data security, the exported resource package contains no important information about the data source connection. Users need to complete the missing information to restore the data connection and enable full page display. The system provides 3 methods for data source matching.
Connect: Enter the username and password to complete the connection information. The connection will be restored later. This method is suitable for proprietary data sources (cloud data sources typically require more complex configurations for connection and are only supported by the "Replace" or "Skip" methods).
Replace: Select an existing data source in the project to replace. After replacement, all pages, data tables, and dictionary tables that reference the original data source will be updated to reference the new data source. This method is recommended when an existing data source in the project closely matches the one in the package.
Skip: Skip connection and replacement at this stage. Import the data source information from the package to the project first. You can edit and connect the data source later within the project.
Import Result Viewing
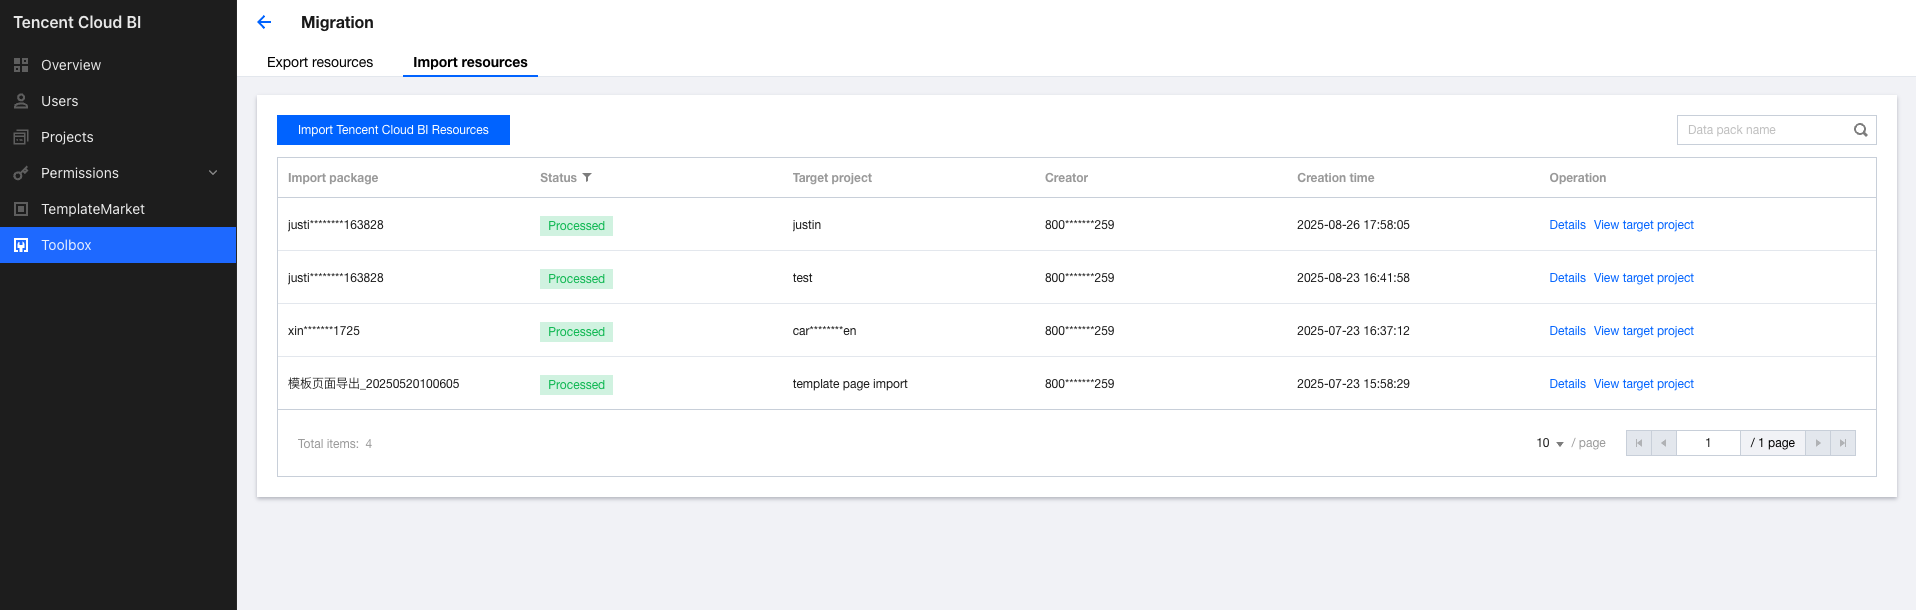
When the import is successful, the import record status will be "Processed". You can view the import results through project management or the "View Target Project" quick action.
FAQs
1. What should I do if the error "Data source connection exceptions (including incomplete connection information, inaccurate connection information, and network issue)" occurs when viewing pages or data after import?
Common causes include incomplete data source connection after import or mismatches between tables in the new data source and the table fields in the BI system, resulting in data connection exceptions. It is recommended to verify whether the data source information is accurate, the connection is functioning properly, and all required fields are included.
2. After import, if the new data source cannot fully match the data tables in BI and cannot be modified, how can the page display be restored?
It is recommended to edit or create data tables within BI to adjust the fields. Then, go to the report editing page and adjust the corresponding components referencing the relevant tables by dragging and dropping the relevant fields in the dimension, metric, and other areas again.
3. After import, if the uploaded Excel data tables or dictionary tables appear empty, how can I recover the data?
In the data table list, tables sourced from Excel or Tencent Documentation support the "Update" operation, allowing users to upload data in the same format to complete or update the table data. (This capability will also be supported for dictionary tables in the future.)
To view the table structure (to check the fields included) of a specified data table or dictionary table for generating corresponding files, select "Edit" on the corresponding data table or dictionary table.
4. How to resolve the processing failed error caused by an incorrect format during import?
First, ensure that the uploaded file format is correct. You need to upload the original .zip file exported from the platform.
If the initial upload fails, try exporting and importing the resource package again. If the issue persists after multiple attempts, contact us through customer service from our official website.