The page embedding feature enables users to embed pages into third-party systems, providing easy access for third-party users.
Prerequisites for the embedding feature:
The current edition is the Basic Edition or the Professional Edition.
Pages need to be published first before they can be embedded.
The current user is an Enterprise Administrator or Project Administrator.
To include page parameters, you need to purchase the Professional Edition.
In this document, you will learn:
How to embed a single page.
How to add page parameters to a page.
Page Embedding Settings
1. Go to the project > Dashboard.
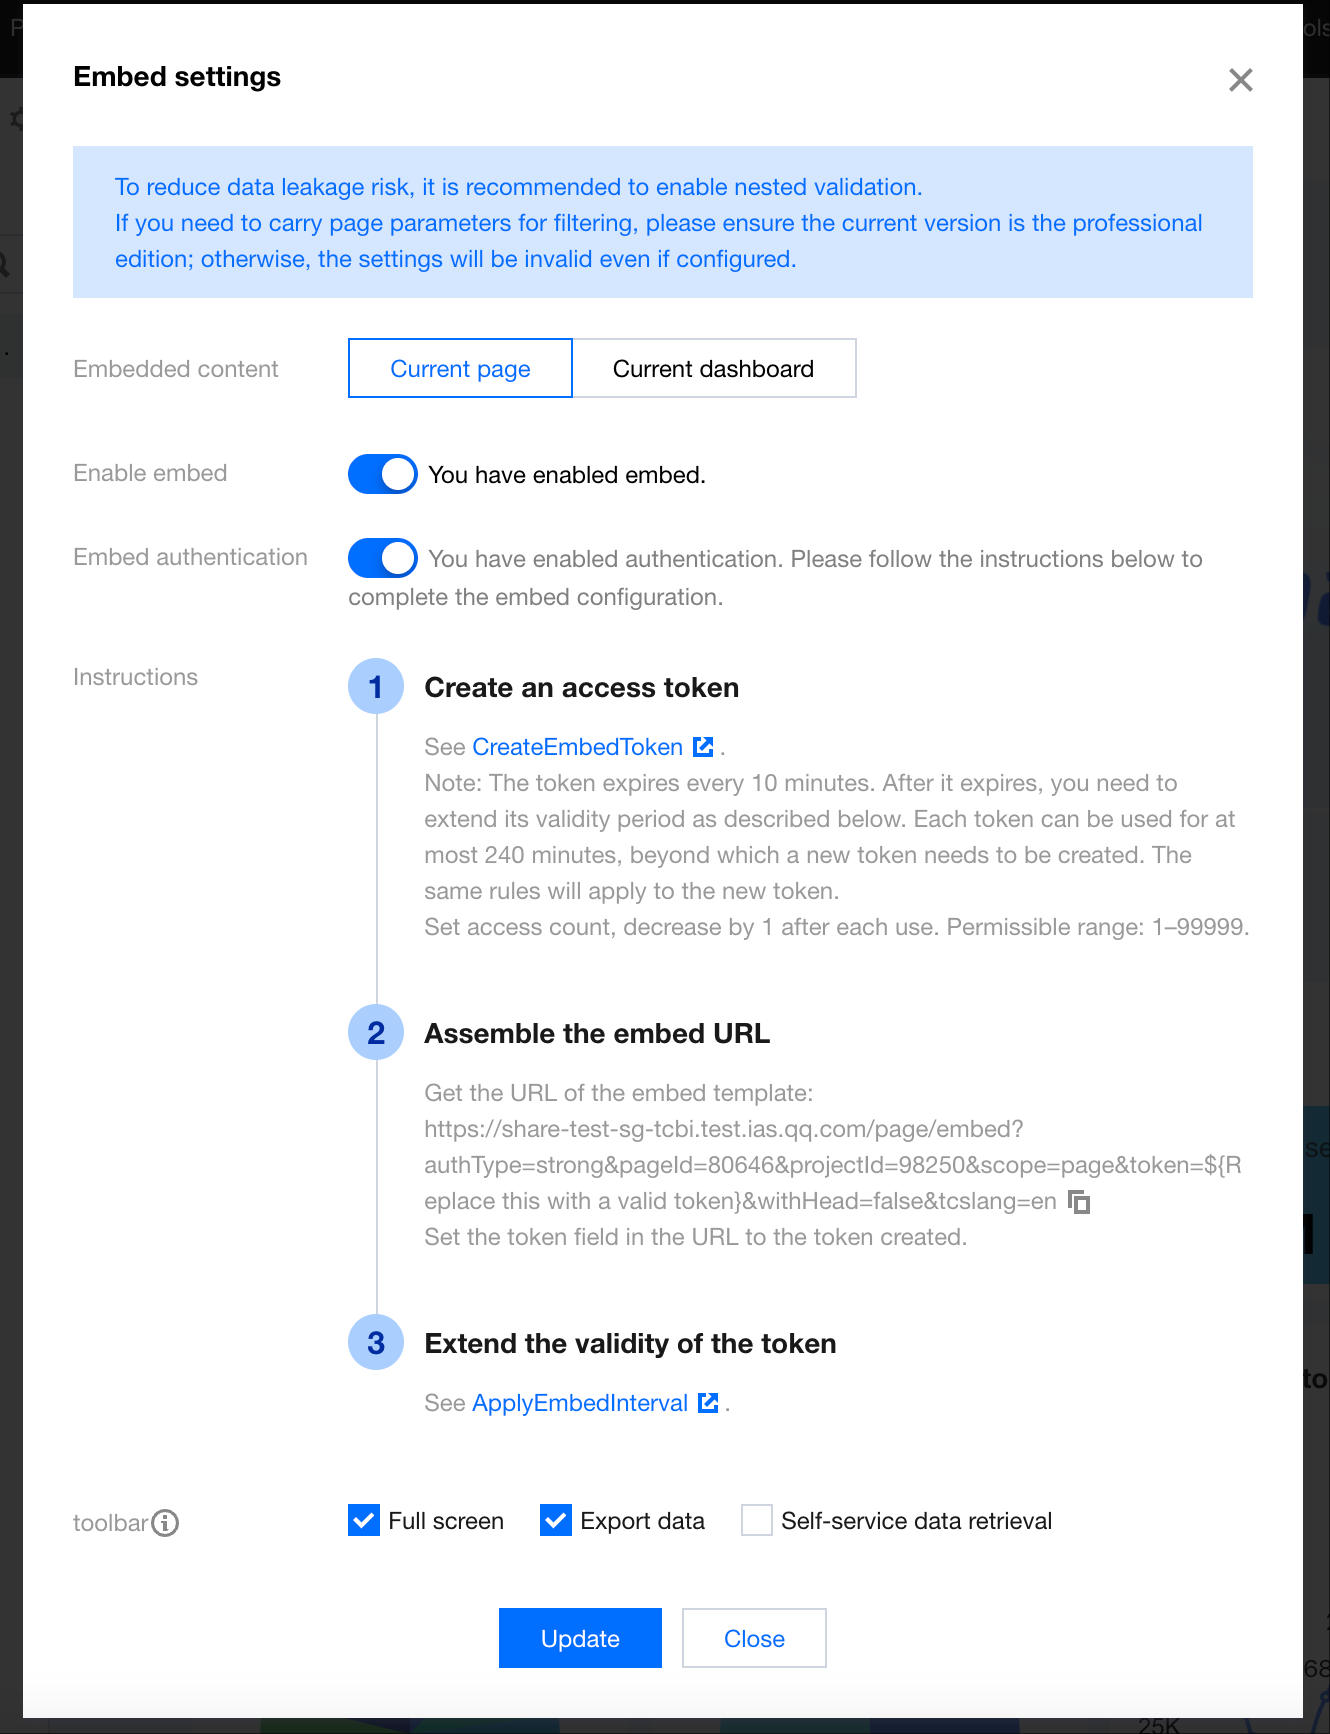
2. Click the Embed icon.
3. In the embedding configurations, select "Current page".
To invalidate the embedded link, you can disable the embedding feature. Once the embedding feature is disabled, users will see a "Page not accessible" message when trying to access the embedded link.
If embedding verification is not enabled, the embedded link may be exposed. It is recommended to enable embedding verification for non-public data to ensure security.
If you want the link to be accessible only within a specific validity period, you can set the validity period. Once the validity period is enabled, users attempting to access the link outside the validity period will see a "Out of validity range" error.
4. Click Update Settings for the settings to take effect.
Including Parameters in Embedded Pages
If you need to include parameters in the embedded page to filter data on the page using the page parameters, you can achieve this in 2 ways.
Method 1: Pass the parameters using the "params" explicit parameter format.
Applicable scenario: The parameters being passed are public and do not require tamper-proofing, for example, a department employee list table, where visitors can modify the "department" to access data for different departments.
Steps:
1. As mentioned above, enable embedding in the dashboard and obtain the embedded link.
/* In this example, assume the embedded link is obtained as shown below. Remember to modify the pageId, projectId, and token values. */
https://tcbi.qq.com/page/embed?authType=strong&pageId=222&projectId=111&scope=page&token=${use a valid token to replace this placeholder}&withHead=false
2. Construct the URL page parameters.
Refer to URL Page Parameter Construction to obtain the page parameters required to be included. In this example, we assume the "department" parameter with the value "Quality Group" needs to be included.
Method 2: Pass the parameters using the token format.
Applicable scenario: The passed parameters are used for data isolation and cannot be tampered with. For example, the department revenue data, where visitors cannot modify the parameters to access data from other departments.
Steps:
1. As mentioned above, enable embedding in the dashboard and obtain the embedded link.
/* In this example, assume the embedded link is obtained as shown below. Remember to modify the pageId, projectId, and token values. */
https://tcbi.qq.com/page/embed?authType=strong&pageId=222&projectId=111&scope=page&token=${use a valid token to replace this placeholder}
2. Through the Token creation API, write the parameters to be included into "GlobalParam". Refer to Creating an Embedded Report Token for details. The following example demonstrates how to perform the operation in the Tencent Cloud API Explorer.