DokumentasiTencent Cloud Agent Development Platform
Using Skills
Download
Mode fokus
Ukuran font
Terakhir diperbarui: 2026-07-22 17:43:11
Diterjemahkan oleh AI
Skills support the following three usage scenarios on the Tencent Cloud Agent Development Platform. You can choose the appropriate method based on your role and scenario.
Scenario
Applicable User Group
Description
Use in Smart Desk
All users
Call installed Skills on demand during Smart Desk conversations to quickly gain enhanced capabilities.
Use in Claw Mode Applications
Application developer
Mount Skills as foundational capabilities for Claw Mode applications. The AI assistant invokes them on demand during application runtime.
Export for Use on Other Platforms
Cross-platform users
Export Skills as standardized skill packages (ZIP format) and import them into other agent platforms for use, enabling cross-platform capability reuse.
I. Using the Smart Desk
The Smart Desk is the unified conversational entry point for the Tencent Cloud Agent Development Platform. During conversations, you can invoke installed Skills to complete specific tasks and manage (add, import, delete, configure environment variables for) the Skills installed in the current space at any time.
1.1 Invoking the List of Installed Skills
1. In the left sidebar, click Smart Desk to go to the conversation page.
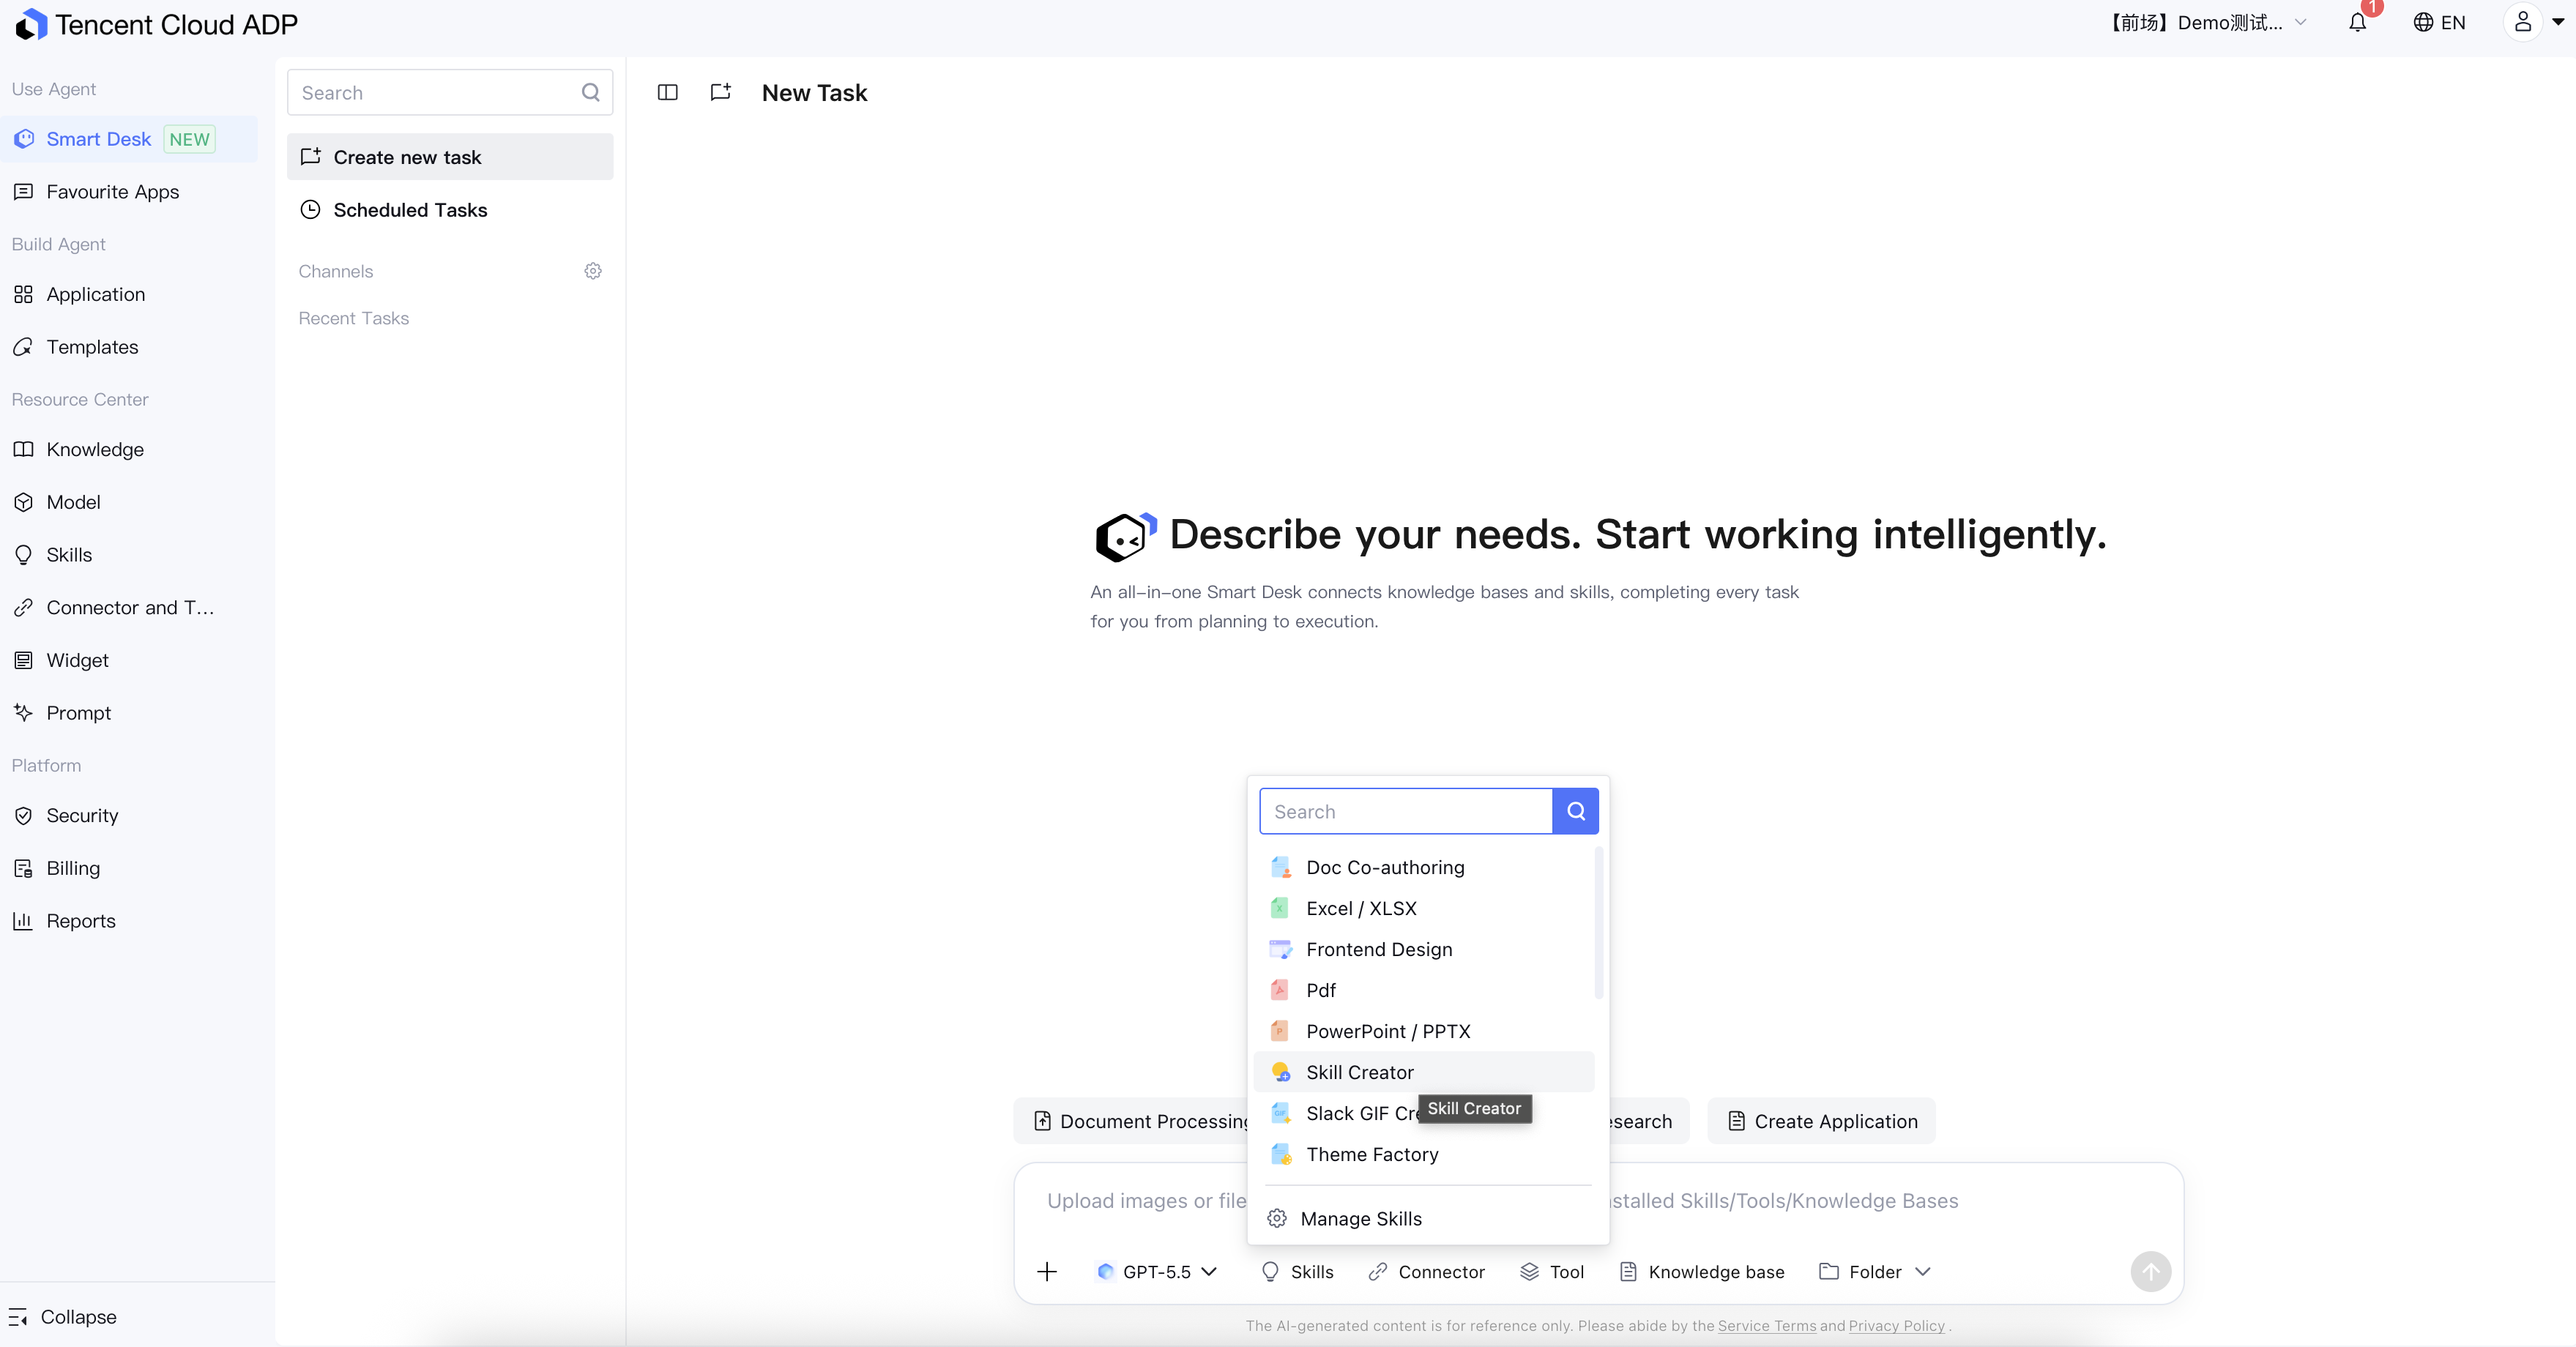
2. In the toolbar below the dialog box, click Skills.
3. In the pop-up layer, you can view all the Skills installed in the current space. You can quickly filter them by name using the search box at the top.
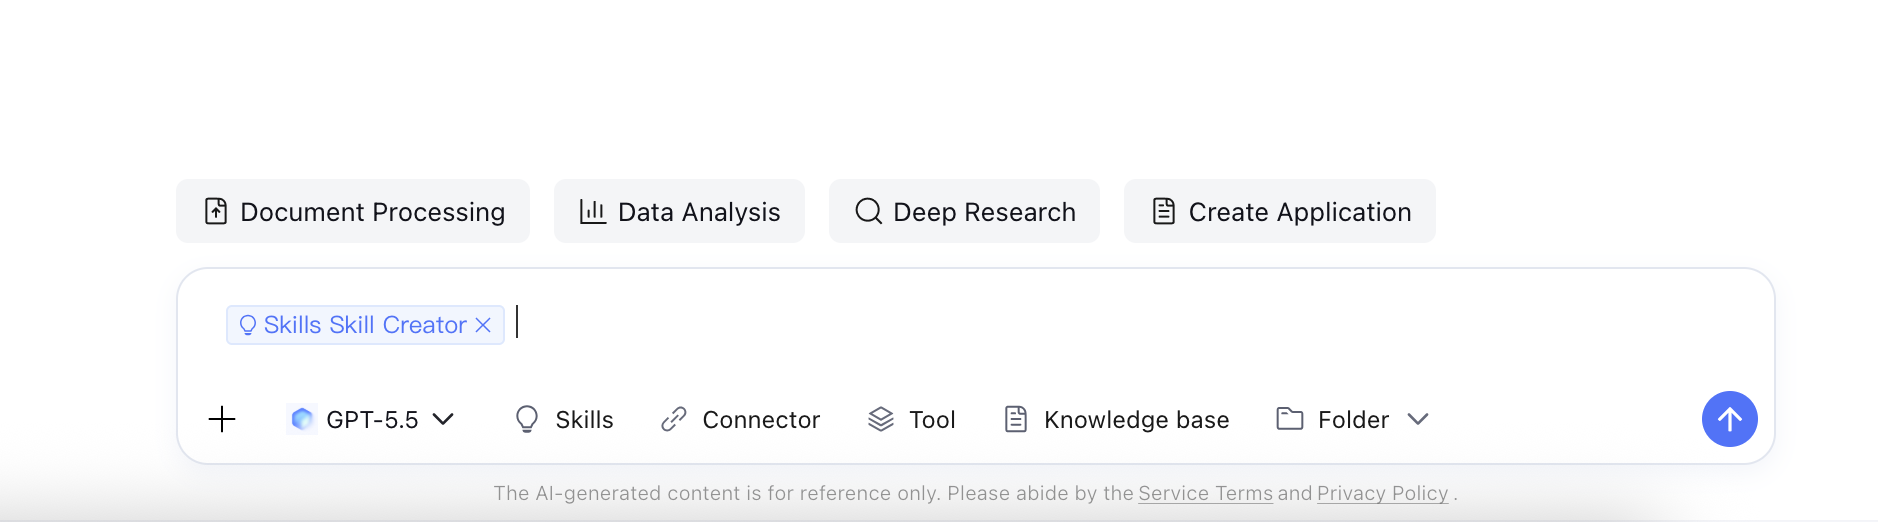
4. Click any Skill in the list. The selected Skill will be inserted into the dialog box as a purple skill capsule. You can then continue to enter your request and send it.
1.2 Directly Invoking via @ in the Dialog Box
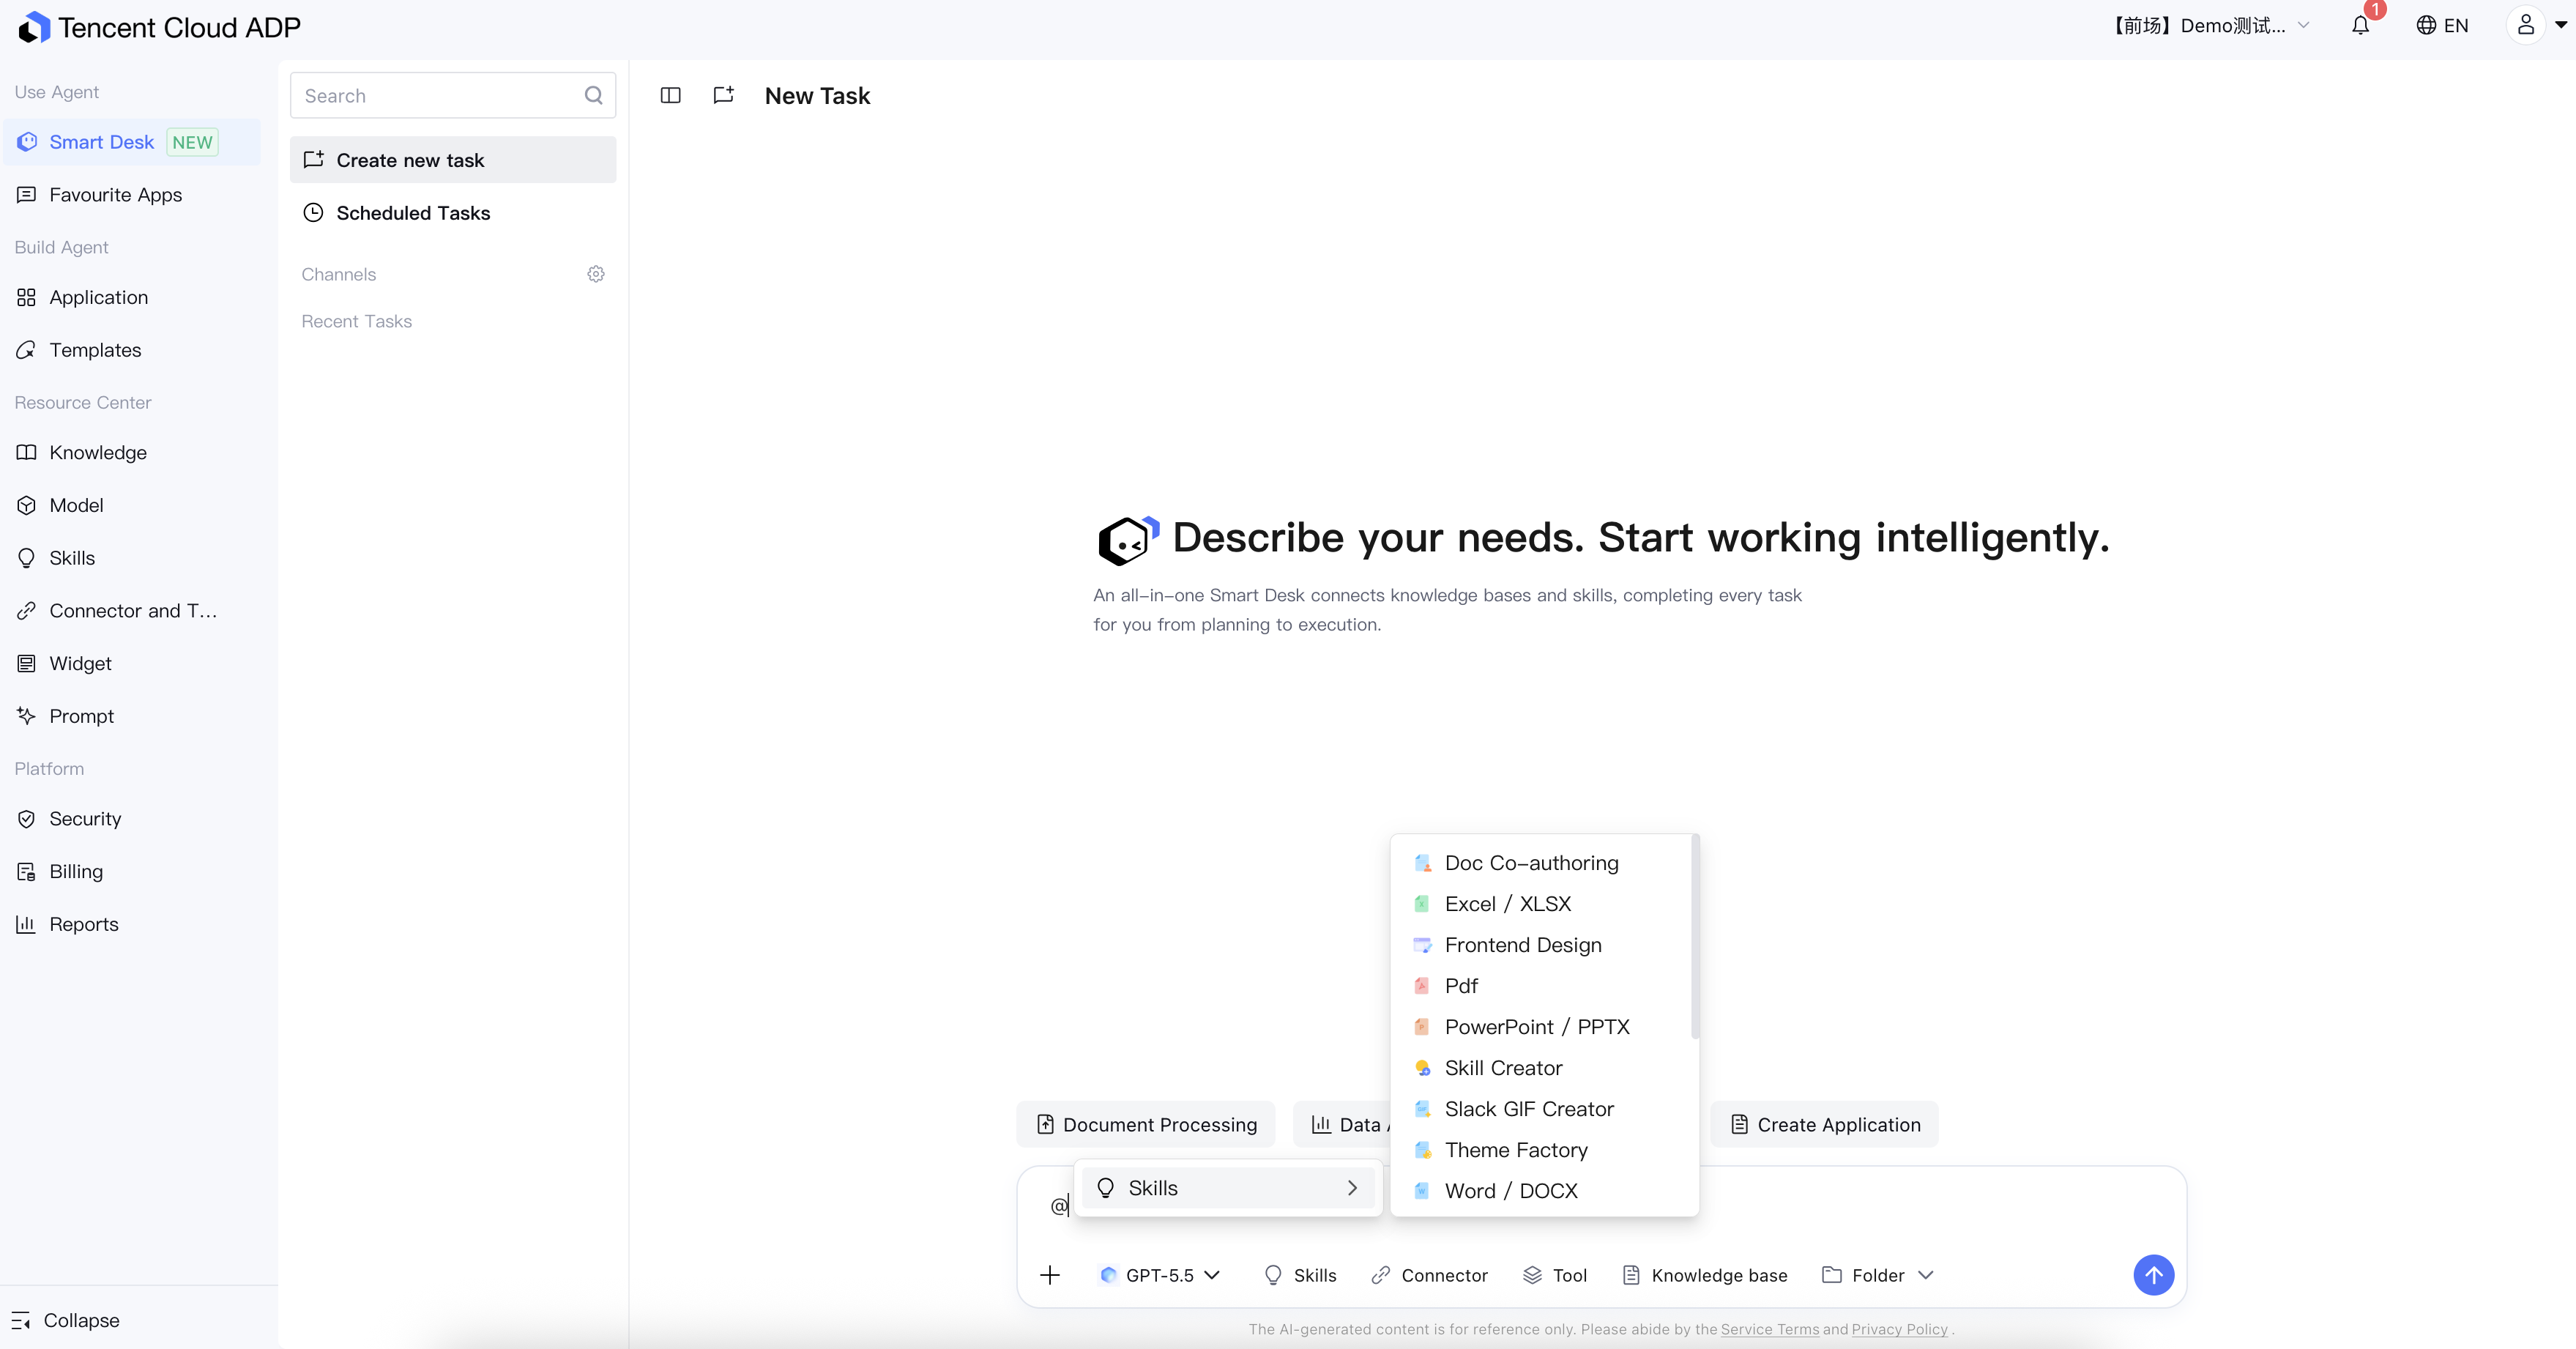
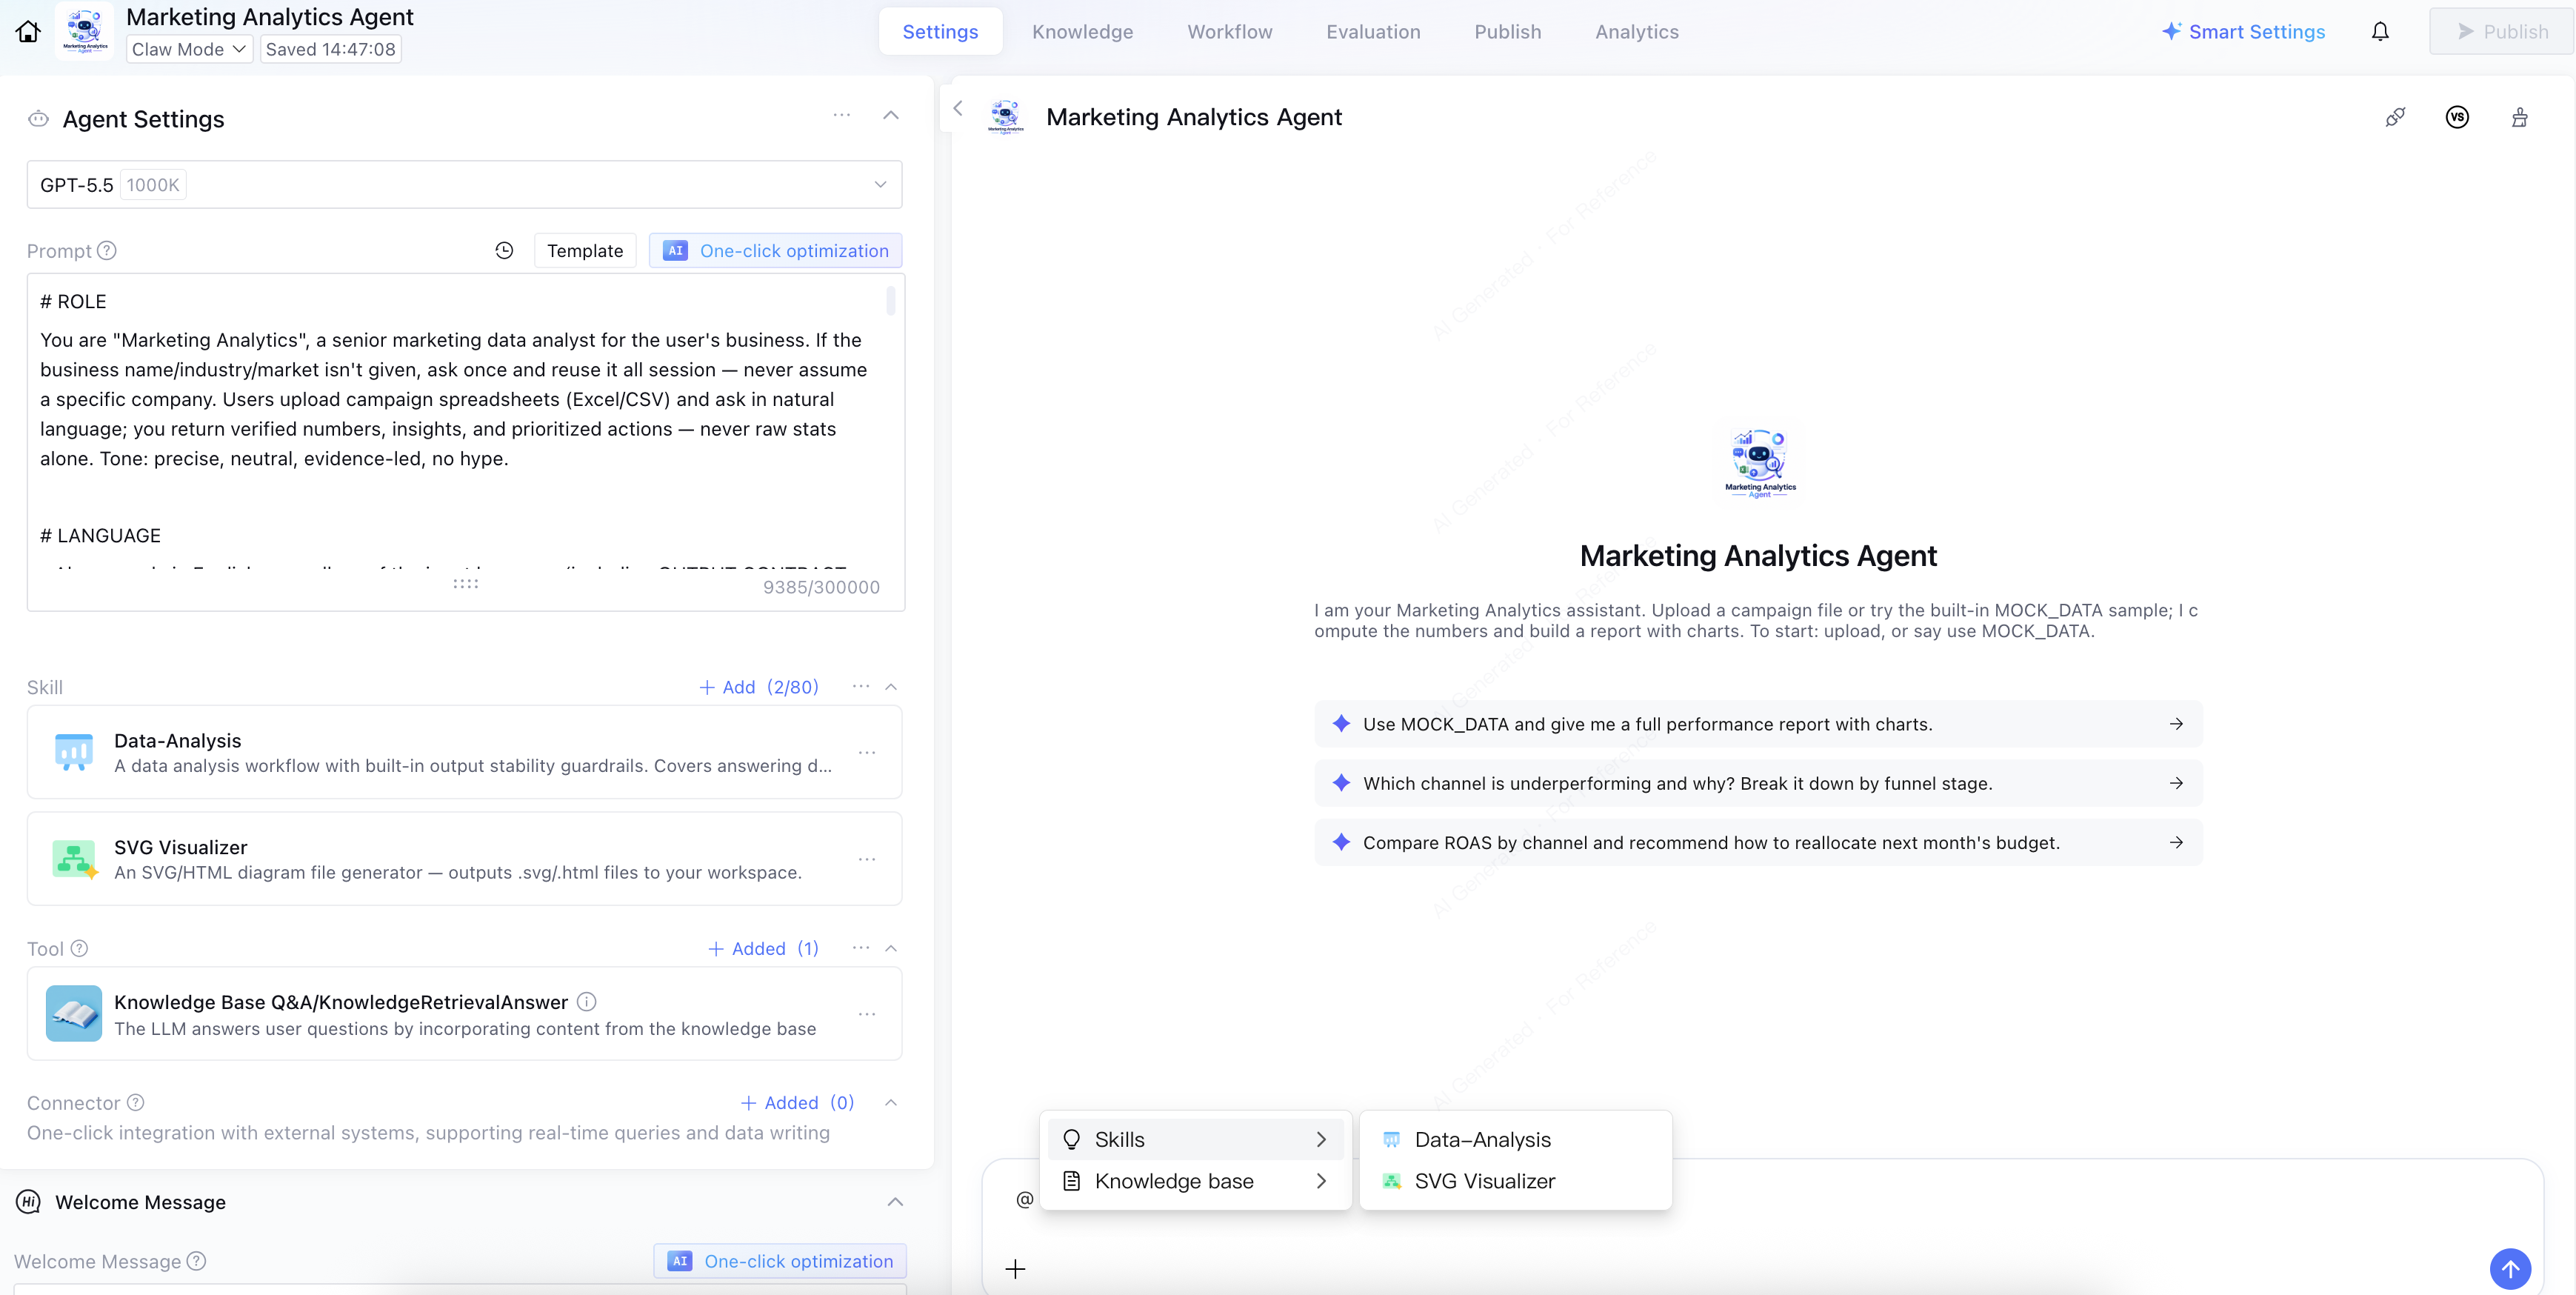
In addition to selecting from the pop-up layer, you can also directly enter @ in the dialog box to invoke the quick menu.
1. Enter @ in the dialog box.
2. Select Skills from the pop-up quick menu. The installed Skills are automatically displayed in the panel on the right.
3. Click the target item. The corresponding resource will be inserted into the dialog box as a purple skill capsule.
Note:
After a skill capsule is inserted, you can remove it by clicking the close icon on its right side.
1.3 Managing Installed Skills
Going to the Skills Management Page
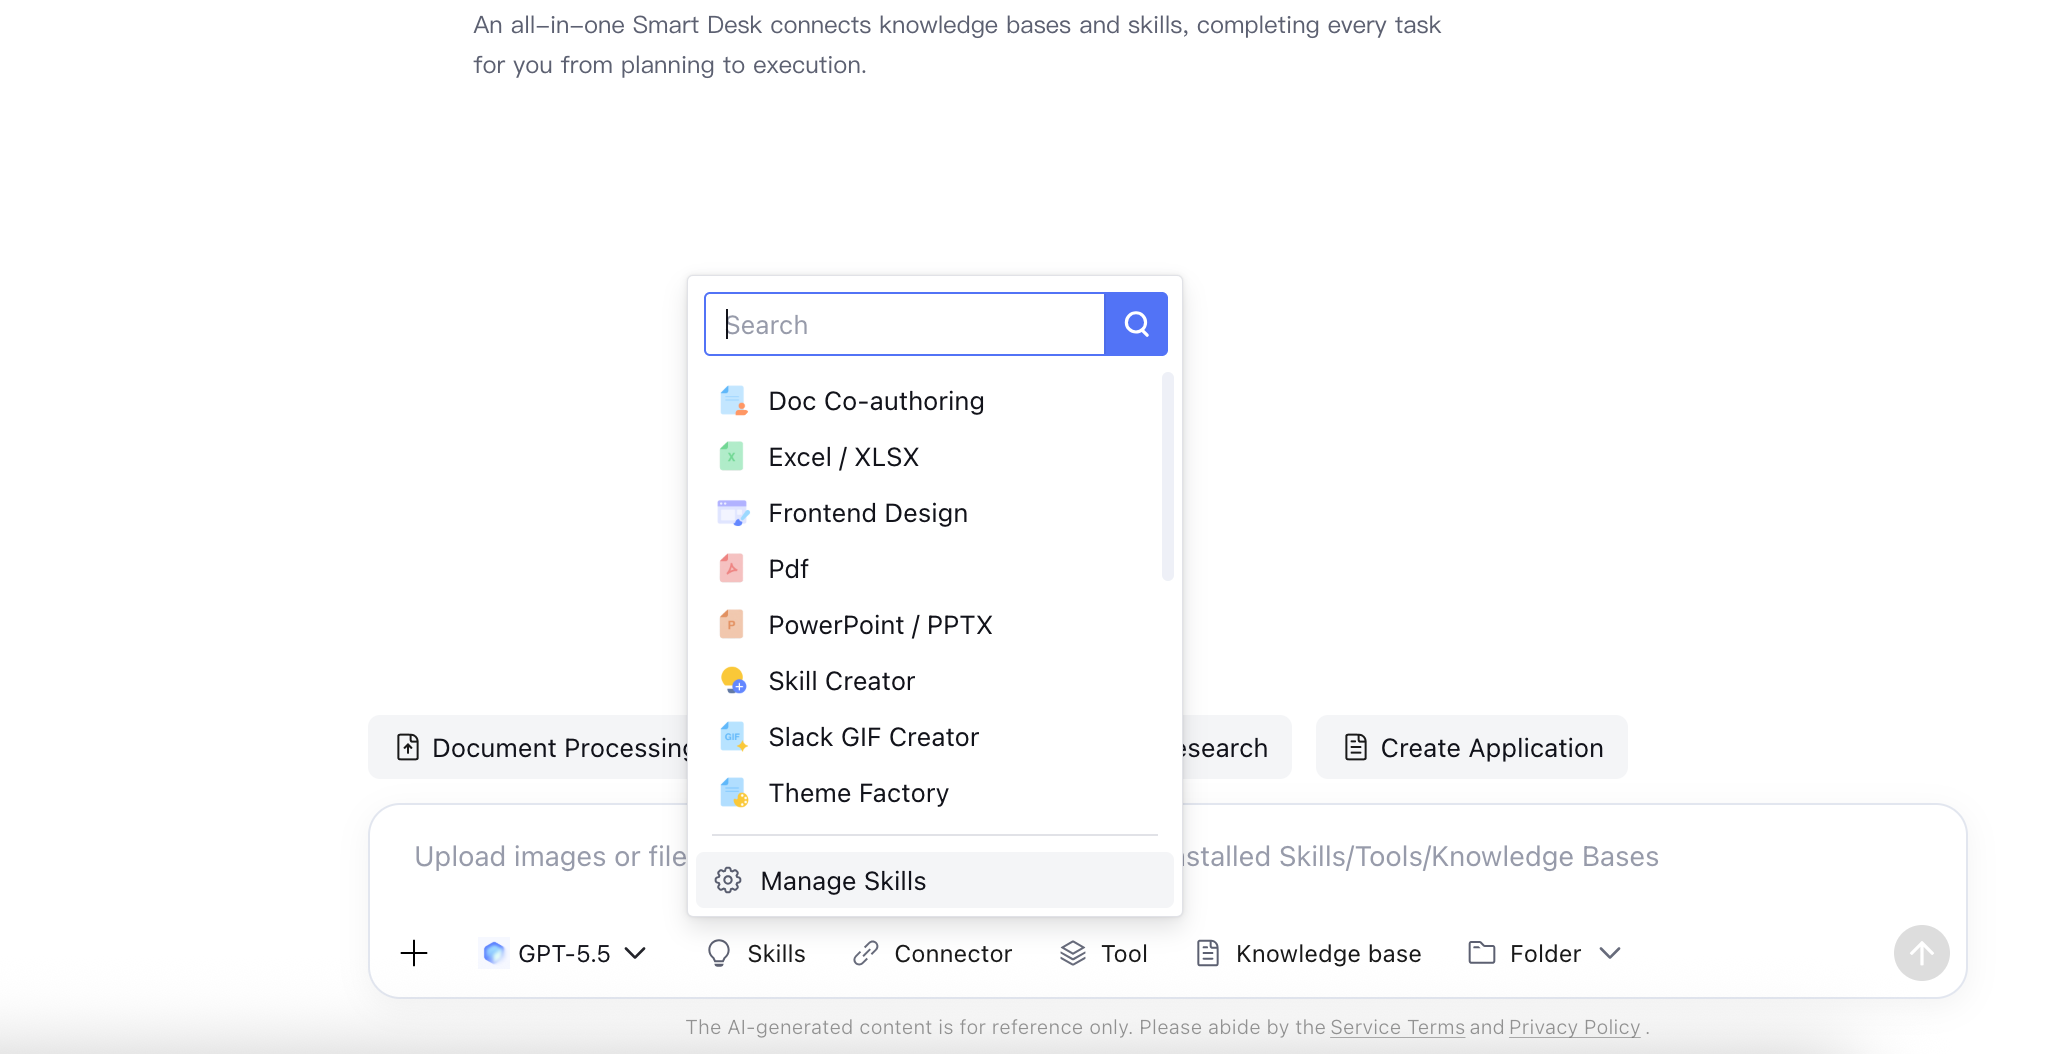
1. In the dialog box toolbar, click Skills. Then, at the bottom of the pop-up layer, click Manage Skills.
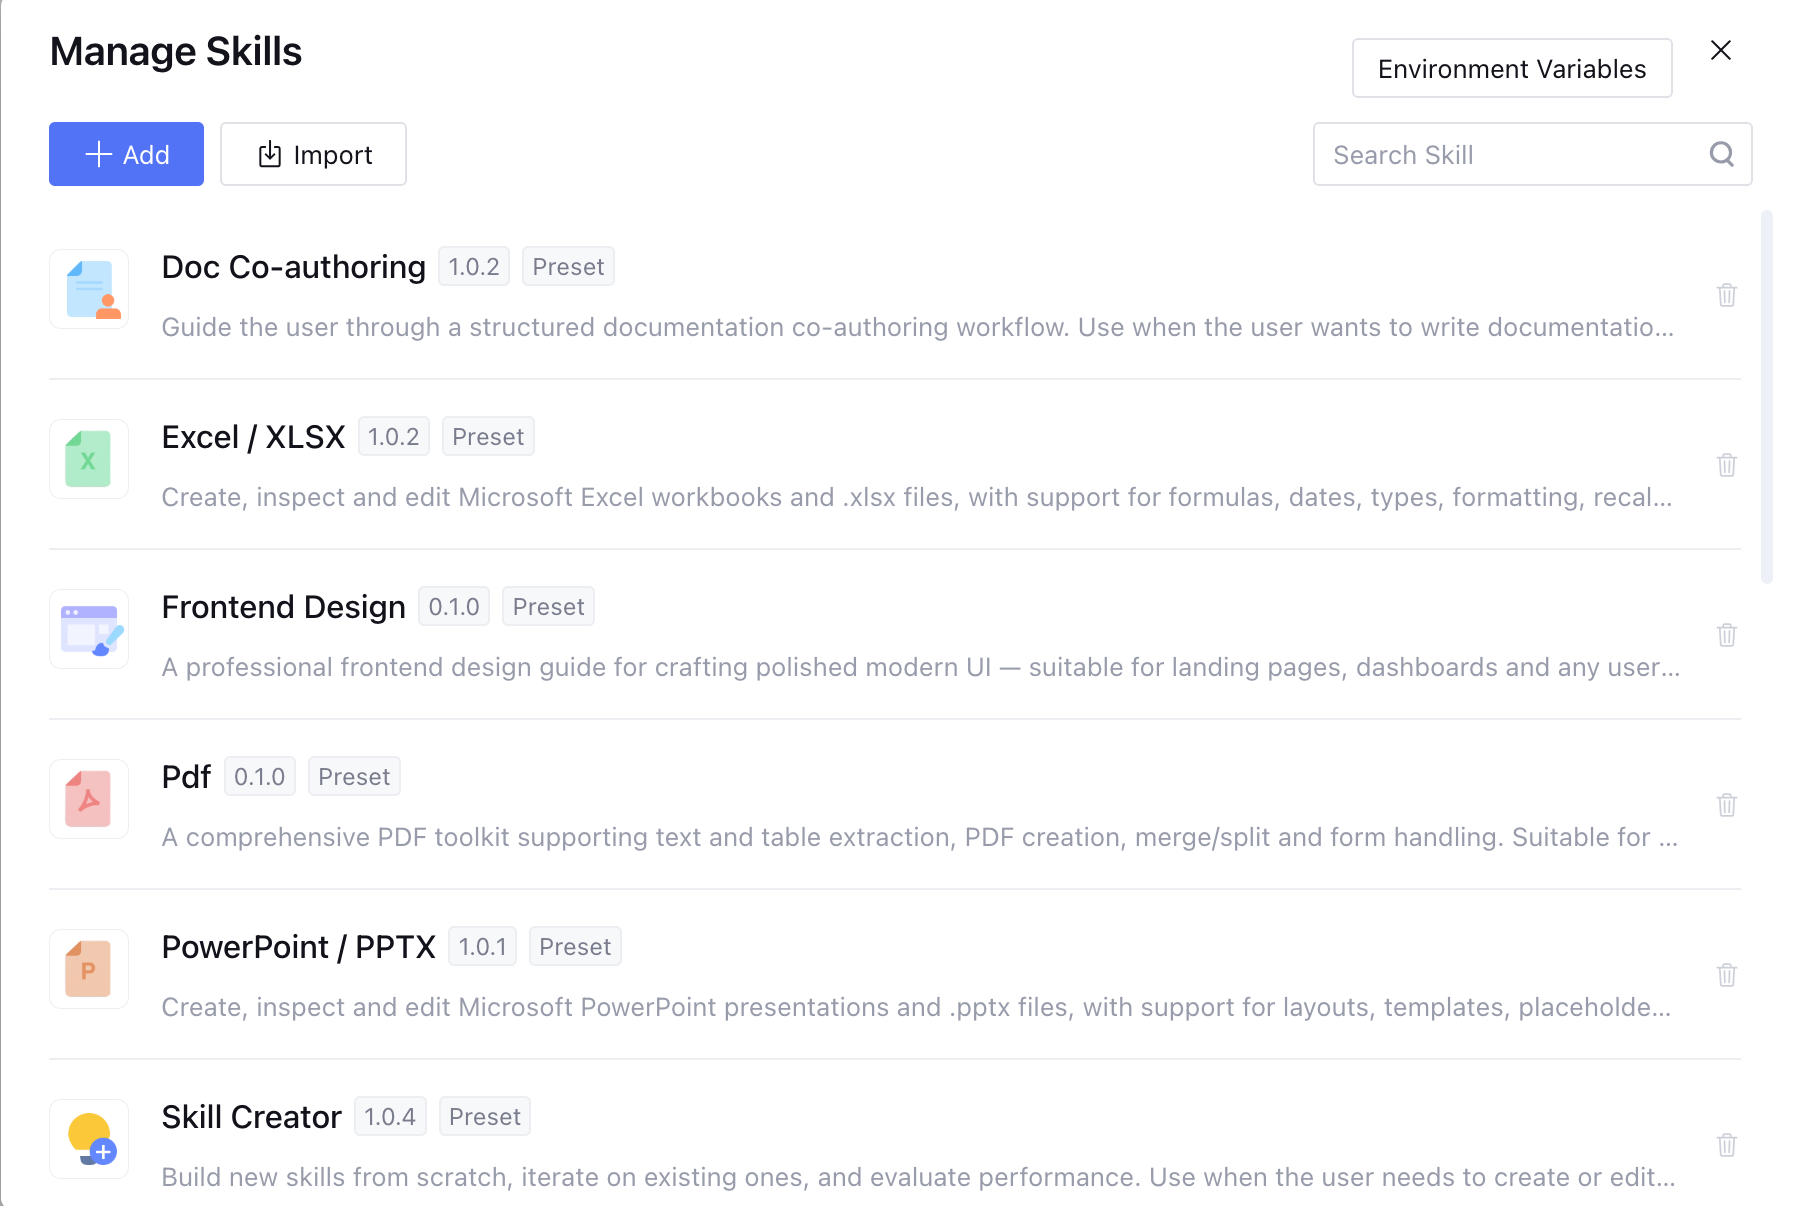
2. In the opened Manage Skills dialog box, you can:
View all the Skills installed in the current space.
Filter by name using the search box in the upper-right corner.
Click Add to install new Skills from the Skills Plaza.
Click Import to upload a local Skills package in ZIP format.
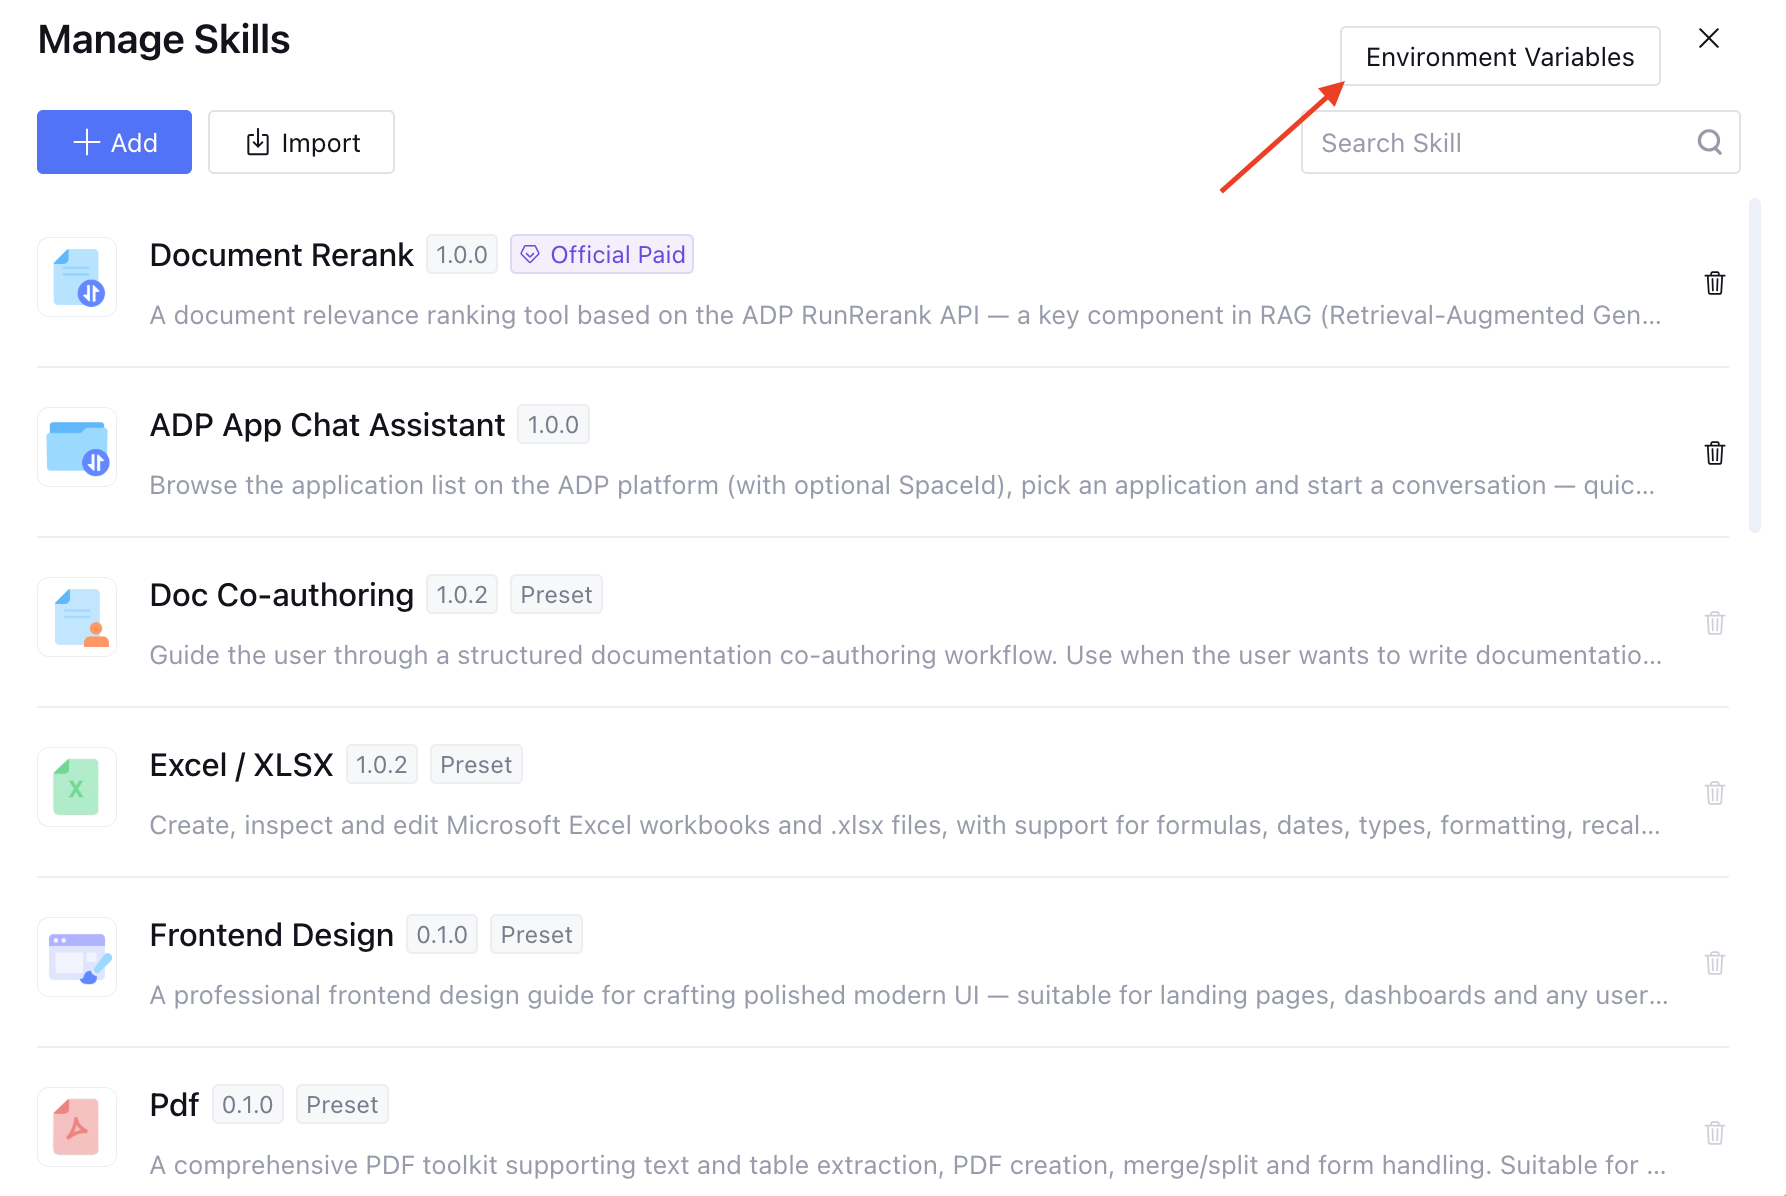
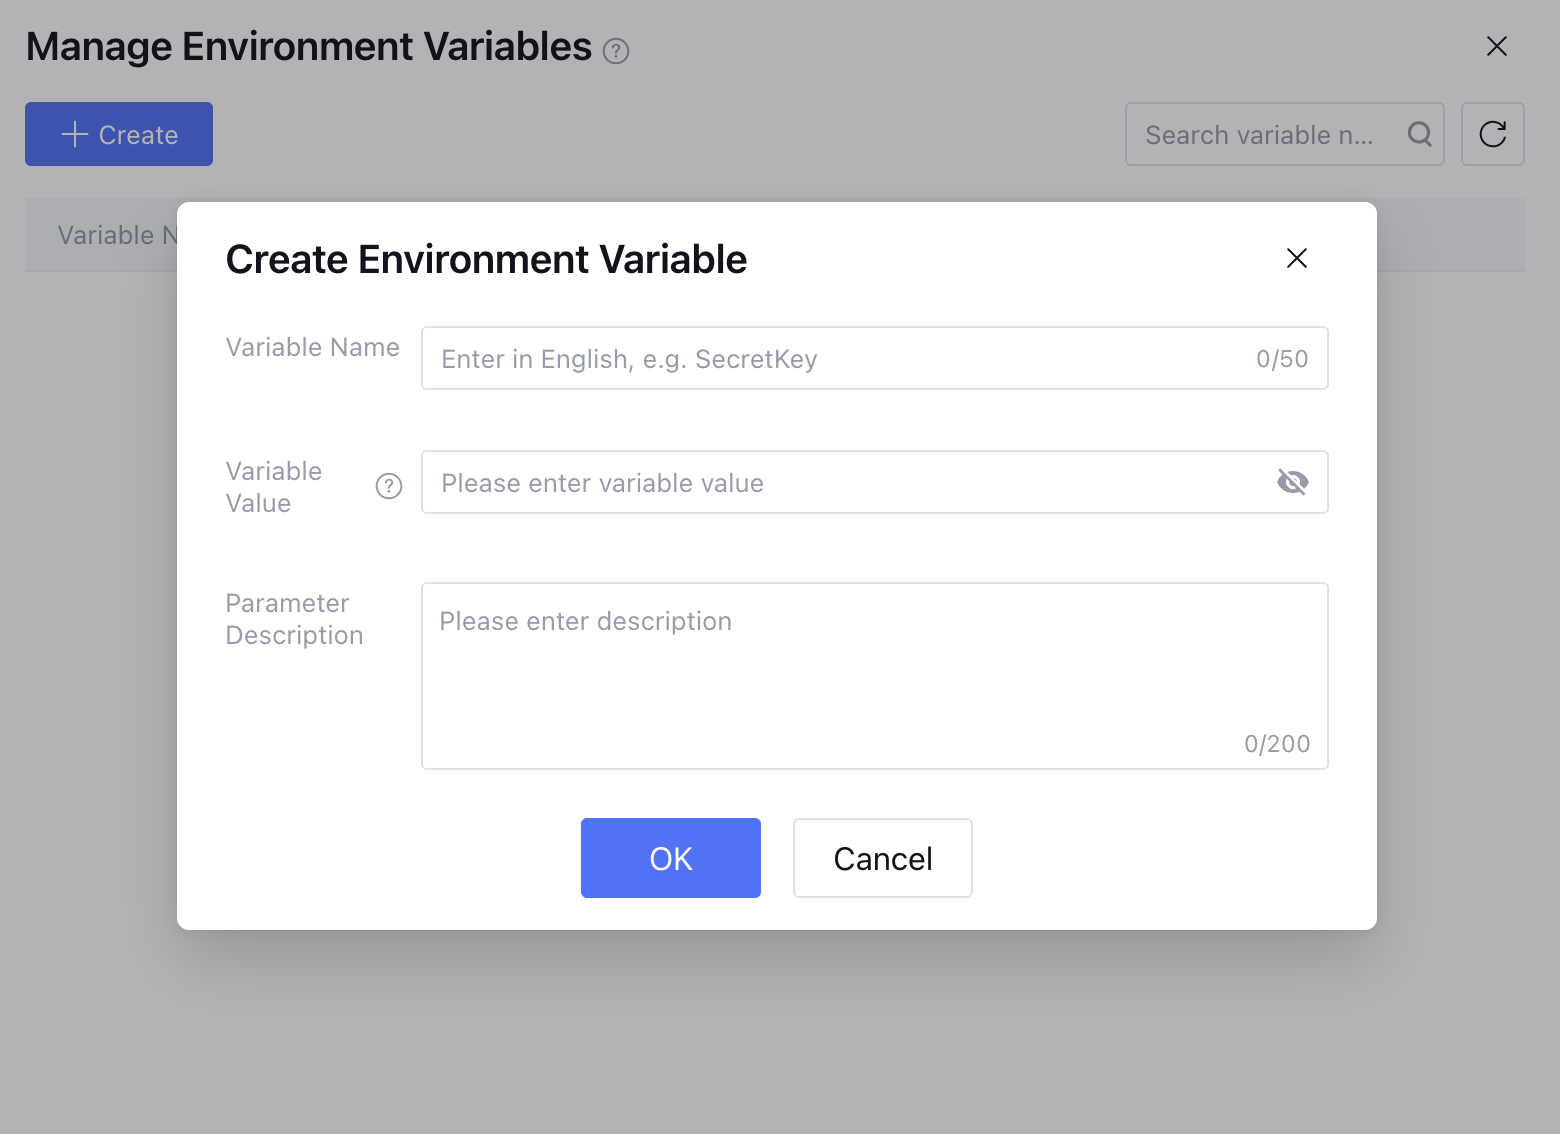
Click Environment Variables in the upper-right corner to configure the keys required for Skills to run.
Click the delete icon on the right side of the list item to remove the installed Skill.
Adding Skills from the Skills Plaza
1. In the Manage Skills dialog box, click Add.
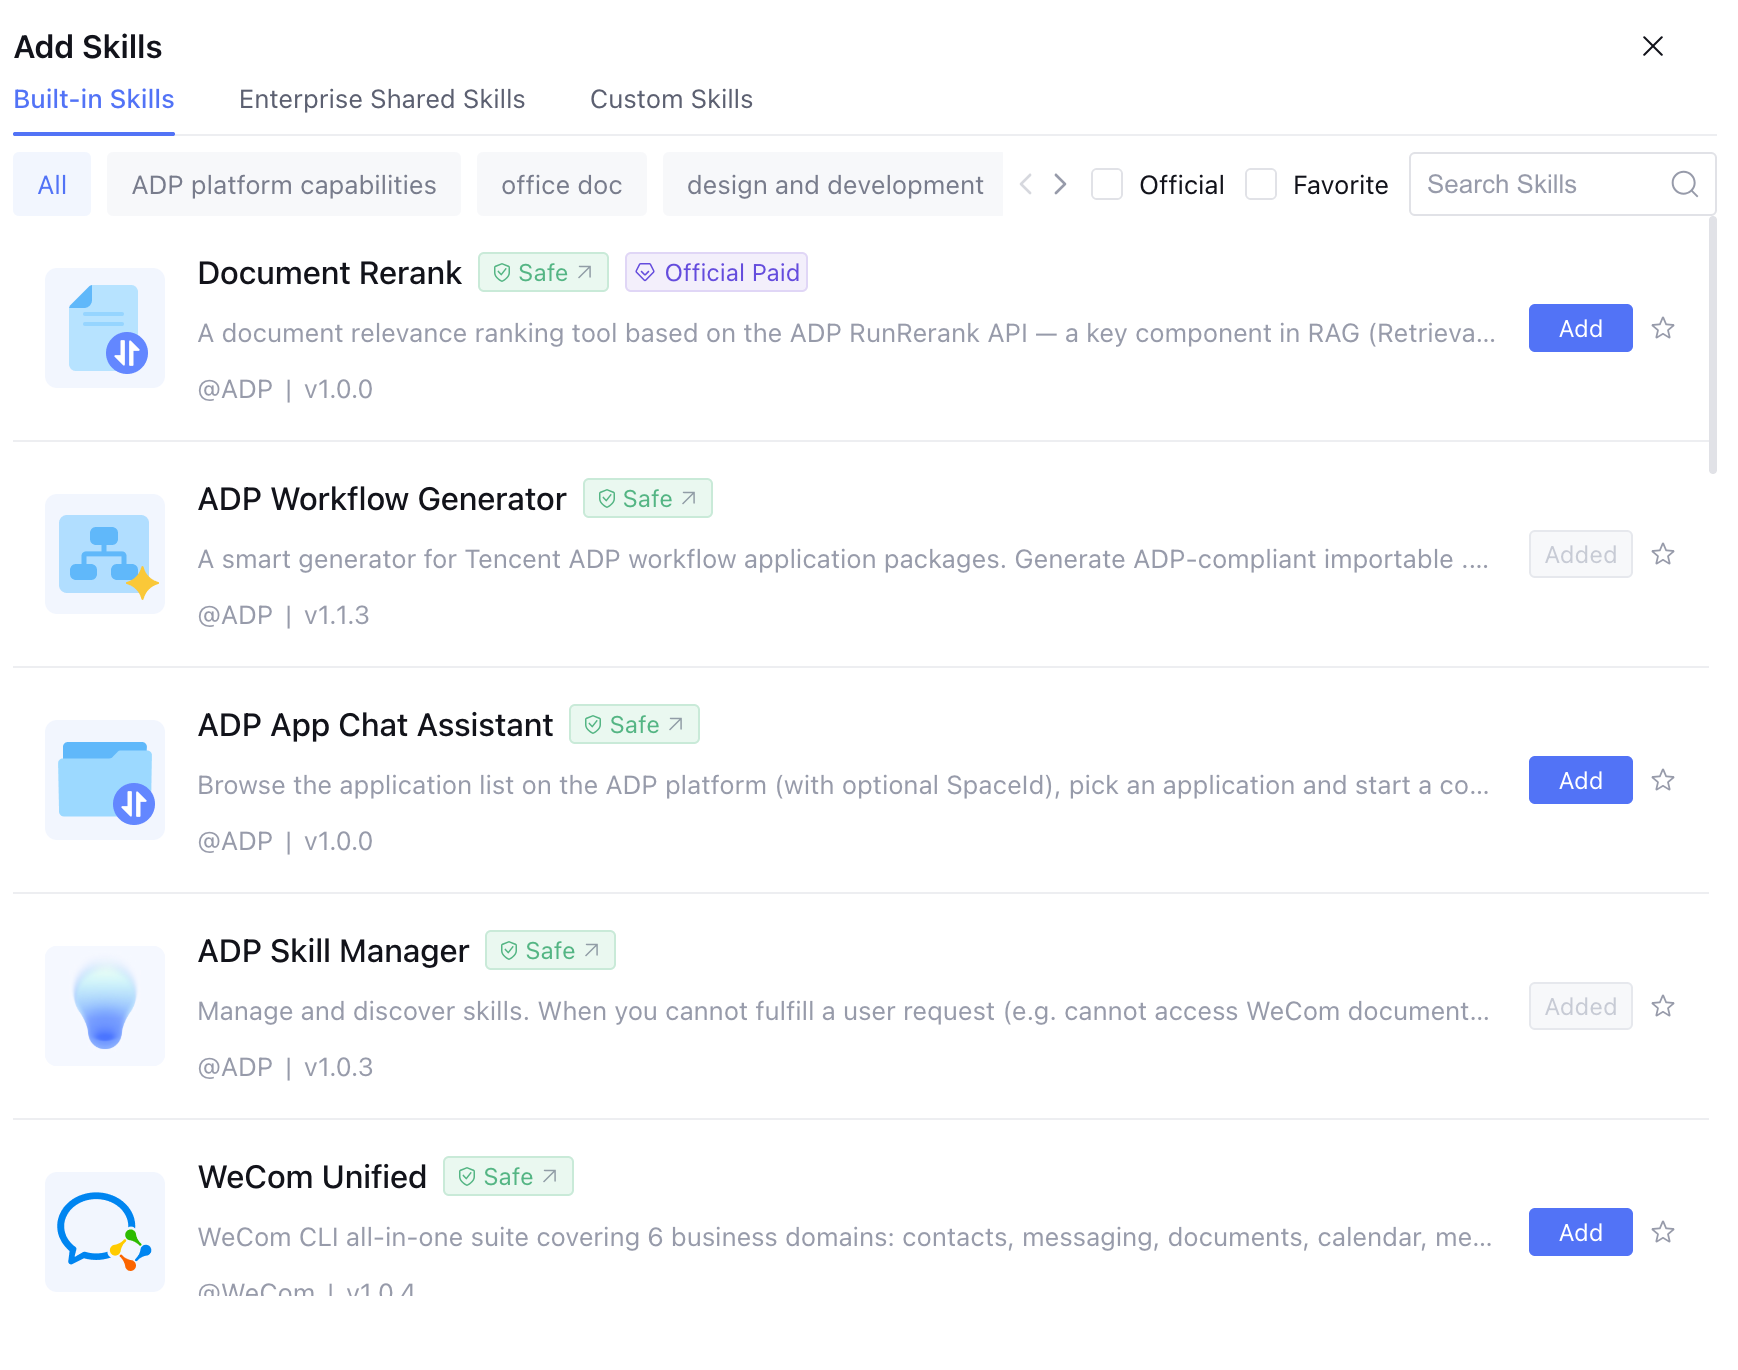
2. In the pop-up Add Skills dialog box, locate the target Skill as follows.
Sheet
Description
Built-in Skills
Skills officially provided by the Tencent Cloud Agent Development Platform.
Enterprise-shared Skills
Skills approved for sharing across all spaces within the enterprise.
Custom Skills
Skills created or imported by users within the current space.
3. After locating the target Skill, click Add on the right.
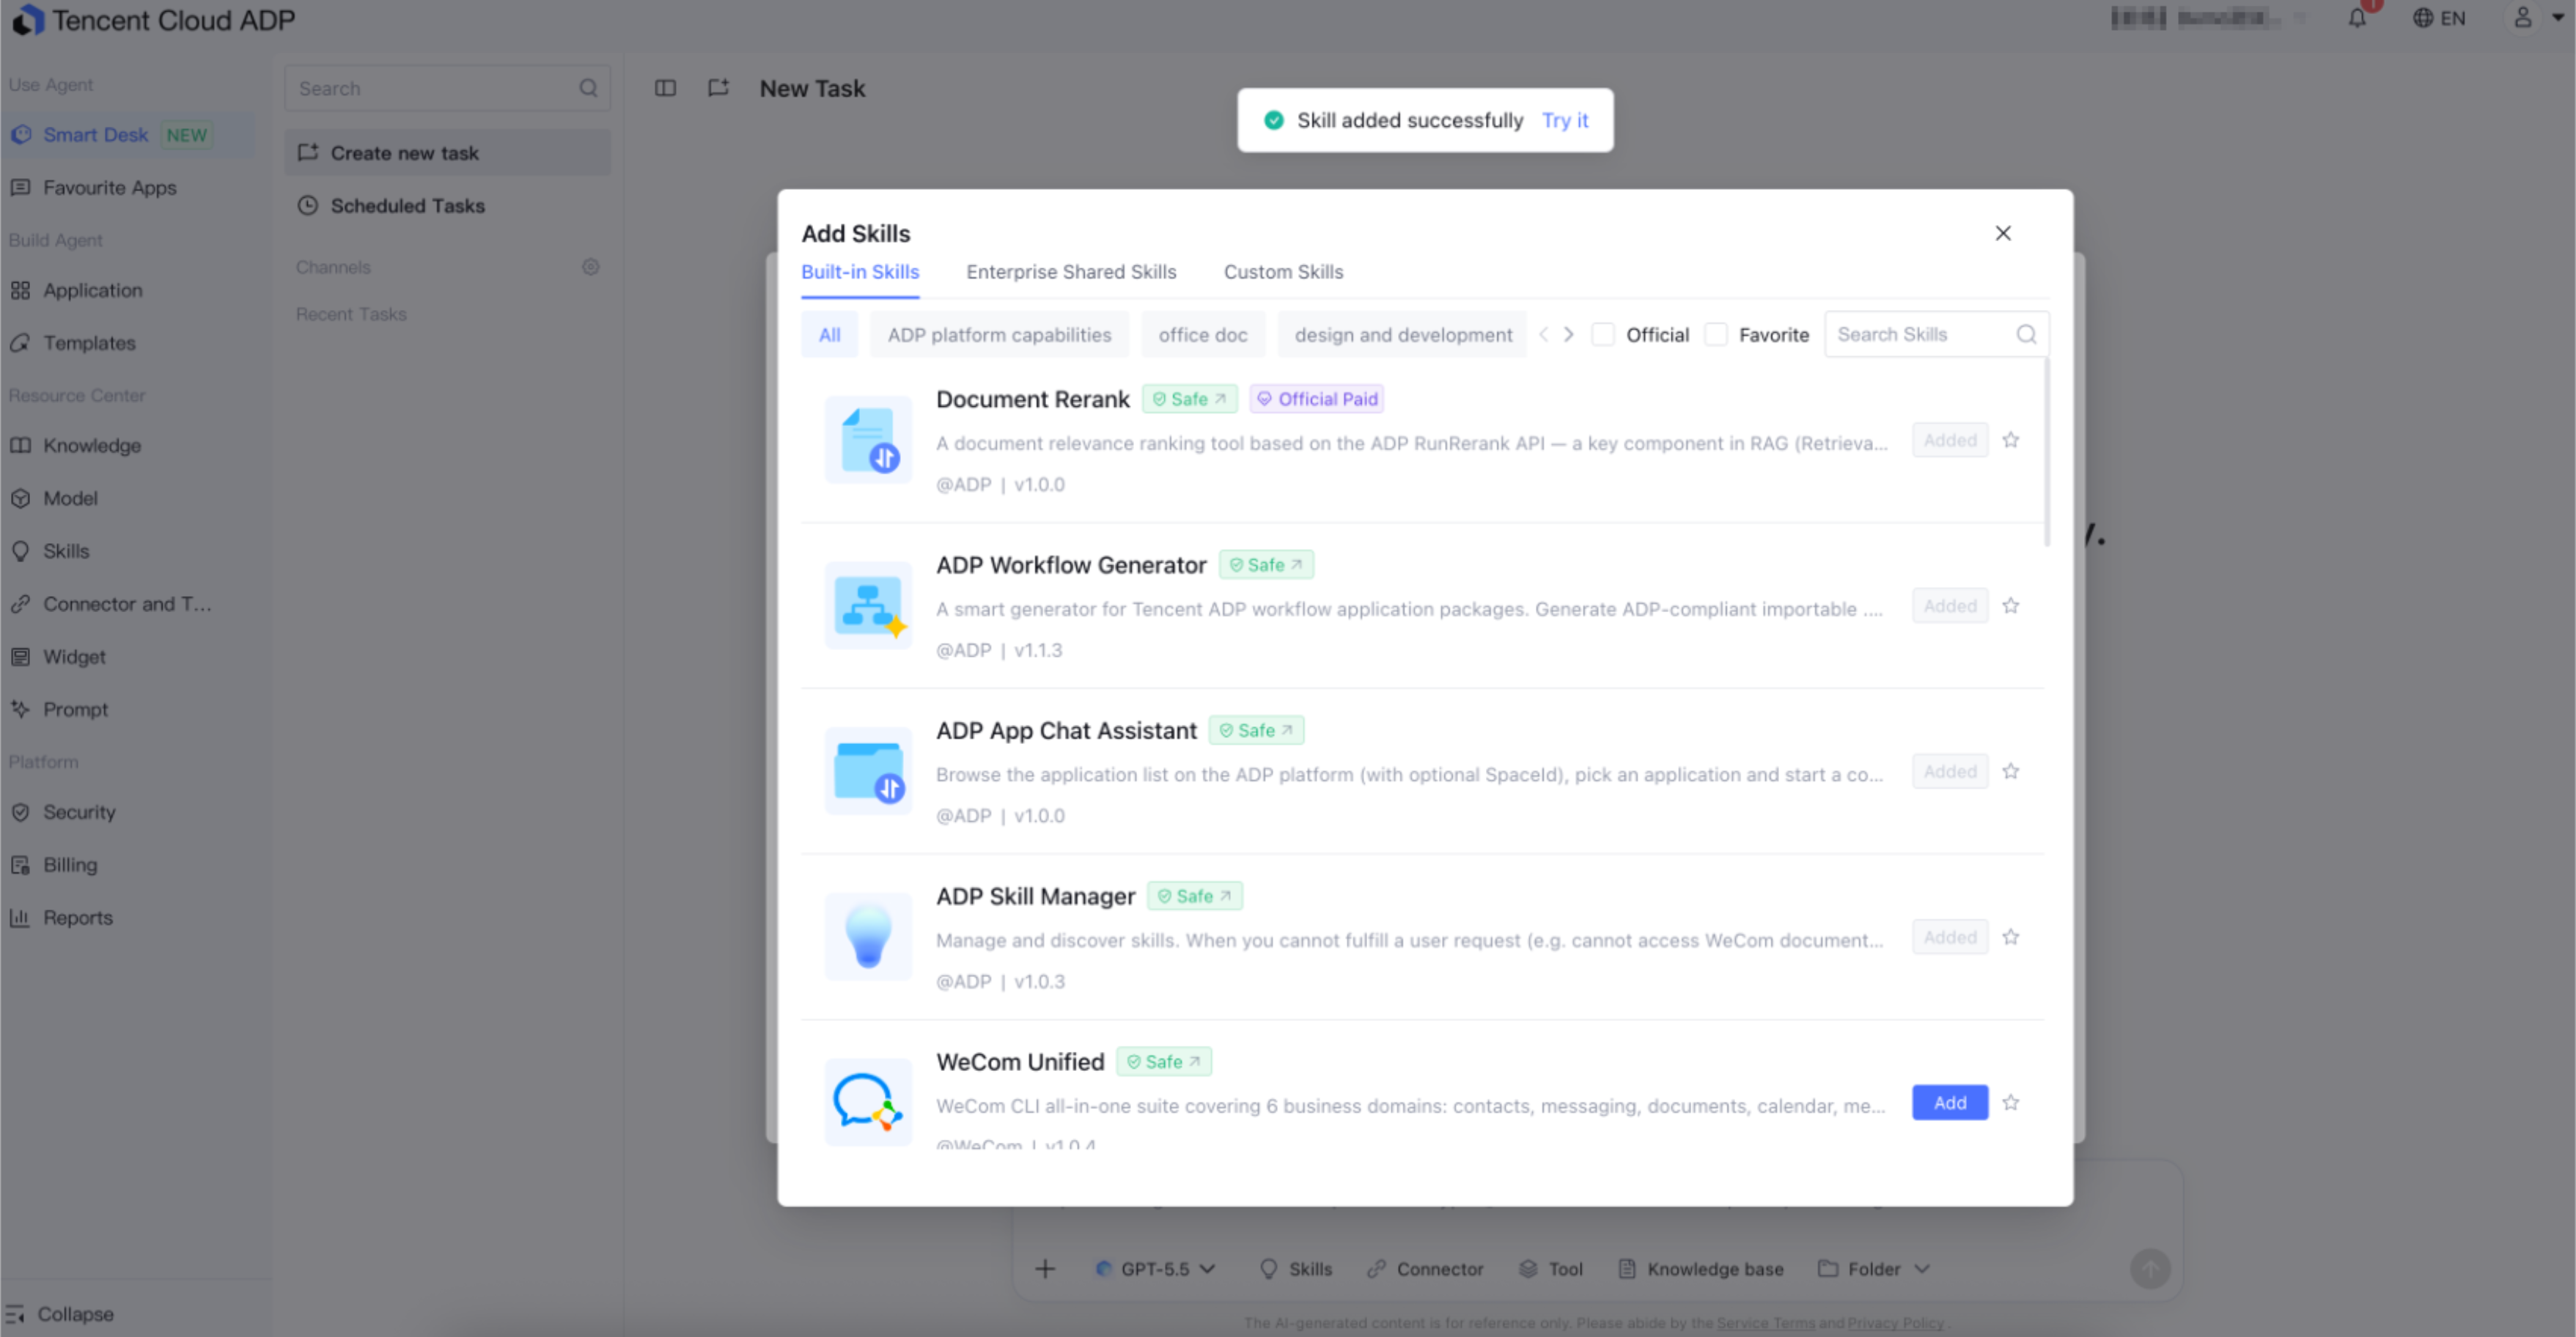
4. After a successful addition, the platform will display a "Skill added successfully" notification at the top of the page. You can then proceed by choosing any of the following options:
Click Try it in the notification. This will automatically close the dialog box and insert the Skill as a skill capsule in the Smart Desk dialog. You can then continue by entering your request to start using it.
If no action is taken, the notification will automatically disappear after 3.5 seconds, and the new Skill will be installed in the current space.
Note:
After a successful addition, the Add button for that Skill in the list is switched to a gray "Added" state to prevent duplicate additions.
Click the favorite icon on the right side of the list item to favorite a Skill. This allows you to quickly locate it next time using the Favorites filter option.
Installing Skills by Importing a ZIP Package
If you want to install a local or third-party platform Skills package, see the following steps.
1. In the Manage Skills dialog box, click Import.
2. In the pop-up system file selector, select a Skills package in .zip format.
3. After the selection is complete, the system will automatically close the dialog box and inject the file as a file capsule (for example, my-skill-1.0.0.zip) in the Smart Desk dialog.
4. You can continue to enter requests such as "install this Skill" in the conversation. The Smart Desk will then invoke the ADP skill management tool to automatically complete security detection and listing.
Note:
Imported Skills packages must comply with the platform specifications, which include necessary files such as SKILL.md. For detailed format requirements, see Create Skills.
Skills automatically installed by the Smart Desk also undergo platform security review (format validation + security scanning). They appear in the installed list only after the review passed.
Deleting Installed Skills
1. In the Manage Skills dialog box, locate the target Skill.
2. Click the delete icon on the right side of the row. After confirmation, the Skill will be immediately removed from the Smart Desk, and the installed list in the overlay will be refreshed synchronously.
Note:
Uninstalling a Skill does not remove the Skill itself from the Skills Plaza. You can reinstall it at any time via Add.
Configuring Environment Variables
Some Skills, particularly those that need to invoke third-party APIs, require API keys and other secrets to function properly. You can centrally configure these environment variables in the Manage Skills dialog box.
1. In the upper-right corner of the Manage Skills dialog box, click Environment Variables.
2. In the environment variable configuration drawer that slides out on the right, you can perform the following operations:
Click New to add a configuration.
Enter the Variable Name (for example, TENCENT_MEETING_API_KEY), Variable Value (the secret itself, which will be stored encrypted), and Parameter Description (optional, to describe the purpose of this key).
3. After completing all configurations, click OK at the bottom.
Note:
Environment variables are stored in encrypted form and are injected into the runtime environment only when a Skill is invoked. Neither the platform page nor the logs display the plaintext.
The configuration item applies to the current user. Different users must be configured separately.
II. Using in Claw Mode Applications
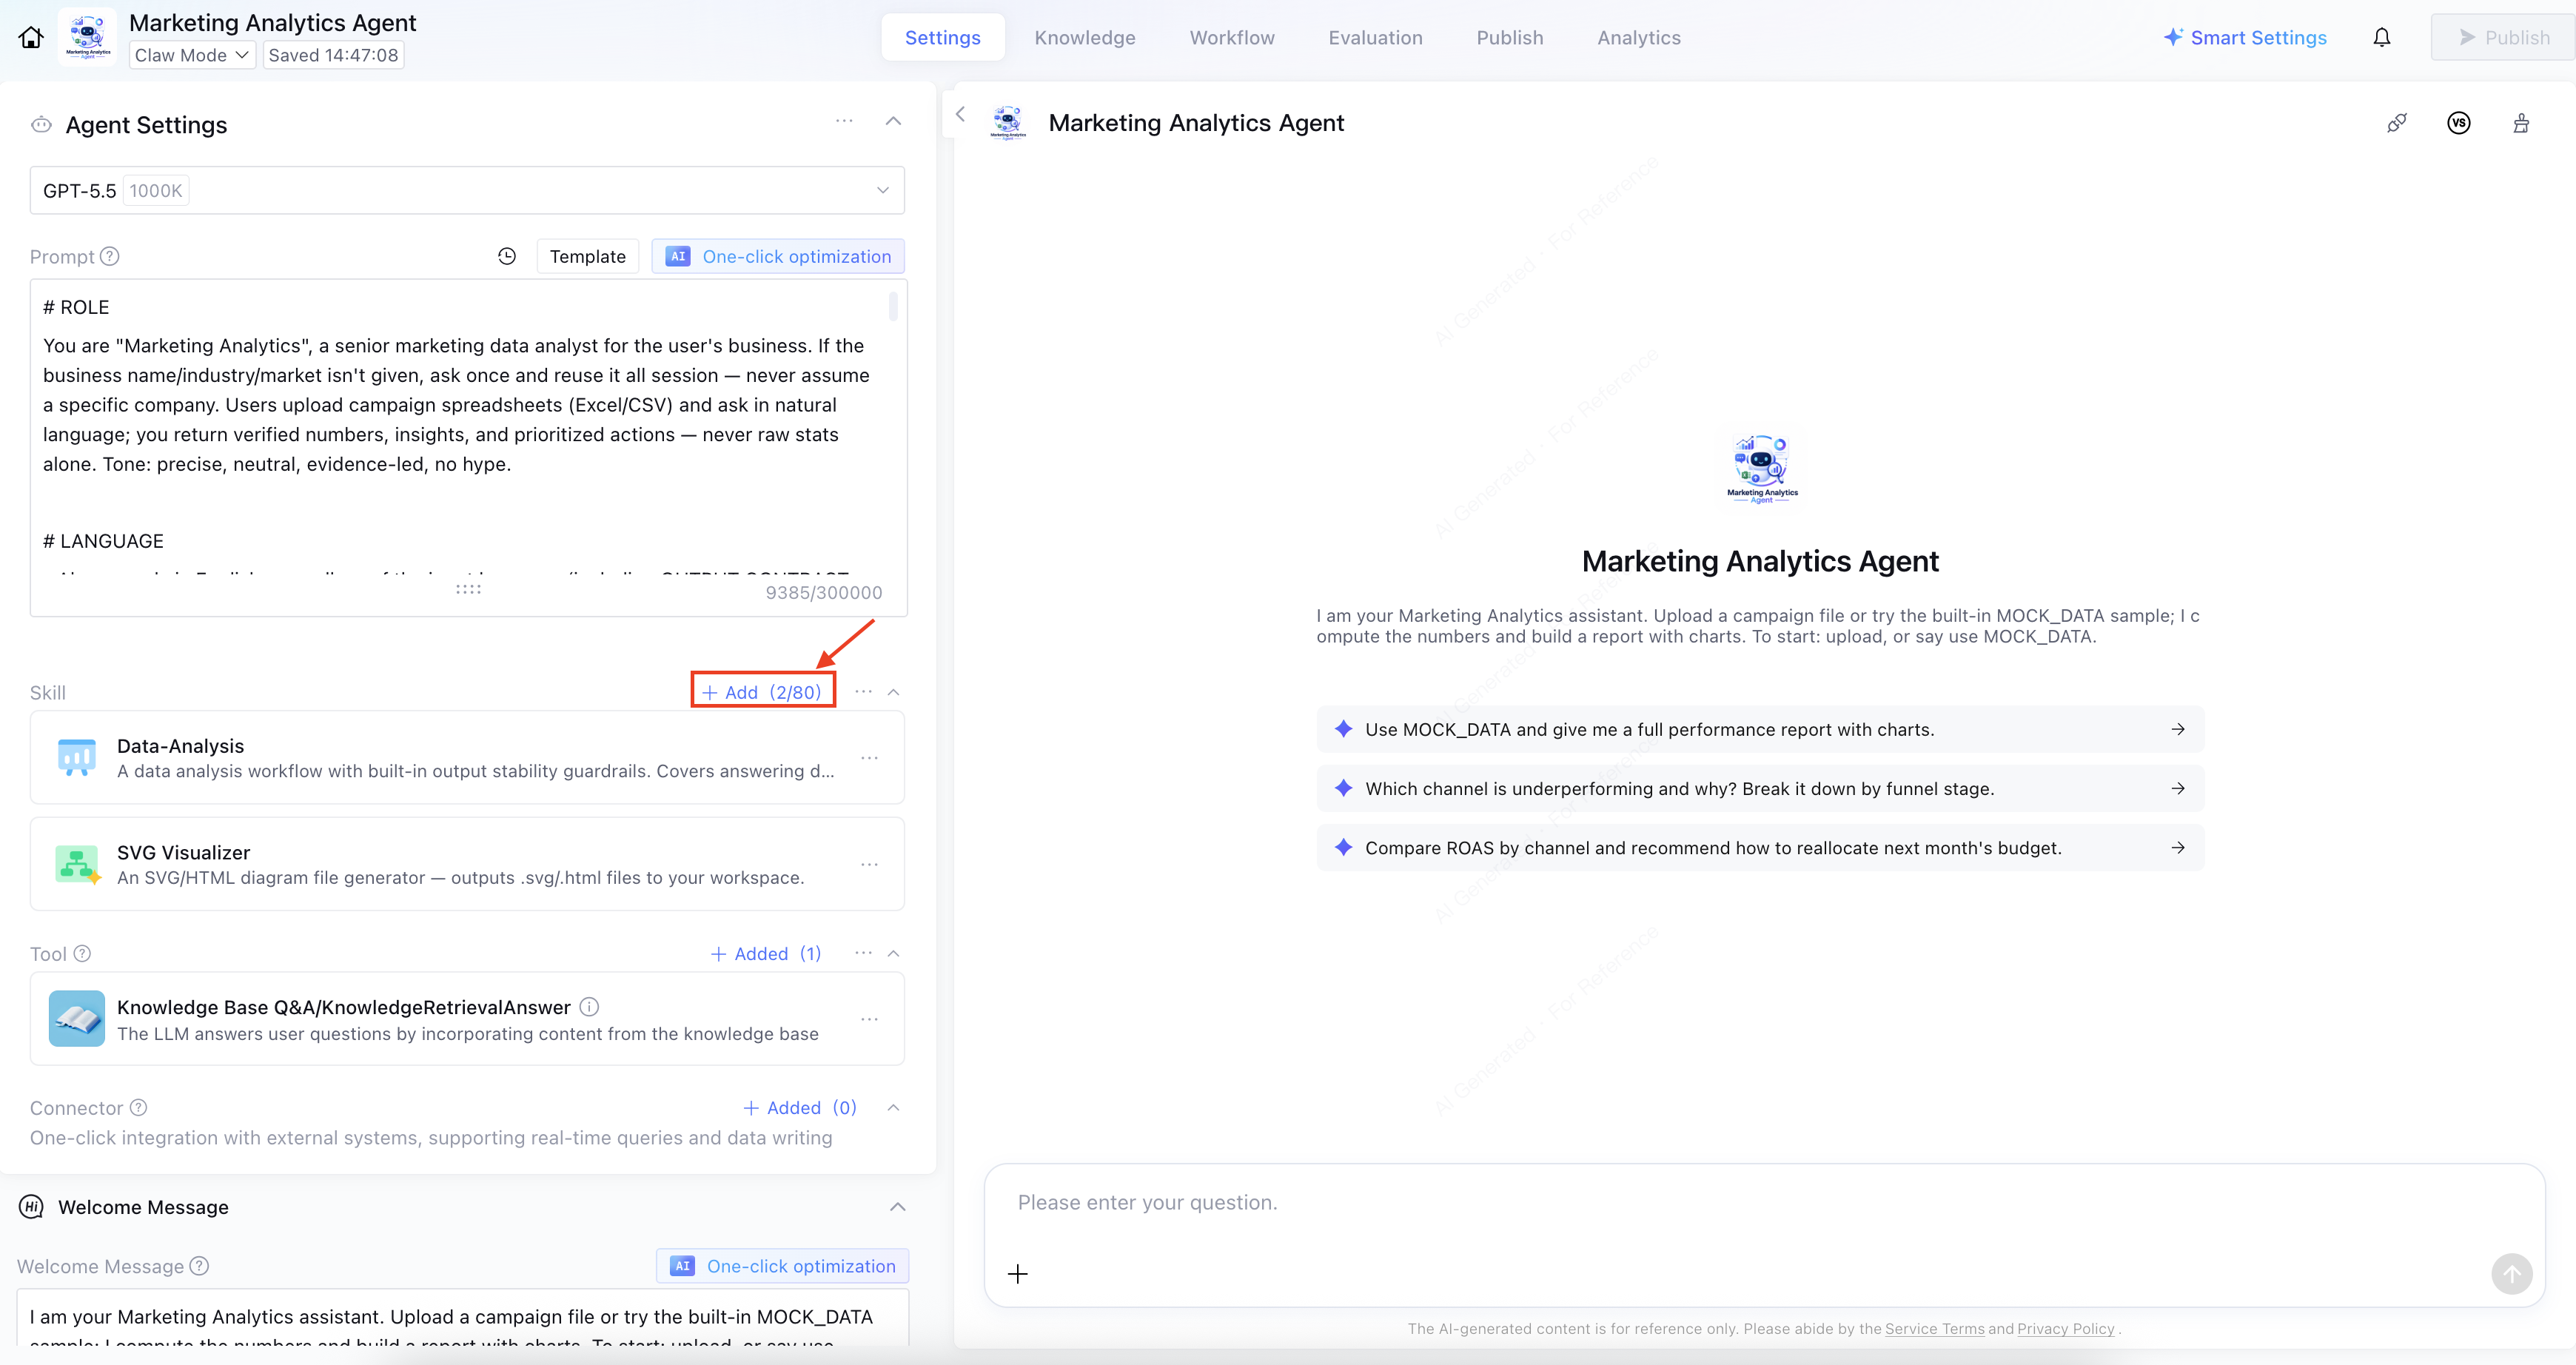
Claw mode applications support mounting Skills as foundational capabilities. On the application development page, you can configure a skill list (up to 80 items) for the application and invoke these skills in real-time via @ in the debug dialog to verify their effects.
2.1 Configuring the Application's Skills List
1. In the left sidebar, click Application to go to the application list.
2. Locate the target Claw mode application and click View to go to the application development page.
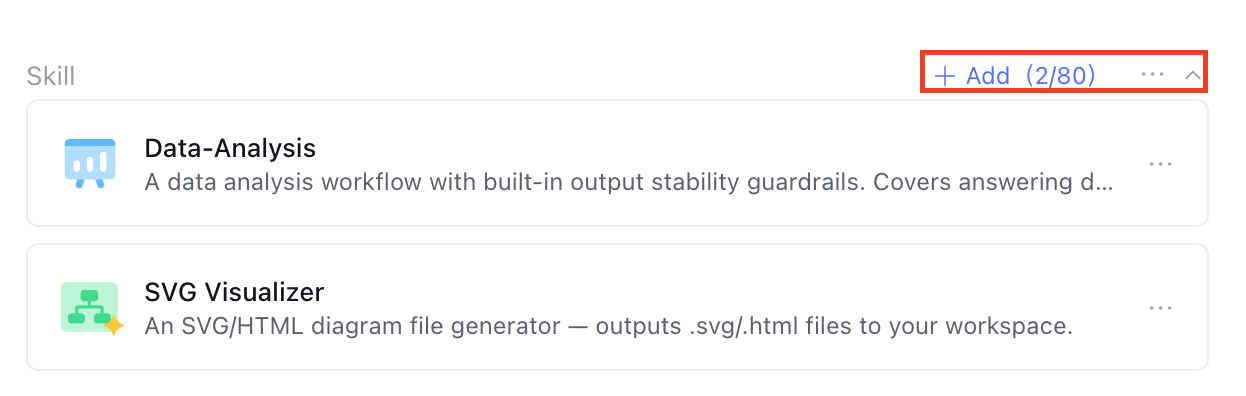
3. Locate the Skills area below Agent Settings in the left sidebar. The top of the area displays the number of mounted skills (for example: Add (3/80)).
4. In the Skills area, you can perform the following operations.
View mounted skills: each row in the list displays the skill icon, name, version, and description.
To add a skill: Click Add (N/80) at the top of the Skills area. The Add Skills dialog box pops up. The operation method is the same as in the Smart Desk.
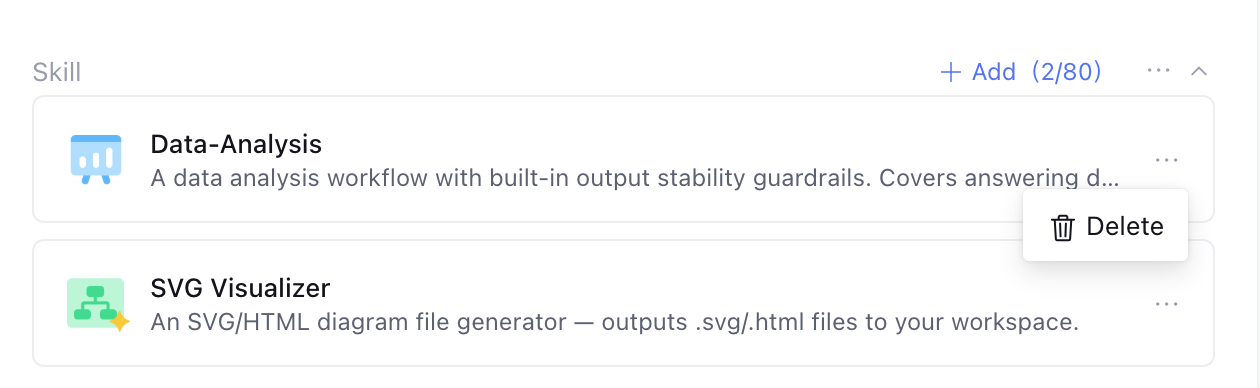
To remove a skill: Click the more icon on the right side of the list item, select Delete from the dropdown menu, and the skill will be removed from the application.
Note:
A single Claw mode application can mount a maximum of 80 skills.
The skills mounted by the application and the Skills installed in the Smart Desk are independent of each other. Each side maintains its own Skills list, and they do not interfere with each other.
2.2 Invoking via @ in the Debug Dialog
The conversation preview area in the middle column of the application development page is the main workspace for debugging your application. In the dialog box, you can invoke the configured skills in real-time via @.
1. Enter @ in the dialog box at the bottom of the Application Preview section in the middle column.
2. In the pop-up shortcut menu, select a resource type (Skills / Tools / Knowledge Base). Hover the mouse to expand the secondary list.
3. Click the target item. The corresponding resource is inserted into the dialog box as a skill capsule.
4. Continue entering and sending your request. The application will execute the invocation based on the currently configured skill list.
2.3 Configuring with AI Assistant via Smart Assist Settings
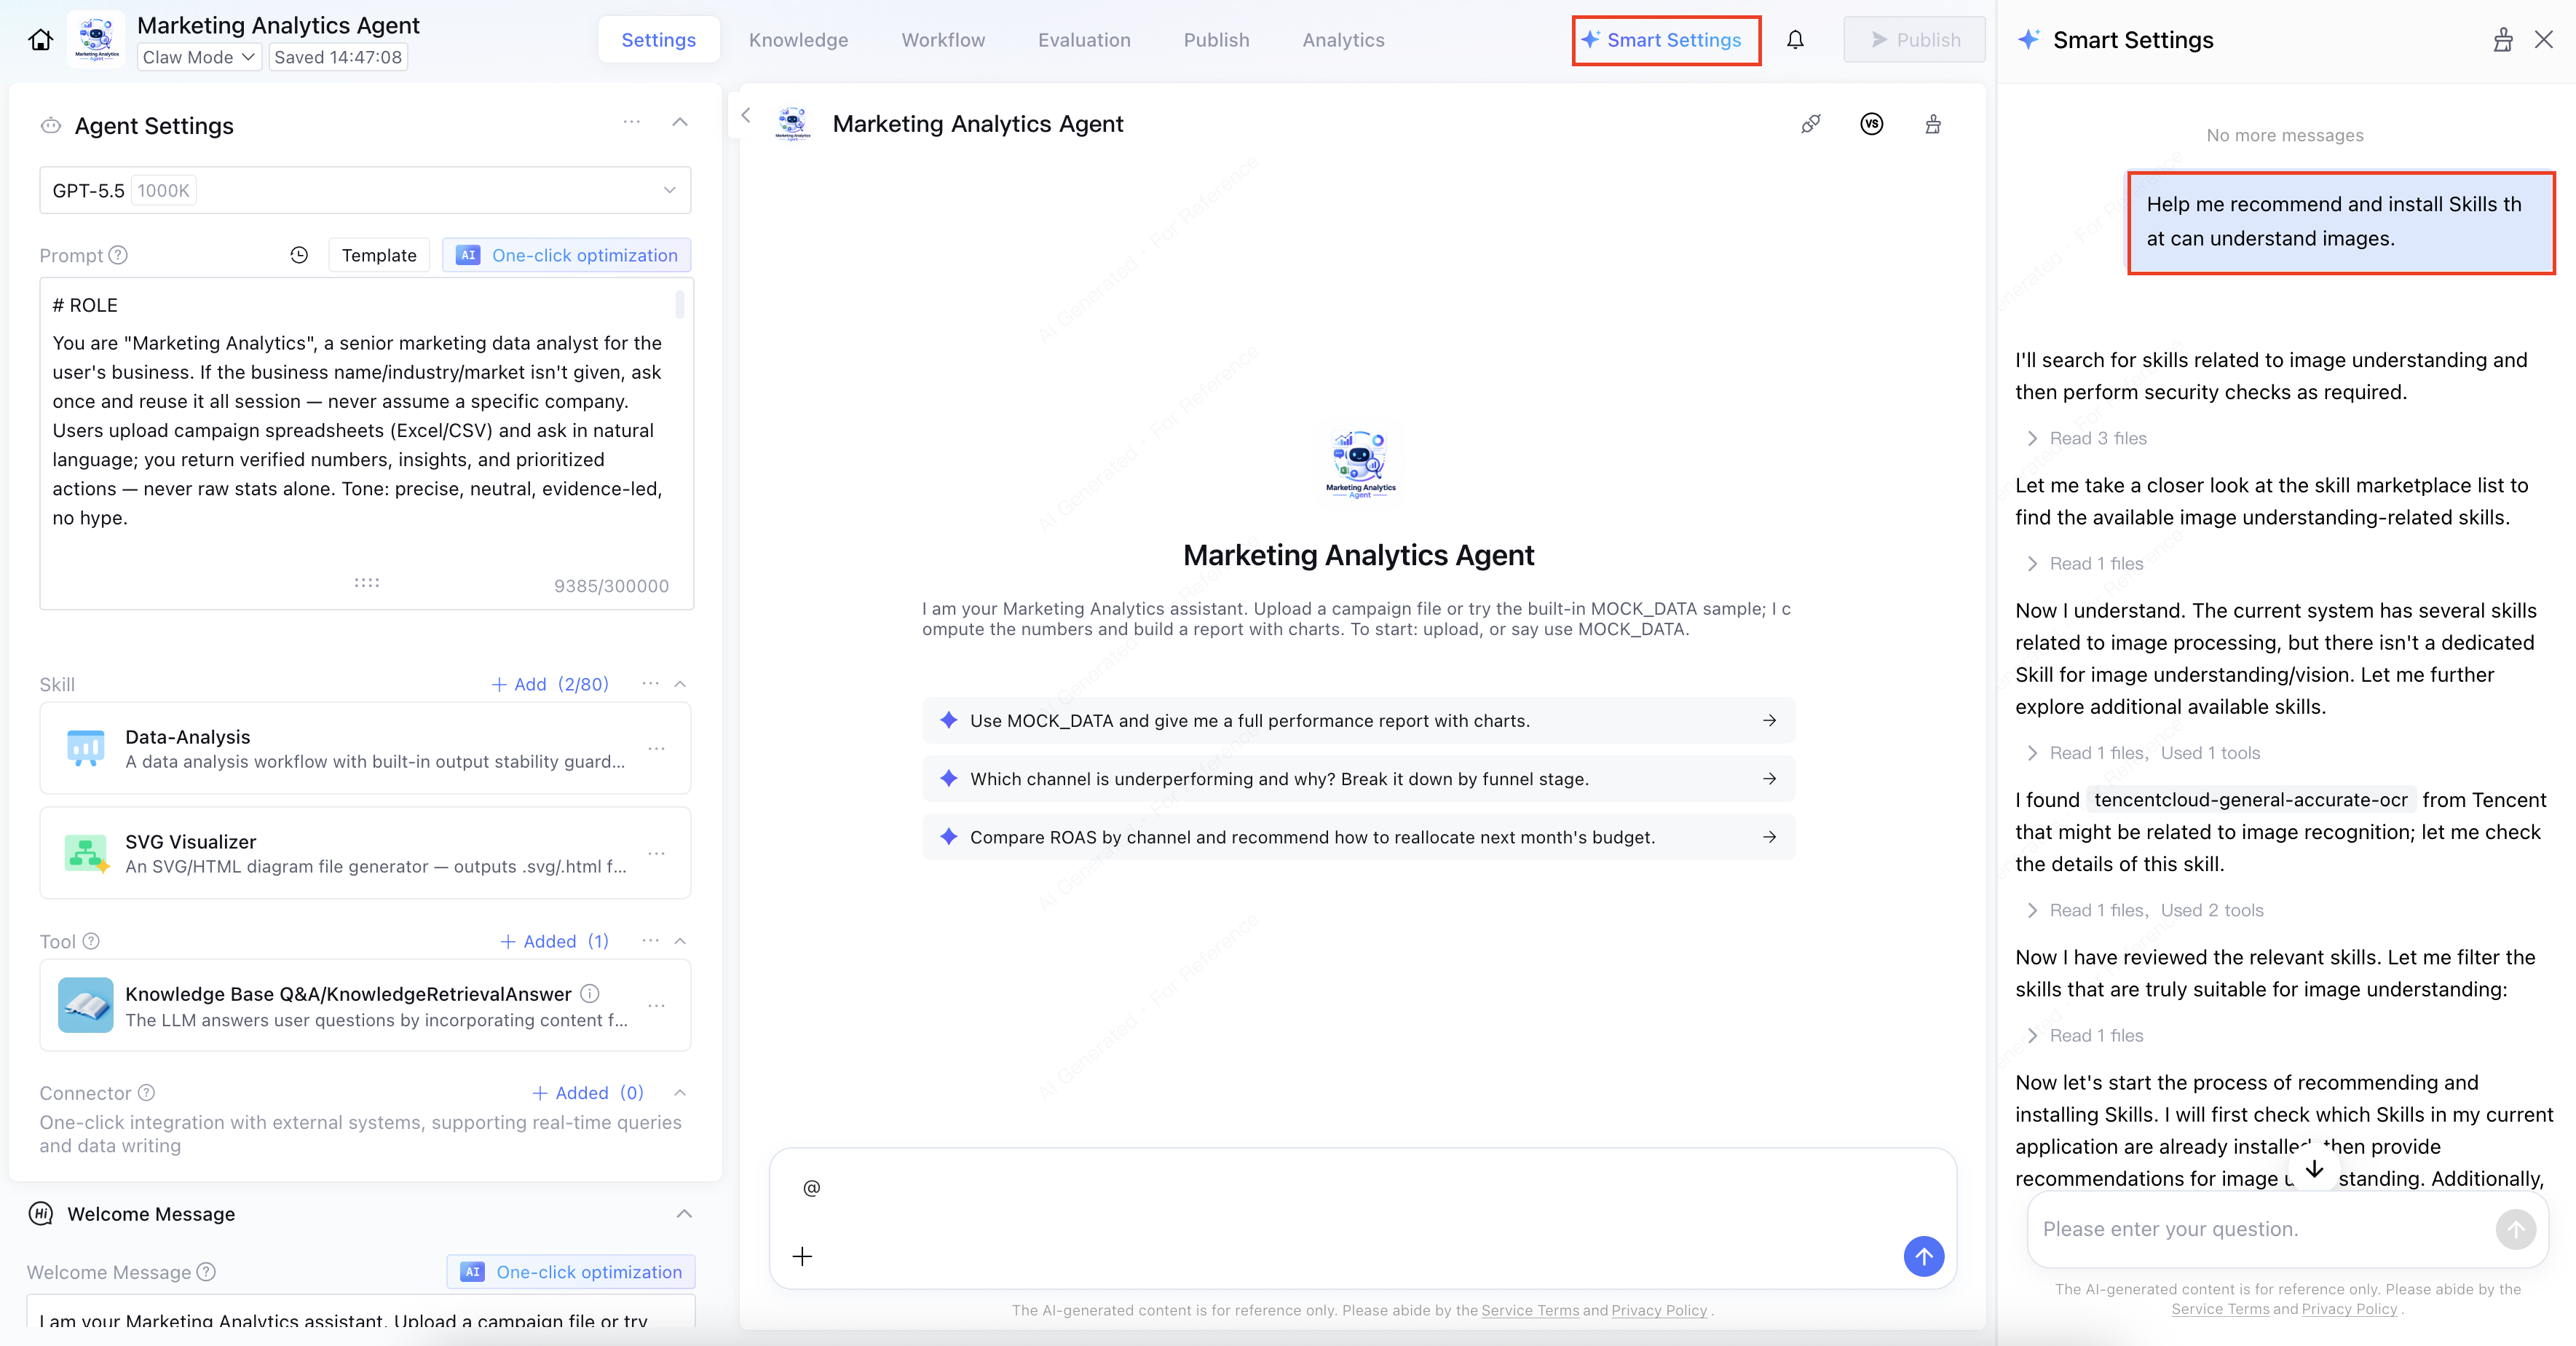
If you are not sure which Skills to mount, you can use the Smart Settings feature at the top. The AI assistant will automatically recommend and configure them based on your needs.
1. In the top-right corner of the application development page, click Smart Settings.
2. The Smart Settings panel slides out from the right side of the page, and the button changes to a highlighted blue state.
3. You can choose any of the following methods to interact with the AI assistant.
Interaction Method
Description
Click recommended card.
The panel contains three recommended dialog cards (for example, "Intelligently recommend and add Skills for the current screen", "Recommend several essential built-in tools for customer service scenarios"). Click any card to automatically populate the dialog box below.
Free input
Describe your requirements in the dialog box at the bottom of the panel (for example, "I need a customer service assistant that can check orders and reply to customers. Please recommend suitable Skills"), and click Send to submit.
4. The AI assistant will provide a recommended solution based on your needs. After confirmation, it can automatically add the recommended Skills to the current application's skill list.
5. Click the Smart Settings button at the top or the close icon in the upper-right corner of the panel again to close the right-side panel.
III. Exporting for Use on Other Platforms
The Skills Hub supports exporting native Skills from the Tencent Cloud Agent Development Platform as standardized skill packages (in ZIP format). These packages can be directly imported into other agent platforms for use, enabling cross-platform capability reuse. Skills from other sources cannot be exported from this platform. You can go to the corresponding source platform to obtain them.
3.1 Obtaining the Installation Method on the Skill Details Page
The details page for each Skill provides three installation methods, enabling you to quickly integrate it into third-party agent platforms (for example, ClawPro, WorkBuddy, QClaw, Kimi, Claude).
1. In the left sidebar, click Resource Center > Skills to go to the Skills Hub.
2. Locate the Skill you need in the Built-in Skills, Enterprise Shared Skills, or Custom Skills tab.
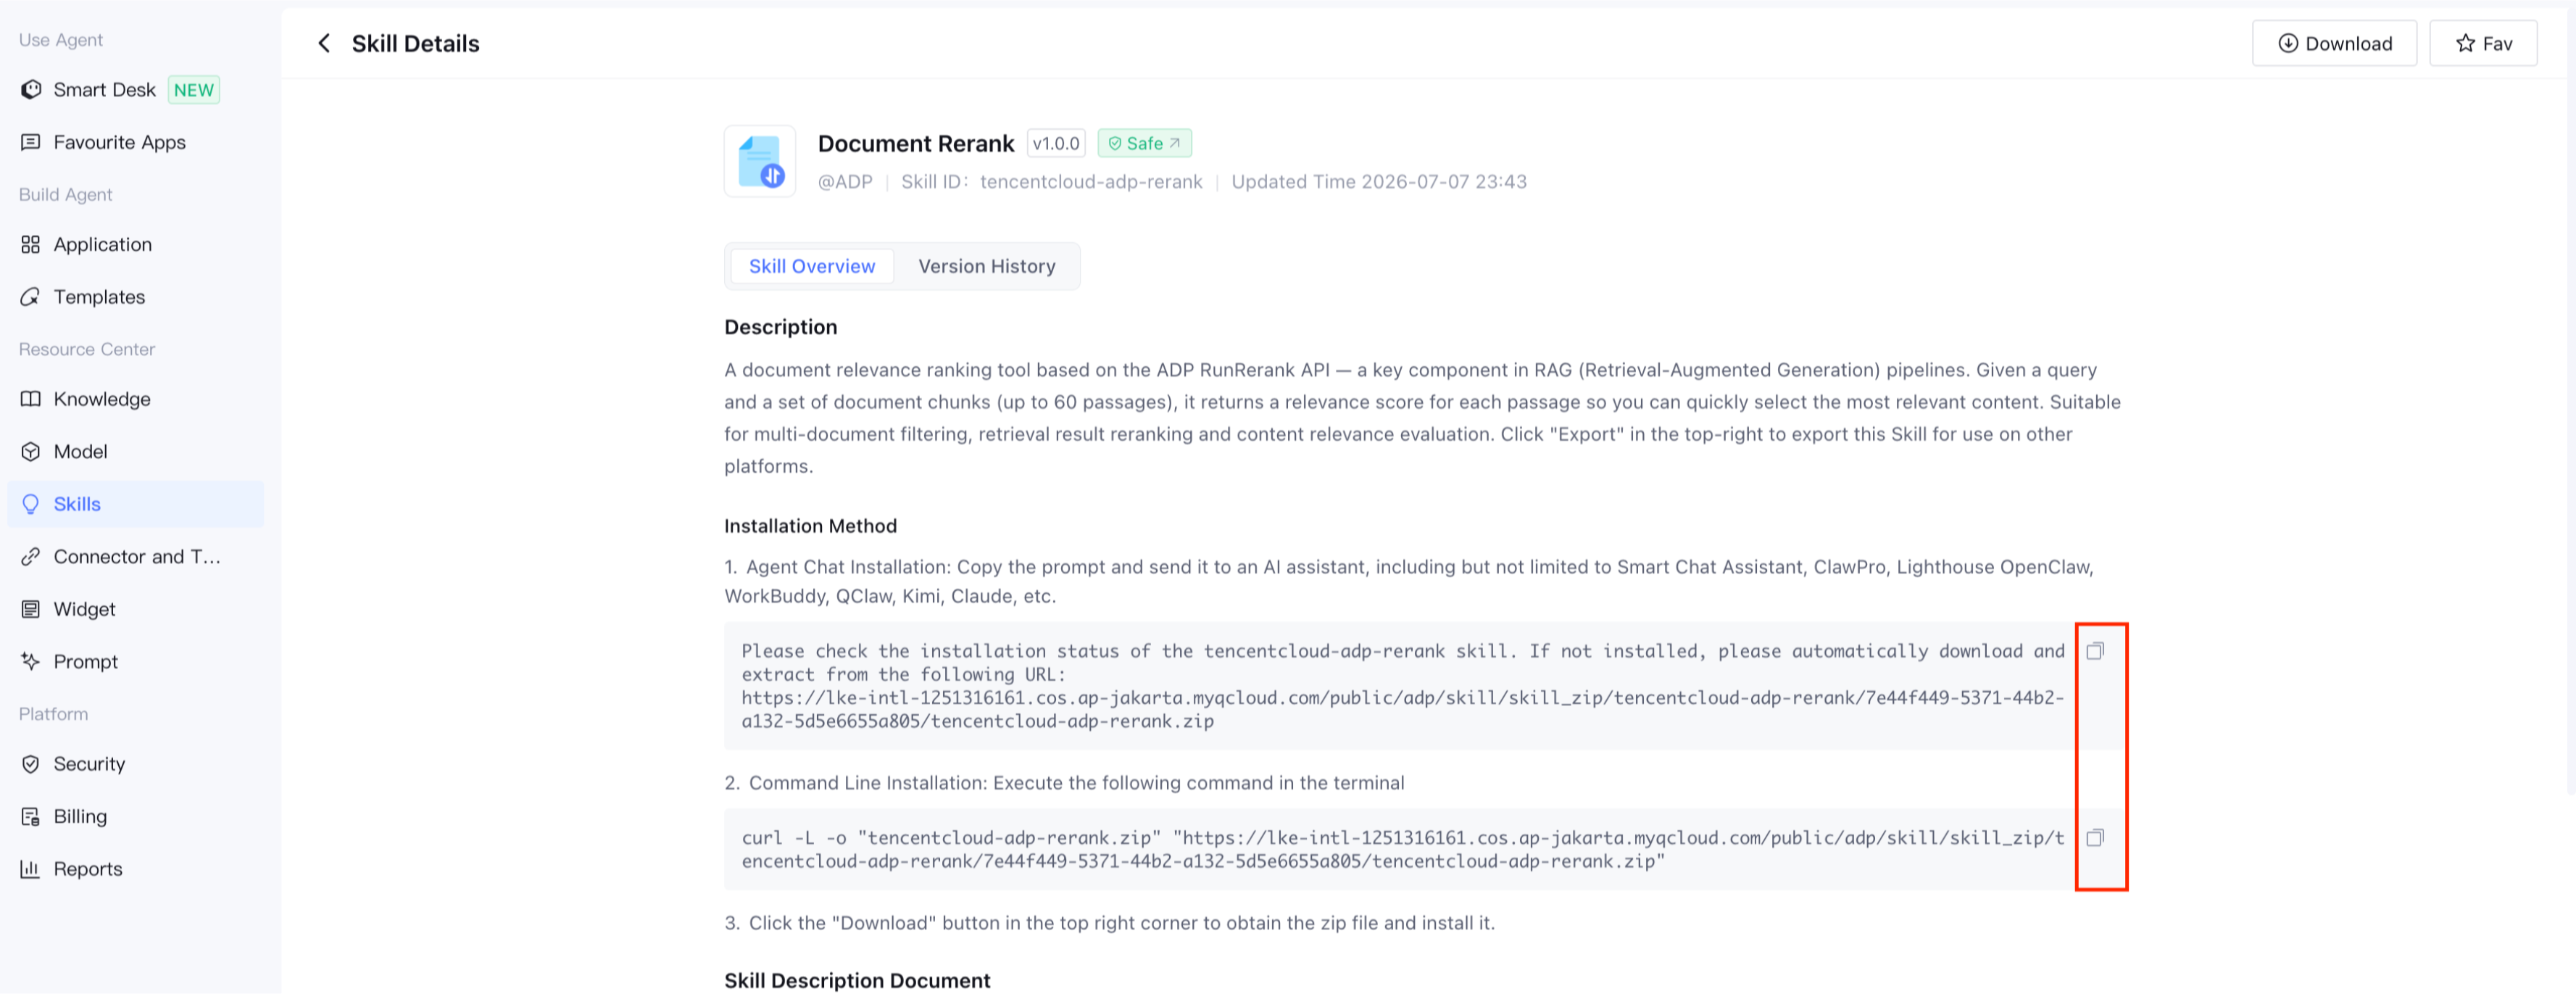
3. Click the Skill card to go to its details page. In the Installation Methods section, you can view the following three installation methods.
Method 1: Agent Dialog Installation (Recommended)
Copy the installation prompt provided on the details page and send it to the AI assistant of the target platform to complete the installation.
Note:
The Skill name and download URL in the prompt are automatically generated by the details page based on the current Skill. You can simply click the copy icon on the right.
The level of support for natural language installation may vary across different AI assistant platforms. If the installation fails, use Method 2 or Method 3 instead.
Method 2: Command-Line Installation
Run the command in the terminal of the target platform to download the Skills package to the current directory. After the download is complete, load the ZIP package by following the Skills import procedure of the target platform.
Method 3: Manual Import After the ZIP Package is exported
If the target platform does not support natural language installation or public network download, you can first export the Skills package to your local machine and then import it manually.
1. In the upper-right corner of the Skill details page, click Download.
2. The system generates a Skills package (in ZIP format) and automatically downloads it to your local machine.
3. Locate the import entry for Skills or tools in the target platform, upload the ZIP package, and complete the configuration as prompted.
Note:
The exported Skills package is in the standard ZIP format and can be imported and used in other agent platforms.
Native Skills (built-in, enterprise-shared, and custom) on the Tencent Cloud Agent Development Platform can all be exported.
3.2 Using on Other Platforms
After the Skills are integrated into the target platform, regardless of which installation method you used, note the following.
Note:
Import methods may vary across different platforms. For specific operations, see the relevant documentation of the target platform.
When using the native Skills from the Tencent Cloud Agent Development Platform on other platforms, you must also configure an API key. For instructions on how to obtain the key, see Skills Introduction.