This guide uses Tencent Cloud and Alibaba Cloud as examples for configuring CNAME domain records. The steps provided are for reference only. Please refer to your specific DNS service provider's documentation for accurate instructions. After you configure the CNAME, you can verify its effectiveness using the methods described in the "Verifying the effect of CNAME record" section.
Prerequisite
Before configuring the CNAME, you need to complete domain name registration and filing. Follow these steps:
2. If your domain names have not obtained an ICP filing, you can go to Tencent Cloud Website ICP Filing Service to apply for ICPfiling.
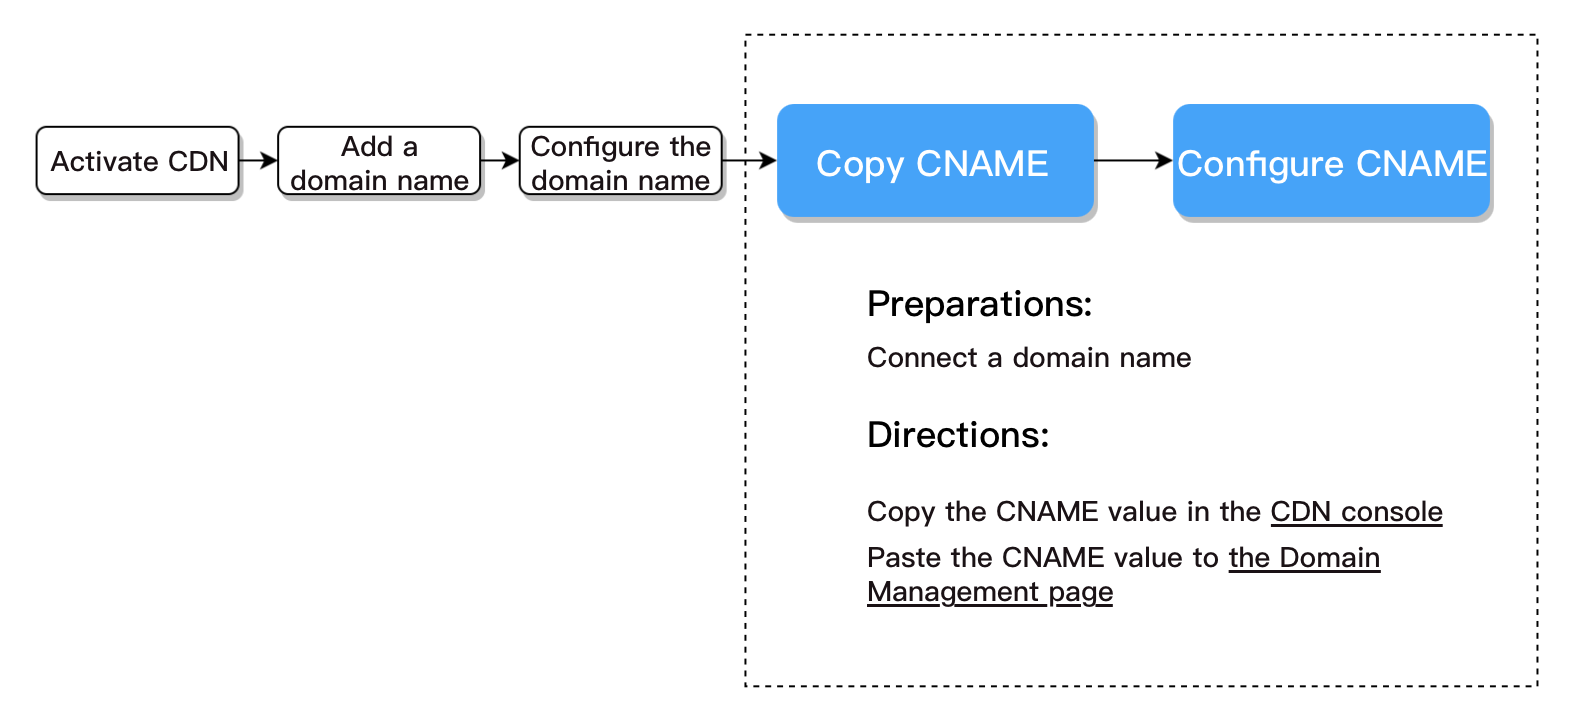
Configuration steps
You need to complete the configuration at the DNS service provider of your domain name. This document describes the configuration steps in Tencent Cloud and Alibaba Cloud.
Tencent Cloud
Quick configuration
If your domain service provider is Tencent Cloud, we recommend you use the quick CNAME record configuration feature. For more information, see Configuring CNAME via DNSPod.
Manual configuration
1. Log in to the CDN console and copy the CNAME address. Before your domain name is successfully resolved, a prompt icon is displayed next to the CNAME record. Copy the CNAME record value.
If the domain name is play.myqcloud.com, please select: console
To resolve the primary domain name myqloud.com, please select: @
To resolve a wildcard domain name, please select: *
record type
Set the record type to CNAME
To point a domain name to another one, please select: CNAME
ISP Line
Used by the DNS server to resolve a domain name to the corresponding server IP address according to the source of the visitor
Please select: Default
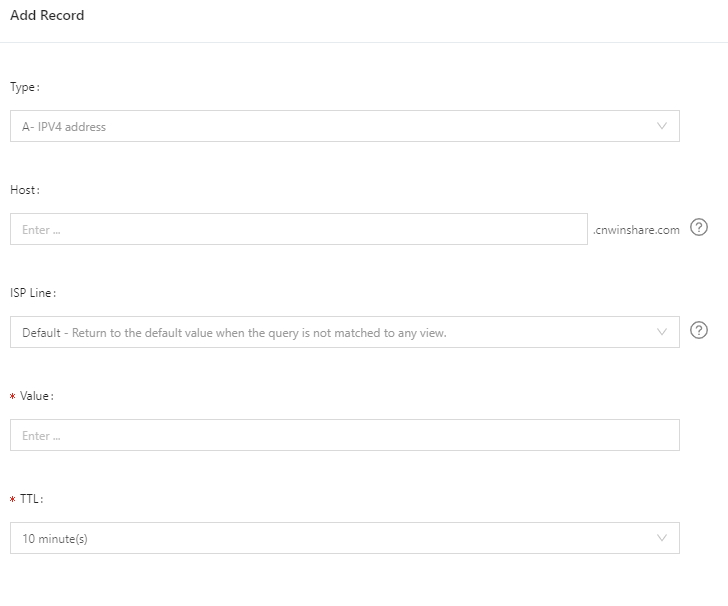
Record values
The domain name to point to. Enter the corresponding CNAME value of the domain name obtained on the Domain Management page in the Tencent Cloud console .
Check the default link in
Tencent Cloud console and enter the recorded value. The format should be: xxxxx.console.tcmpp-dev.tmfcloud.com
TTL (s)
Time to live of the cache, which is 600s by default
You’re advised to set it to 600s.
Alibaba Cloud
If your DNS service provider is Alibaba Cloud, you can add a CNAME record as follows.
1. Before your domain name is successfully resolved, a prompt icon is displayed next to the CNAME record. Copy the CNAME record value in the Tencent Cloud console. Copy the CNAME record value.
2. Log in to the Alibaba Cloud DNS console.
3. Click the domain name to be resolved to enter the resolution record page.
4. Click Add Record.
5. Select CNAME as the record type. Enter the host record as needed (e.g., `www`), which is the domain name prefix. Enter the CNAME value you copied in Step 1 as the record value. Retain the default settings for ISP Line and TTL.
6. Finally, click Confirm.
Subsequent Steps
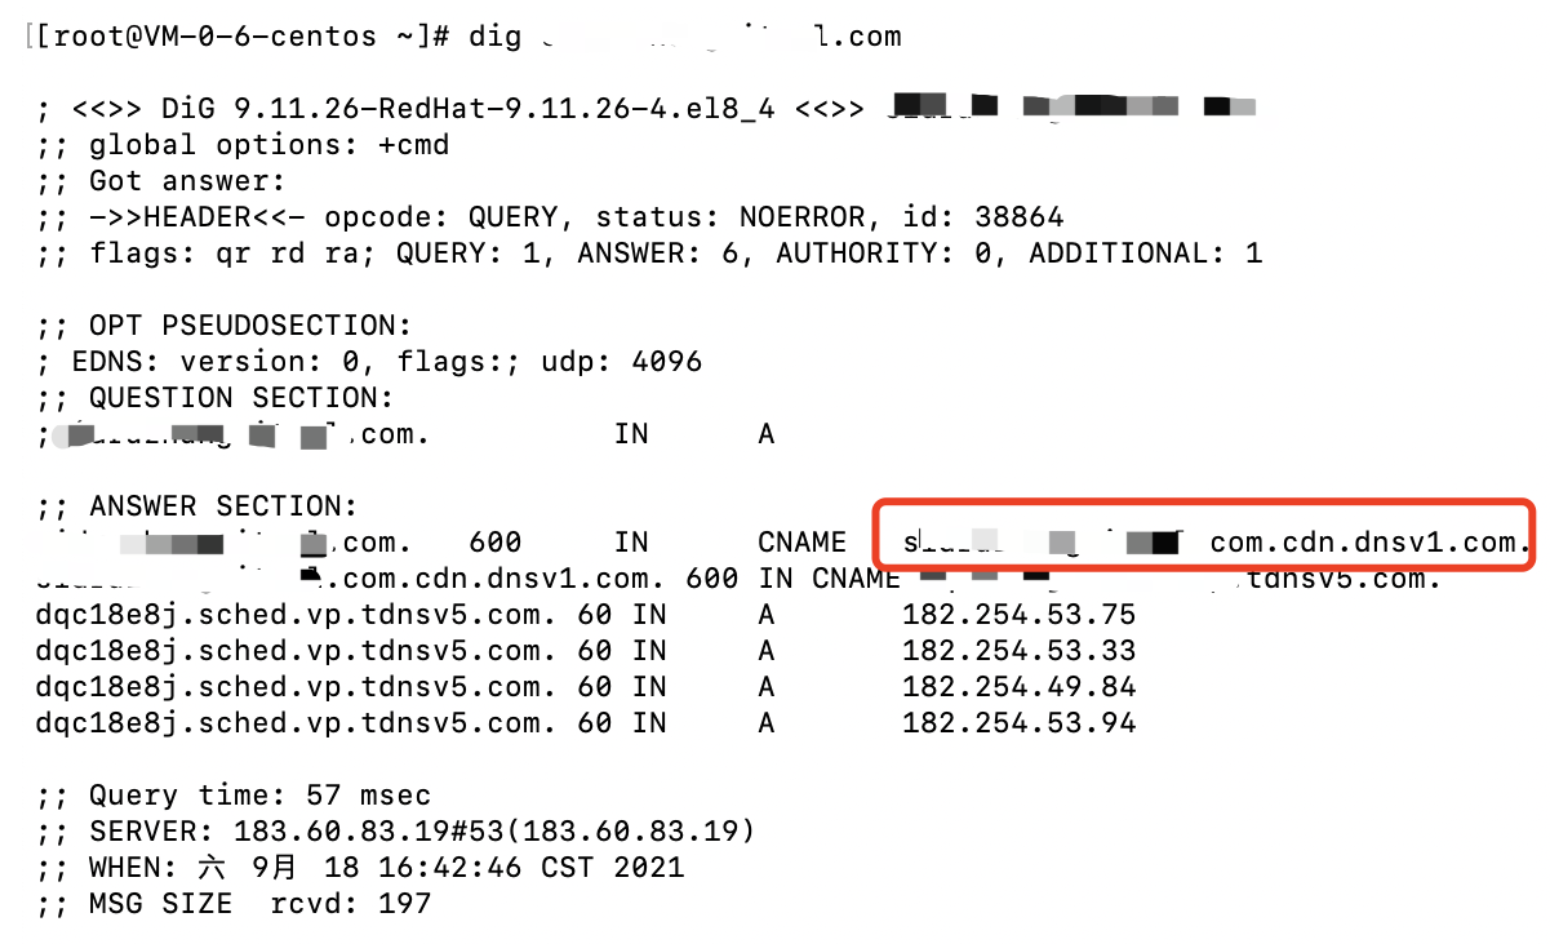
Verifying the Effect of CNAME Record
The time it takes for a CNAME record to take effect varies by DNS service provider. It is generally within half an hour. The time it takes for a CNAME record to take effect varies by DNS service provider. It is generally within half an hour. You can also check whether the CNAME record is in effect by running `nslookup` or `dig`. If the CNAME record response is the CNAME configured, it indicates that the configuration is successful, and the acceleration is enabled.