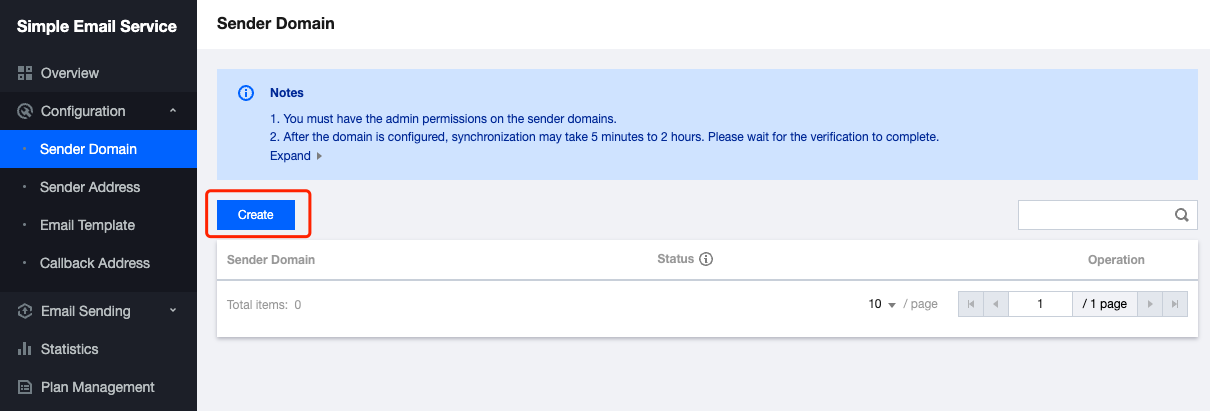
SES supports all industry-standard authentication mechanisms, including DomainKeys Identified Mail (DKIM), Sender Policy Framework (SPF), Domain-Based Message Authentication, Reporting and Conformance (DMARC), and Mail Exchanger (MX) Record.
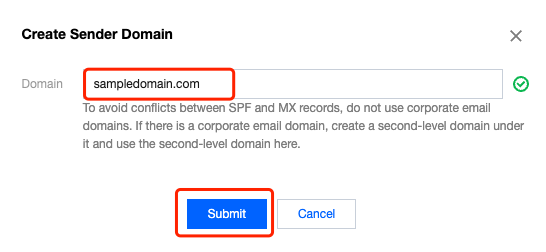
sampledomain.com is a sample only and should be replaced with your sender domain.
A domain in the sampledomain.com format is a primary domain, and one in the abc.sampledomain.com format is a non-primary domain. The following configuration steps vary depending on the domain type (primary or non-primary). See the corresponding description for details.
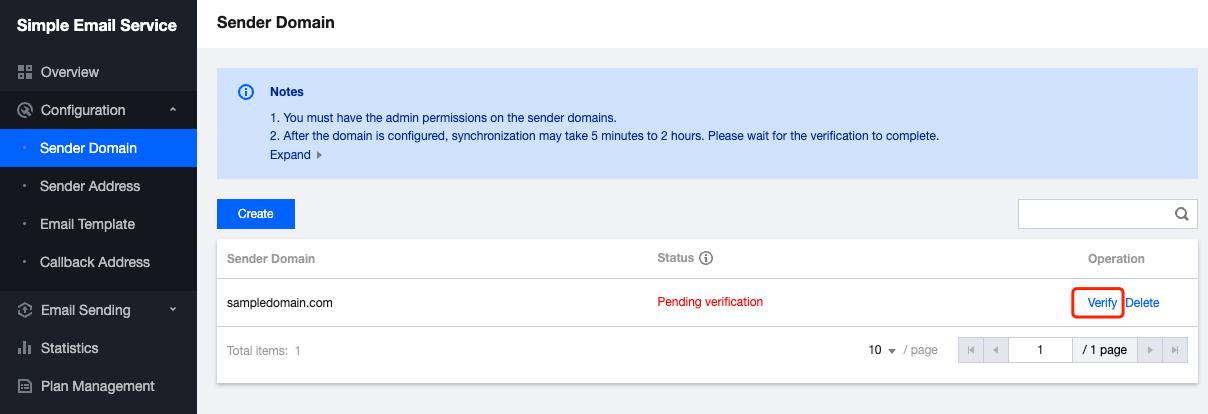
3. Go back to the Sender Domain page and click Verify.
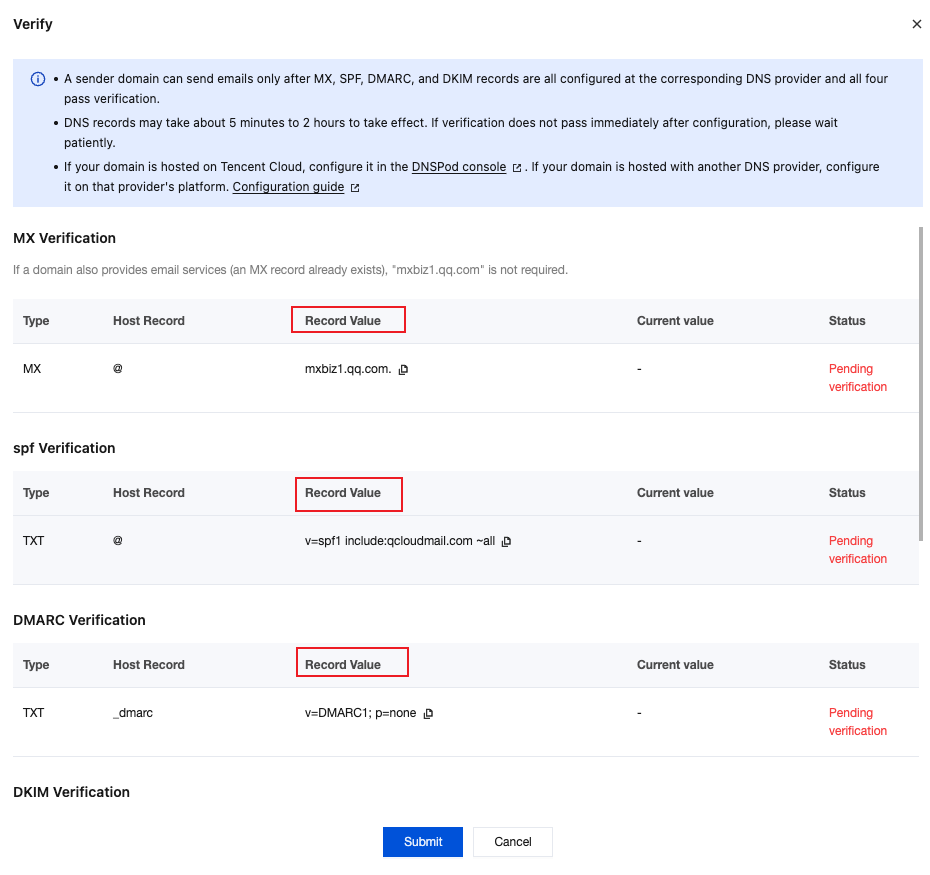
4. Record the Record Value shown on the pop-up window.
Note:
Below is an example only. The actual content displayed on the corresponding page shall prevail.
5. If your domain is hosted with Tencent Cloud, log in to the DNSPod console to configure verification information. Click a sender domain to go to the configuration page.
Note:
If your domain is hosted with another domain service provider, configure it as instructed in the checklist.
6. Take the primary domain sampledomain.com as an example to add records. Fill in Record Value obtained in the above step 4.
MX authentication:
Host record: @
Record type: MX
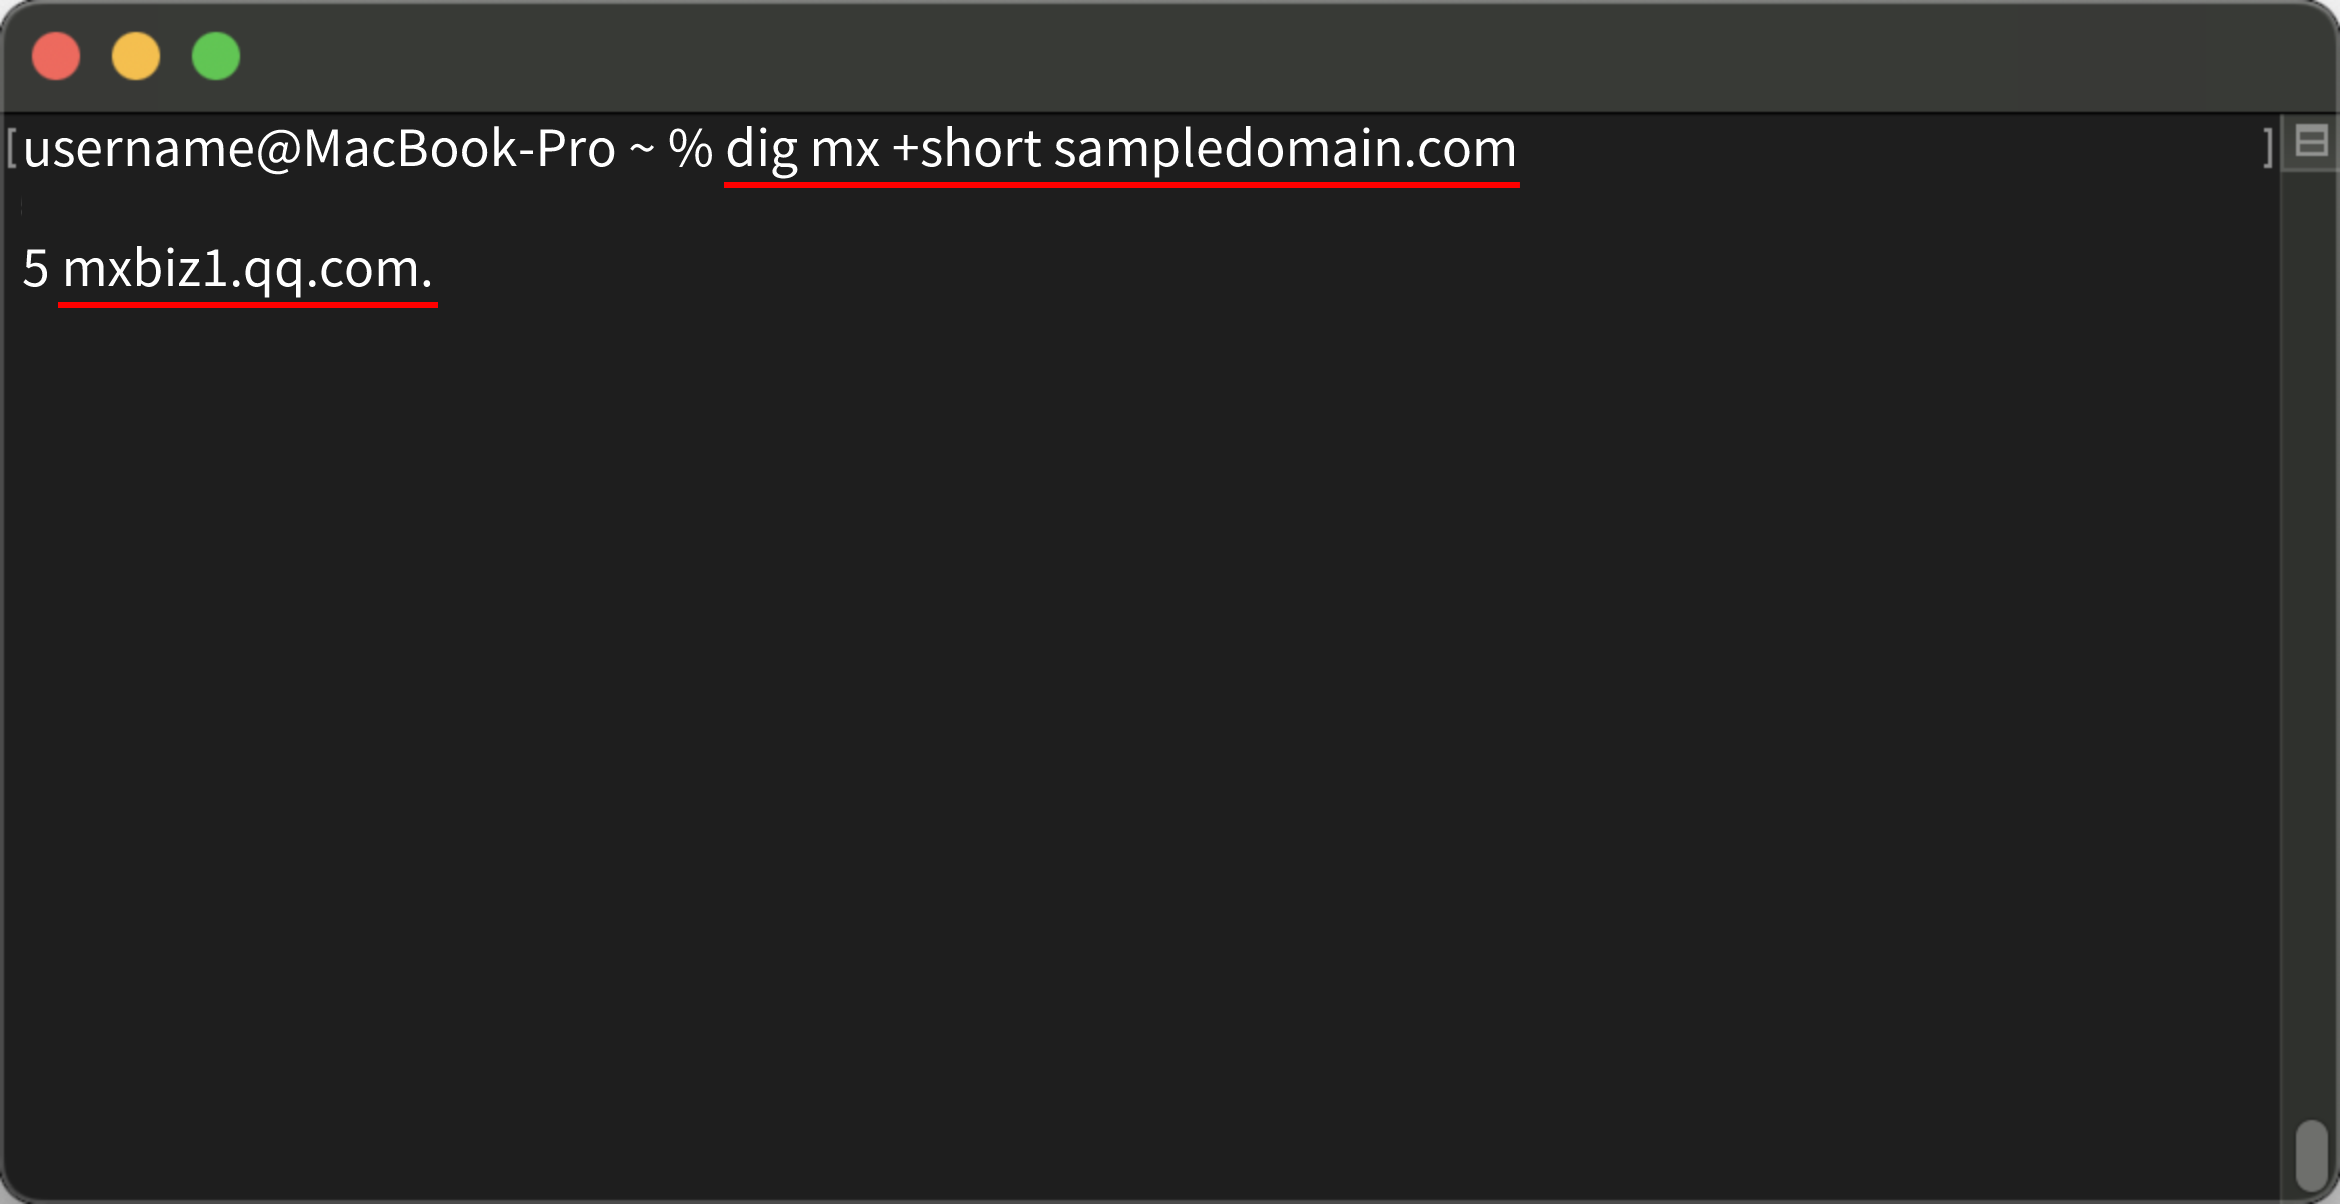
Record value: mxbiz1.qq.com. If you have an email server, enter your email server address in the record value.
Note:
For a non-primary domain, abc.sampledomain.com, for example, the host record should be abc.
Make sure the record value is ended with . Some domain service providers add the . at the end of an MX record by default.
SPF authentication:
Host record: @
Record type: TXT
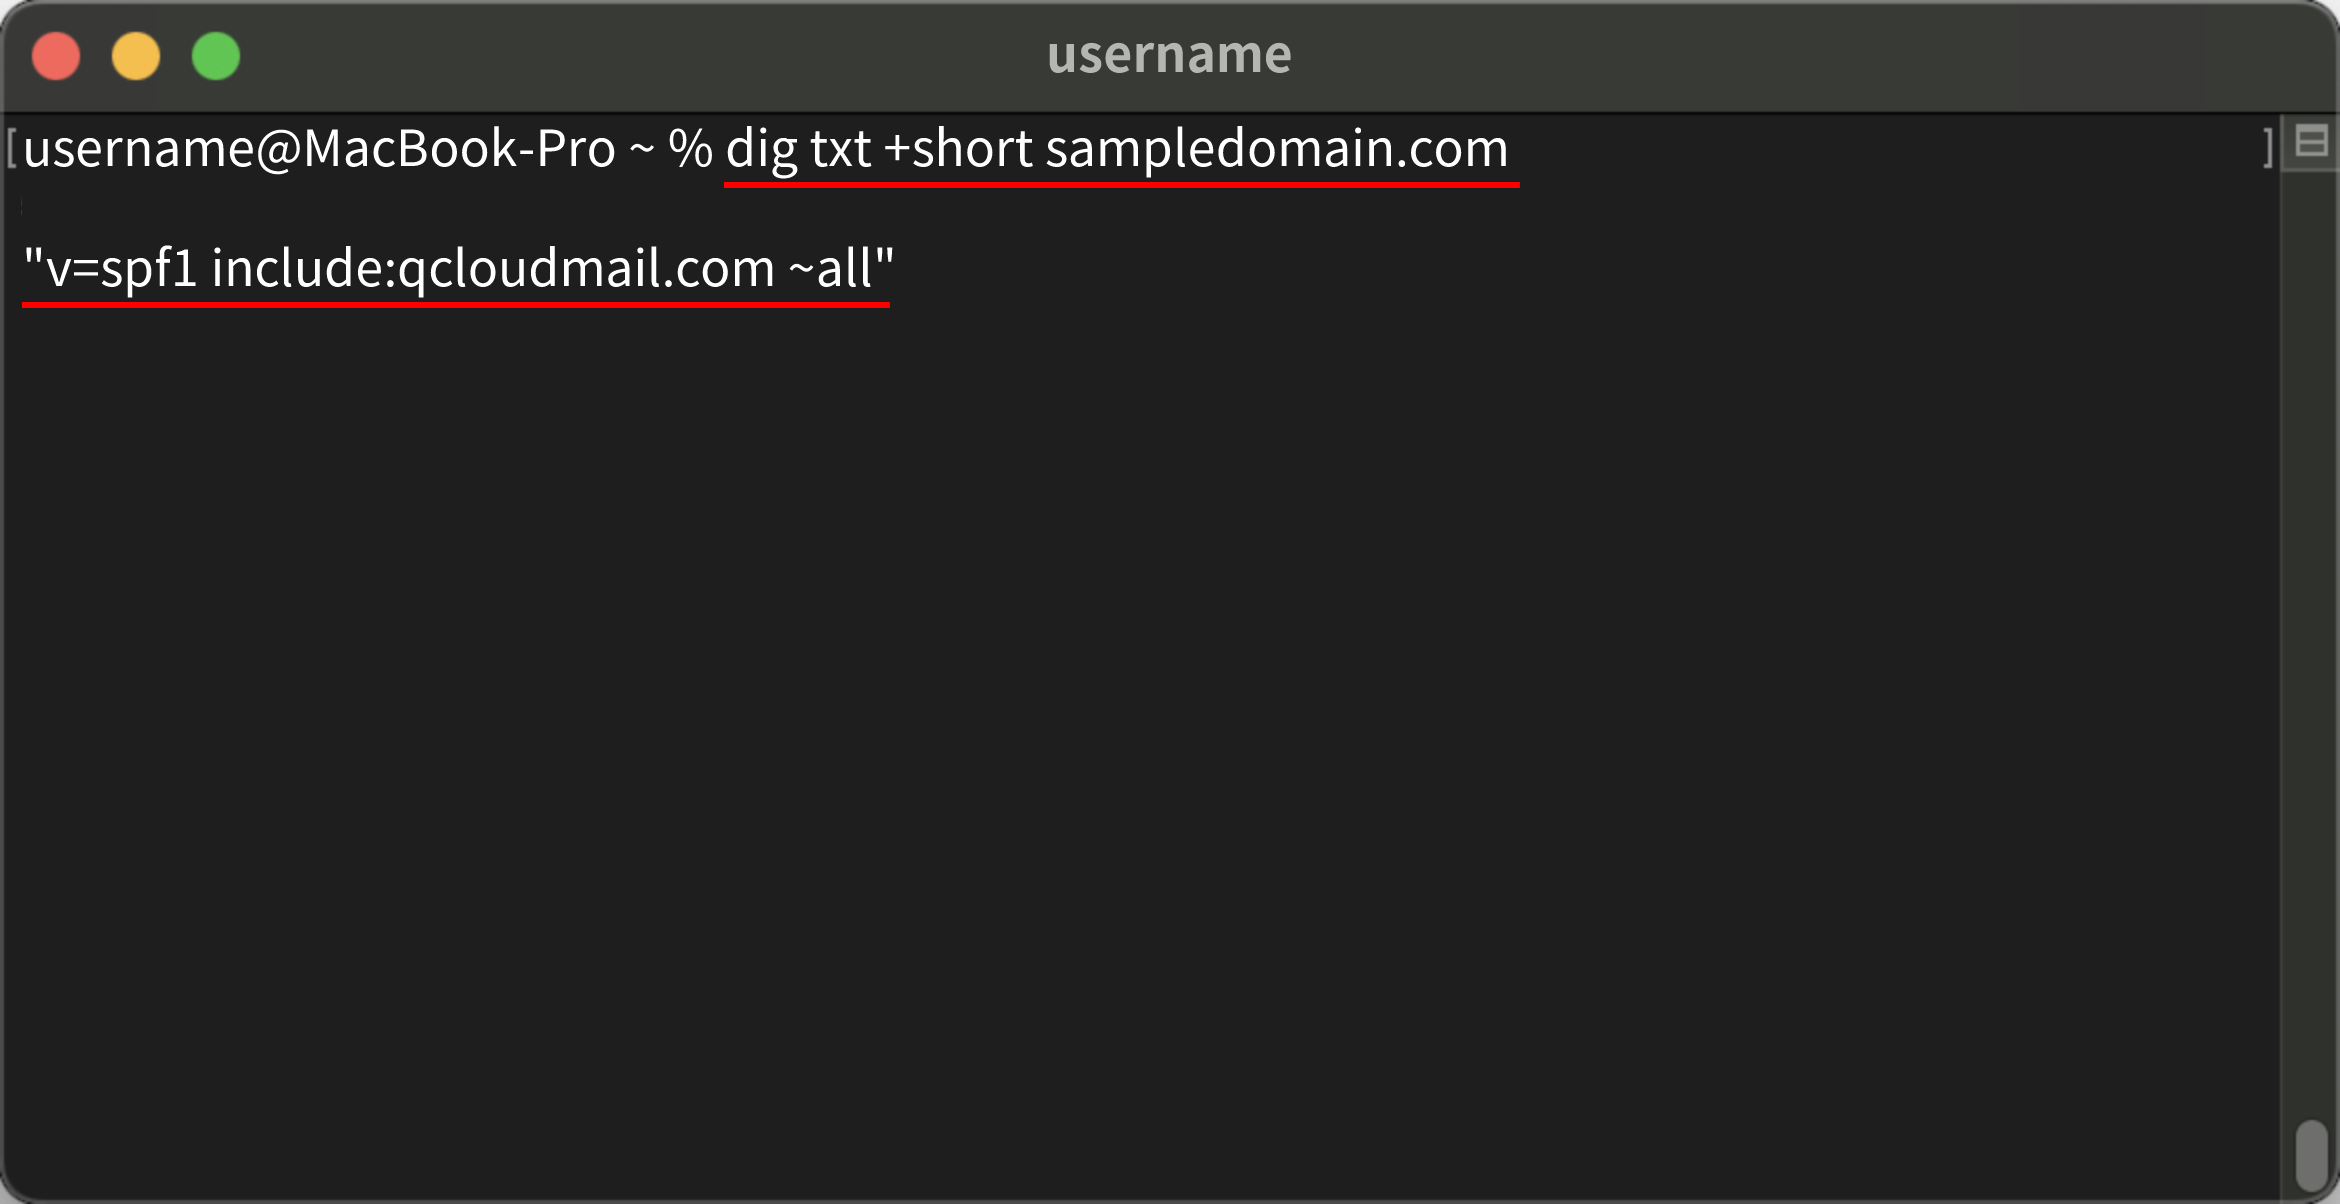
Record value: v=spf1 include:qcloudmail.com ~all
Note:
For a non-primary domain, abc.sampledomain.com, for example, the host record should be abc.
If you have multiple email push service providers, you need to include domains of all these service providers in the record value, v=spf1 include:qcloudmail.com include:domain1.com ~all, for example, where domain1.com represents the domain of another email push service provider. Make sure that there is only one SPF record in the DNS configuration of your sender domain.
DMARC authentication:
Host record: _dmarc
Record type: TXT
Record value: v=DMARC1; p=none
Note:
For a non-primary domain, abc.sampledomain.com, for example, the host record should be _dmarc.abc.
The DMARC record must contain the v and p flags. If you know more about DMARC, you can add other flags or modify flag values as needed.
DKIM authentication:
Host record:
If you choose a 2048-bit key: qcloudsg2048._domainkey
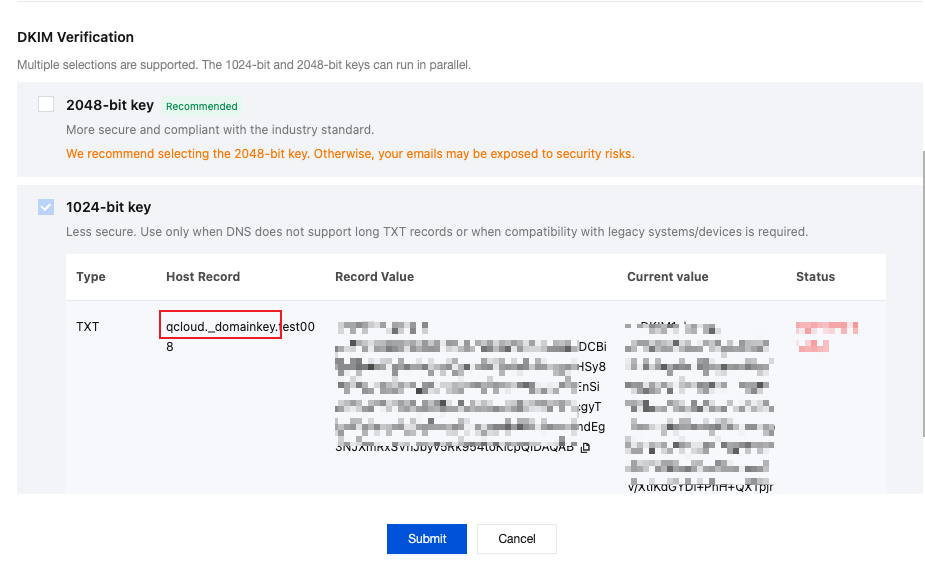
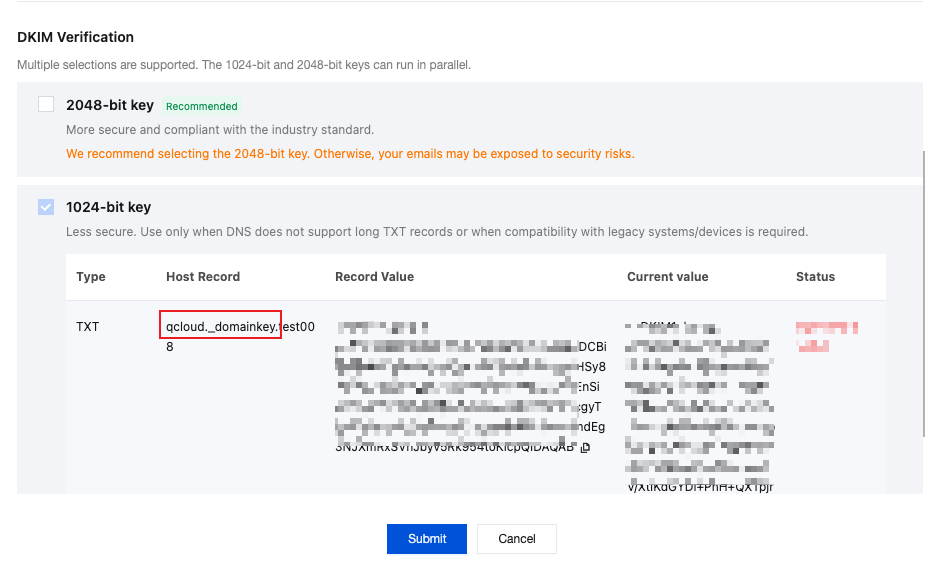
If you choose a 1024-bit key: qcloudsg1024._domainkey,Note: For domains created before July 6, 2026, please enter qcloud._domainkey. Please verify carefully in the console and make sure it matches what is displayed in the console as shown below.
Record type: TXT
Record value: Your record value.
Note:
1. If the sending domain is not the root domain (e.g., abc.sampledomain.com), enter the following in the host record:
For a 2048-bit key, enter the host record: qcloudsg2048._domainkey.abc
For a 1024-bit key, enter the host record: qcloudsg1024._domainkey.abc,For domains created before July 6, 2026, the host record is: qcloud._domainkey.abc. Please verify carefully in the console.
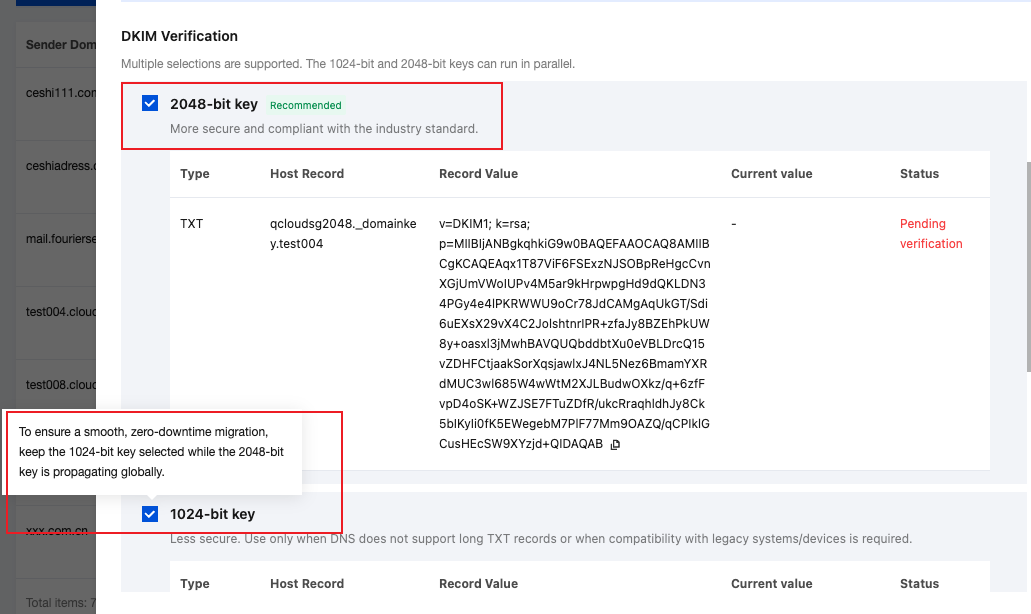
2. Should you choose a 1024-bit or 2048-bit key for DKIM verification?
2048-bit: Complies with industry standards and offers higher security. Recommended.
1024-bit: Lower security. Only consider it in the following scenarios:
Your DNS provider does not support extra-long TXT records
You need compatibility with legacy systems or devices
The platform supports multiple selections. When both are selected, the 1024-bit and 2048-bit keys can run in parallel as dual keys.
7. Go back to step 4 and click Submit for verification. The Current Value shows what you configured in the above DNS configuration. When the verification status becomes Verified, the configuration is completed.
Note:
If the configuration operation in Step 1 is completed and the sender domain is “Verified”, skip this verification step.
This document describes how to query the DNS domain server with the dig command and check whether your sender domain is properly set.
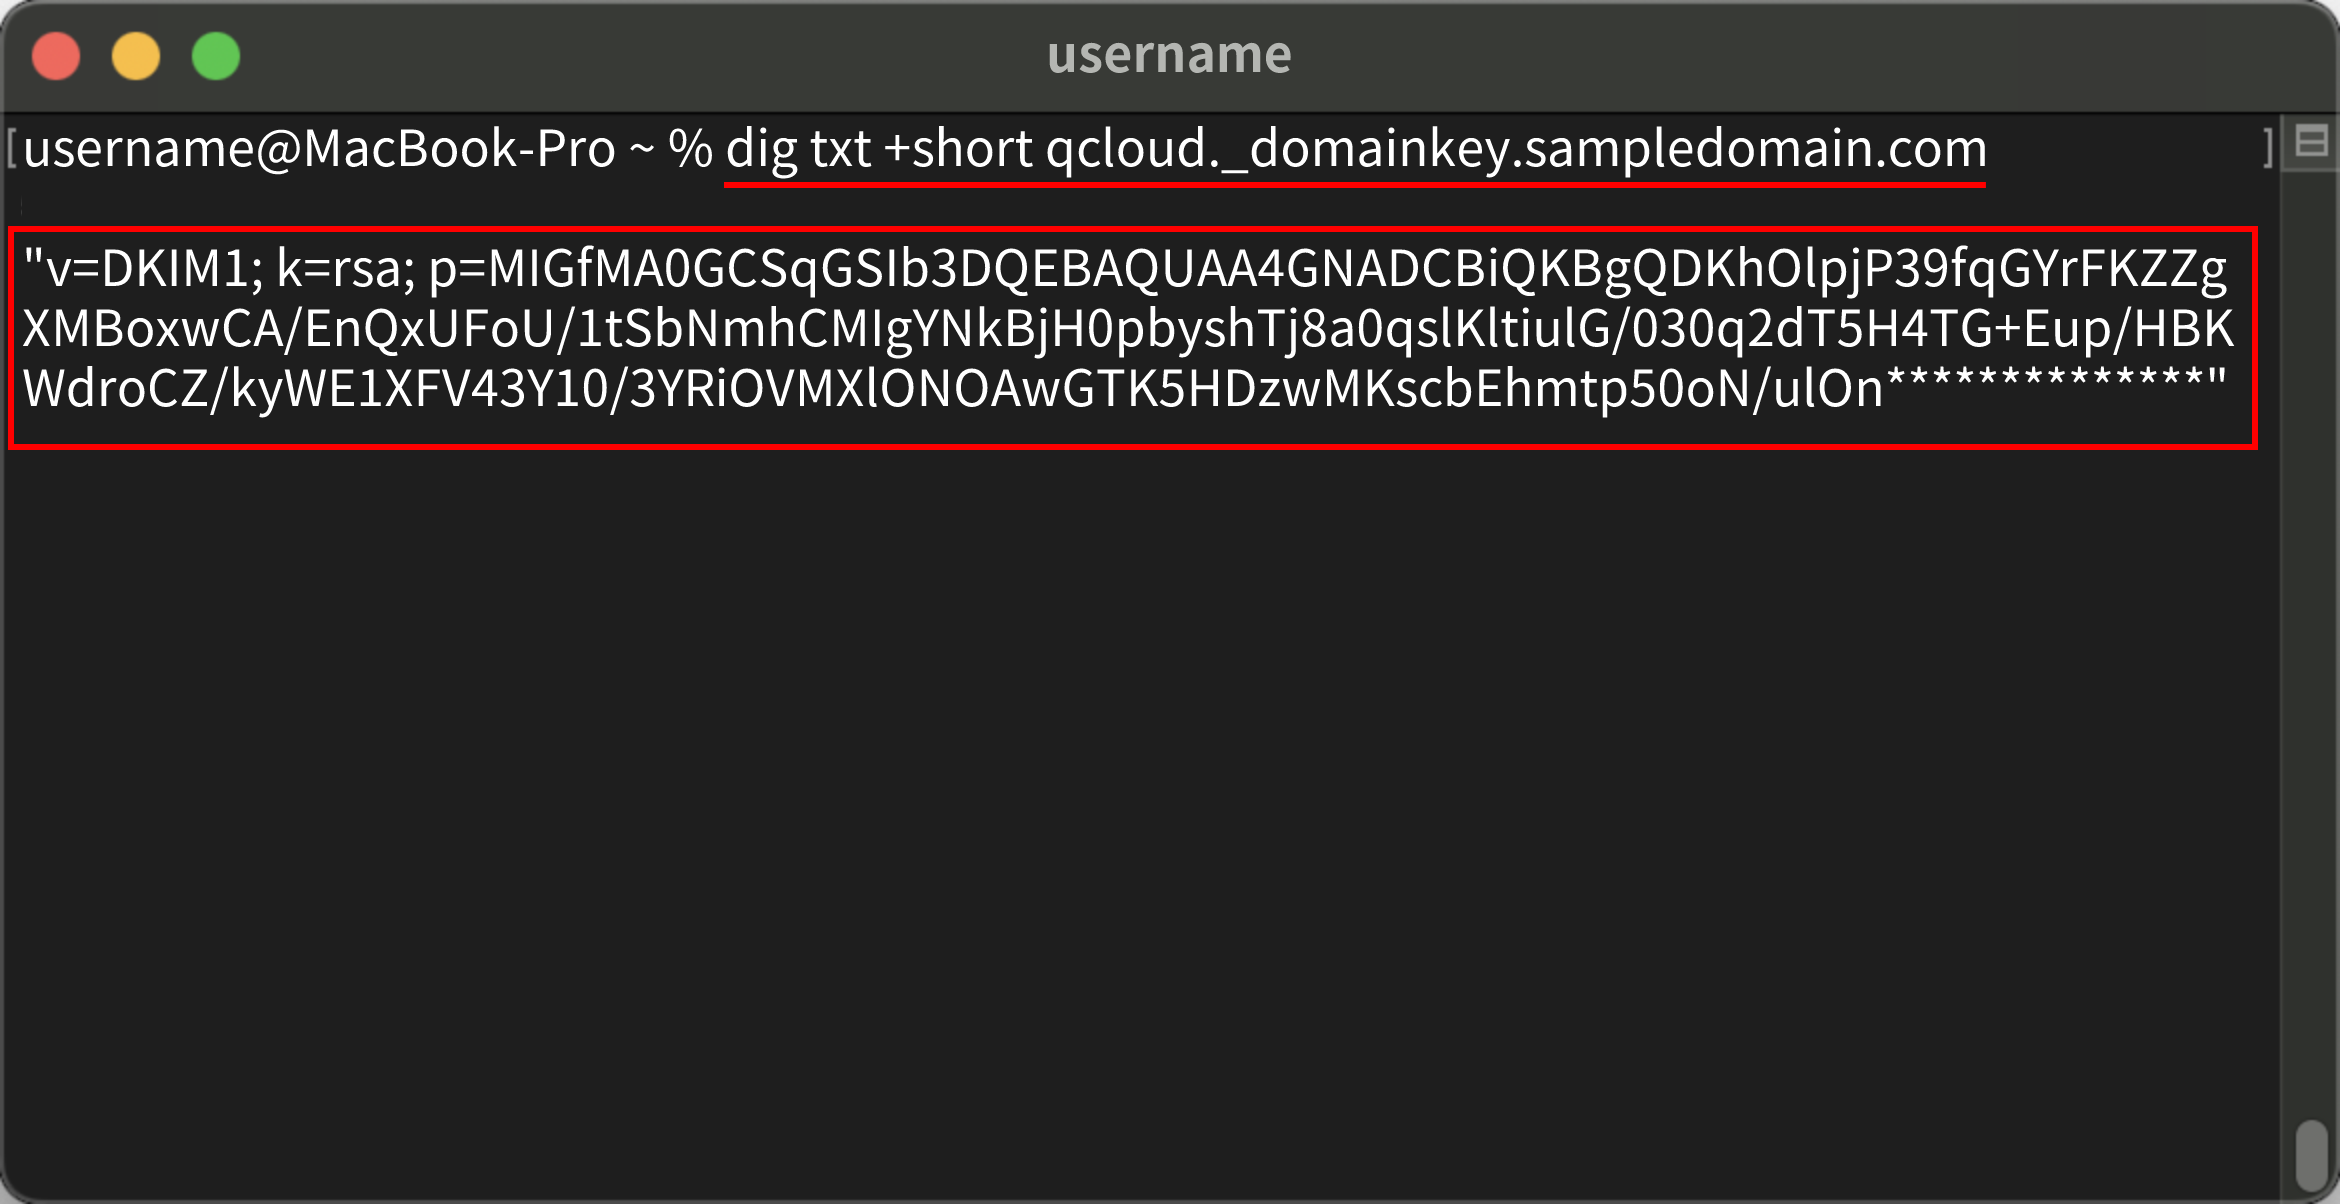
Enter the following commands in the command line, respectively, and press the carriage return to check whether the returned values are the same as those displayed on the sender domain configuration page.
dig mx +short sampledomain.com
dig txt +short sampledomain.com
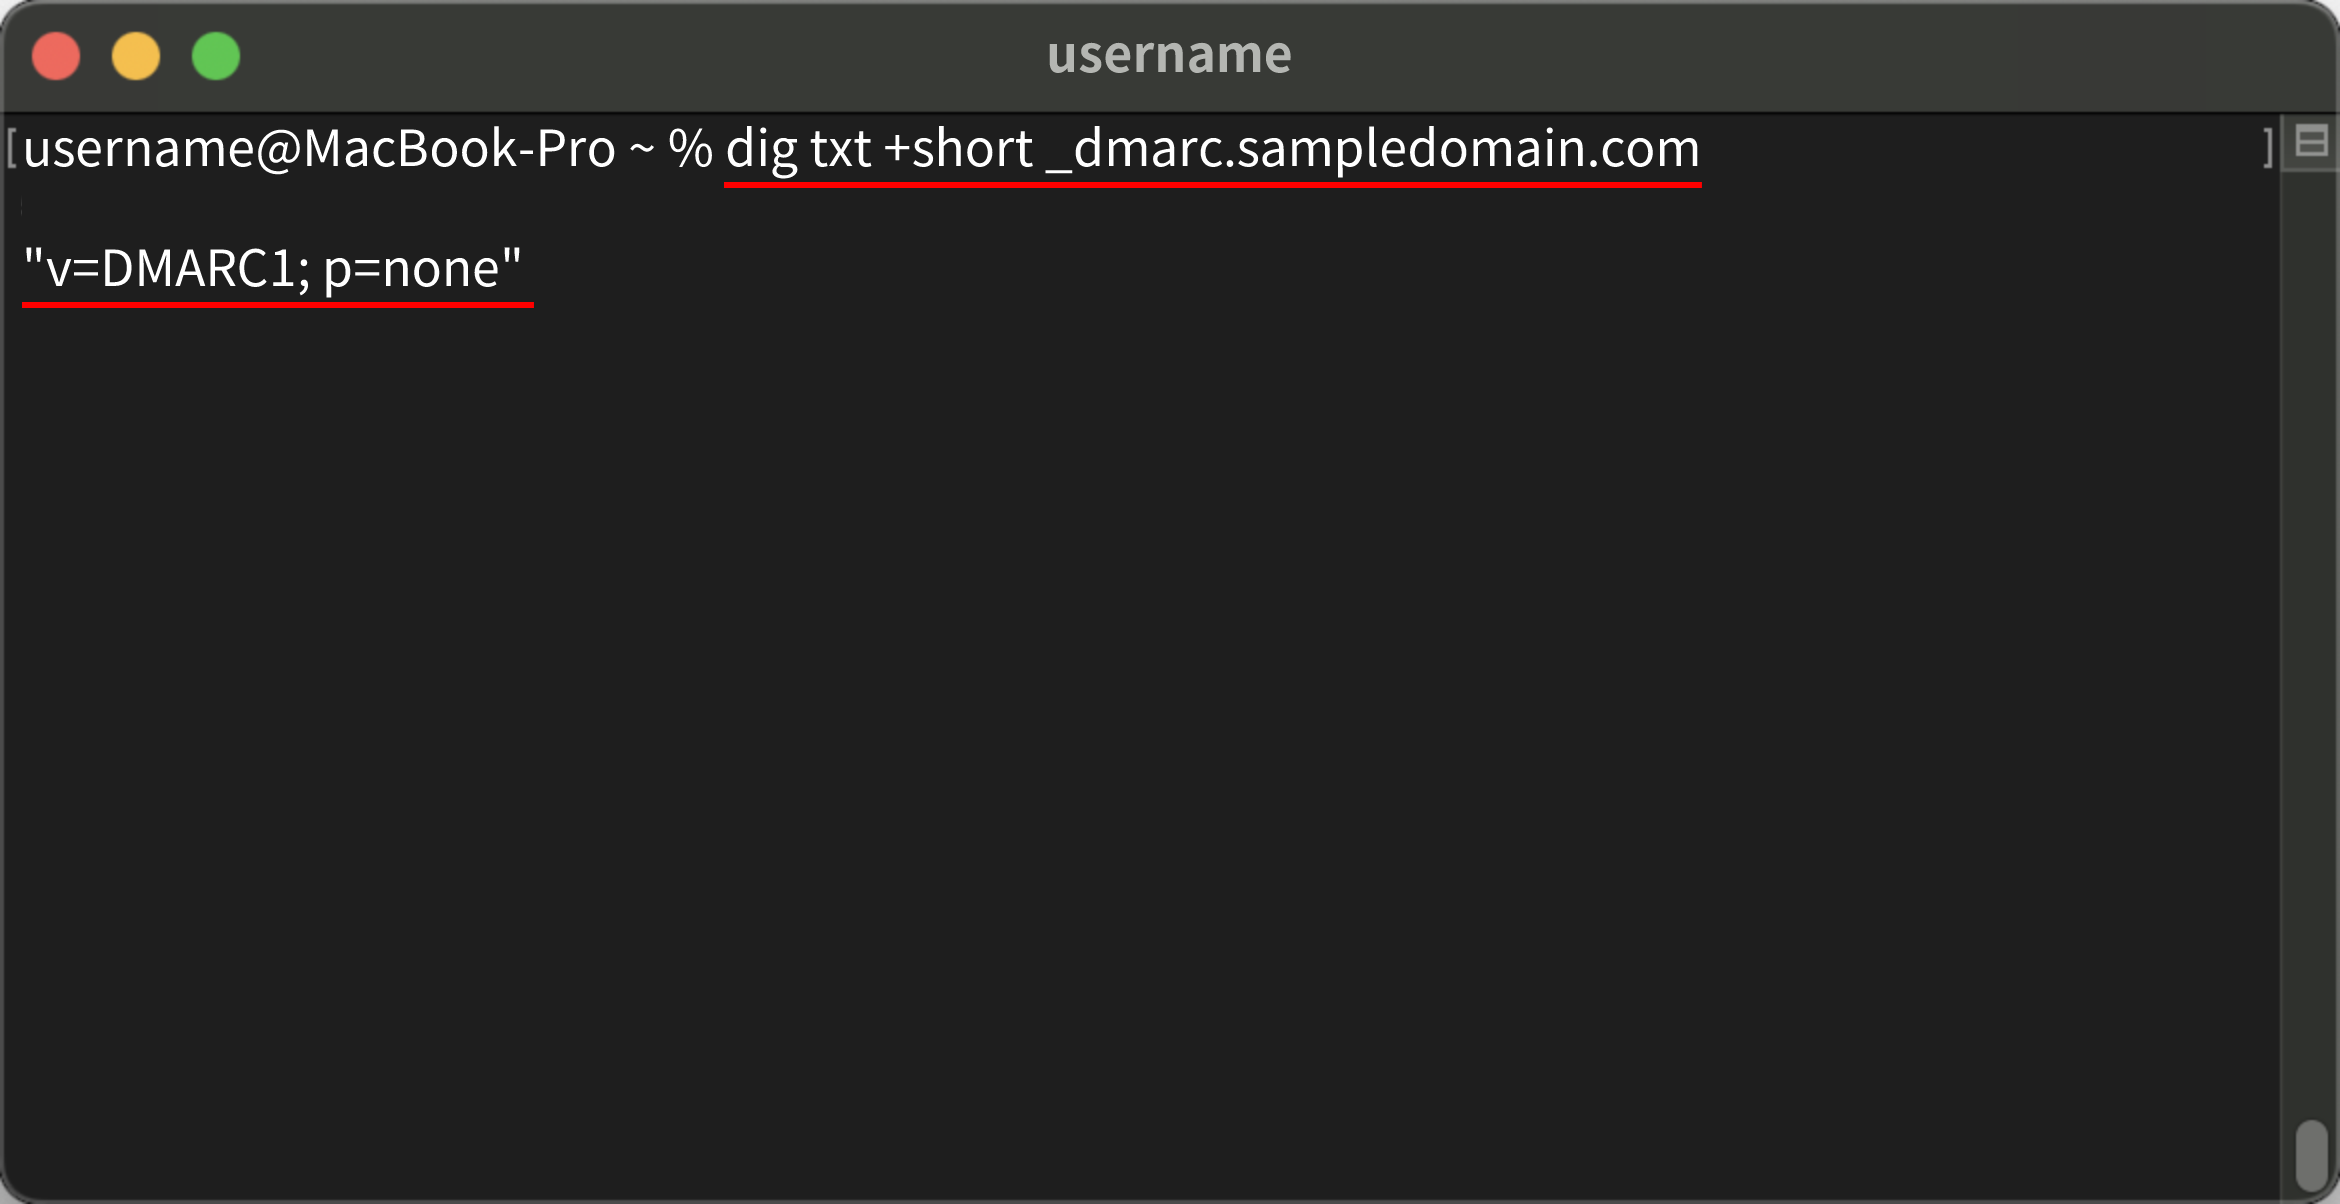
dig txt +short _dmarc.sampledomain.com
dig txt +short qcloud._domainkey.sampledomain.com
Note:
sampledomain.com in the above commands is a sample only and should be replaced with your sender domain.
Note:
If there is any issue after you perform configuration and verification as described above, submit a ticket.
If you have used the DNSPod service, but it cannot be found by the dig command, the identity verification for the domain may have failed (so the registry stopped resolution).
How to upgrade the DKIM key length from 1024-bit to 2048-bit
1. The DKIM key length supports a smooth upgrade from 1024-bit to 2048-bit. If your sending domain is actively sending emails, there is no need to pause sending tasks during the upgrade — your business will not be affected.
2. Upgrade steps:
2.1 Go to the "Sending Domains - Verification" page. In the "DKIM Verification" section, select the 2048-bit key. If your sending domain has active sending tasks, you also need to keep the 1024-bit key selected.
2.2 Following the configuration guide above, add a 2048-bit DKIM record at your DNS provider. Specifically:
Host record: Enter qcloudsg2048._domainkey. If your sending domain is not the root domain (e.g., abc.sampledomain.com), enter qcloudsg2048._domainkey.abc as the host record.
Record type: Select TXT
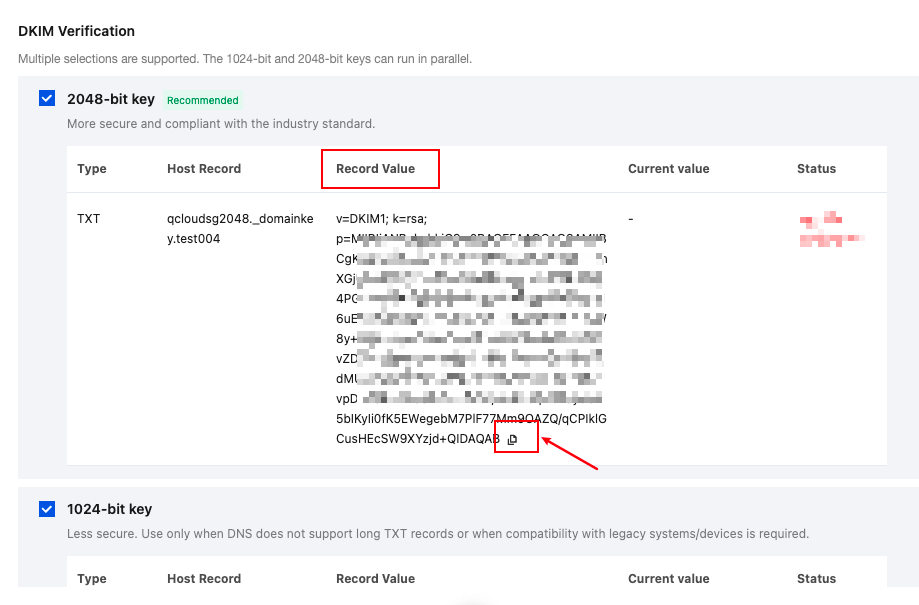
Record value: Enter your "Record value" as shown in the image below.
2.3 Return to the domain verification page and click "Submit Verification" to verify. The "Current Value" shows the content you configured in the DNS settings above. When the verification status displays "Verification Passed", the configuration is complete.
Note: It may take approximately 5 minutes to 2 hours for the DNS configuration to take effect. If verification does not pass immediately after configuration, please be patient and wait.