Step 1. Creating an S3 bucket for input/output files
1. Click Create bucket.
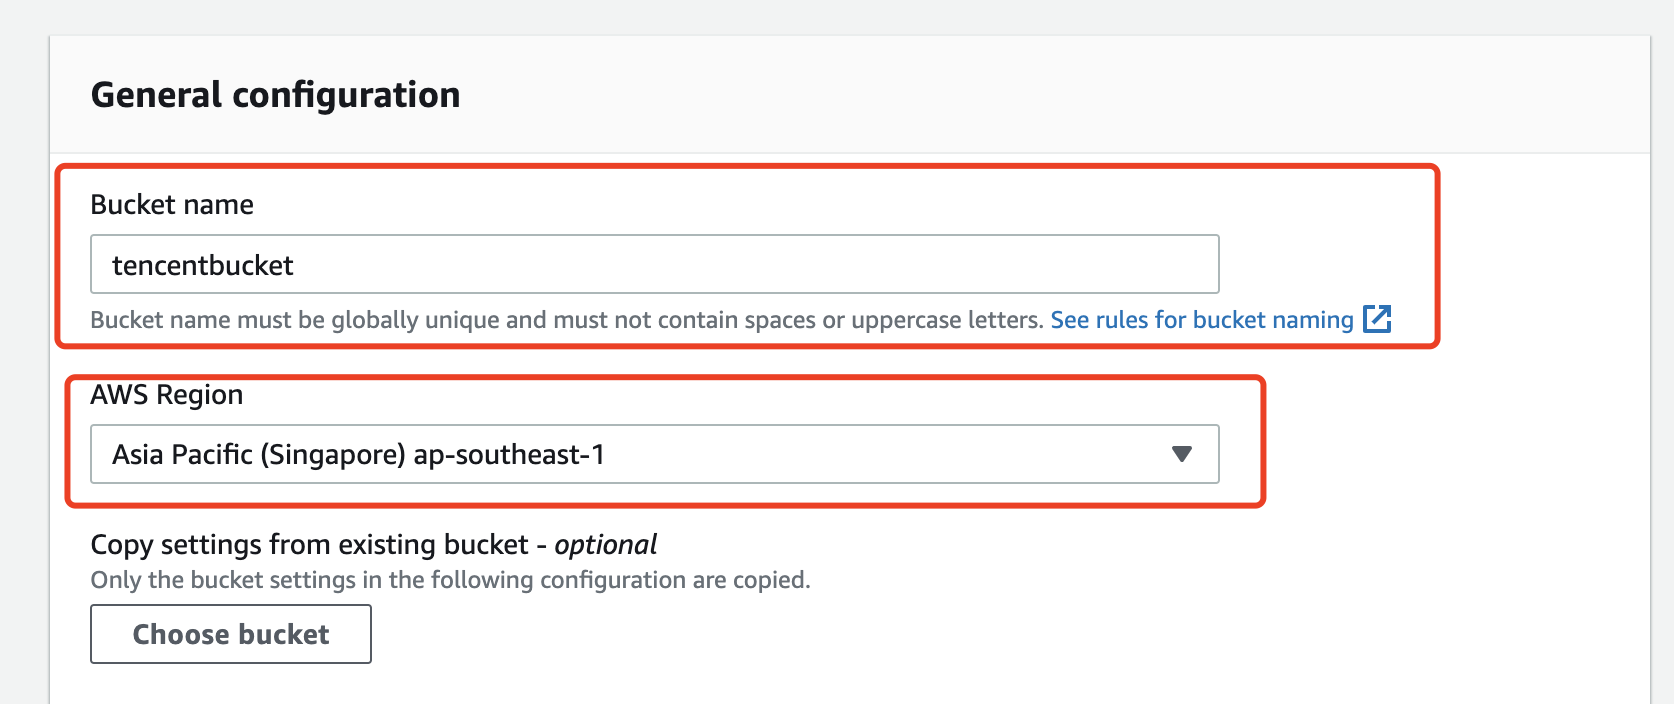
2. Enter a bucket name and select a region.
Enter a bucket name and select a region for the bucket. As an example, Singapore is selected in the screenshot below.
3. Click Create bucket.
4. Repeat the above steps to create a bucket for transcoding outputs (optional).
Note:
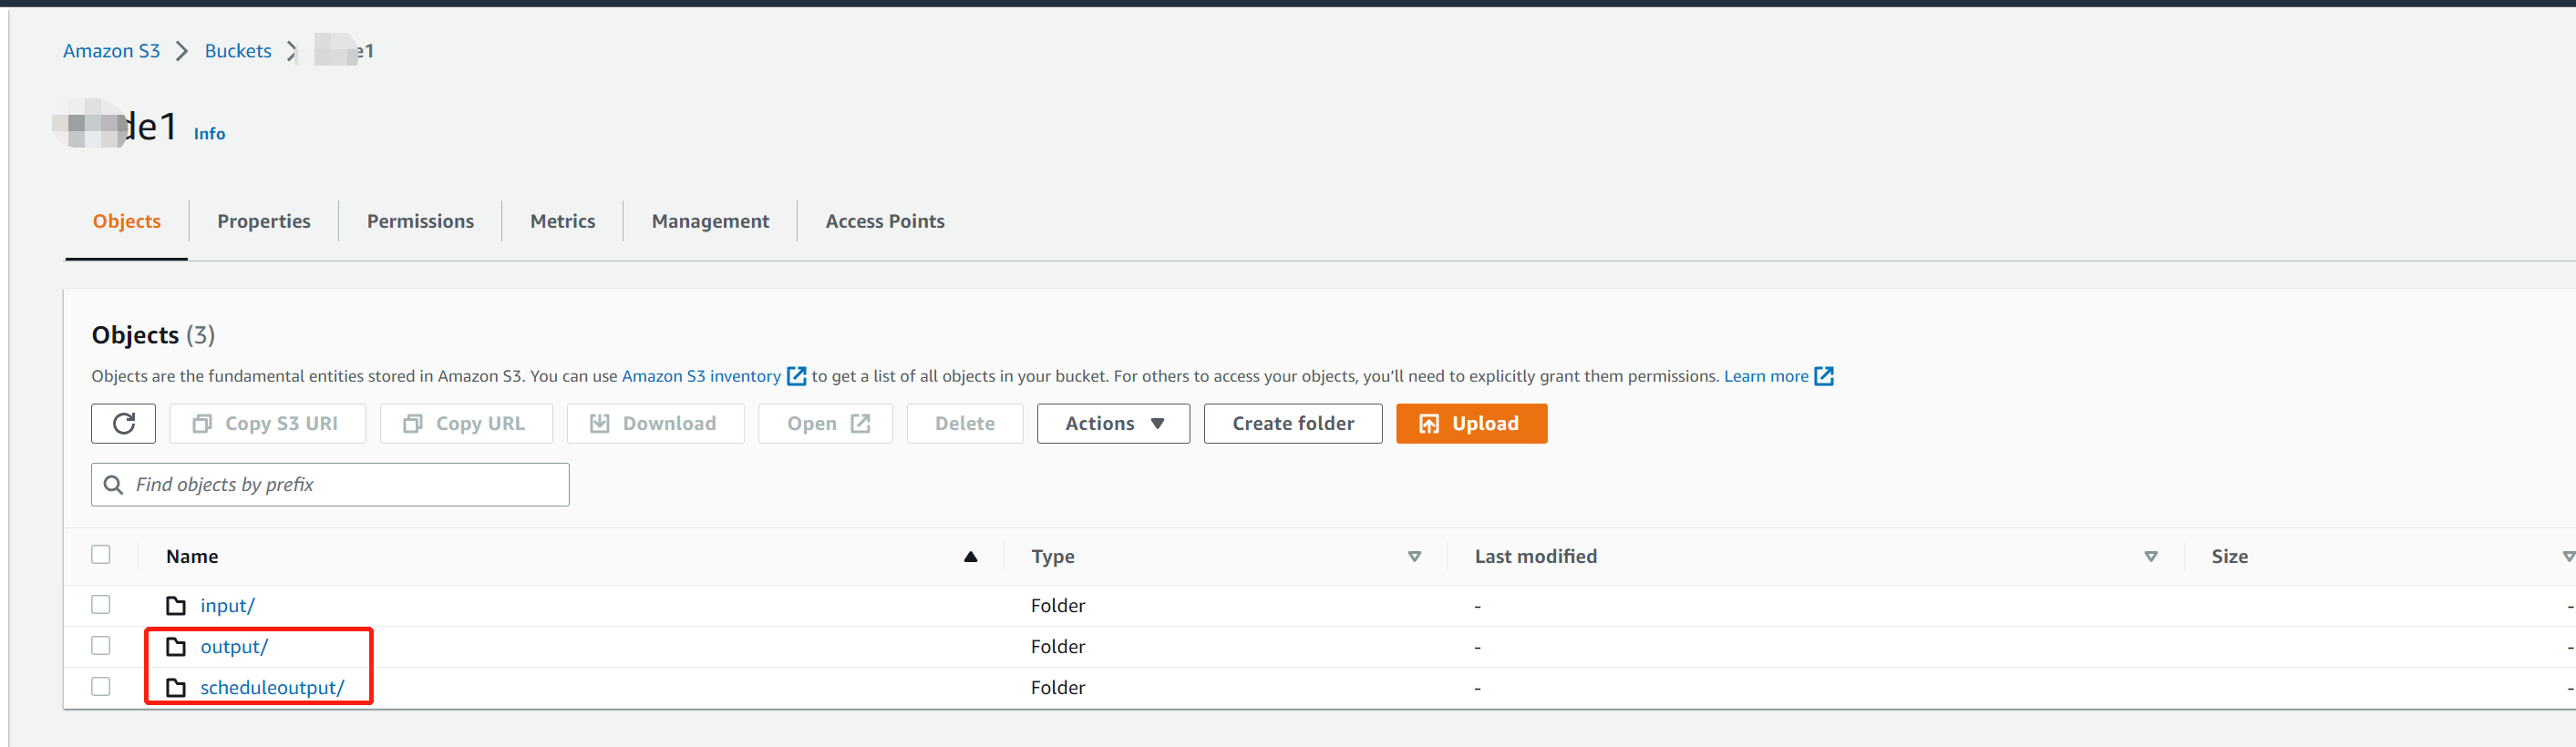
You can also output transcoding files to a new directory of the input bucket.
Step 2. Creating an SQS queue for bucket notifications
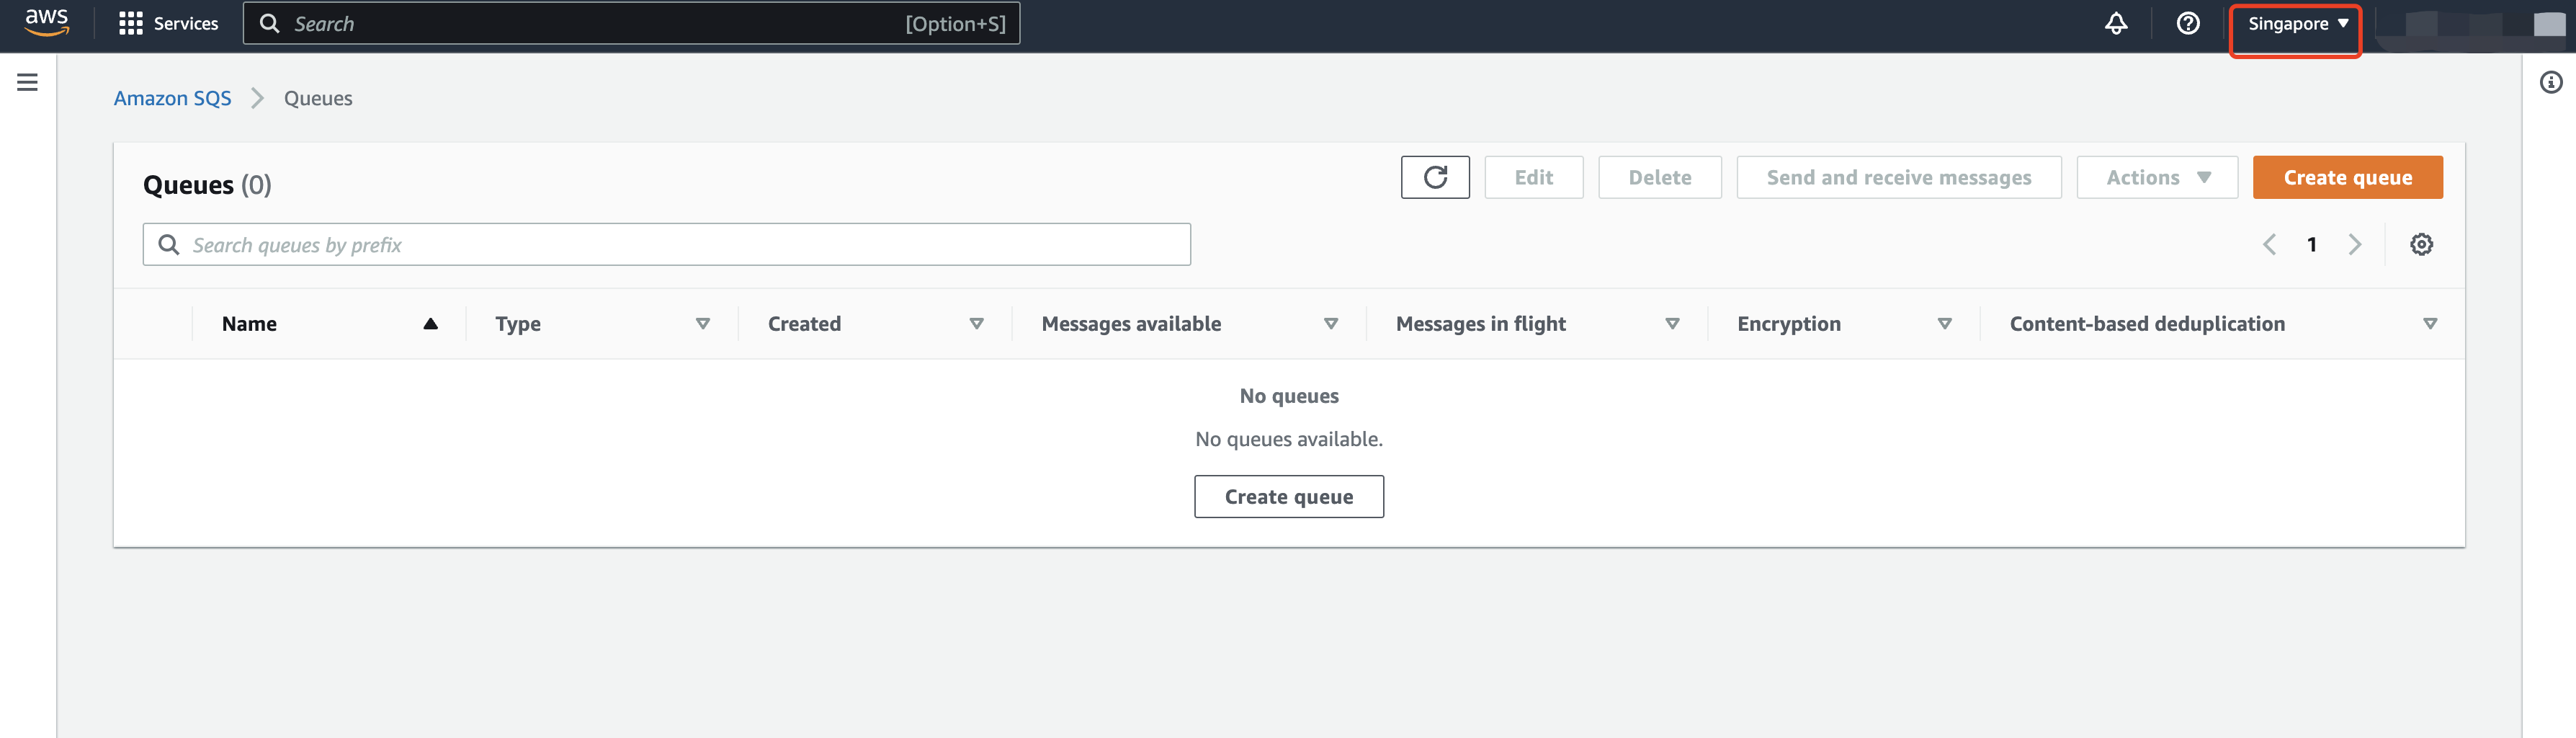
1. Select the queue region.
Select Singapore (ap-southeast-1).
Note:
To bind the queue to your bucket, make sure the queue region is the same as the bucket region.
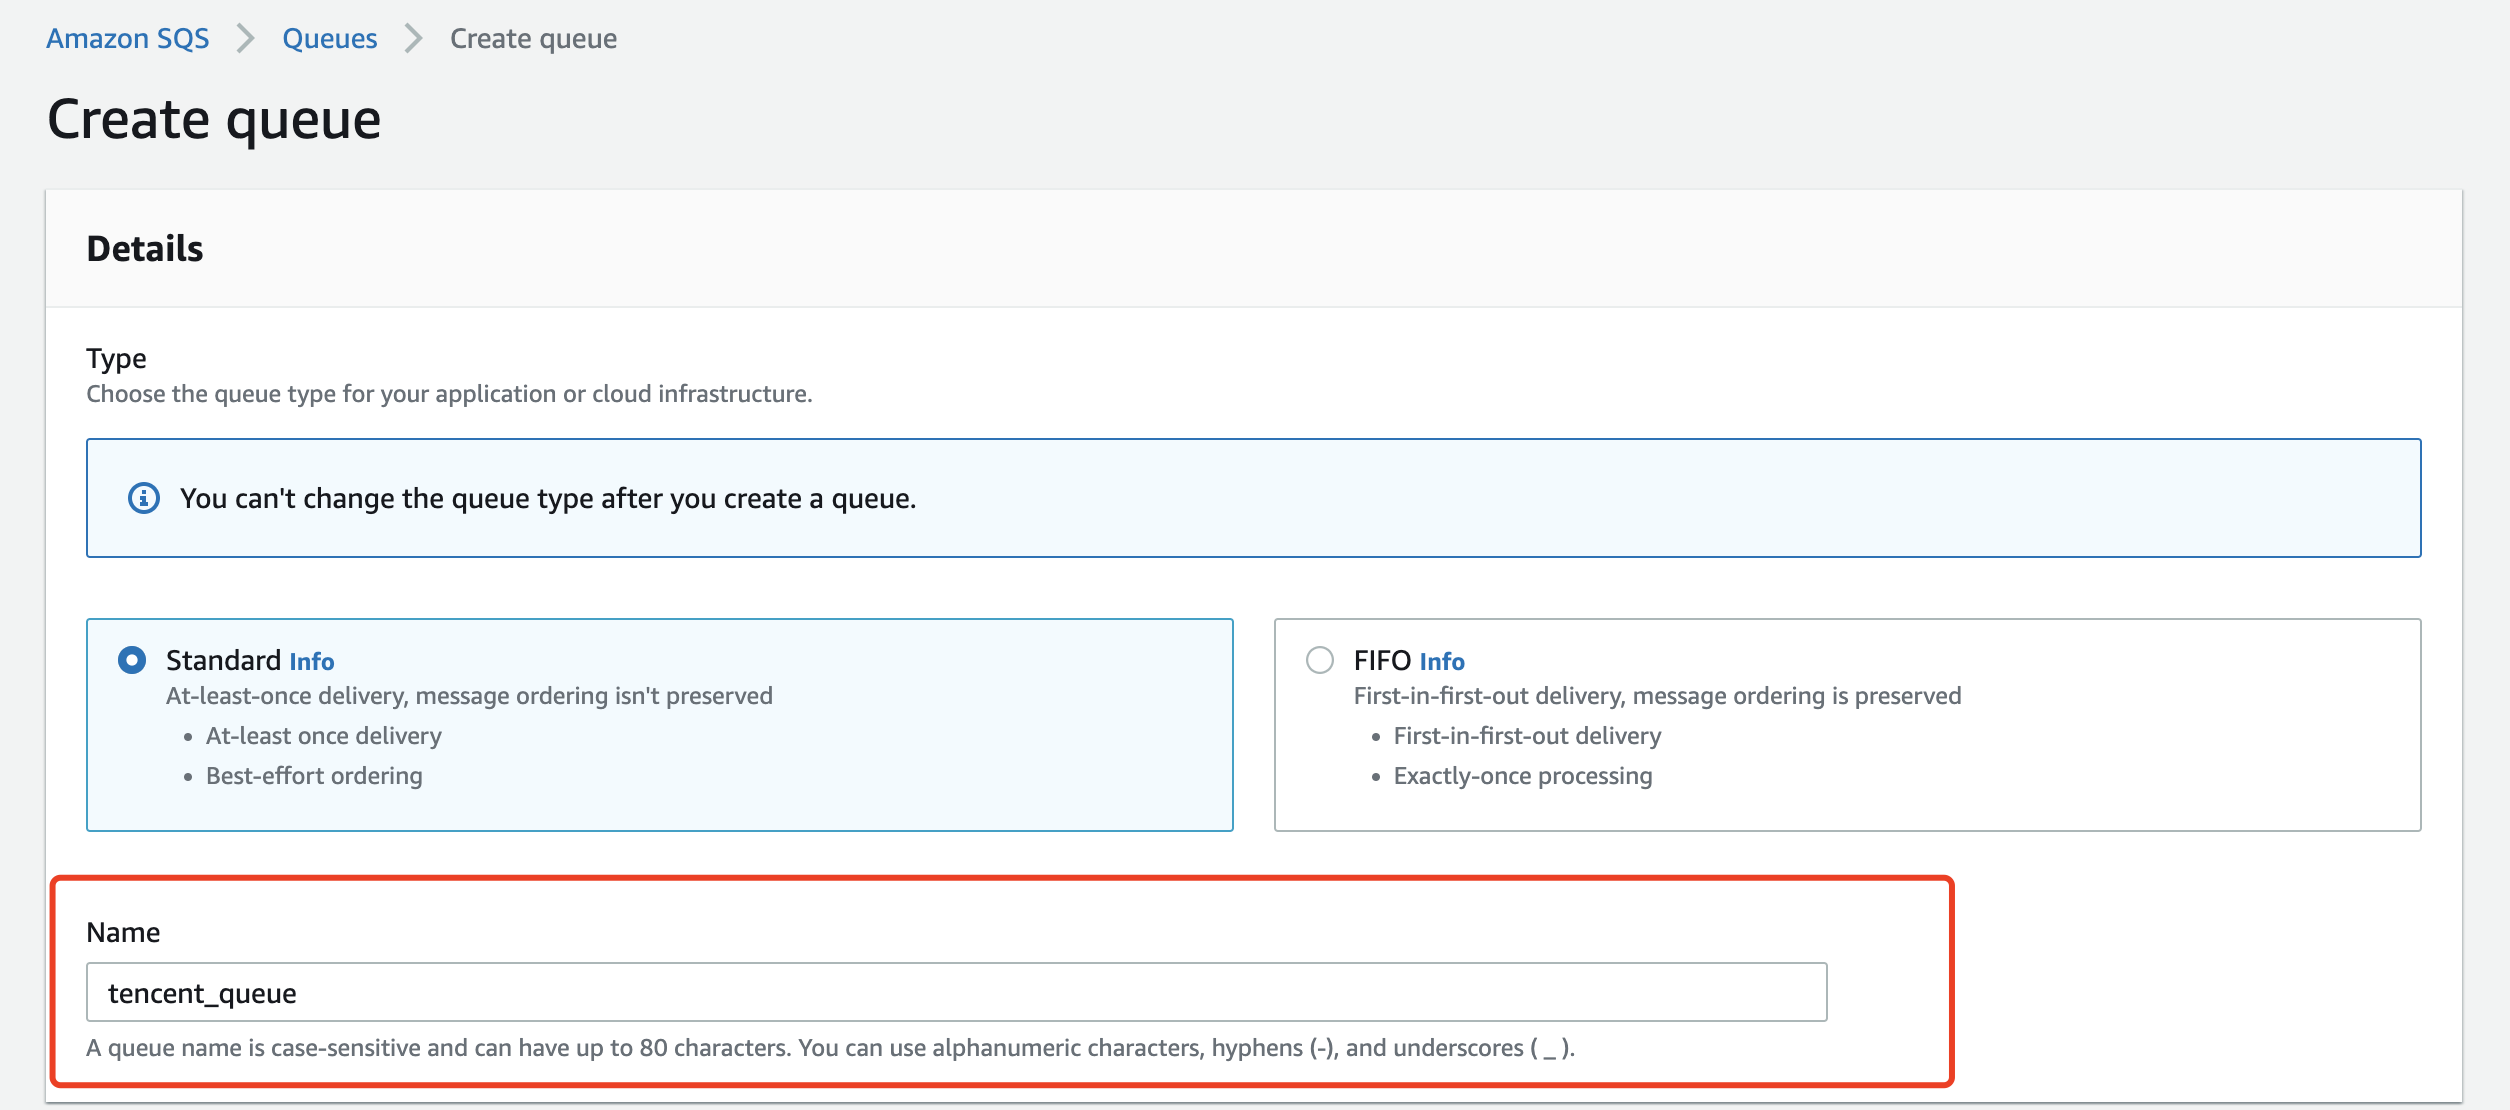
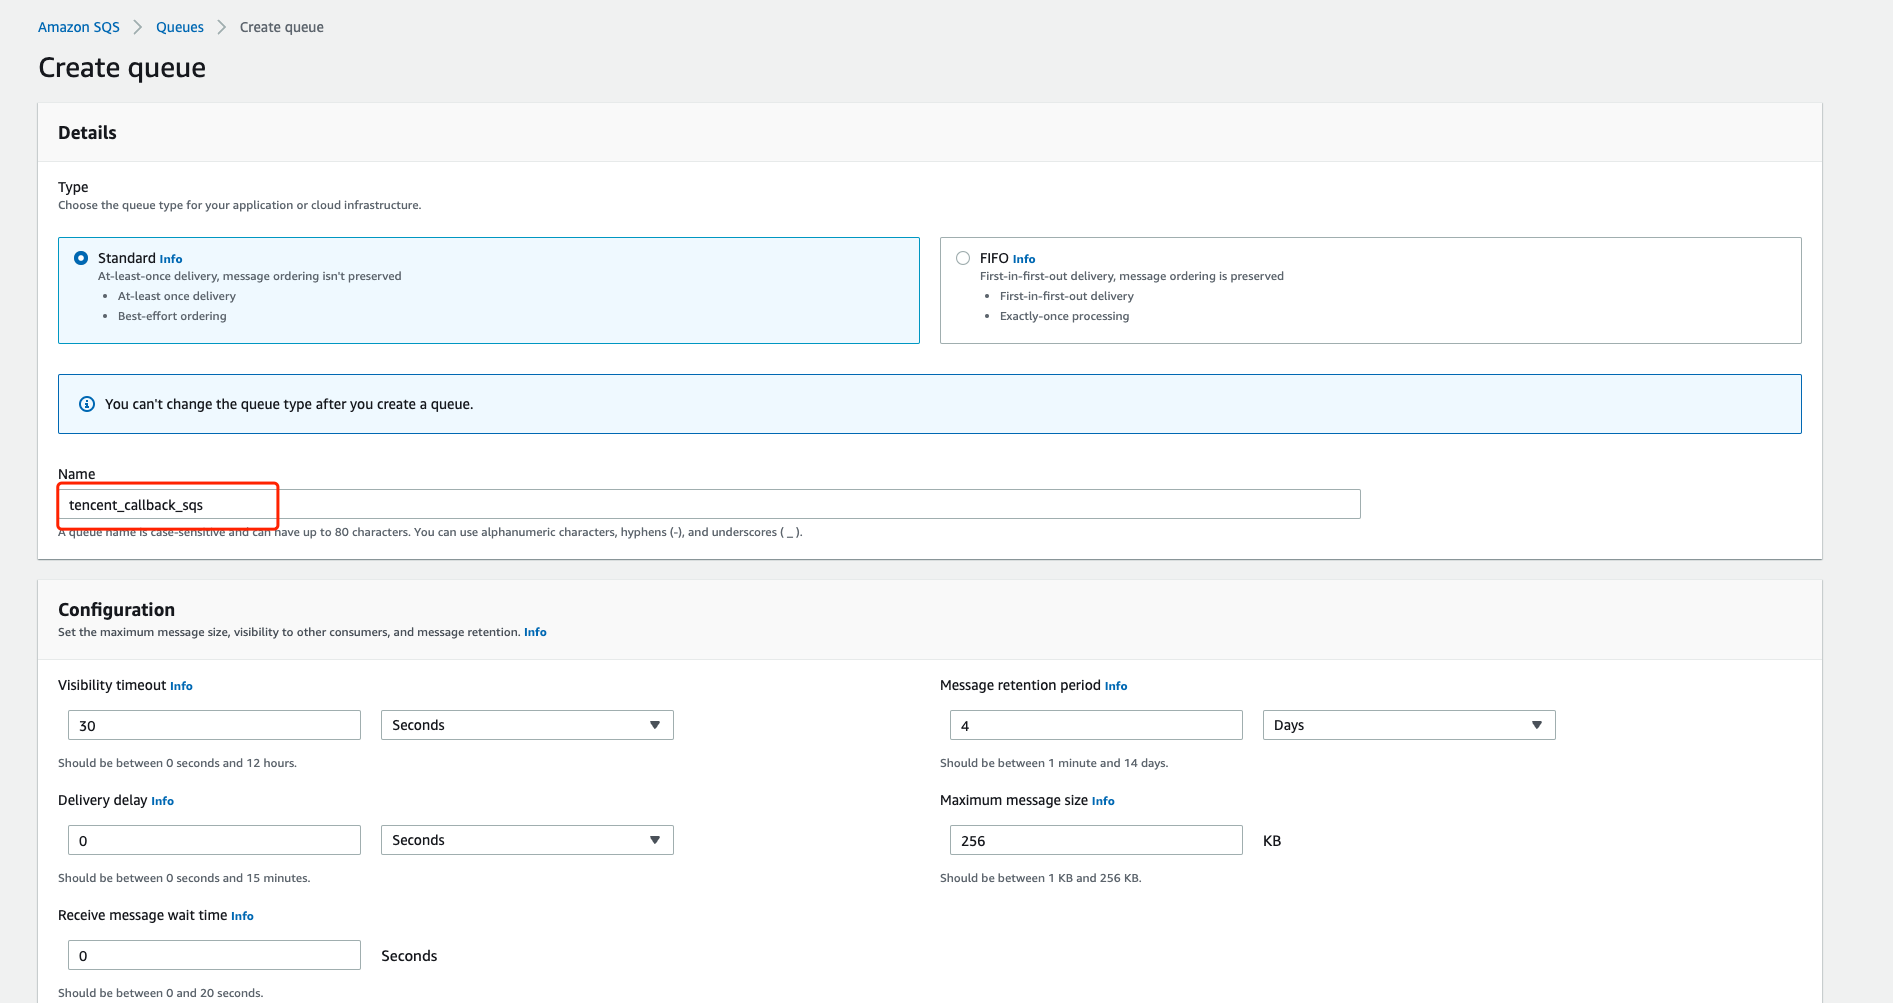
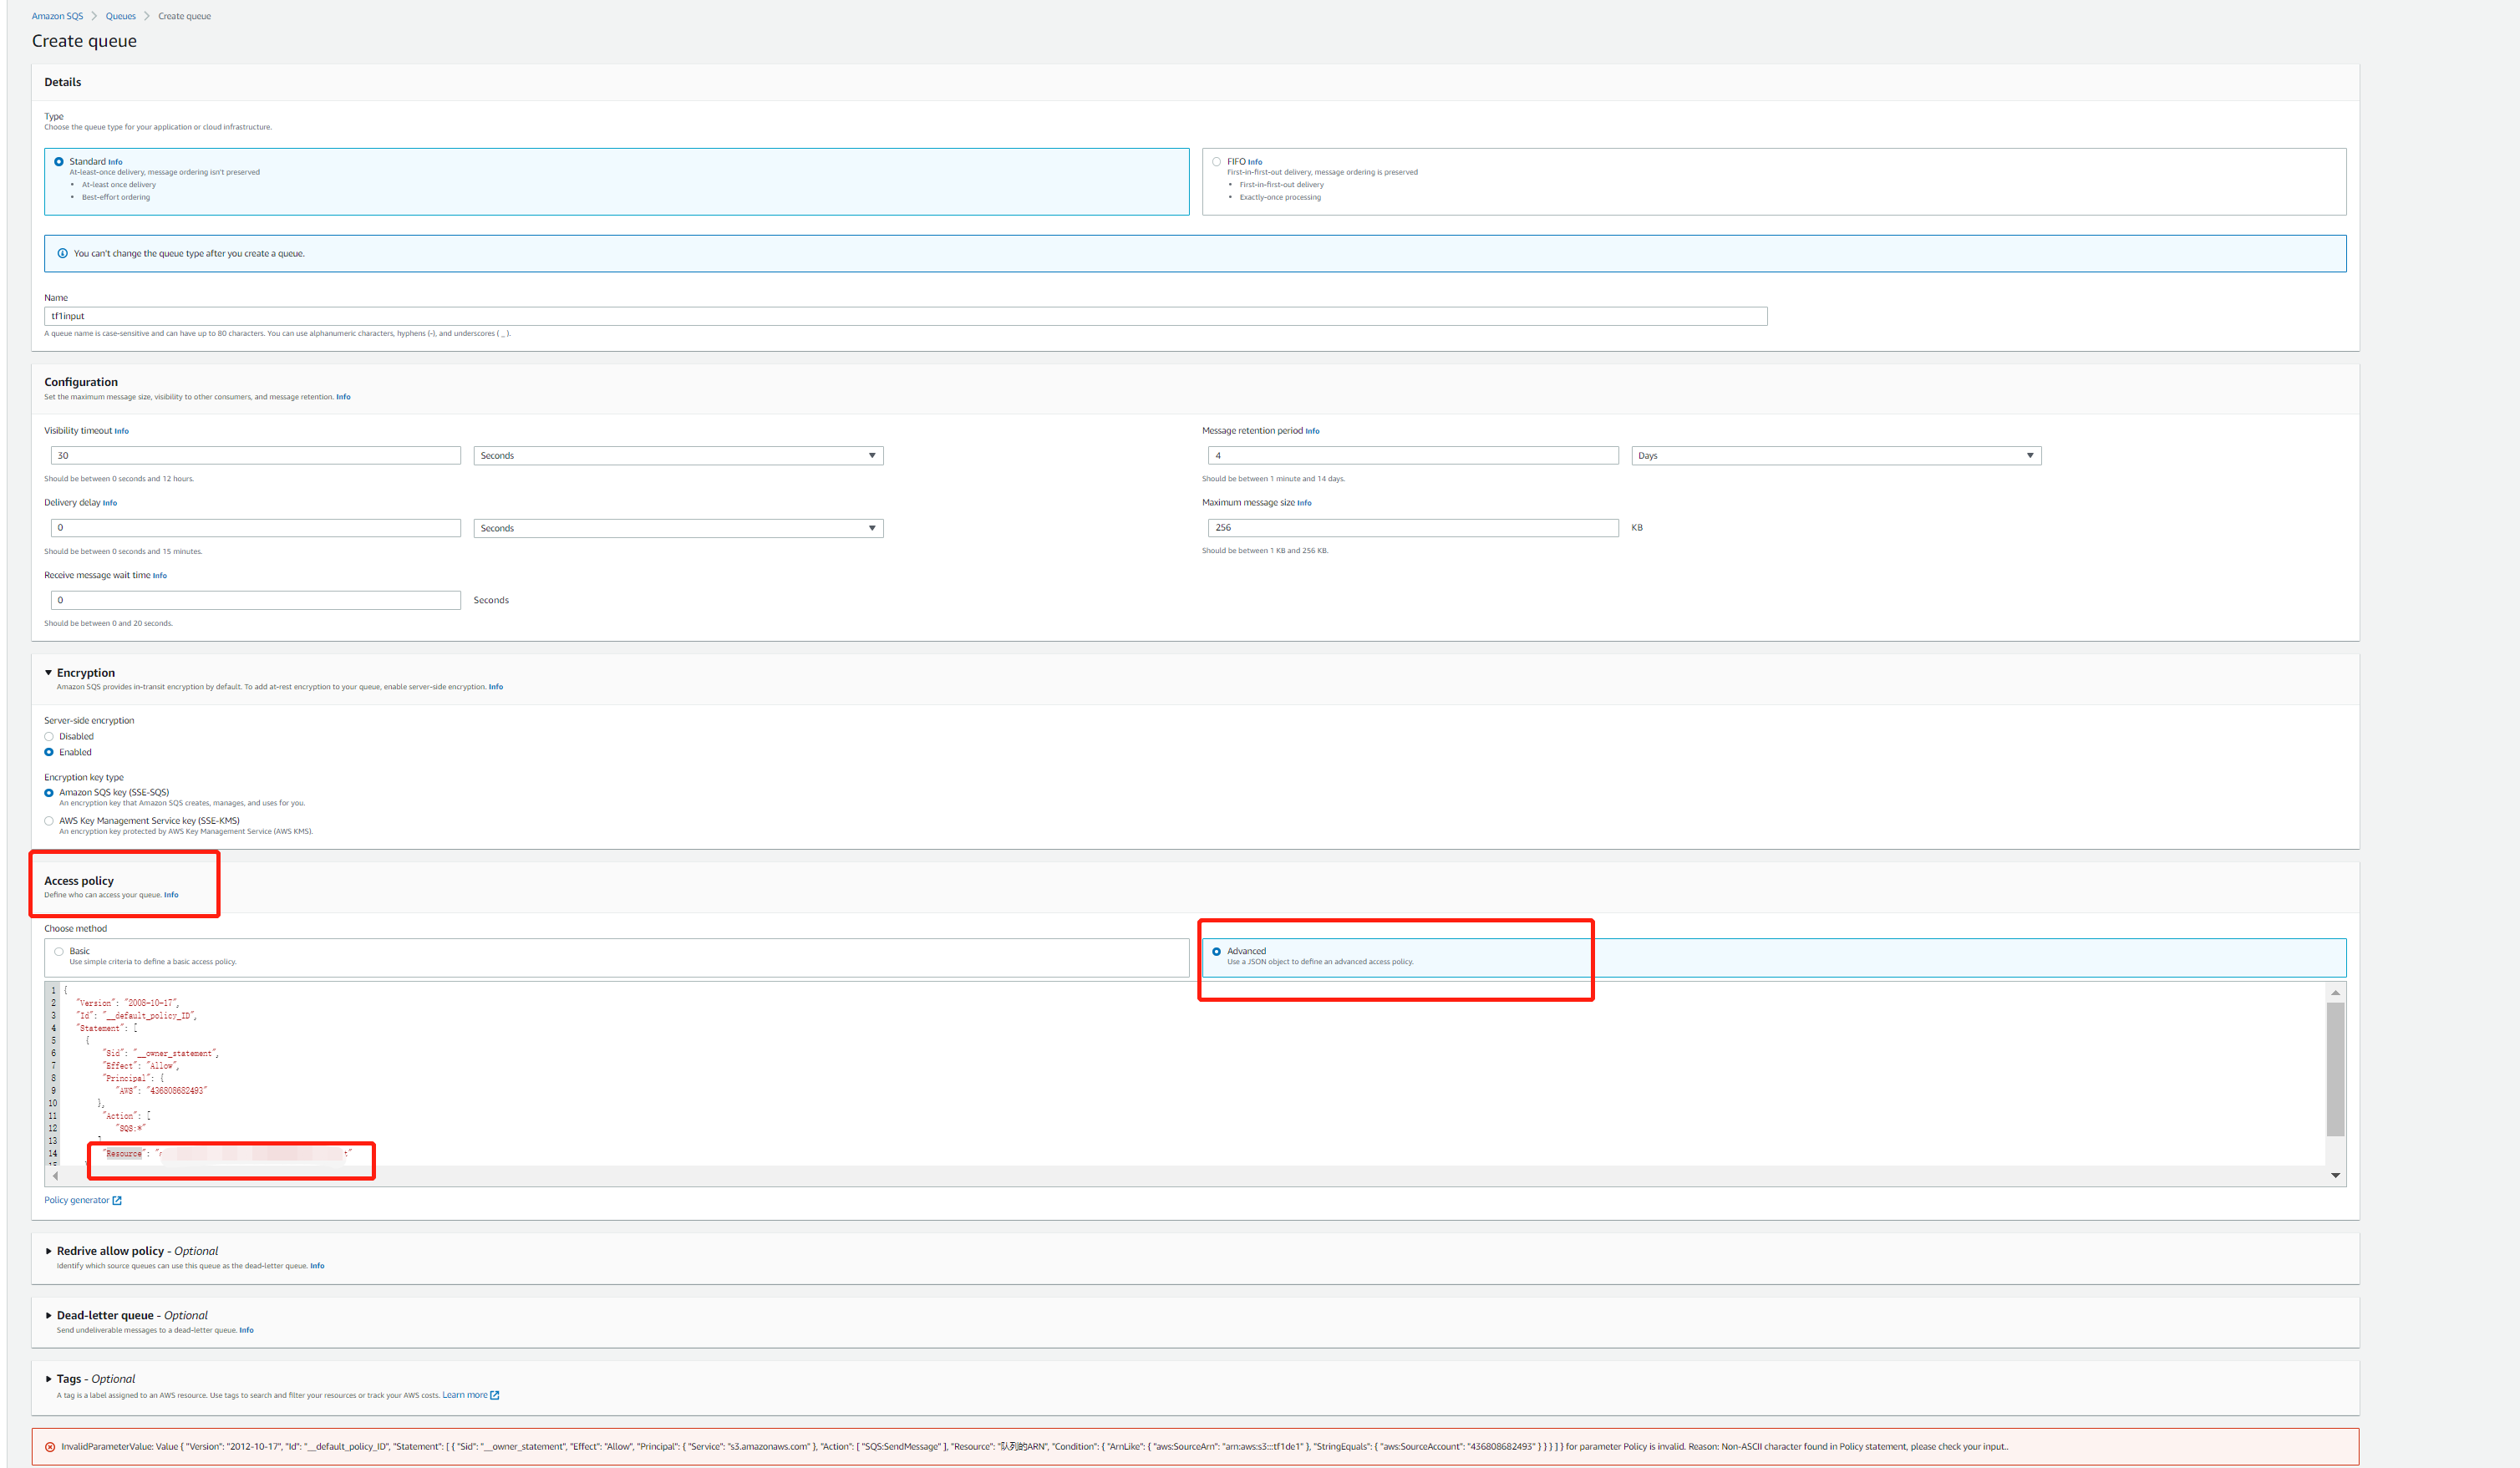
2. Enter a queue name.
3. Disable encryption.
4. Modify the access policy.
Select Advanced, enter your SQS ARN, S3 bucket ARN, and account ID at the specified locations below (for how to get the information, refer to the end of this document), and paste it under the access policy tab in the AWS console.
{
"Version": "2012-10-17",
"Id": "__default_policy_ID",
"Statement": [
{
"Sid": "__owner_statement",
"Effect": "Allow",
"Principal": {
"Service": "s3.amazonaws.com"
},
"Action": [
"SQS:SendMessage"
],
"Resource": "Your SQS ARN",
"Condition": {
"ArnLike": {
"aws:SourceArn": "Your bucket ARN"
},
"StringEquals": {
"aws:SourceAccount": "Your account ID"
}
}
}
]
}
5. Click Create queue.
Step 3. Creating an SQS queue for transcoding callbacks
Note:
This is required only if you use AWS SQS callbacks.
1. Select the queue region.
Select Singapore.
Note:
The queue region must be the same as your bucket region.
2. Enter a queue name.
3. Disable encryption.
4. Click Create queue.
Step 4. Binding the input bucket with the SQS queue
1. Go to the input bucket details page.
Return to the Amazon S3 console. Find the bucket you created and click the bucket name to enter the details page.
2. Bind the bucket with the SQS queue.
2.1 Select Properties.
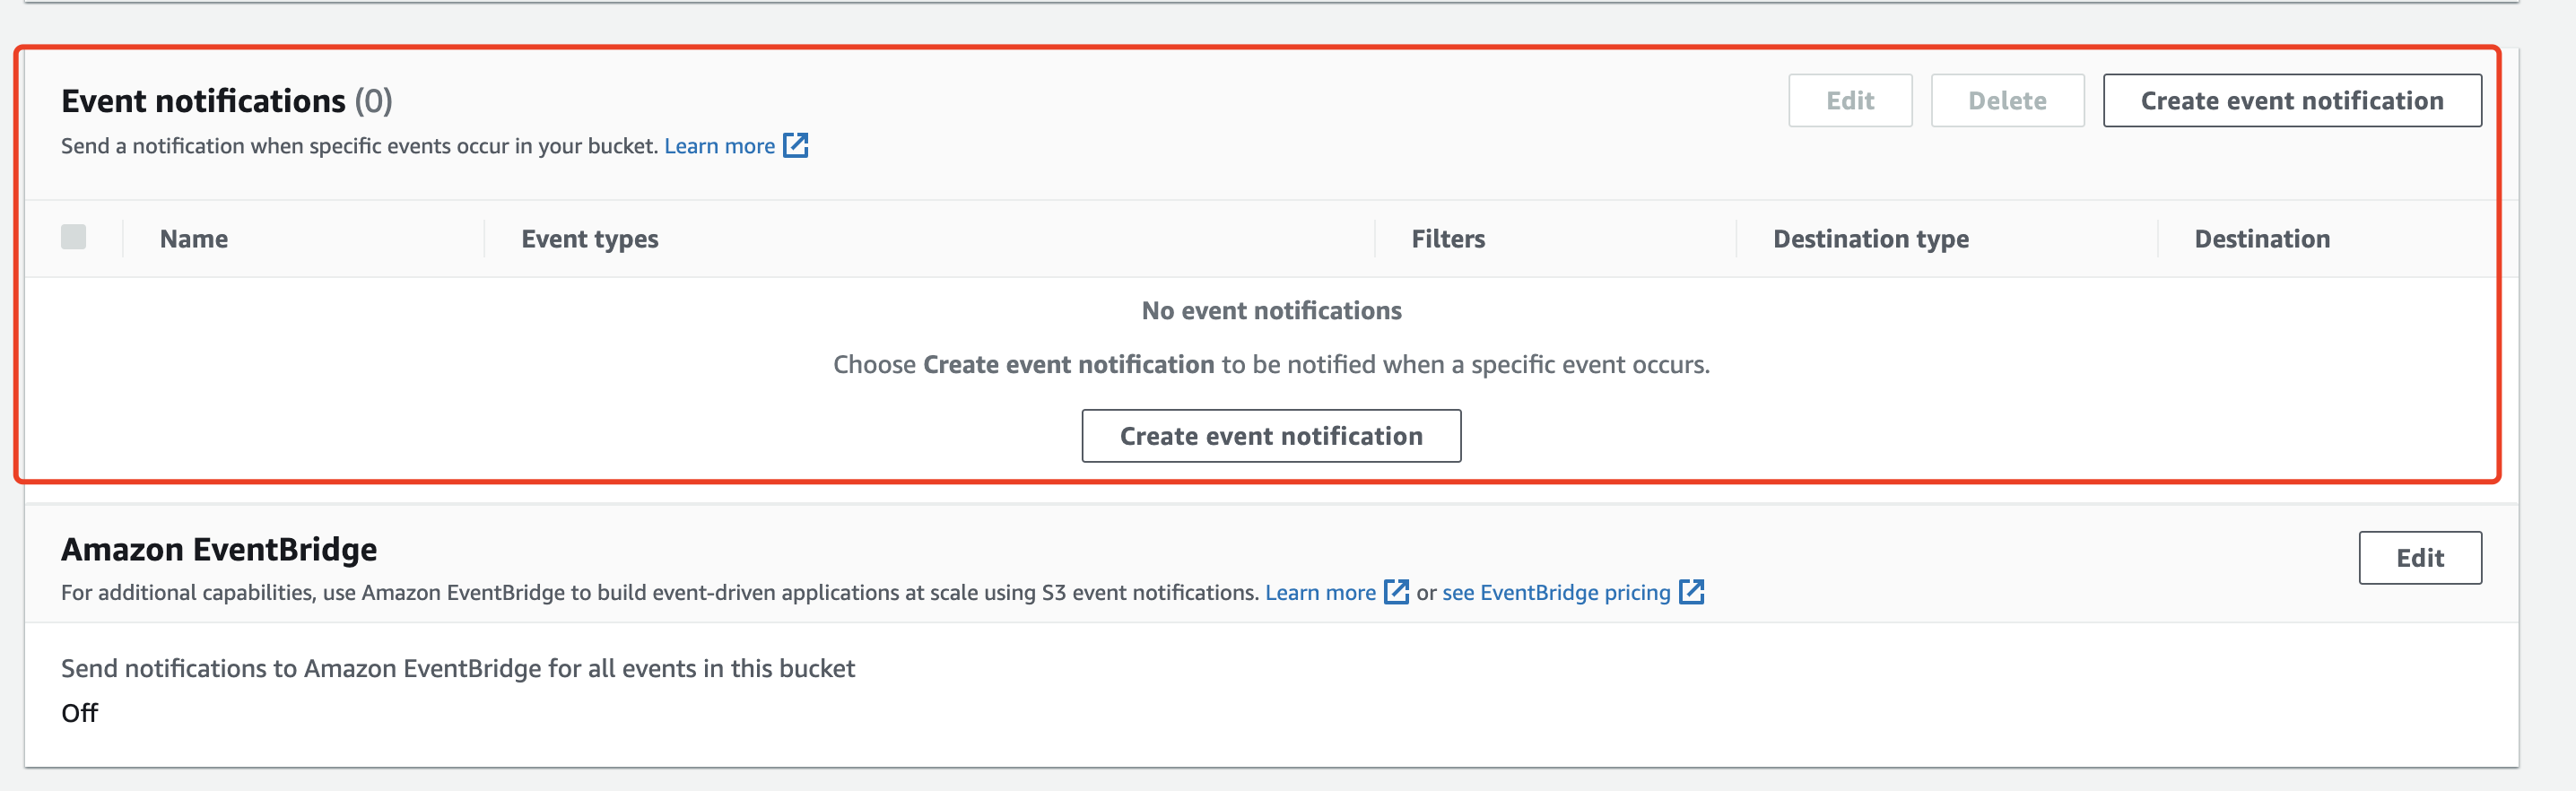
2.2 Scroll down until you find Event notifications. Click Create event notification.
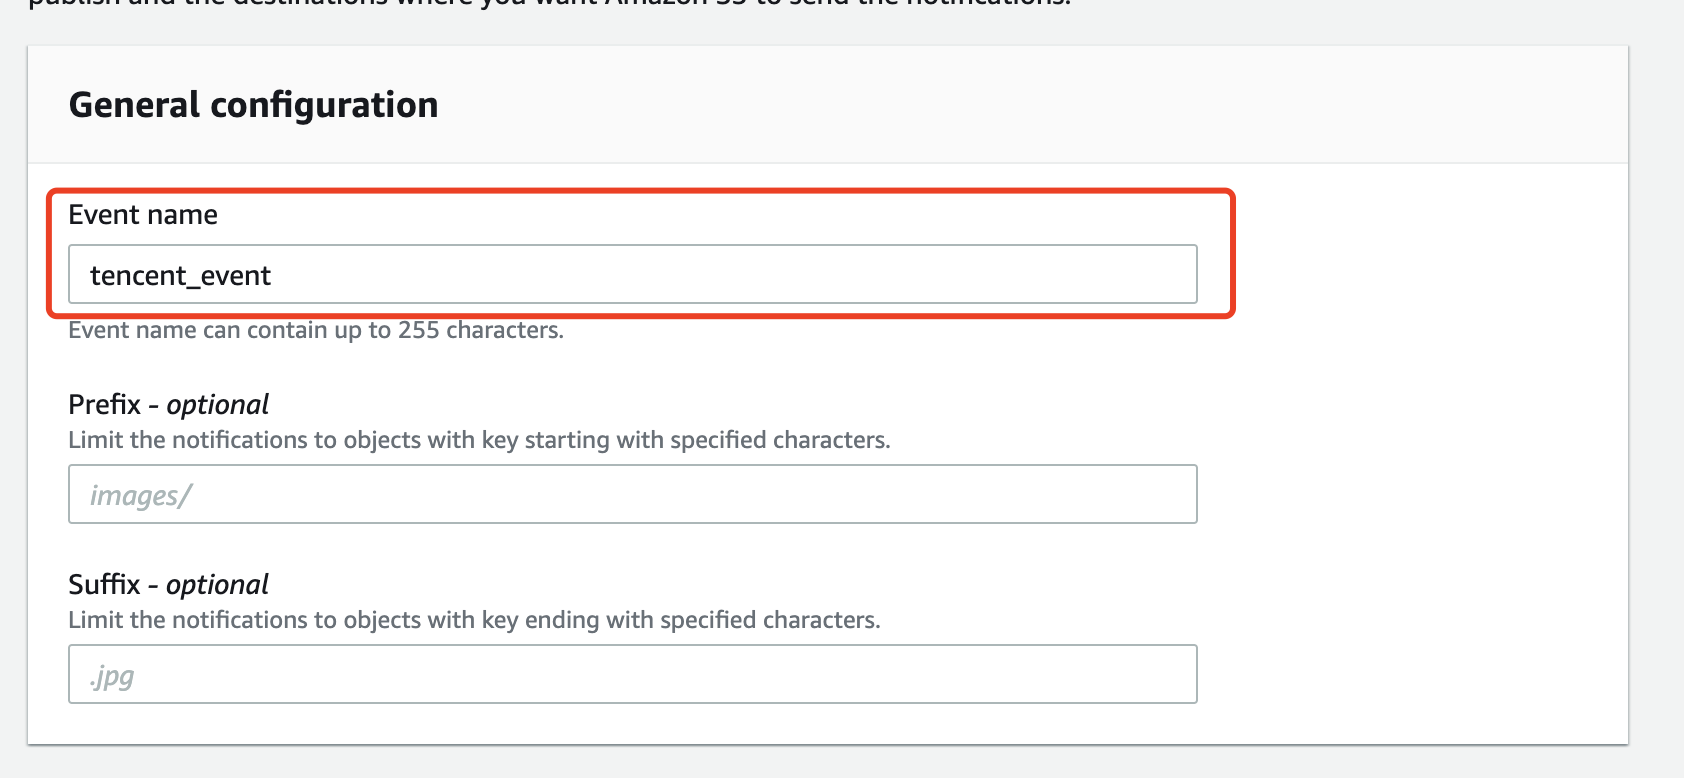
2.3 Enter an event name.
2.4 Select All object create events in Event types.
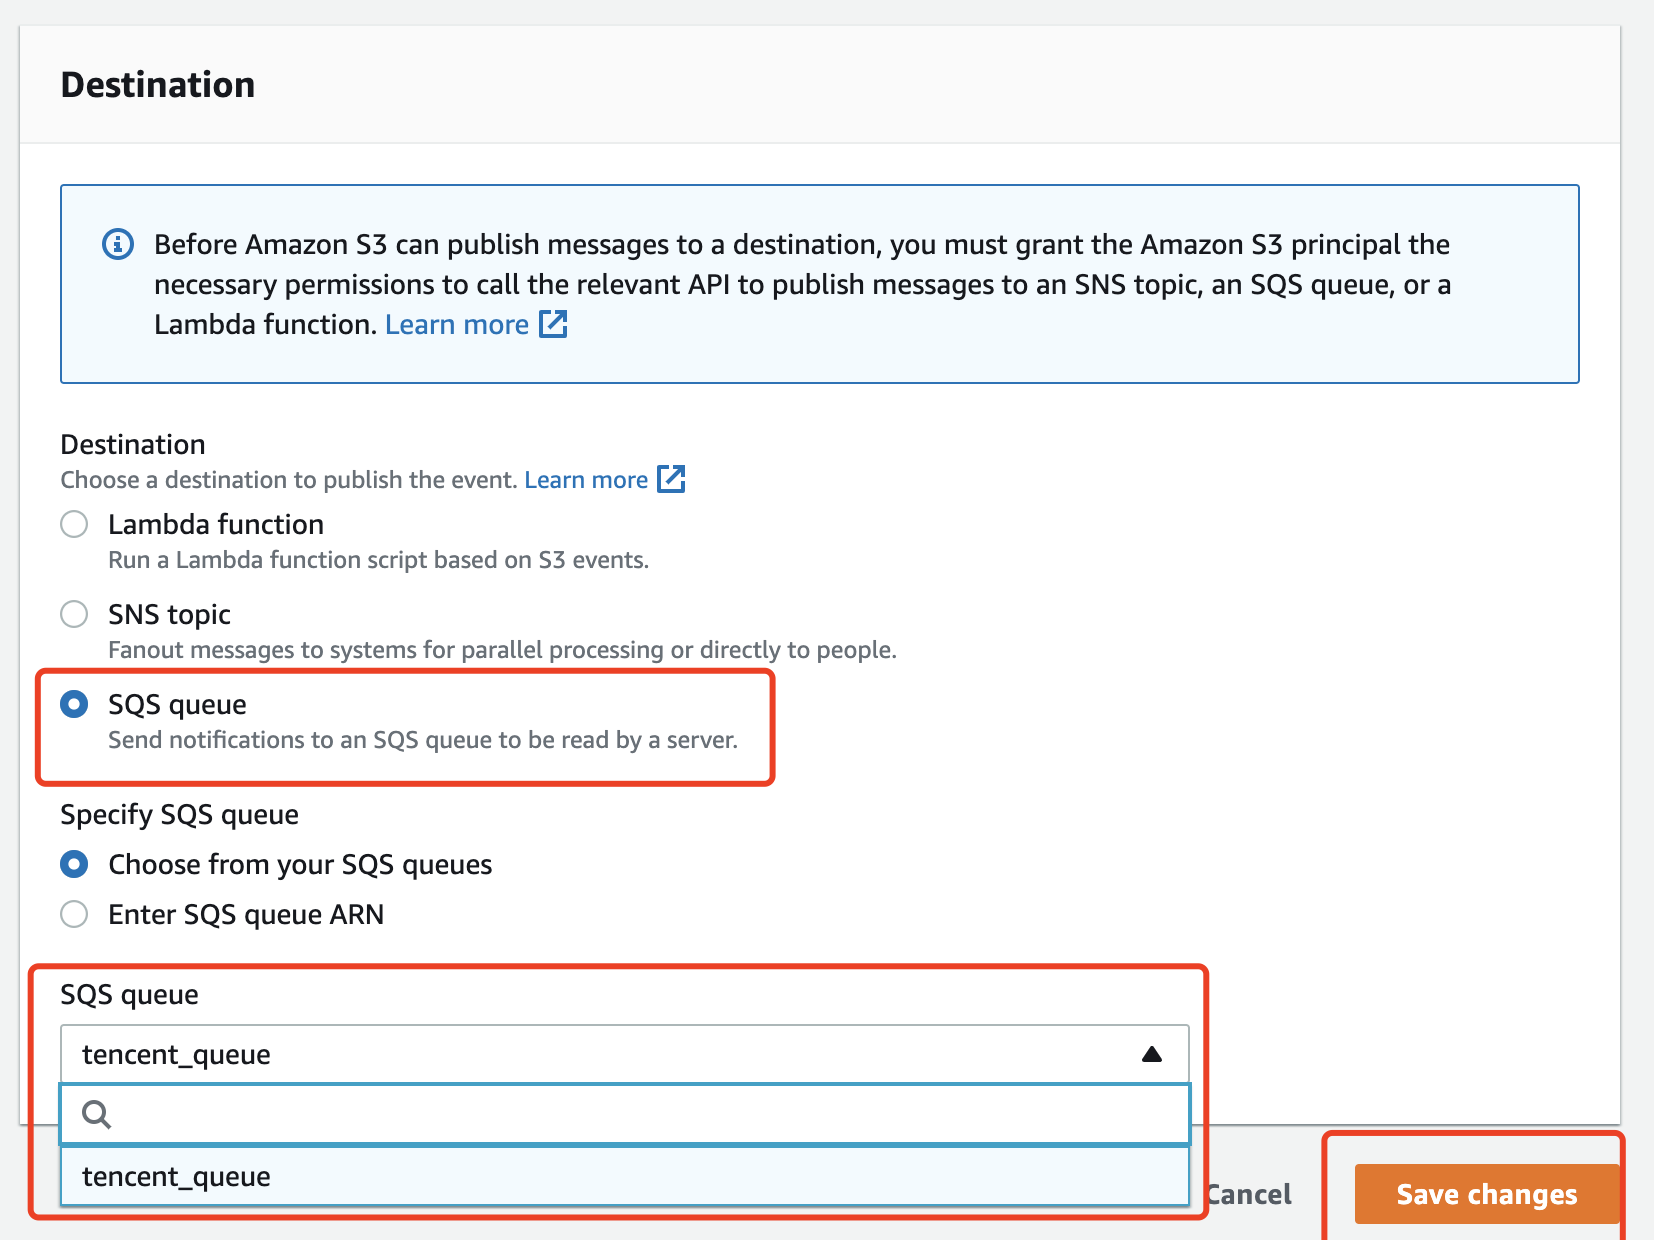
2.5 For Destination, select SQS queue, and select the queue you created for receiving bucket notifications. Click Save changes.
2.6 Check if your SQS queue have available messages. If Messages available has turned from 0 to 1, the binding is successful.
Step 5. Creating an IAM user and grant it permissions
5.1 Create a policy.
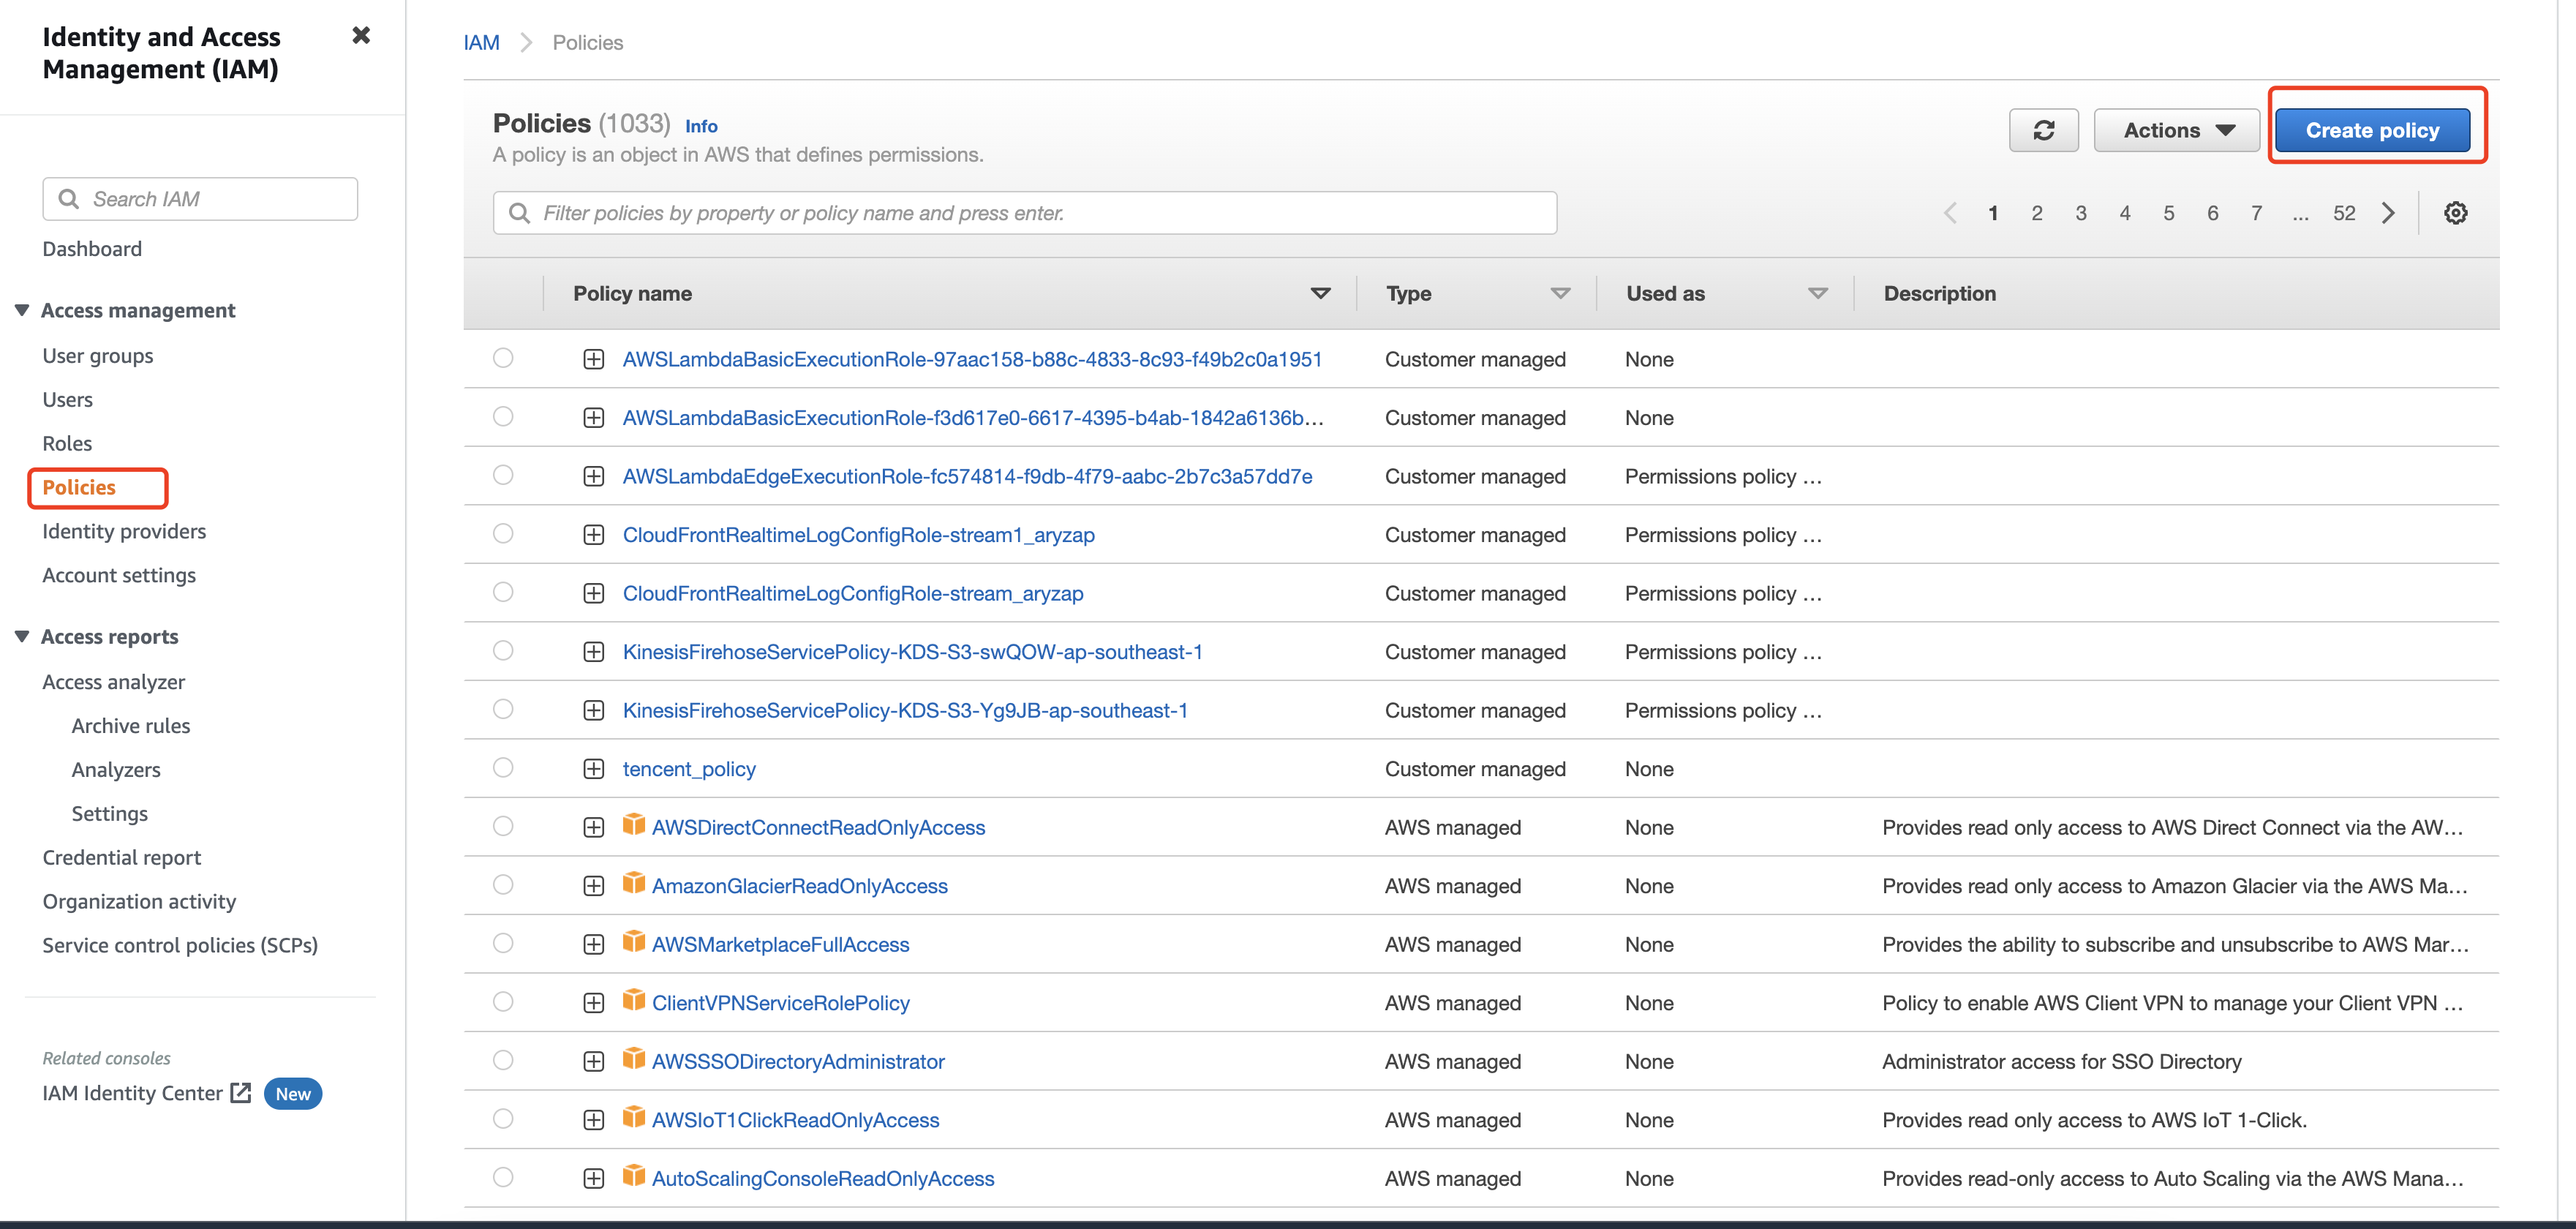
1. Go to Identity and Access Management, click Policies, and then click Create policy.
2. Choose the JSON tab, enter your SQS ARN and bucket ARN in the JSON policy below, paste it under the JSON tab, and click Next (twice).
Policy for Amazon SQS callbacks
Policy for HTTP callbacks
{
"Version": "2012-10-17",
"Statement": [
{
"Sid": "VisualEditor0",
"Effect": "Allow",
"Action": [
"sqs:DeleteMessage",
"s3:GetObject",
"sqs:GetQueueUrl",
"sqs:ReceiveMessage",
"s3:GetObjectAttributes",
"sqs:GetQueueAttributes",
"sqs:ListQueueTags"
],
"Resource": [
"The ARN of the SQS queue for bucket notifications",
"The input bucket ARN + /*"
]
},
{
"Sid": "VisualEditor1",
"Effect": "Allow",
"Action": [
"s3:PutObject",
"sqs:GetQueueUrl",
"sqs:SendMessage"
],
"Resource": [
"The ARN of the SQS queue for transcoding callbacks",
"The output bucket ARN + /*"
]
}
]
}
{
"Version": "2012-10-17",
"Statement": [
{
"Sid": "VisualEditor0",
"Effect": "Allow",
"Action": [
"sqs:DeleteMessage",
"s3:GetObject",
"sqs:GetQueueUrl",
"sqs:ReceiveMessage",
"s3:GetObjectAttributes",
"sqs:GetQueueAttributes",
"sqs:ListQueueTags"
],
"Resource": [
"The ARN of the SQS queue for bucket notifications",
"The input bucket ARN + /*"
]
},
{
"Sid": "VisualEditor1",
"Effect": "Allow",
"Action": [
"s3:PutObject"
],
"Resource": [
"The output bucket ARN + /*"
]
}
]
}
Note:
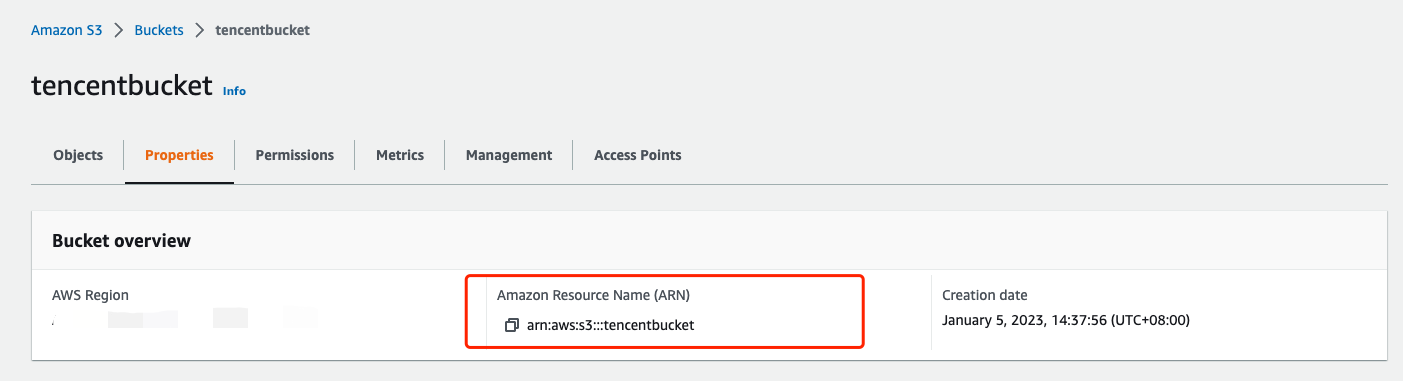
In Resources of the JSON document, make sure you attach /* to the bucket ARN. For example, if your bucket ARN is arn:aws:s3:::tencentbucket, enter arn:aws:s3:::tencentbucket/*.
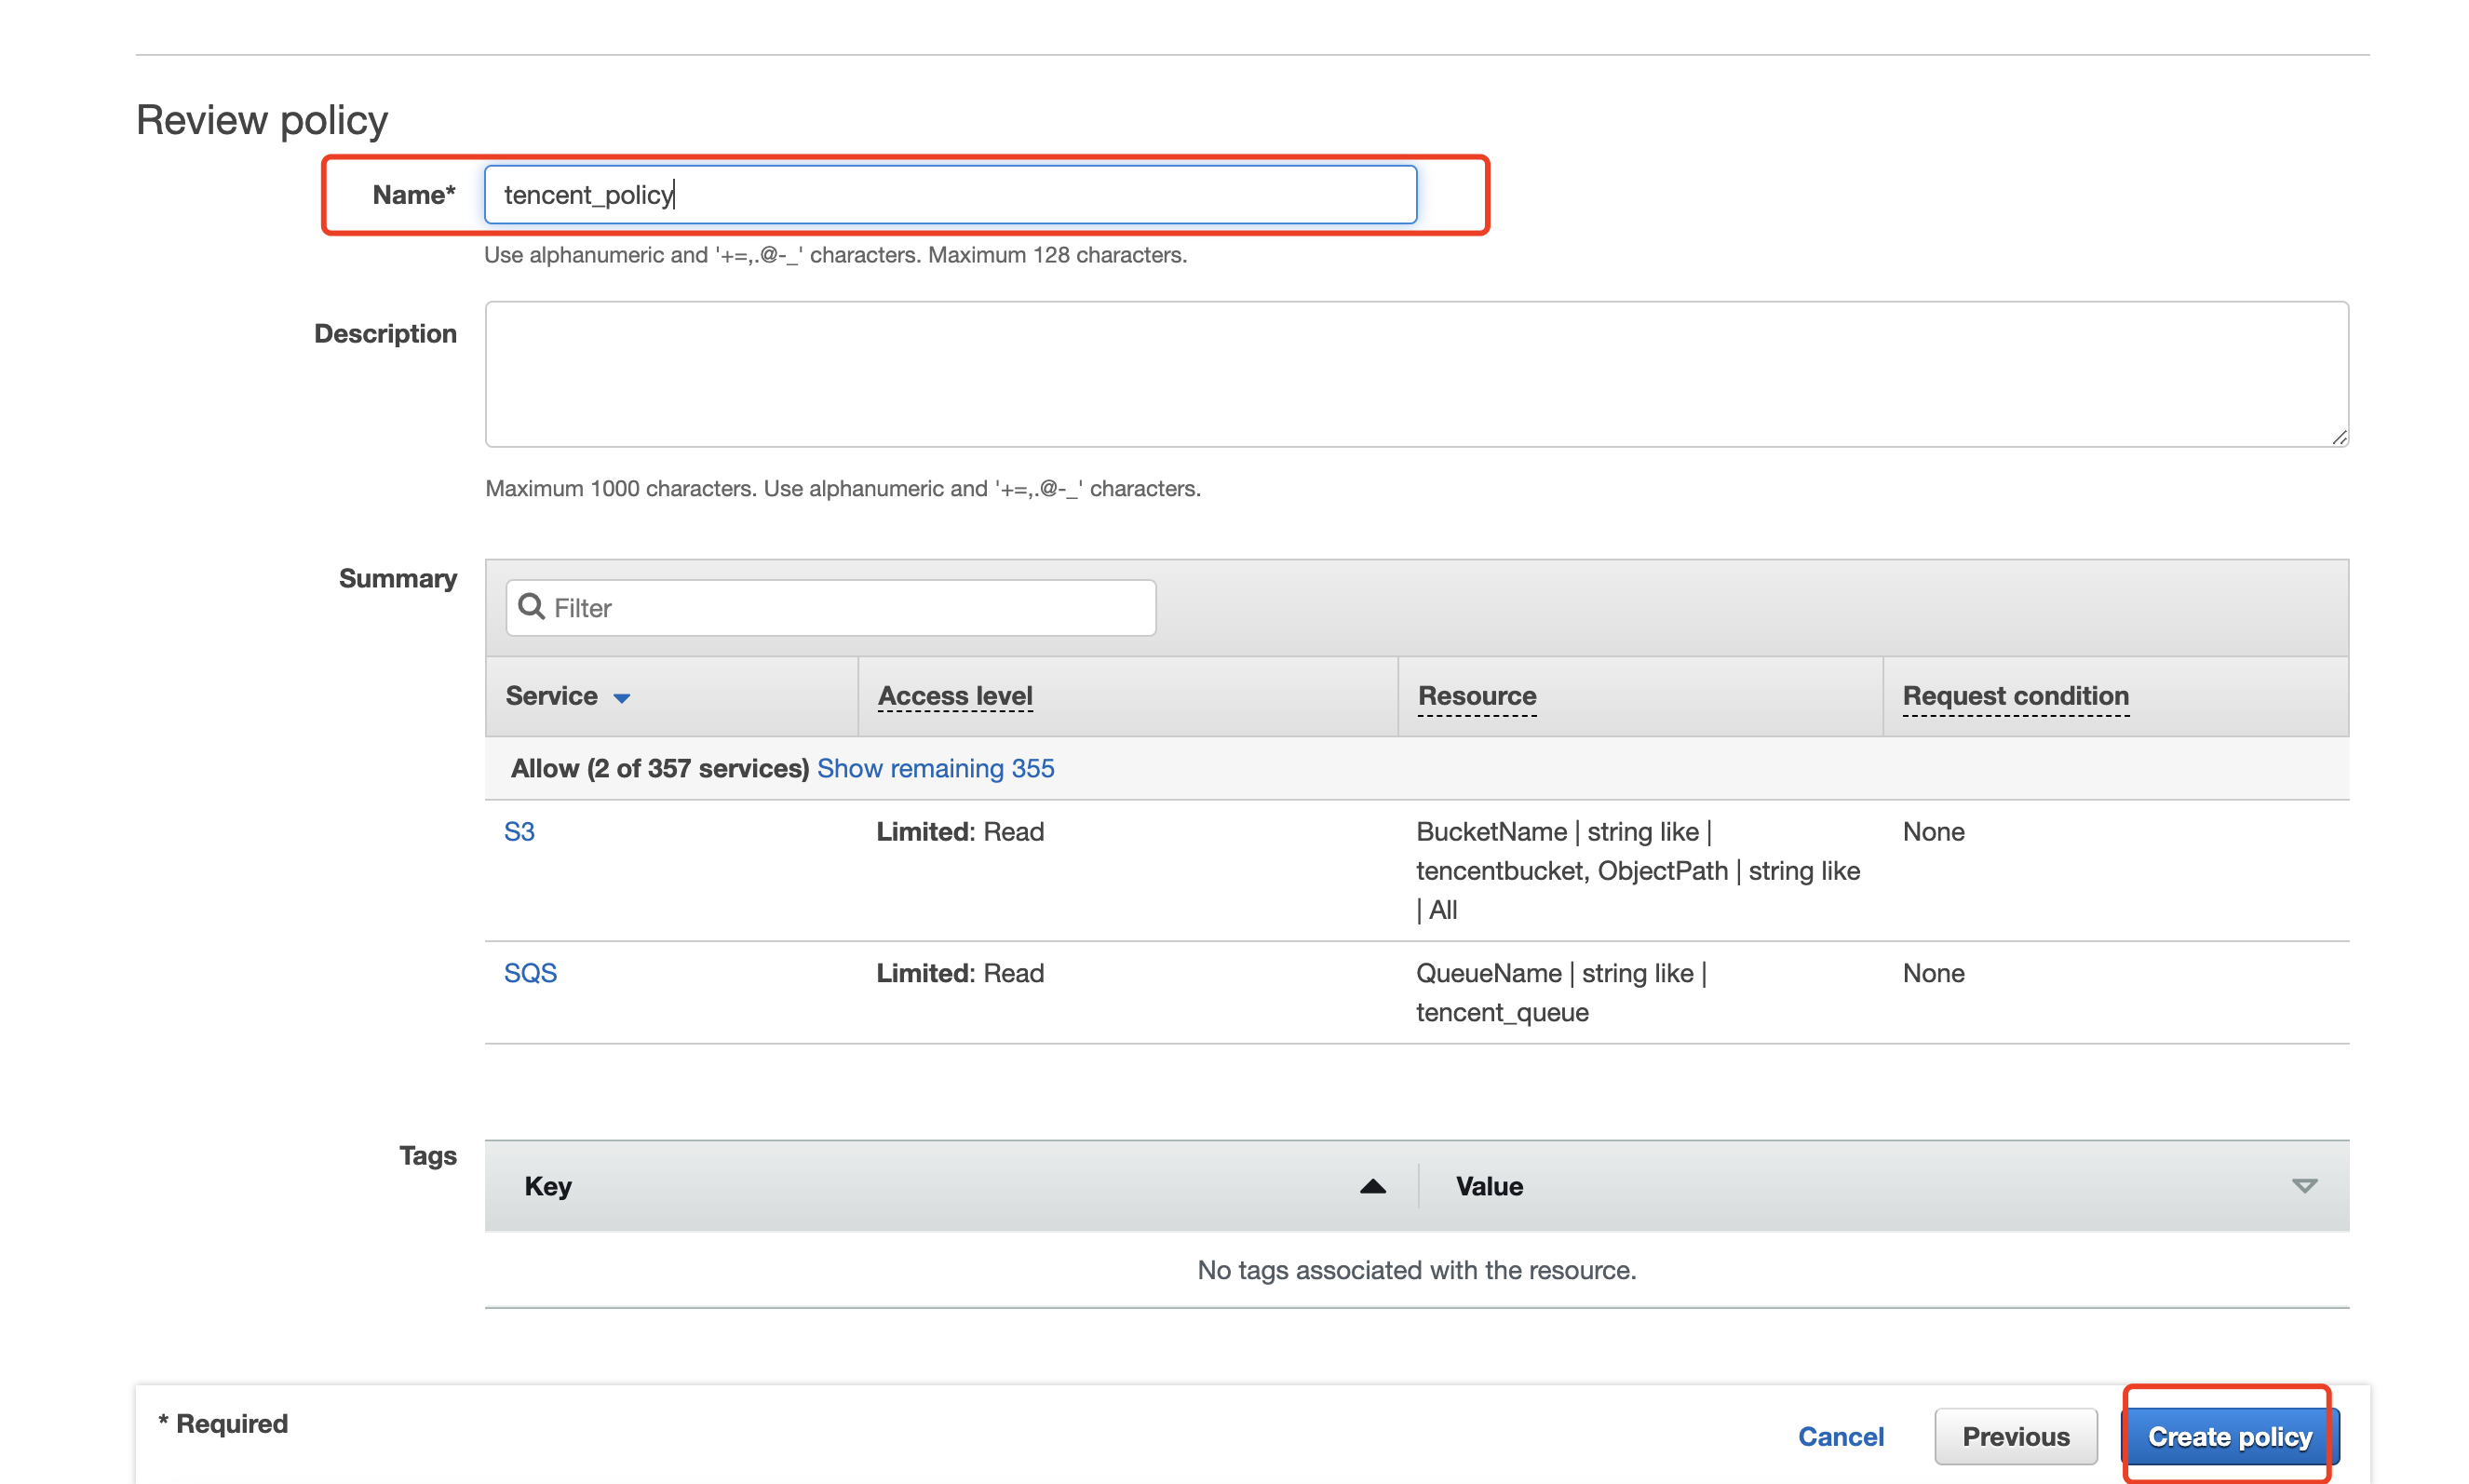
3. Enter a policy name and click Create policy.
5.2 Create an IAM user.
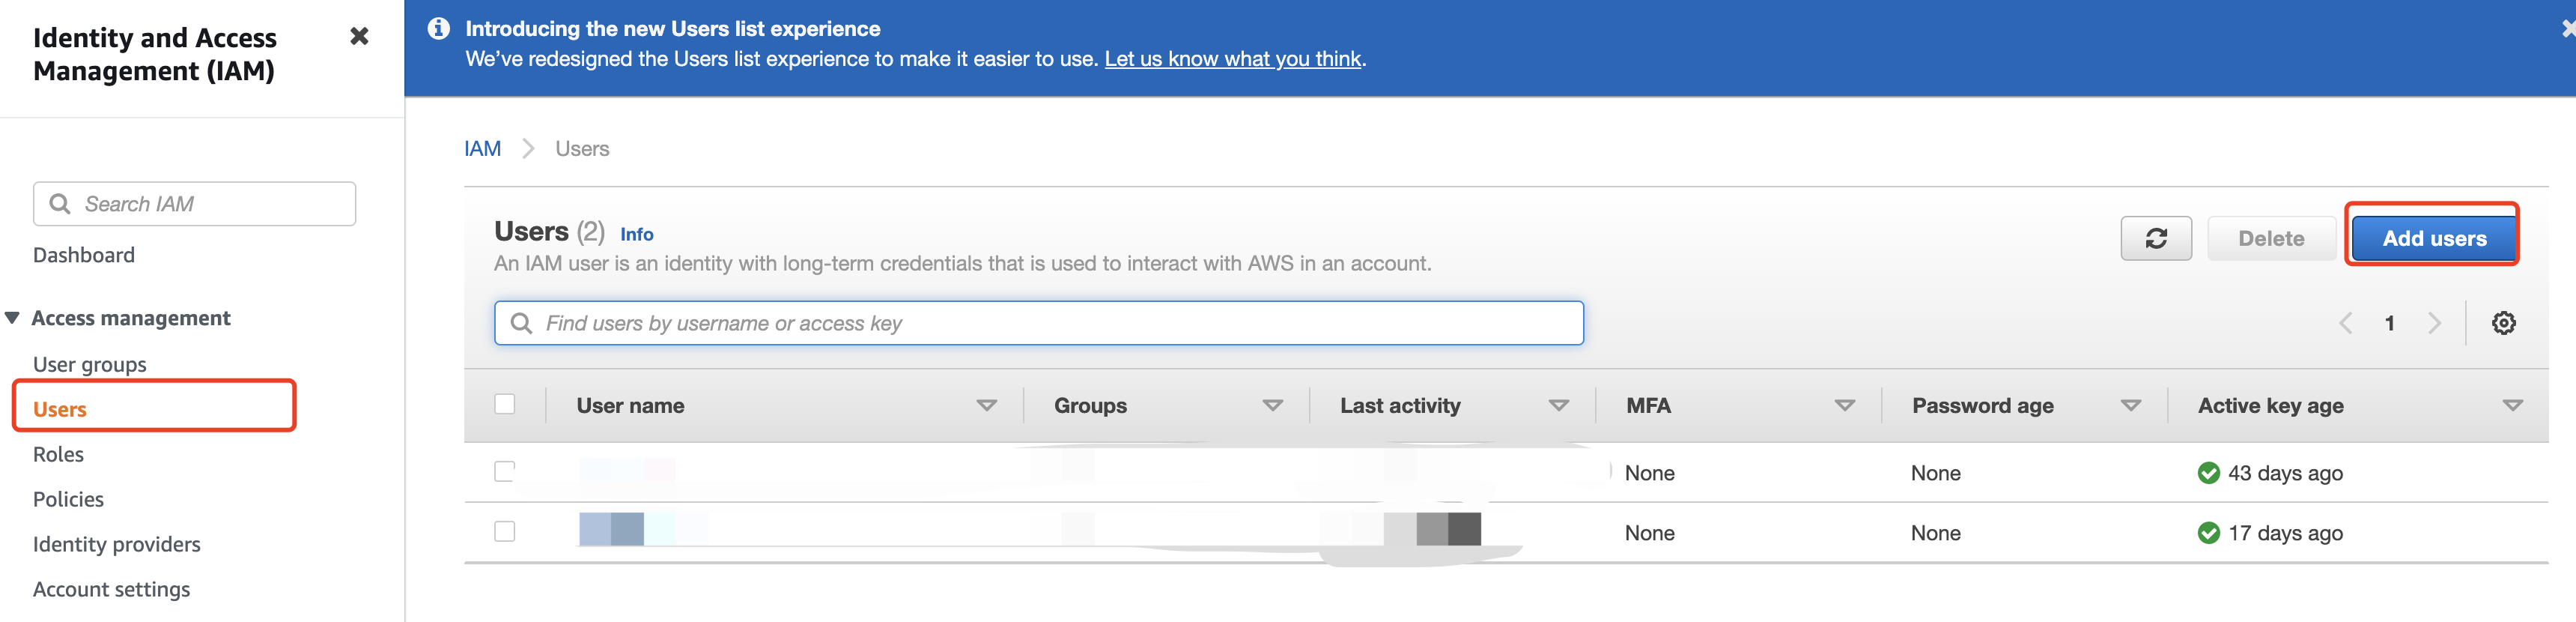
1. Go to the IAM page, click Users, and then click Add users.
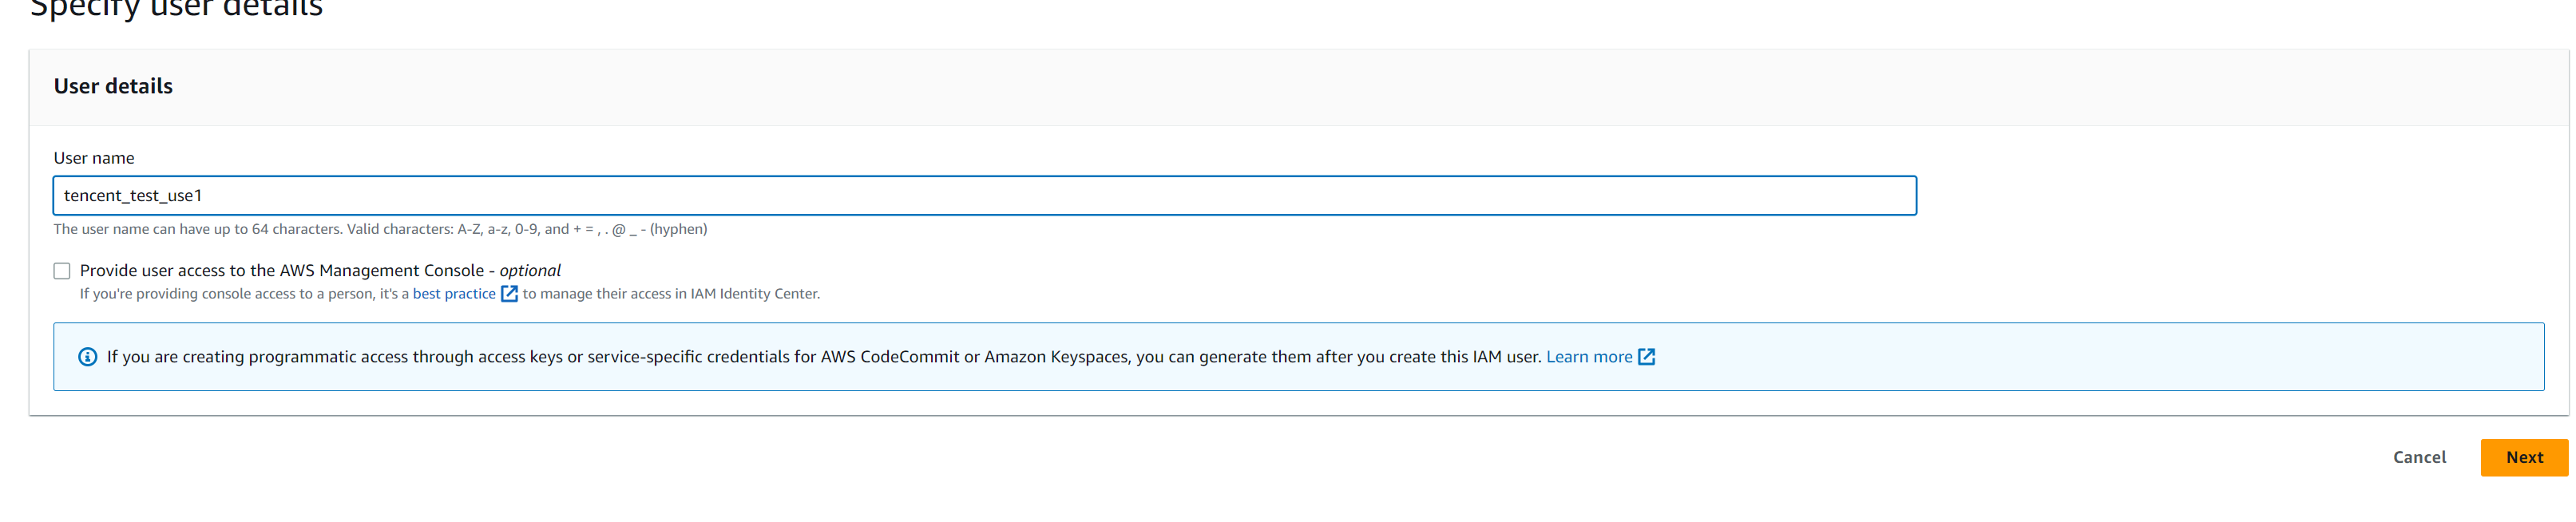
2. Enter a user name and click Next in the bottom right.
Click Attach existing policies directly, type in the search box the name of the policy you just created, and select the policy.
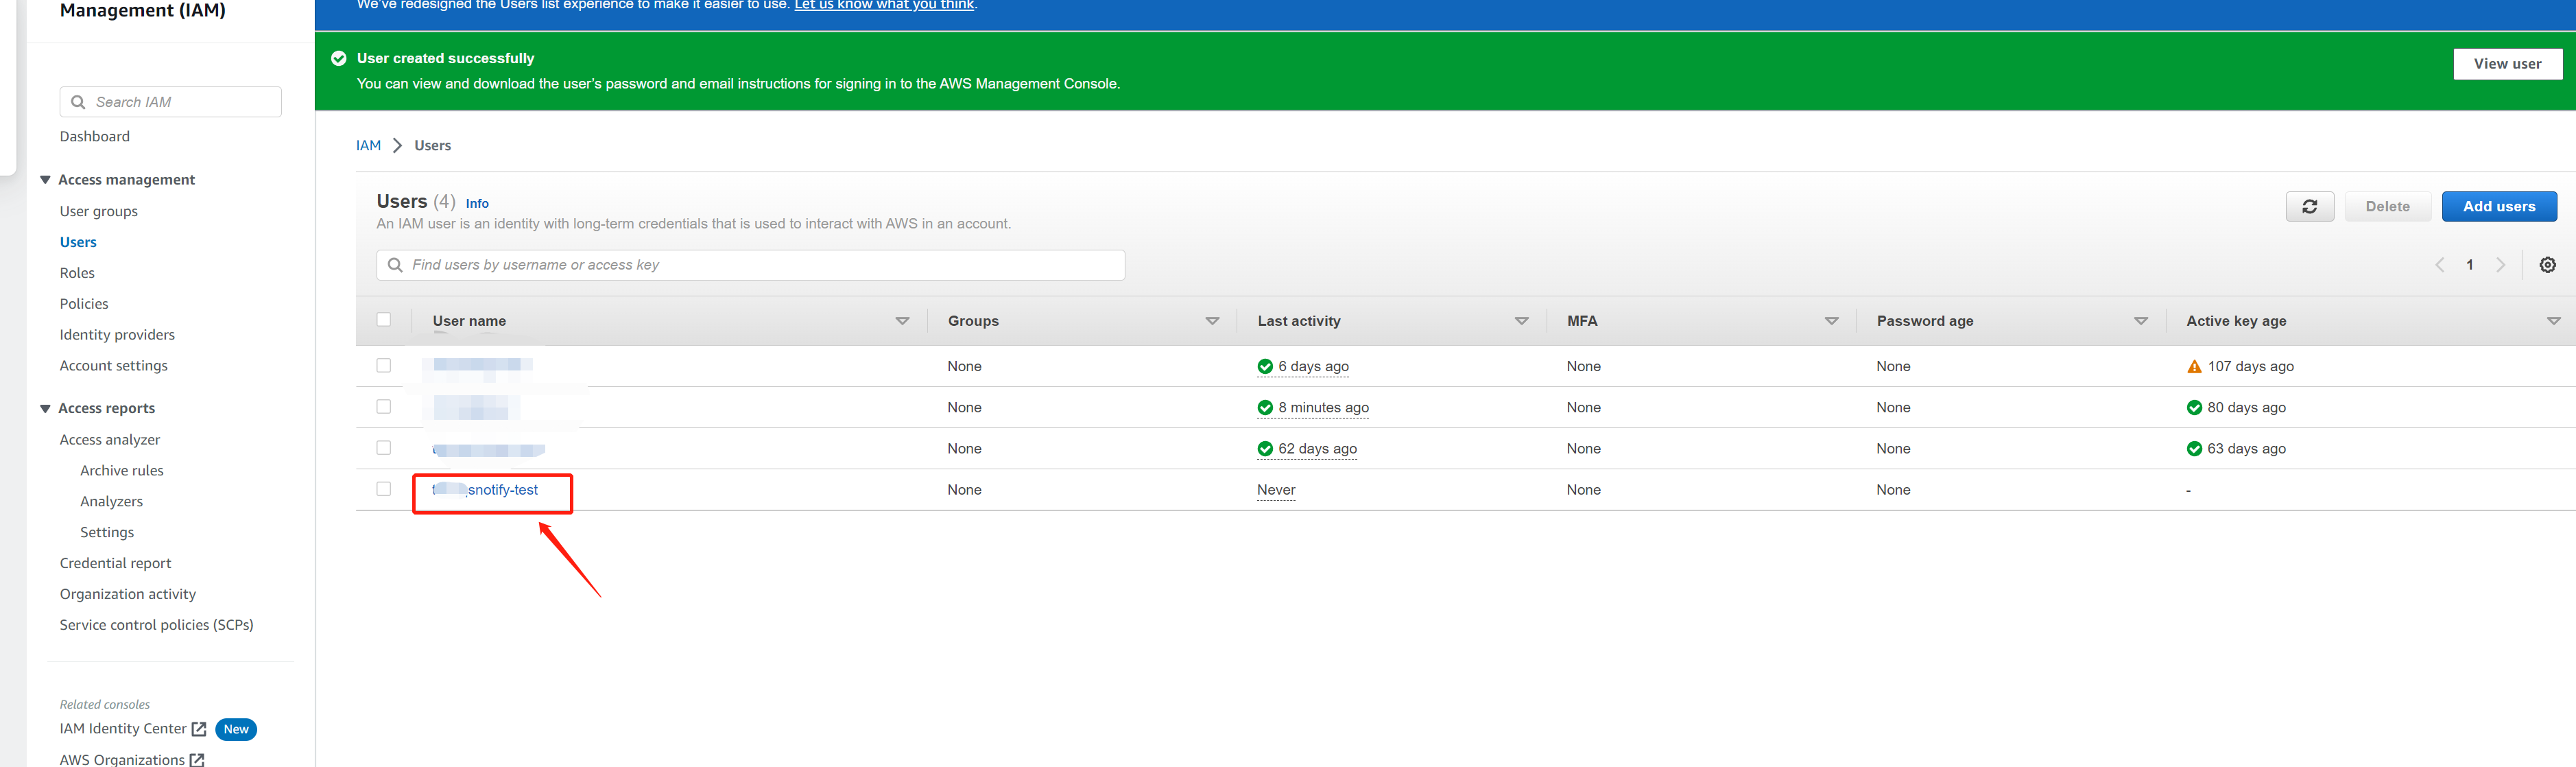
Click Next and then click Create user.
3. Click the name of the user you created.
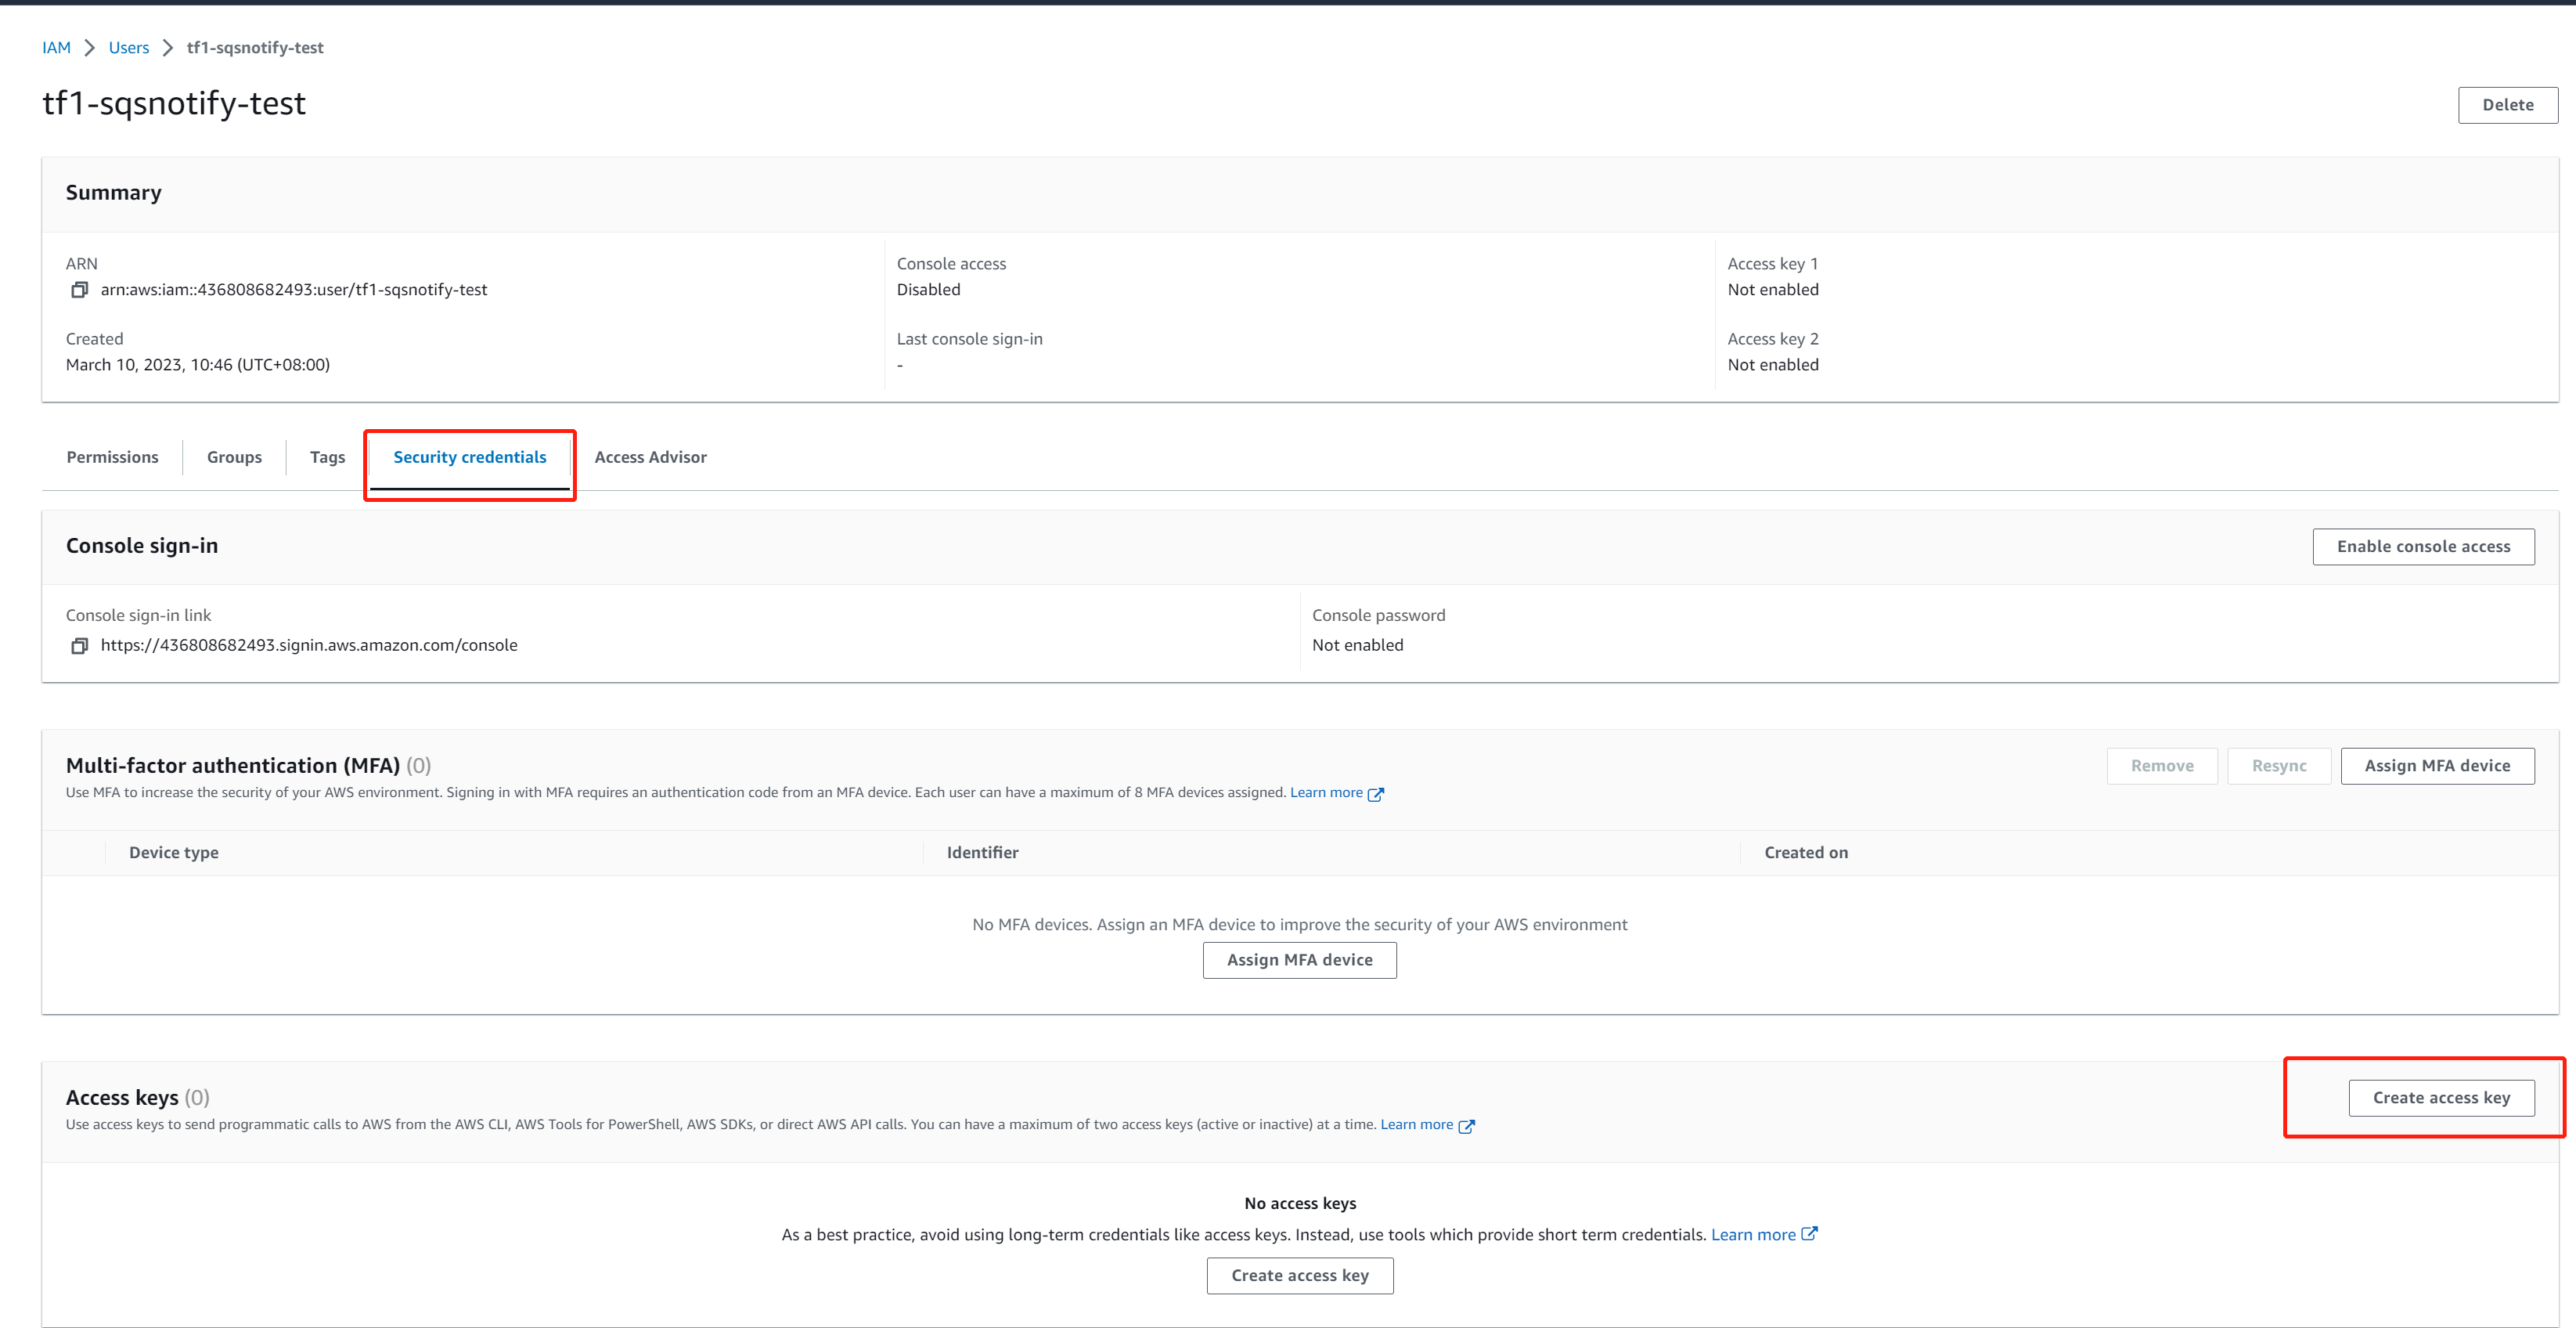
4. Click Security credentials > Access keys > Create access key.
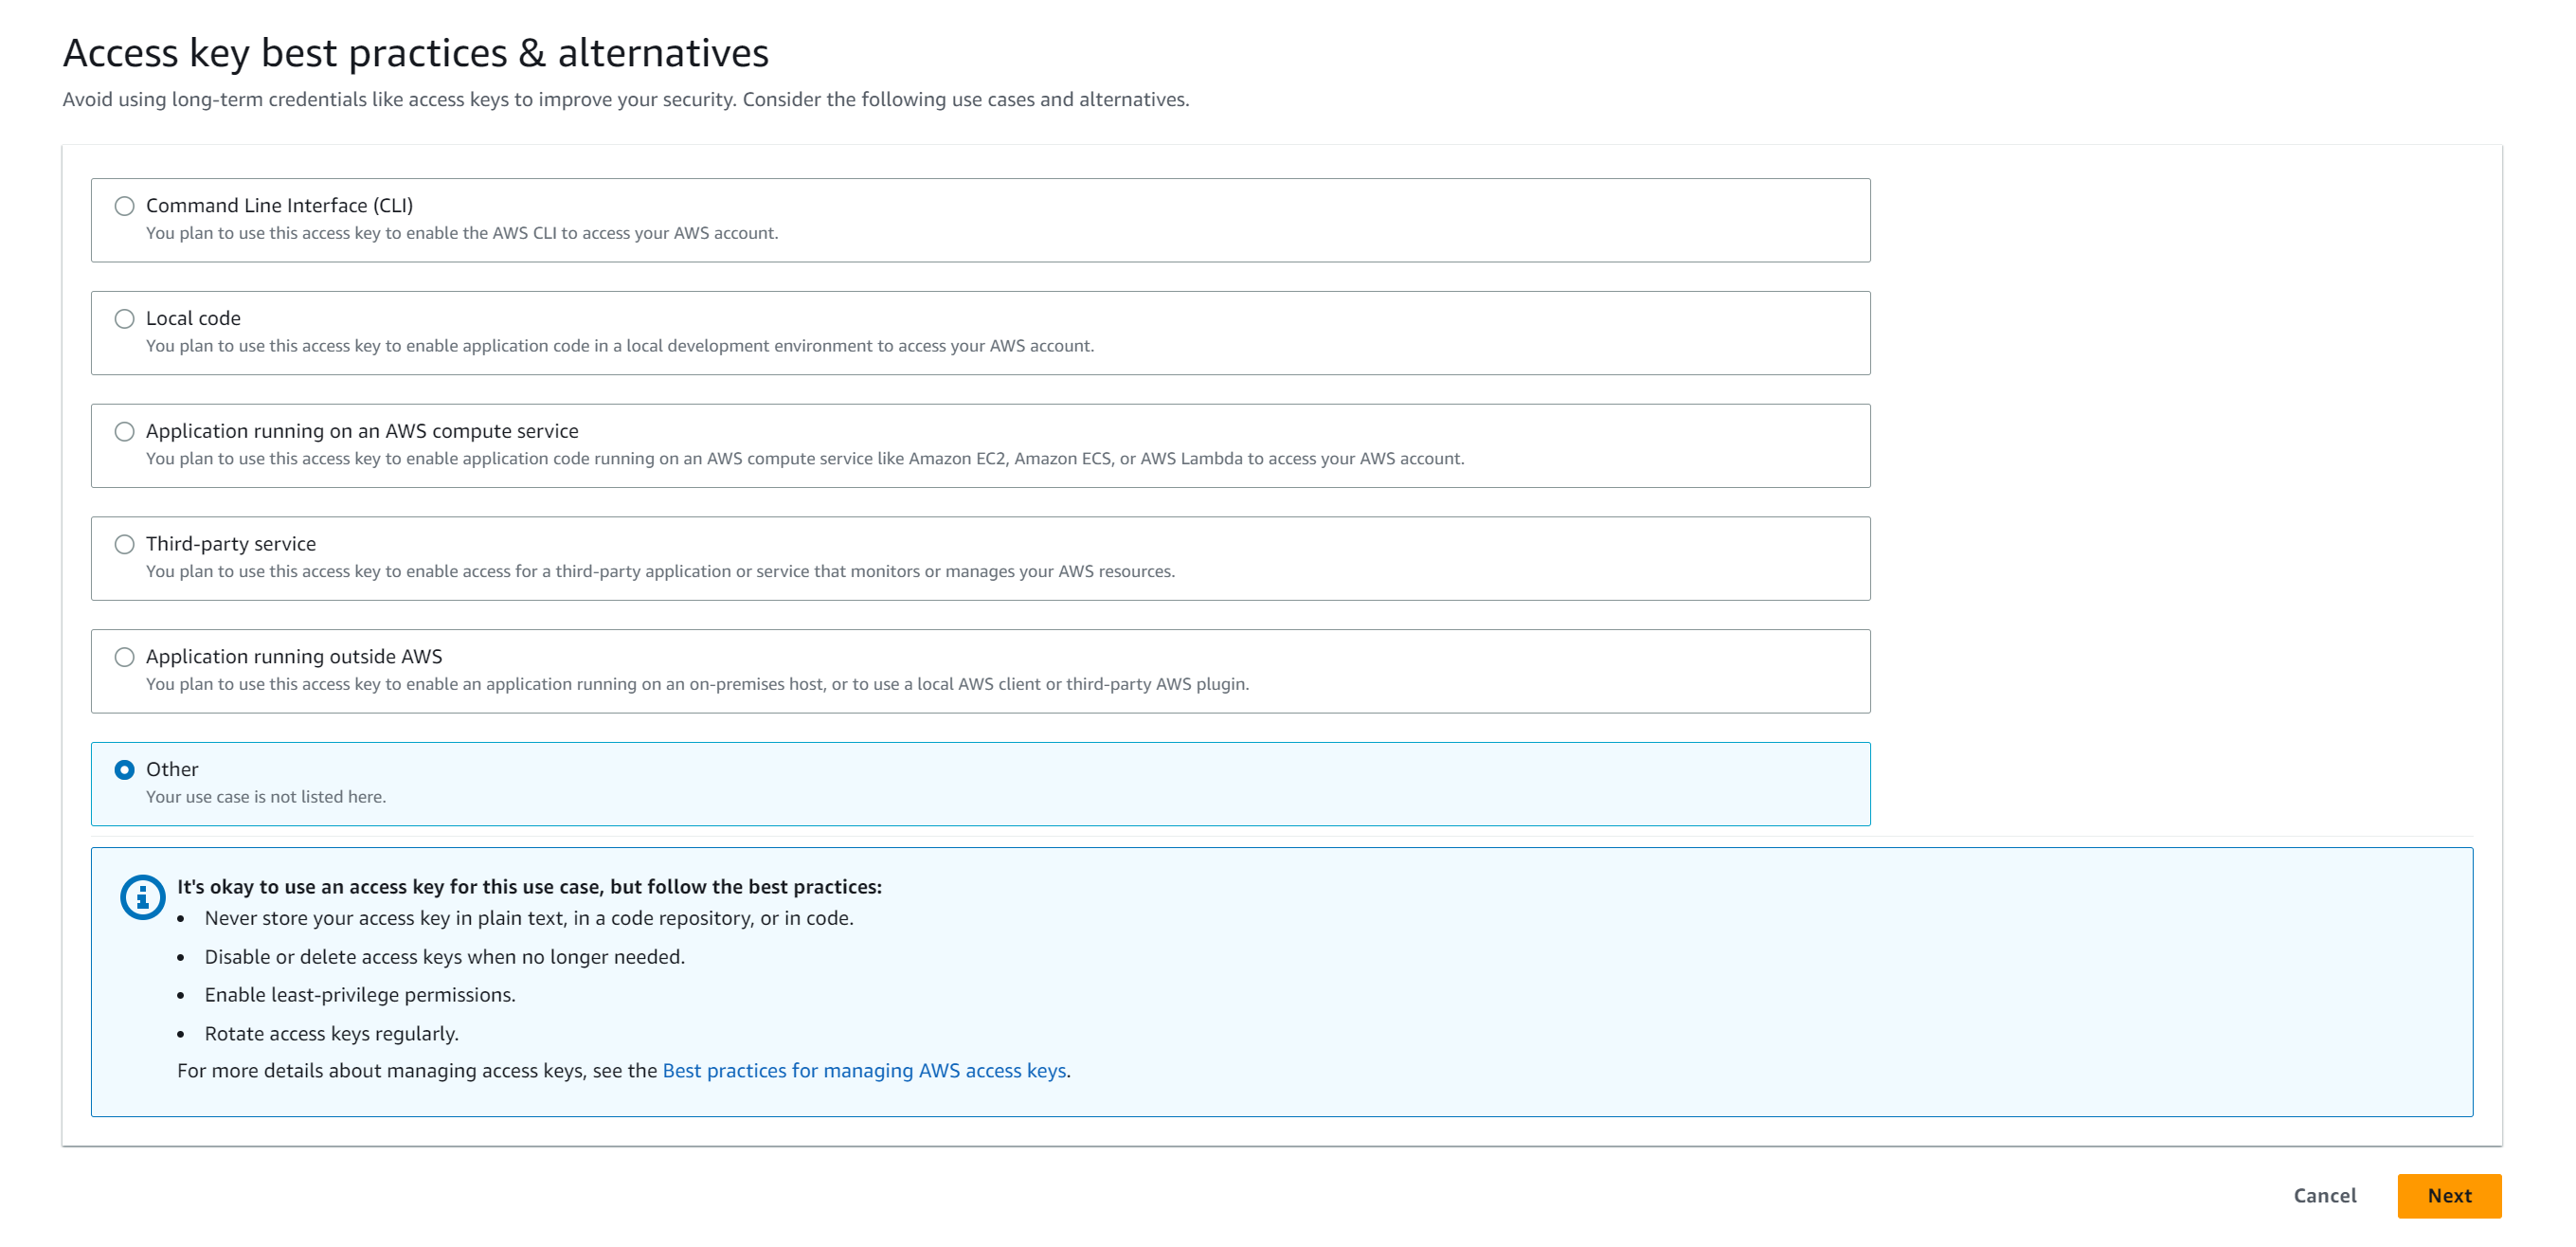
5. Select Other and click Next. Note the access key ID and secret access key.
Appendix
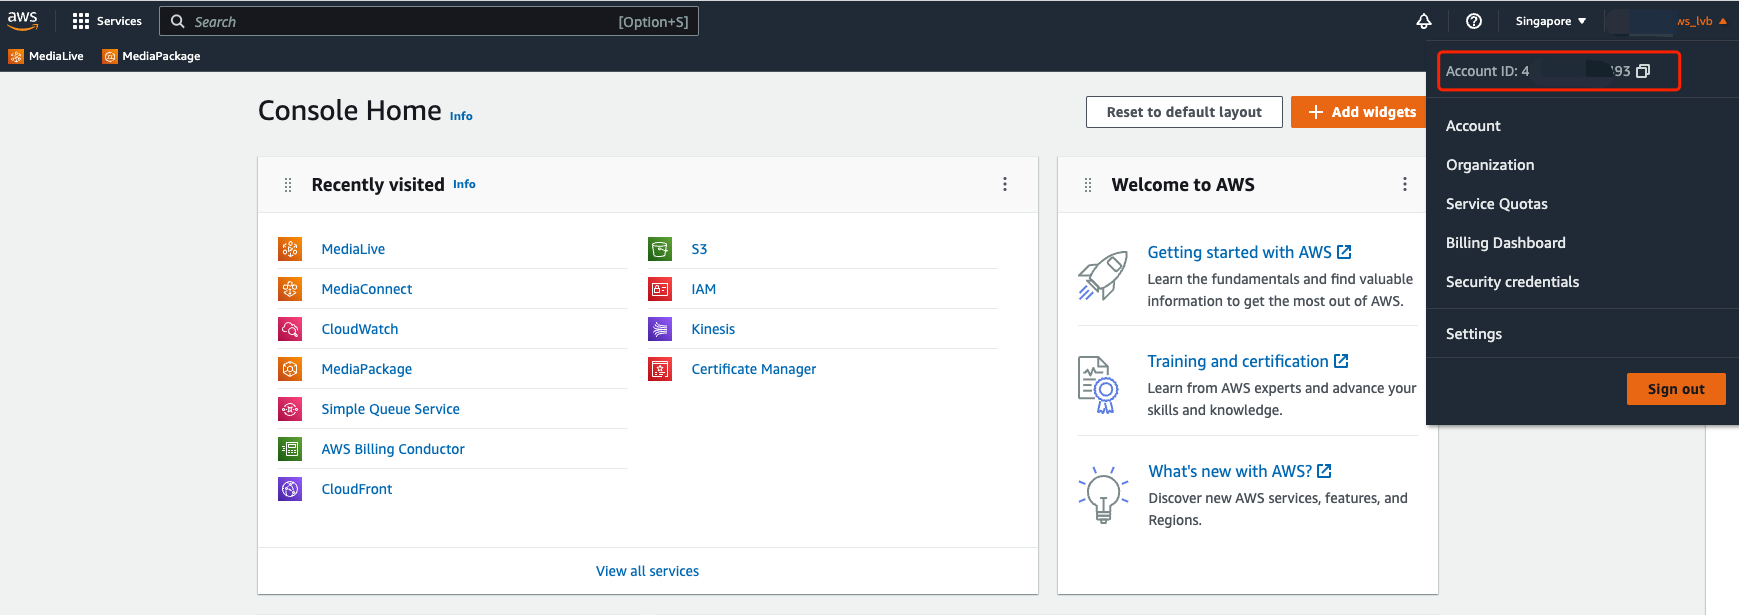
You can view your account ID by clicking your user name in the top right corner of the console home page.
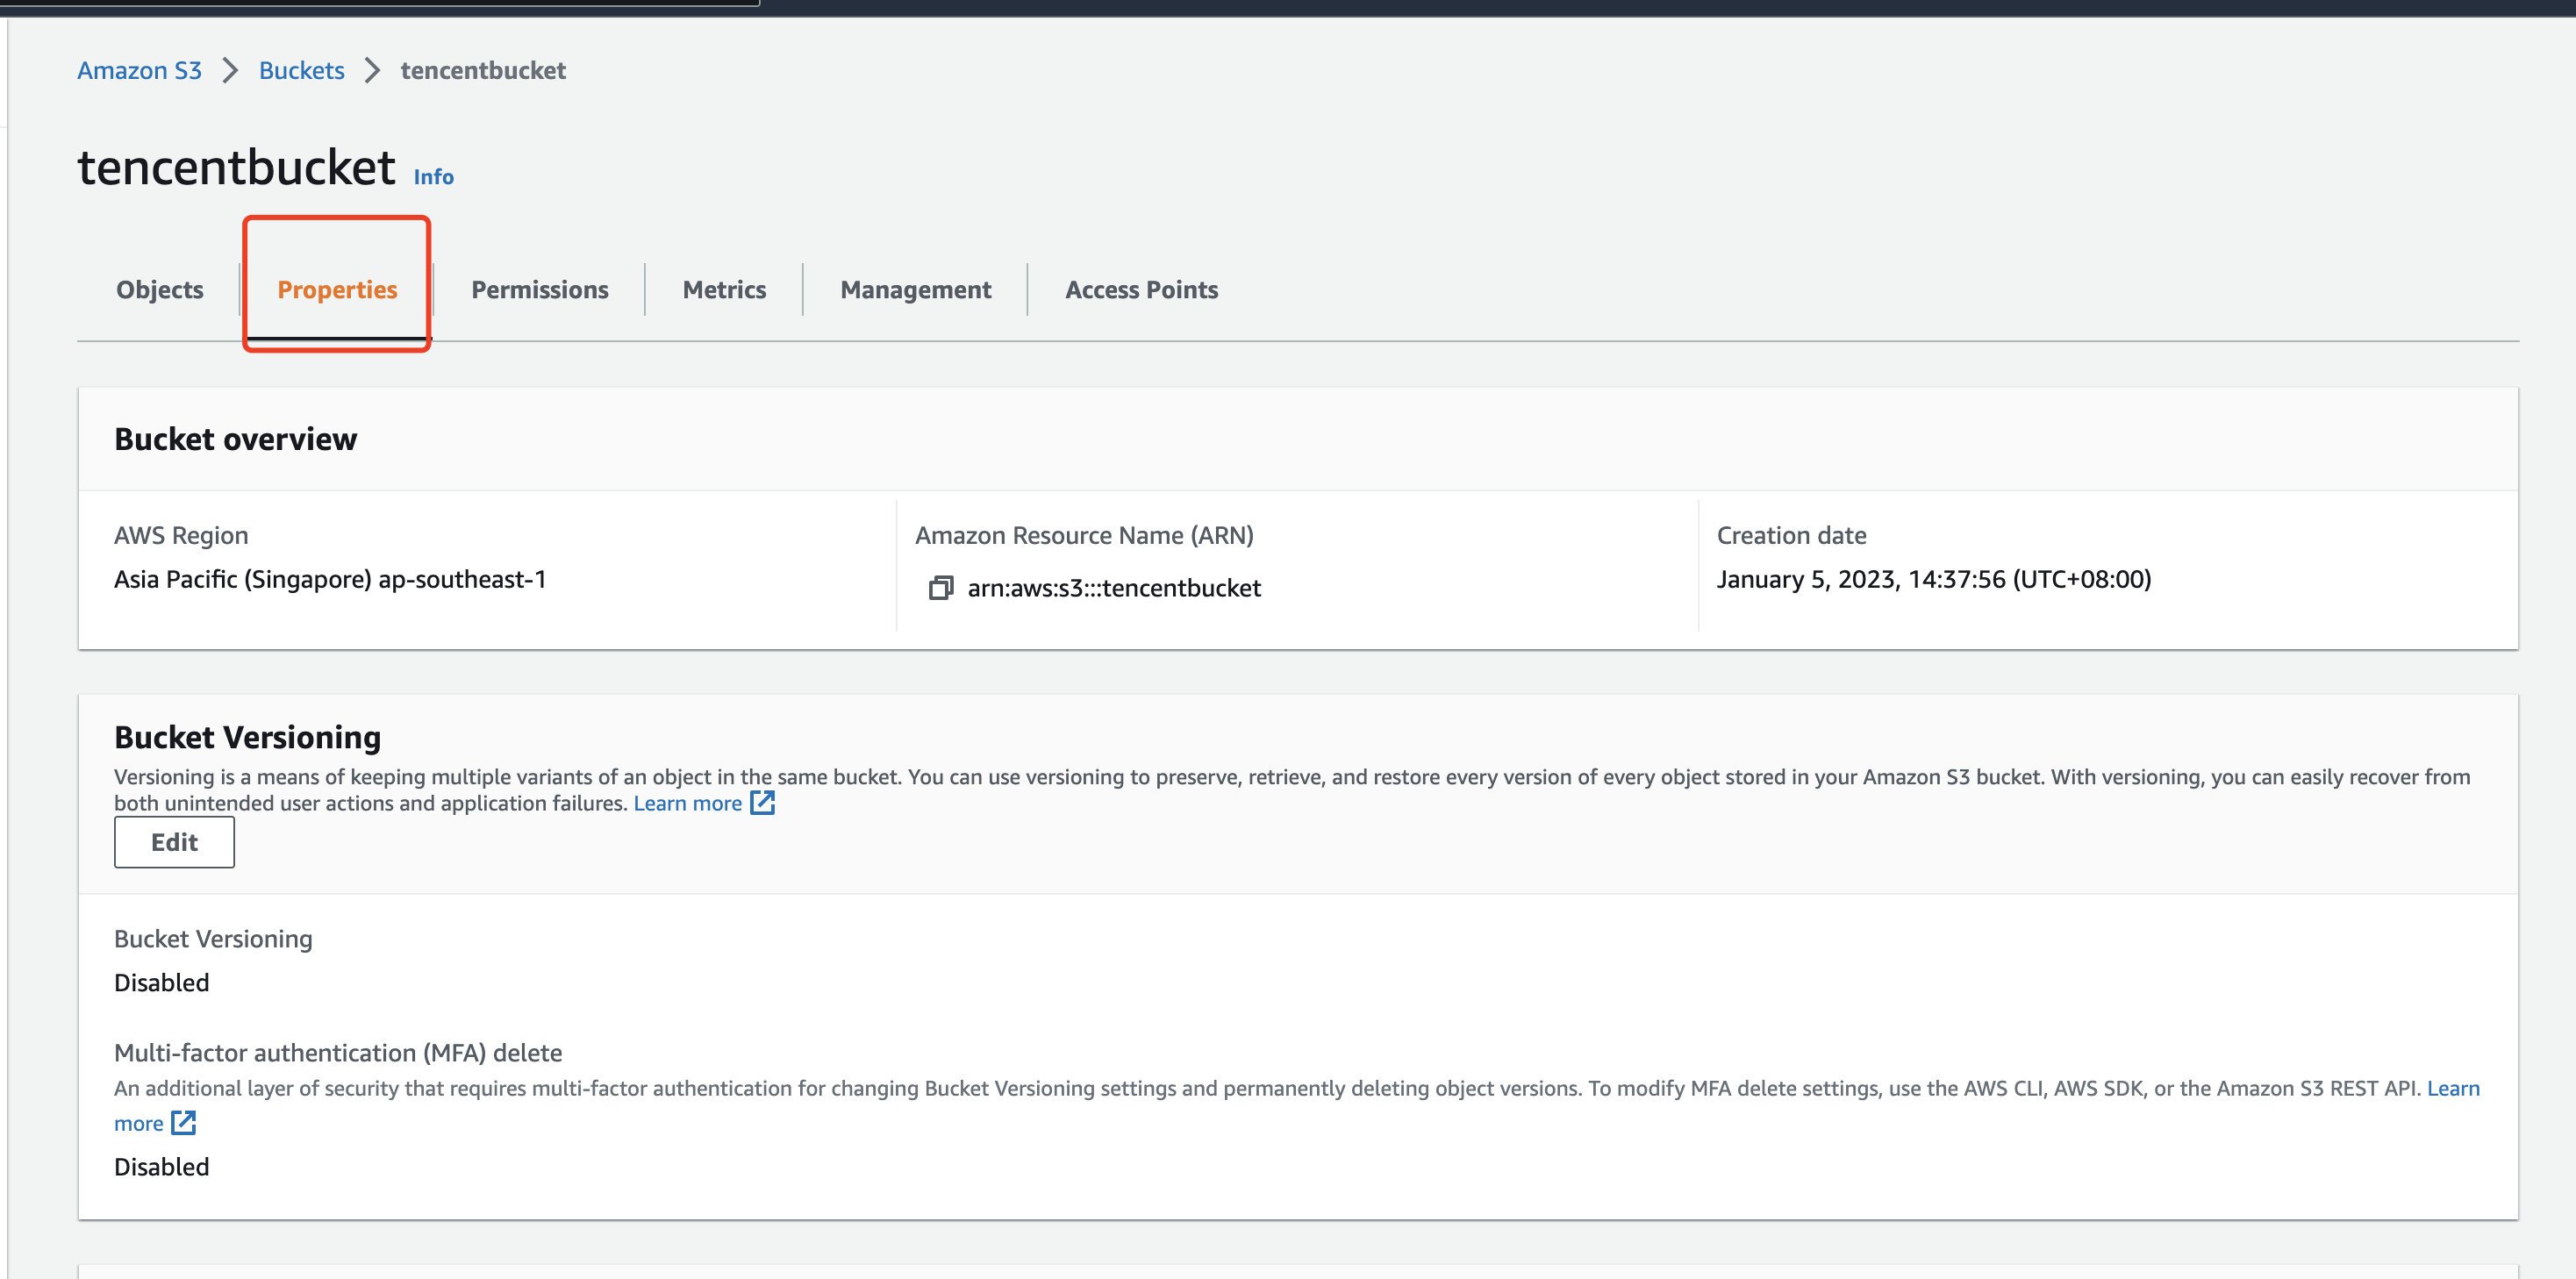
To view the ARN of an S3 bucket, go to the Buckets page and click Properties.
To find the ARN of your SQS queue, on the Create queue page, find Access policy, click Advanced, and Resource indicates your queue ARN.
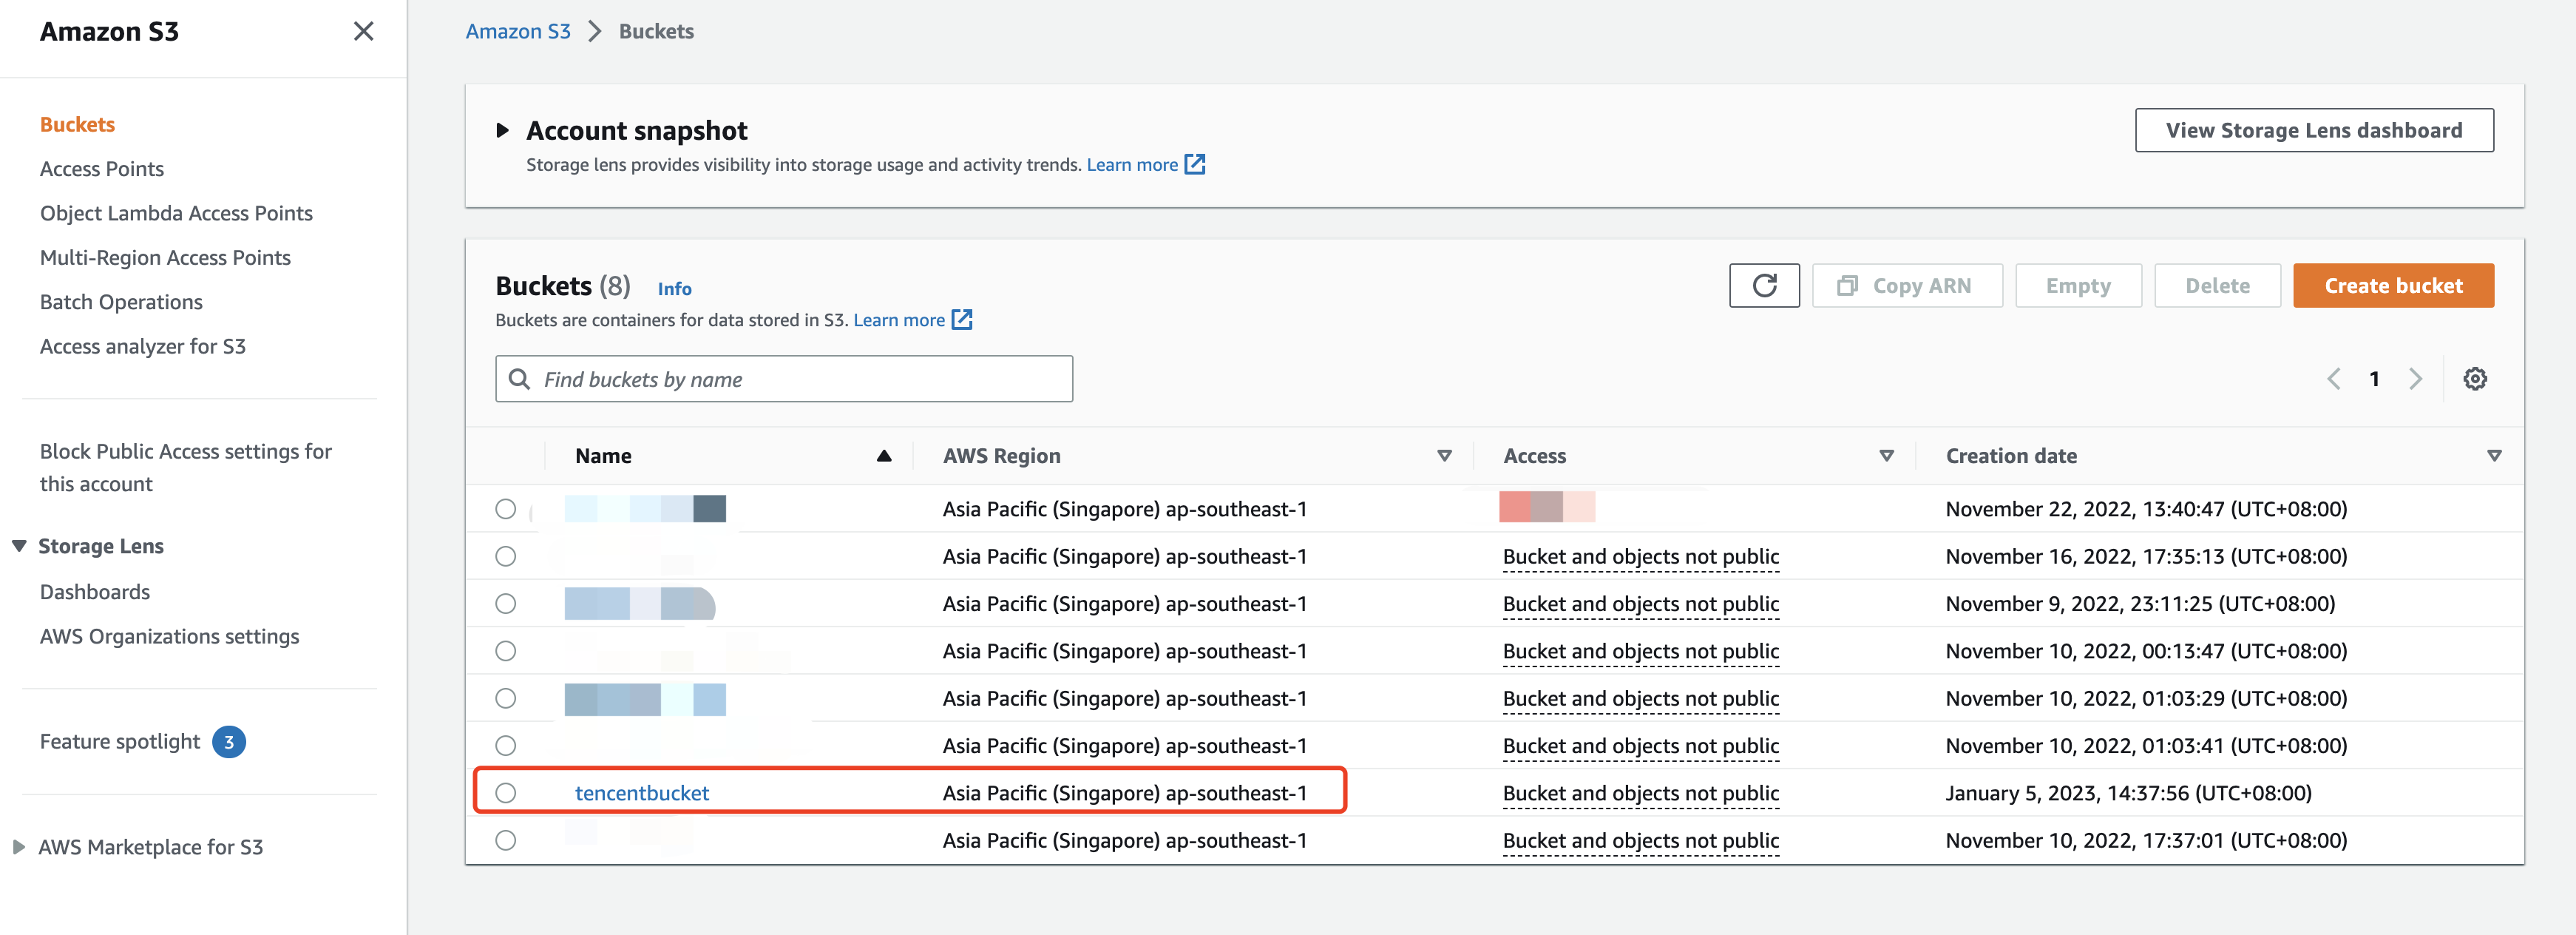
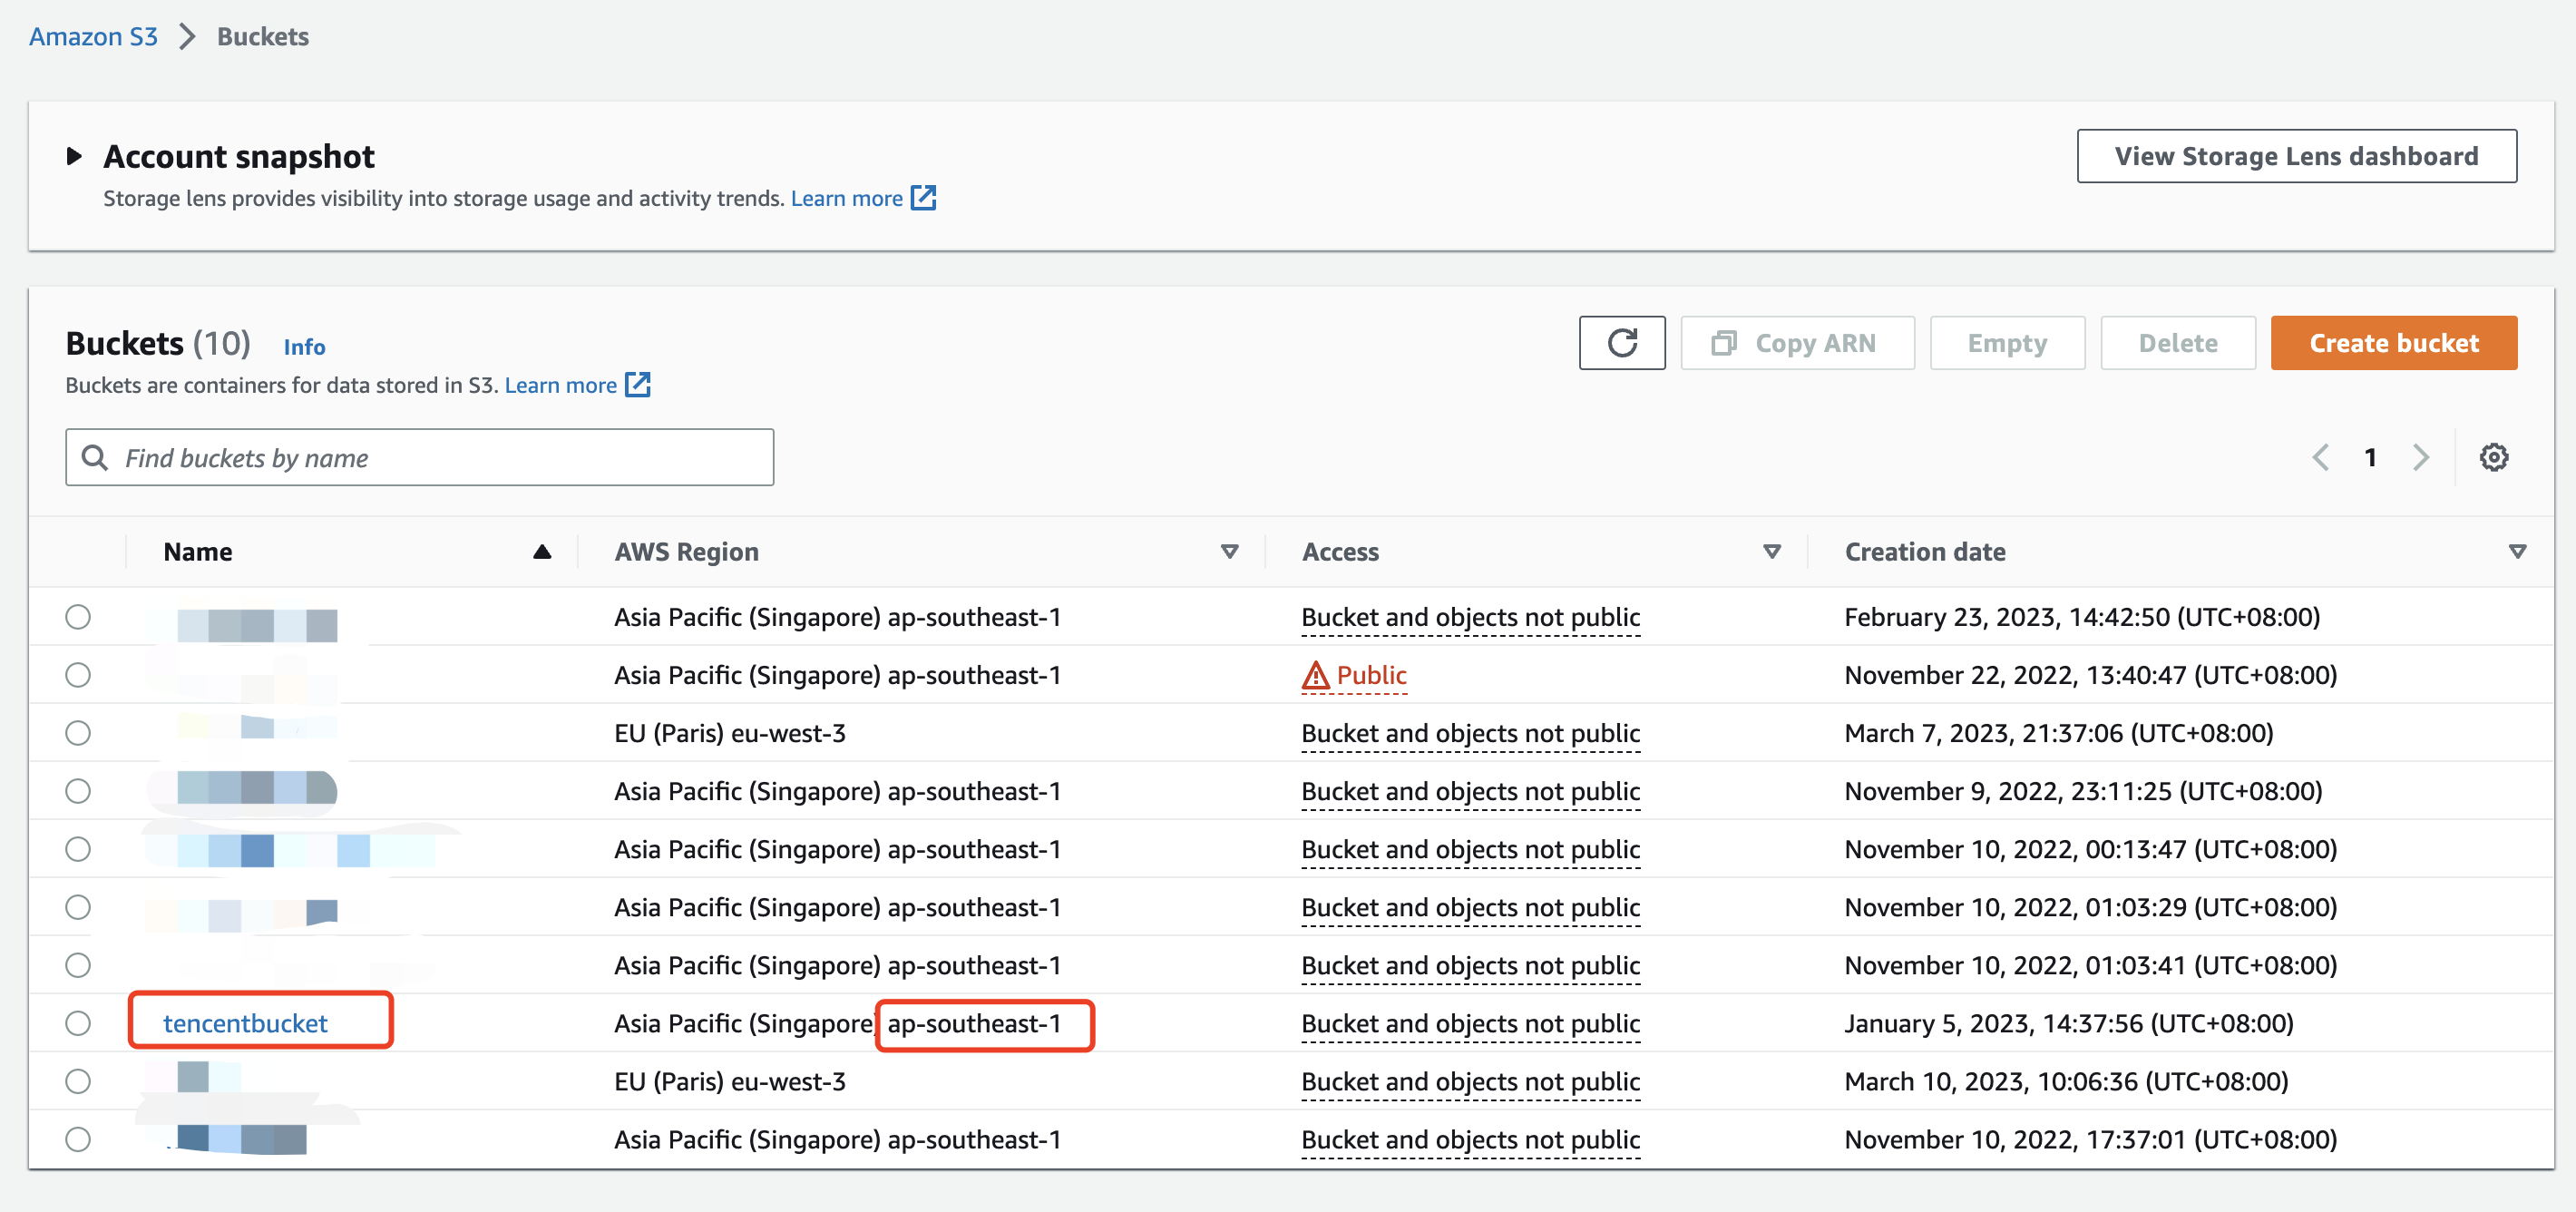
If you don't know what to enter for the region field in the Tencent Cloud console, go to the Amazon S3 Buckets page, find your bucket, the latter half of AWS Region (remove the spaces) is what you should provide to Tencent Cloud. According to the screenshot below, the region you should enter for the tencentbucket bucket is ap-southeast-1.